Raspberry Pi typically uses Raspberry Pi OS, a Debian-based system optimized for Pi hardware. However, developers and power users prefer Ubuntu for its regular updates, familiar interface, and extensive features.
With many Ubuntu versions available, such as Ubuntu Mate, Server, or Core, there are multiple options to choose from. Despite differences in hardware and versions, the steps to prepare and install Ubuntu on a Raspberry Pi device are similar.
This guide provides instructions on how to install Ubuntu on Raspberry Pi.
Prerequisites
- A Raspberry Pi device (version 2 or later). Check compatibility with the Ubuntu version (Desktop, Server, Core, or MATE).
- A storage device (microSD card or USB drive) with at least 8GB capacity (16GB recommended).
- A microSD card reader or USB port.
- A system running Windows, macOS, or Linux to prepare the bootable image.
Installing Ubuntu on Raspberry Pi
Installing Ubuntu on a Raspberry Pi requires downloading the correct Ubuntu image, preparing the storage device, and booting the system from that device.
Follow the steps below to see how to install Ubuntu on Raspberry Pi.
Step 1: Download Ubuntu Image
Download the Ubuntu image for Raspberry Pi. There are several versions designed for different configurations:
1. Choose an Ubuntu version that best suits your device:
- Ubuntu Desktop features a complete desktop environment.
- Ubuntu Core is a minimal and lightweight OS suitable for IoT and embedded apps.
- Ubuntu Server is a lightweight server OS without a GUI.
- Ubuntu MATE is a resource-friendly desktop environment with a lightweight GUI.
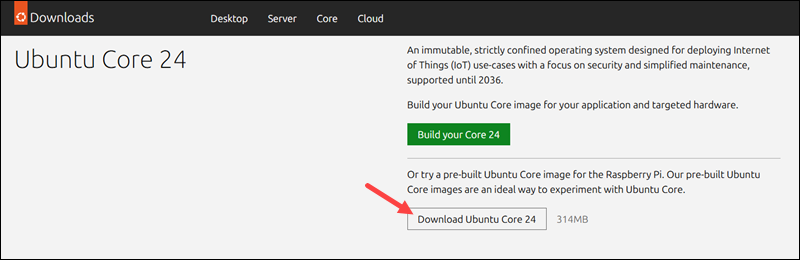
2. Visit the appropriate Downloads page to download the image:
- The Ubuntu Downloads page features Desktop, Server, or Core versions.
- The Ubuntu MATE Downloads page has the MATE-specific images.
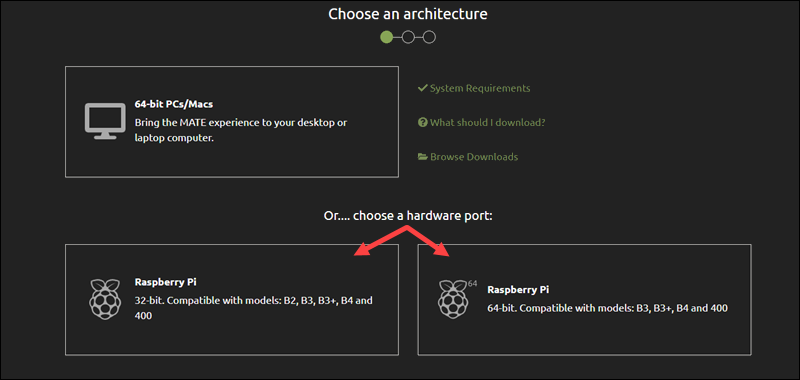
3. Choose an appropriate image for your Raspberry Pi model:
- Raspberry Pi 2 or 3 uses 32-bit images for optimal performance.
- Raspberry Pi 4 and later can use either 32-bit or 64-bit images, depending on the requirements.
4. Download the file and save it on the local machine. The file is a compressed .xz image.
Step 2: Extract Image
When the download completes, extract the .img file using a decompression tool. The steps differ between operating systems.
Extract Image on Linux
Linux users can extract the file via the terminal:
1. Use the cd command to navigate to the file's location. Typically, the file is saved in the Downloads directory:
cd ~/Downloads2. Run the following command to extract the file:
xz -d [file_name].img.xz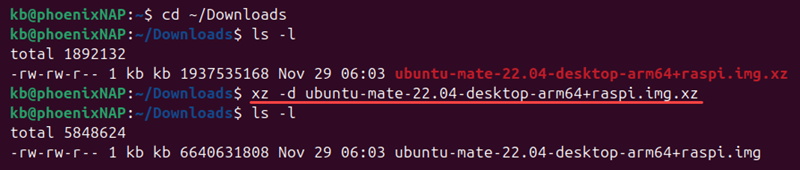
Replace [file_name] with the actual name of the downloaded file.
Extract Image on macOS
macOS users can utilize the Unarchiver tool to extract the image file:
1. Locate the .xz file in Finder (typically in the Downloads folder).
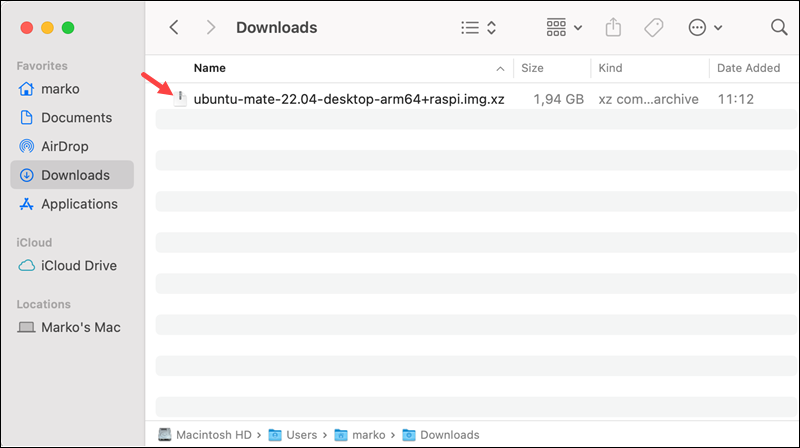
2. Double-click the file to start the extraction.
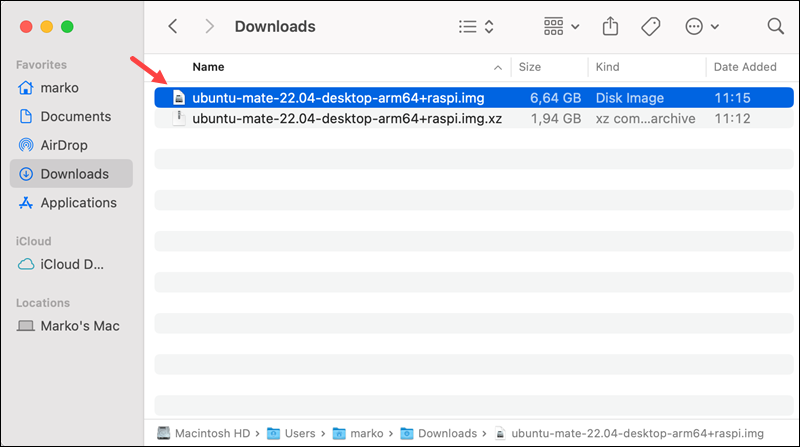
The .img file is saved in the same location after extraction.
Extract Image on Windows
Windows users can use an extraction tool, such as 7-Zip:
1. Locate the .xz file in the File Explorer.
2. Right-click the file and select 7-Zip->Extract Here. Alternatively, select Extract files and choose a different destination.
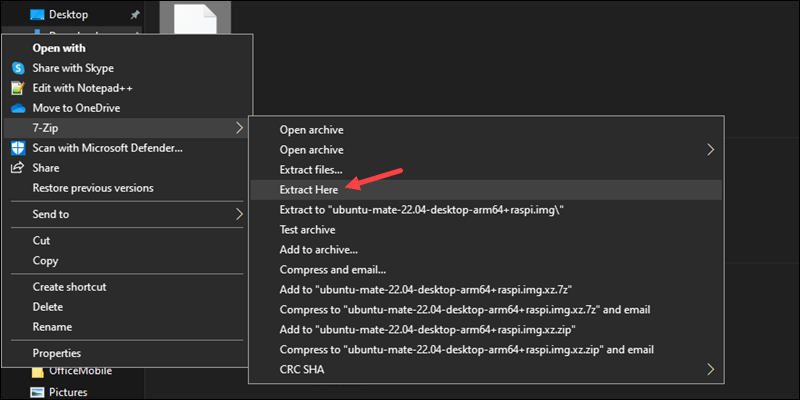
The .img file appears in the specified location after extraction.
Step 3: Format microSD Card or Flash Drive
Before writing the Ubuntu image, format the storage device to ensure compatibility with Raspberry Pi during the boot process. The recommended file system is FAT32, and the format process is identical for both storage devices. Insert the card or drive into a computer and follow the steps below based on your OS.
Important: Formatting a storage device erases all data stored on it. To prevent data loss, back up any sensitive data before formatting.
Format on Linux
To format a storage device on Linux:
1. Open the terminal and list all connected devices:
lsblk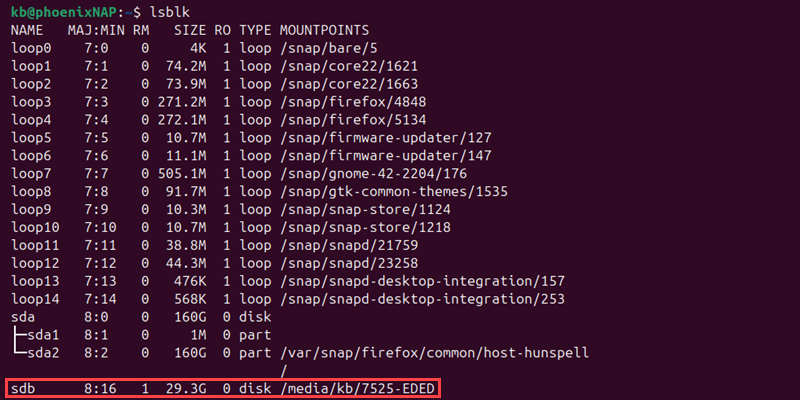
Identify the device name from the list.
sudo umount [partition_path_or_name]3. Format the device to FAT32 with:
sudo mkfs.vfat -F 32 /dev/[device_name]
The command formats the device.
Format on macOS
Use the Disk Utility to format the storage device on macOS:
1. Open Applications->Utilities->Disk Utility.
2. Locate the storage device on the list and select it.
3. Click the Erase button in the top menu.
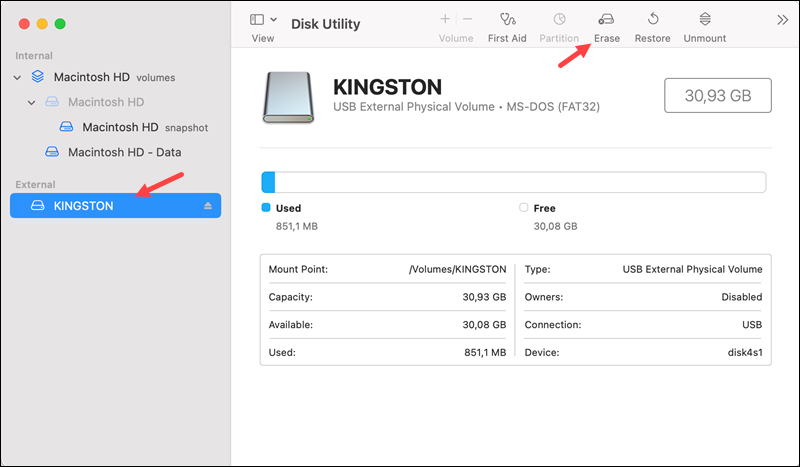
4. Choose "MS-DOS (FAT)" as the format.
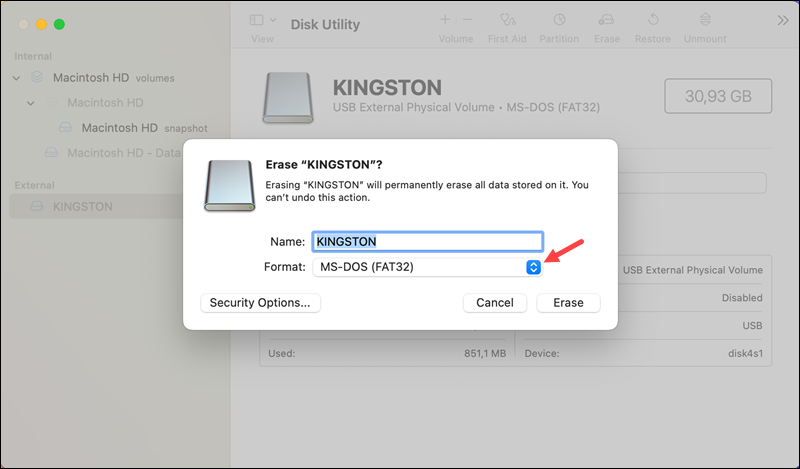
5. Click Erase to confirm and format the card or drive.
Format on Windows
To format the storage device on Windows, use the File Explorer:
1. Right-click the storage device and select Format.
2. Set the file system to FAT32 and leave the other options unchanged.
3. Click Start to confirm.
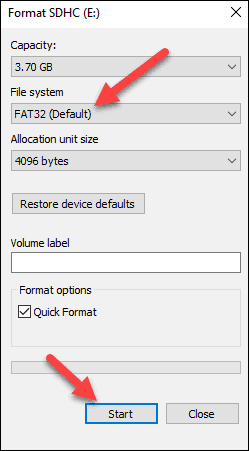
The process erases all the data and formats the device to the selected file system type.
Step 4: Write Ubuntu Image to SD Card or Flash Drive
After formatting the storage, write the .img file onto the device. There are multiple ways to write the file depending on the operating system and preferred tools.
Write Ubuntu Image via Terminal
Use the terminal on Linux or macOS systems to write the image:
1. Navigate to the directory where the .img file is:
cd ~/Downloads2. Use the dd command to write the image to the device:
sudo dd bs=1M if=[image_name].img of=/dev/[device_name] conv=sync status=progress
Replace [image_name] with the .img file name and the [device_name] with the storage device. The command shows the writing progress.
3. The writing process takes some time. Wait for it to complete, then eject the device safely.
Write Ubuntu Image via Raspberry Pi Imager
The Raspberry Pi Imager is an official imaging utility available for Linux, macOS, and Linux. The utility can be downloaded from the official Raspberry Pi software page.
To write an Ubuntu image using the imager, launch the application and do the following:
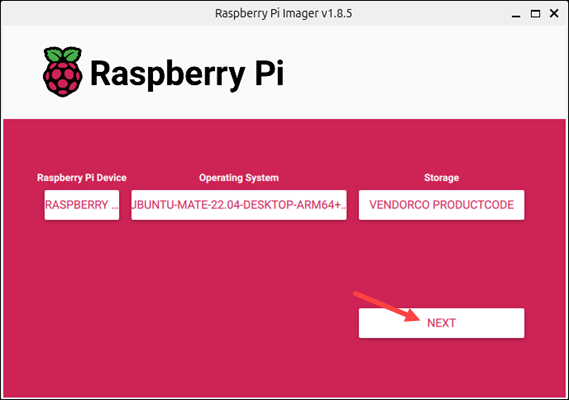
1. Click Choose Device and select the Raspberry Pi device from the list.
2. Select Choose OS->Use custom.
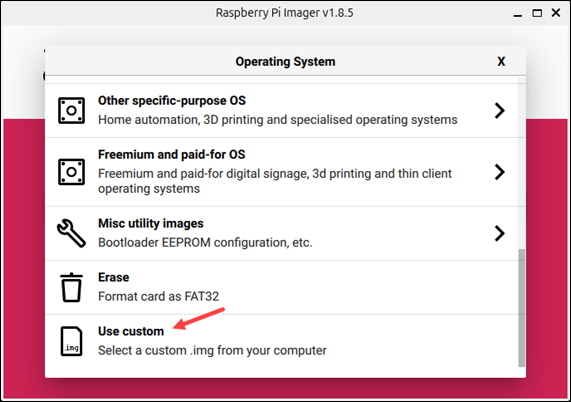
Locate and select the .img file.
3. Insert the storage device and select it under Storage.
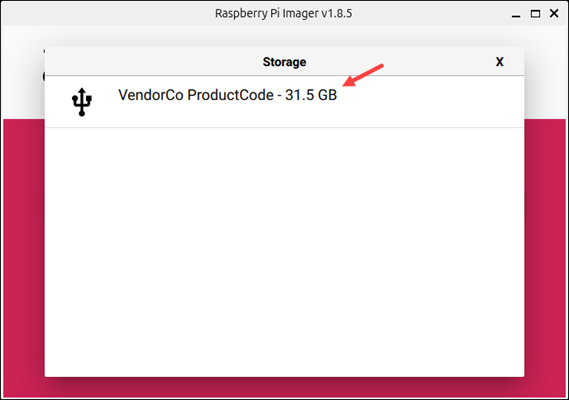
4. Click Next to proceed.
5. Choose whether to edit OS settings or to proceed with default ones.
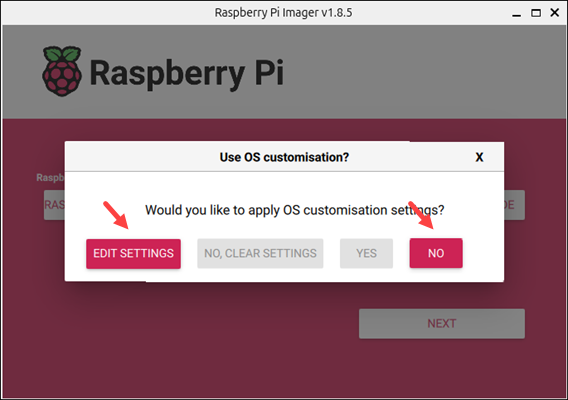
6. Confirm the data deletion from the storage device to start the flashing process. Wait for it to complete before proceeding.
Write Ubuntu Image via Etcher
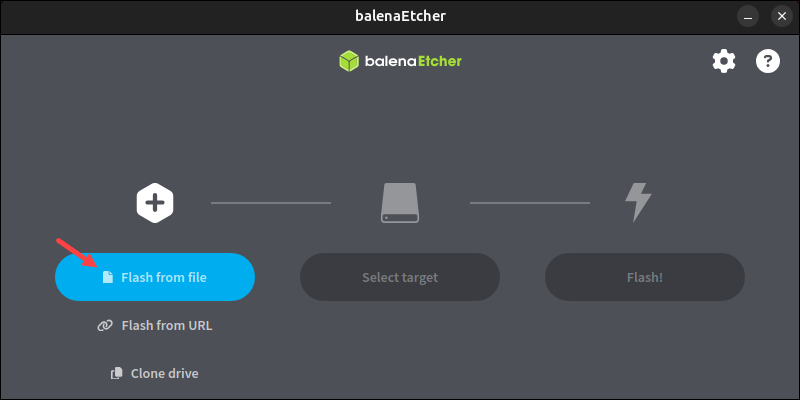
Etcher is another cross-platform tool for writing disk images. Download and install the balenaEtcher tool from the official website.
Note: For an in-depth tutorial on installing Etcher on Ubuntu, visit our article How to Install Etcher on Ubuntu. The guide offers two installation options, via GUI or terminal.
Start the program and follow the steps below:
1. Select Flash from file and locate the .img file.
2. Click Select target and choose the storage device.
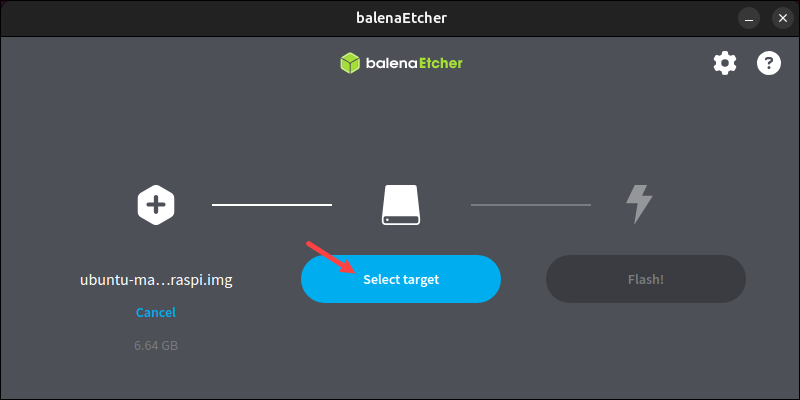
3. Once ready, click Flash to write the disk image.
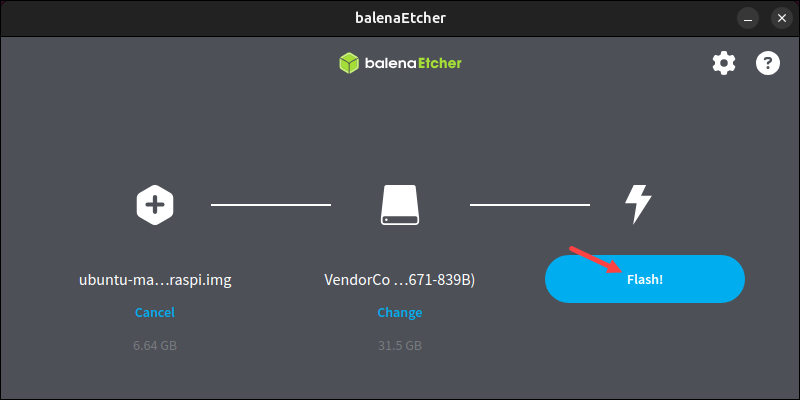
Wait for the flash process to complete.
Step 5: Boot Ubuntu
Once the storage device is prepared with an Ubuntu image, boot the Raspberry Pi device into Ubuntu:
1. Insert the storage device into the appropriate port on the Raspberry Pi.
2. Connect the essential peripherals (power cable, display, keyboard, and mouse). If working in headless mode, refer to our guide to enable SSH on Raspberry Pi.
3. Turn on the Raspberry Pi device by plugging in the power cable.
4. The device goes through the boot sequence and loads the Ubuntu OS installation.
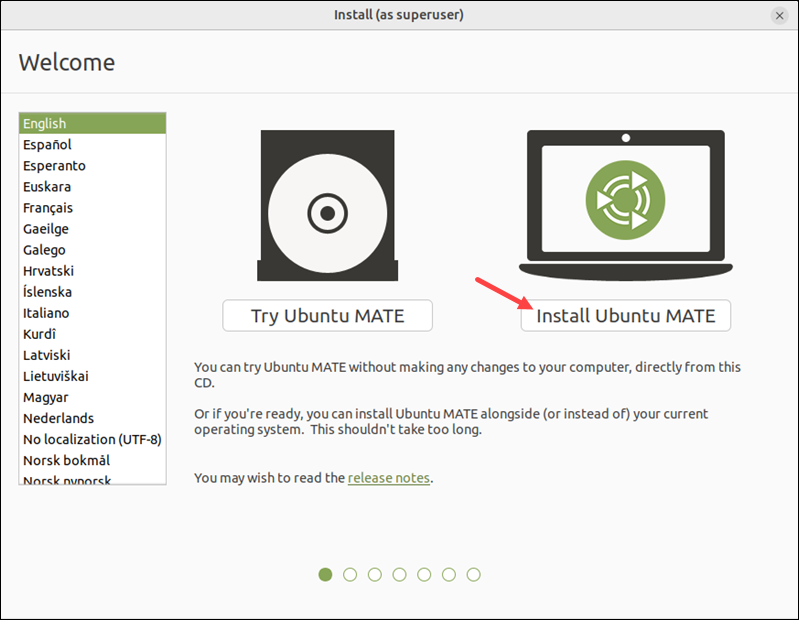
Follow the on-screen instructions to complete the installation steps.
Step 6: Update Ubuntu
Once the system fully loads on your Raspberry Pi, run the updater to get the latest software and security patches. Open the terminal and run the apt update and upgrade commands:
sudo apt updatesudo apt upgradeAlternatively, use the Software Updater GUI tool to update and upgrade. After updating, reboot the system:
sudo rebootThe device is ready to use with a fresh Ubuntu installation.
Configuring Ubuntu on Raspberry Pi
After installing, updating, and upgrading Ubuntu on Raspberry Pi, continue by configuring the system and adjusting the default settings. Below are some common post-installation steps that help set up essential features.
Wi-Fi Setup
To connect the Raspberry Pi device to a wireless network, use the GUI or terminal. Click the network icon, select or add the desired network, and enter the password when prompted.

If in a headless setup, use the terminal instead:
1. Open the Netplan configuration file for editing:
sudo nano /etc/netplan/50-cloud-init.yaml2. Locate or add the wifis section and provide the Wi-Fi credentials:
wifis:
    wlan0:
        dhcp4: true
        access-points:
            "[SSID]":
                password: "[password]"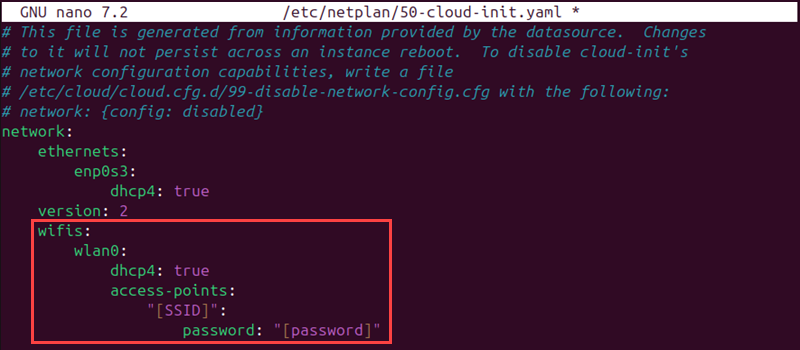
Replace [SSID] and [password] with the actual values.
3. Save the file and close nano (CTRL+X, Y, Enter).
4. Apply the configuration:
sudo netplan applyThe device connects via a wireless connection based on the provided information.
Change Hostname
To modify the device's hostname, use the following command:
sudo hostnamectl set-hostname [new_name]Restart the terminal to see it applied. Changing the hostname makes it easier to identify the Raspberry Pi device on the network.
Additional Configuration
Additional setup and configuration depend on the device's use and purpose. For instance:
- Enable SSH on Raspberry Pi to allow remote connections.
- Install additional packages using the APT package manager.
- Set up a static IP address.
- Configure the UFW firewall to secure the device.
- Install and set up monitoring tools to monitor network traffic.
- Mount an external drive using the mount command.
- Install the LAMP stack or Nginx to set up a web server.
Conclusion
This tutorial showed how to prepare a storage device and install Ubuntu on Raspberry Pi. Follow the sections for your OS to complete the process.
Next, see how to set up a Raspberry Pi DNS server to reduce DNS lookups.