A Domain Name System (DNS) translates human-readable domain names to IP addresses. DNS serves as a phone book of internet addresses for quicker access to pages. Setting up a Raspberry Pi as a DNS server improves DNS lookup time and connection speed.
This guide will explain how to configure the Raspberry Pi as a DNS server.

Prerequisites
- Raspberry Pi 2, 3, or 4 with Raspbian OS using a static IP address.
- Ethernet cable connection or Wi-Fi dongle.
- Power supply.
- MicroSD card.
- Terminal access (directly or through SSH) with sudo privileges.
Raspberry Pi DNS Server Setup Guide
There are several methods to set up a Raspberry Pi as a DNS server. However, the simplest approach is to use the lightweight DNSMasq utility.
Step 1: Update Packages
Before starting, open the terminal and update software packages on your Raspberry Pi using the apt package manager:
sudo apt updatesudo apt upgradeWait for the update and upgrade to complete before proceeding to the next step.
Step 2: Install DNS Software
Install DNSMasq on the Raspberry Pi:
sudo apt install dnsmasq
DNSMasq is an excellent choice for small-scale networks.
Step 3: Configure DNSMasq
Configuring DNSMasq ensures the best setup for the DNS server.
1. Modify the dnsmasq.conf file using the nano text editor by running:
sudo nano /etc/dnsmasq.conf2. Locate (CTRL+W to search) and uncomment the following lines by removing the hash sign (#):
domain-needed– Configures the DNS server to not forward names without a dot (.) or a domain name to upstream servers. Any names without a dot or domain stay in the local network.bogus-priv– Stop the DNS server from forwarding local IP range reverse-lookup queries to upstream DNS servers. That prevents leaking of the local network to upstream servers.no-resolv– Stops reading the upstream nameservers from the /etc/resolv.conf file, relying instead on the ones in the DNSMasq configuration.
3. Find (CTRL+W) and remove the following line:
#sever=/localnet/192.168.0.1Replace with:
server=8.8.8.8server=8.8.4.4This step uses Google’s DNS servers as upstream nameservers.
4. Find (CTRL+W) the following line:
#cache-size=150Uncomment and change the cache size to 1000:
cache-size=1000Increasing the cache size reduces the number of DNS requests to the DNSMasq cache. Network performance improves because DNS lookup time decreases.
5. Save the file with CTRL+X, then press Y and hit Enter to keep the changes.
6. Restart DNSMasq to apply the changes:
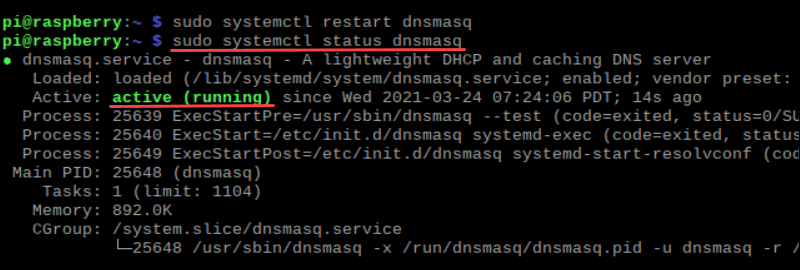
sudo systemctl restart dnsmasq7. Check the status of the DNS server with:
sudo systemctl status dnsmasqThe status shows as active (running), indicating the Raspberry Pi is running as a DNS server:
Step 4: Test the DNS Server
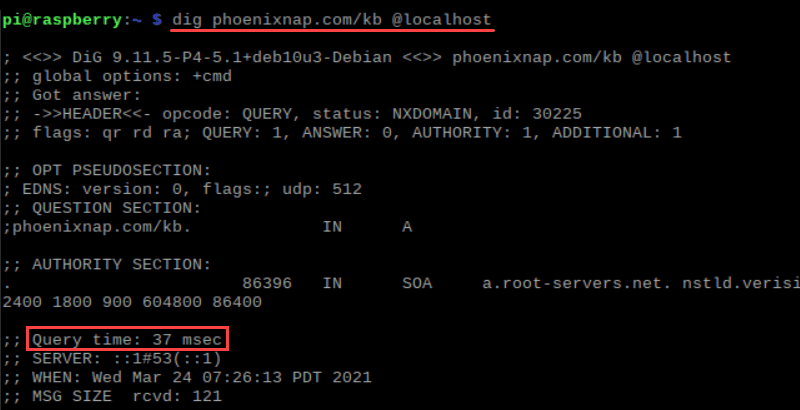
1. Test the newly set up DNS server with the dig command. Check the DNS data by running:
dig <domain> @localhostFor example:
dig phoenixnap.com/kb @localhost2. Check the query time in the response:
Note: If the system cannot find the command, run sudo apt install dnsutils.
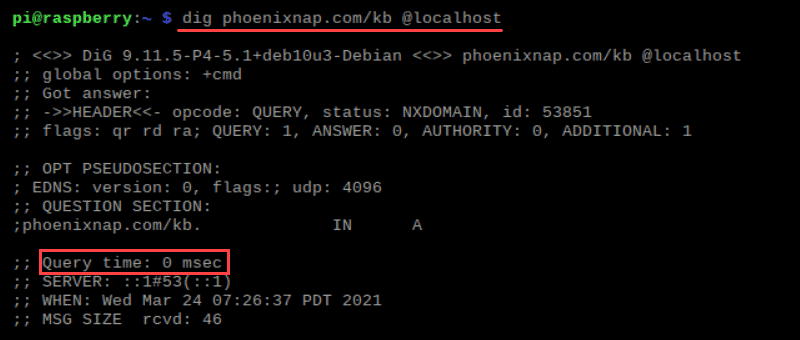
3. Rerun the command. Notice the query time reduces because the address is cached:
Step 5: Configure Your Device to Use the Raspberry Pi as a DNS Server
The final step is to configure other devices to use the Raspberry Pi as a DNS server.
1. Find the IP address on the Raspberry Pi by running ifconfig from the terminal. Save the eth0 inet address if using an ethernet connection or the wlan0 inet address if using Wi-Fi:
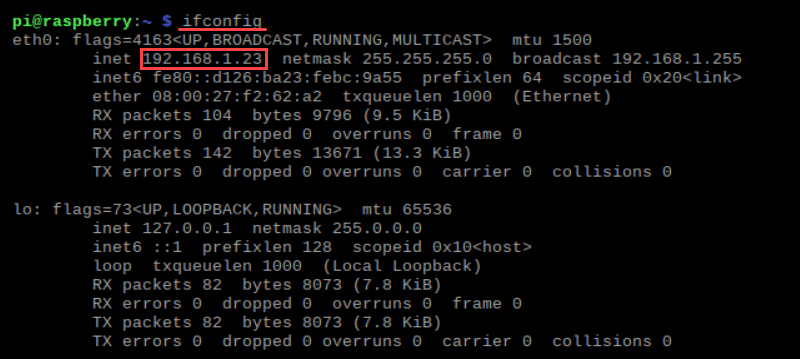
2. Set the DNS server address as the Raspberry Pi address on the device you want to configure. The DNS server address is in the network settings and differs depending on the OS in use.
Every device must point to the Raspberry Pi's address for DNS server use.
Note: Learn about various DNS record types by referring to our post DNS Record Types Explained.
Conclusion
This article explained how to set up the Raspberry Pi as a DNS server. Using a Raspberry Pi as a DNS server improves network speed and connectivity by caching addresses.
To learn more about DNS, check out our article on DNS best practices for security and performance.

