Node.js relies on a package management system to install, manage, and execute code dependencies. The two most commonly used command-line tools are NPM and NPX. Although they appear similar, each tool serves a distinct purpose in modern JavaScript and Node.js workflows.
Node Package Manager (NPM) installs and manages packages, while Node Package eXecute (NPX) runs packages without requiring a permanent installation. Understanding how they differ helps avoid unnecessary installs, improves efficiency, and clarifies modern package management practices.
This tutorial will compare NPX and NPM, explain how they work, and highlight the key differences between them.
What Is NPM Package Manager?
NPM helps install and manage packages in Node.js projects. These packages are small utilities or large libraries, and their purpose is to avoid writing repetitive code from scratch. NPM connects to the NPM registry, a large public database of mostly open-source packages that developers use to build, test, or run JavaScript applications.
Besides installing packages, NPM also helps manage version updates, configure project settings, and run custom commands through its built-in scripting system.
The following sections outline NPM's main features and explain how it works behind the scenes.
NPM Features
Understanding NPM's key features helps developers manage dependencies efficiently and automate common tasks. These features support everything from installing packages to handling version conflicts, making NPM essential for any Node.js project.
The following table shows the most important NPM features:
| Feature | Description |
|---|---|
| Package installation | Installs packages from the public NPM registry or other sources such as GitHub or the local file system. Supports global and local installs. |
| Dependency management | Automatically tracks installed packages in the package.json file, including version ranges and metadata. |
| Package scripts | Allows defining and running custom scripts to automate tasks such as builds, testing, and automatically checking source code for errors (linting). |
| Semantic versioning | Uses Semantic Versioning (SemVer) in the format major.minor.patch to label package versions. This system helps NPM determine which updates are safe and which might introduce breaking changes. |
| Lockfiles | Uses package-lock.json to lock exact versions of dependencies for consistent installs across environments. |
| Configuration options | Provides CLI flags, environment variables, and a config file (.npmrc) to customize behavior. |
| Publishing packages | Enables developers to publish and share their own packages publicly or privately through the NPM registry. |
| Scoped packages | Enables namespace-style package organization using scopes, which are identifiers (like @my-team) that group related packages together, making it easier to manage modular architecture and collaborate within teams. |
| Cache system | Saves downloaded packages locally to speed up future installs and reduce network requests. |
| Audit and security tools | Includes npm audit to detect known vulnerabilities and suggest fixes. |
How Does NPM Work?
NPM provides a range of features that simplify the management of Node.js dependencies and scripts. This section explains how NPM implements these features by following a structured process to install, update, and maintain packages reliably across projects.
To accomplish this, NPM:
1. Reads project configuration. NPM parses the package.json file to identify declared dependencies, version constraints, and lifecycle scripts that need execution.
2. Resolves dependency tree. It analyzes all direct and transitive dependencies, selecting compatible versions based on semantic versioning to prevent conflicts.
3. Fetches packages. NPM downloads required packages from the NPM registry, using a local cache to speed up repeated installations and reduce bandwidth usage.
4. Installs packages locally. Packages are installed into the project's node_modules directory, isolating dependencies per project and preventing global pollution.
5. Updates lock file. NPM updates or creates the package-lock.json file to record exact package versions and dependency relationships for consistent future installs.
6. Runs lifecycle scripts. During installation, NPM executes scripts such as preinstall, postinstall, or prepare defined by the package or project to perform setup tasks.
7. Manages caching and cleanup. NPM maintains a cache of downloaded packages to improve performance and periodically removes unused files to conserve disk space.
What Is NPX Package Manager?
NPX is a command-line tool that comes with NPM and runs Node.js packages without requiring global installation. It fetches and executes the specified package either from the local project or directly from the NPM registry. This allows developers to use one-off tools or test packages without permanently adding them to their project.
The following sections outline NPX's key features and explain how the tool operates.
NPX Features
NPX simplifies package execution, especially for short-term or one-time use. Knowing its features helps developers avoid global installs, reduce setup time, and run tools more efficiently.
The table below outlines the main capabilities:
| Feature | Description |
|---|---|
| On-demand package execution | Runs packages directly from the NPM registry without adding them to node_modules or installing them globally. Useful for one-time use tools. |
| Local binary resolution | Automatically detects and executes binaries from the local node_modules/.bin directories. Prioritizes project-specific dependencies. |
| Version targeting | Allows running a specific version of a package without altering project dependencies. Useful for testing legacy or unstable versions. |
| Argument forwarding | Passes arguments directly to the underlying package executable. Enables full control over command-line behavior. |
| Temporary runtime environment | Runs packages in an isolated environment that is discarded after execution. Prevents cluttering the global scope. |
| Remote source support | Allows execution of packages from GitHub, tarballs, or URLs. Useful when testing unlisted or private sources. |
| Interactive command support | Supports packages that require user input or prompts during execution. Useful for tools that generate starter code or interact through the terminal. |
How Does NPX Work?
NPX executes Node.js packages by either using local project binaries or fetching them directly from the NPM registry for one-time use. It avoids global installations by temporarily downloading and running packages in an isolated environment.
NPX operates by following a specific, step-by-step process to locate, download, execute, and clean up packages without permanent installation. Unlike the Features section that highlights what NPX does, this section explains how NPX accomplishes these tasks behind the scenes.
The following steps outline the internal workflow NPX uses to run packages efficiently and cleanly:
1. Checks local project binaries. NPX first looks in the project's node_modules/.bin directory for the requested executable. If it exists, NPX runs this local version to ensure project consistency.
2. Searches local cache. If there is no local binary, NPX checks a cache of previously downloaded packages for a matching version and uses it if available.
3. Fetches the package remotely. When necessary, NPX downloads the package from the NPM registry or a specified remote source such as GitHub or a tarball URL.
4. Extracts and isolates the package. NPX extracts the package into a temporary directory, which creates an environment for execution that avoids global or local pollution.
5. Executes with forwarded arguments. Any additional command-line arguments go directly to the package's executable, which provides full control over command behavior.
6. Removes temporary files. After execution completes, NPX cleans up by deleting the temporary files and directories to keep the system tidy.
7. Maintains interactive sessions. NPX also supports interactive commands that require user input during execution, such as scaffolding tools or CLI prompts.
NPM vs. NPX
Although NPM and NPX are both part of the Node.js system and rely on the same registry, they serve different purposes and behave in fundamentally different ways. NPM focuses on package management, which involves installing, updating, and organizing dependencies. On the other hand, NPX is a package runner that executes binaries directly, often without requiring permanent installation.
Understanding how they differ helps avoid common mistakes, such as using the wrong tool for installing or running commands. The following sections break down the key differences across several areas, including installation, usage, scripts, and Node.js compatibility.
Installation
NPM and NPX are both distributed with Node.js and are typically available immediately after installing Node.js, regardless of the operating system. This means there's usually no need to install either tool separately. However, the installation method for Node.js, and by extension, NPM and NPX, varies slightly across operating systems.
On Windows and macOS, the official Node.js installer includes both tools by default. On Linux, installation methods vary by distribution. While package managers like apt or dnf work, the recommended approach is to use a version manager such as Node Version Manager (NVM) to ensure compatibility and easy upgrades. This method works consistently across distributions and avoids outdated versions often found in system repositories.
The following sections explain how installation applies specifically to NPM and NPX.
NPM
NPM installs automatically alongside Node.js and requires no separate setup in most environments. Once you install Node.js, NPM becomes available system-wide, and you can use it immediately from the terminal.
However, installation methods vary across operating systems, and choosing the correct one ensures access to up-to-date and compatible versions of Node.js and NPM.
On Windows, the most common method is downloading the Node.js installer from the official Node.js website. The installer includes NPM, sets up environment variables, and configures everything.

Another option is to use Chocolatey, a Windows package manager. After installing Chocolatey, take the following steps:
1. Install Node.js and NPM with:
choco install nodejs-lts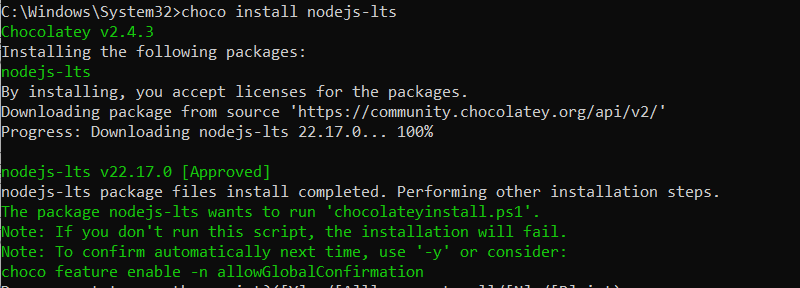
This installs the latest Long-Term Support (LTS) version, which ensures stability and compatibility in production environments.
2. Reset environment variables to add Node.js and NPM to PATH:
refreshenv
3. Verify the installation:
node -v
4. Check the NPM version:
npm -v
Note: To get complete steps on NPM installation on Windows, check out our guide on how to install Node.js and NPM on Windows.
On macOS, NPM comes bundled when installing Node.js using the official installer or Homebrew. Homebrew is a popular package manager for macOS that simplifies installation and version control.
For example, to install Node.js and NPM with Homebrew, take these steps:
1. Update Homebrew:
brew update
2. Install Node.js and NPM:
brew install node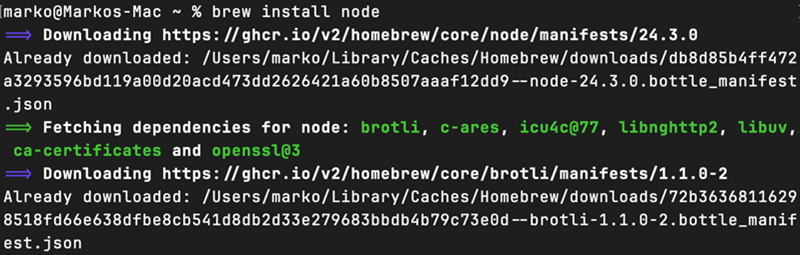
3. Confirm you successfully installed Node.js:
node -v
This installs the current Node.js version, which is 24.3.0.
4. Verify the NPM installation:
npm -v
Note: To explore other options and see full instructions, see our article on how to install NPM on macOS.
On Linux, the recommended installation method is using NVM. NVM allows you to install and manage multiple versions of Node.js in a user-specific environment, independent of the system package manager.
To install Node.js and NPM with NVM, follow these steps:
1. Download and run the NVM install script:
curl -o- https://raw.githubusercontent.com/nvm-sh/nvm/v0.40.3/install.sh | bash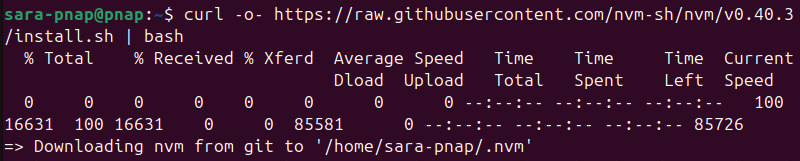
Note: This uses NVM version 0.40.3, the latest release at the moment. Always check the official NVM GitHub page for the most up-to-date version.
2. Reload your shell configuration so the nvm command becomes available immediately with:
source ~/.bashrcNote: The .bashrc file is a configuration file for the Bash shell. If you're using Zsh or another shell, run source ~/.zshrc or the appropriate config file.
3. Install the latest Long-Term Support (LTS) version of Node.js with:
nvm install --lts
This installs the latest LTS (Long-Term Support) version of Node.js along with NPM.
The LTS version is older than the current release (v24.3.0) because it prioritizes stability, extended maintenance, and compatibility over new features.
4. Verify Node.js was installed correctly:
node -v
This prints the installed Node.js version (e.g., v22.17.0), confirming the installation.
5. Confirm NPM is on the system:
npm -v
This displays the NPM version and confirms the tool is on the system, along with Node.js.
Most distributions also offer Node.js through their native package managers or external sources such as the Ubuntu repository or NodeSource repository. However, these versions are often outdated or exclude tools like NPX entirely, which is why nvm remains the preferred method.
Note: For more details on how to install the current version and distribution-specific instructions, refer to our guides on how to install Node.js on Ubuntu, on CentOS and Rocky Linux, and on Debian.
NPX
NPX comes with NPM and is installed automatically when you install Node.js. It does not require a separate installation in most environments. However, availability varies depending on the NPM version and the method of Node.js installation.
However, NPX availability depends entirely on the installed NPM version. If NPM is outdated or broken, NPX may be missing or unusable. In most cases, updating NPM is the correct way to install or fix NPX, regardless of your operating system or distribution.
Note: There are several methods for updating NPM. Check out our guide for a detailed explanation of ways to update NPM in Windows, macOS, and Linux.
On Windows, NPX is part of the official Node.js installer, along with NPM. If Node.js was installed using the installer or Chocolatey, NPX is available by default.
To verify installation, run:
npx --version
If the command returns no output, it indicates an outdated or minimal Node.js installation. On Windows, the safest way to update NPM is by reinstalling Node.js using the official installer, which updates both Node.js and NPM.
Alternatively, use:
npm install -g npm@latest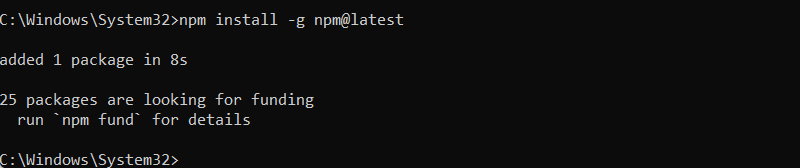
Another option is to use npm install -g npm. However, that command often causes issues on Windows.
Note: If NPM is not available or you need to troubleshoot installation issues, refer to the Node.js and NPM installation steps explained earlier or to the update guide mentioned at the beginning of this section.
On Linux, NPX is also bundled with NPM, but availability depends on how Node.js was installed.
If you used NVM, NPX is included and up to date as part of the selected Node.js version. The installation process is the same as already explained in the NPM section.
To confirm NPX is available, use:
npx --versionIf Node.js was installed via a package manager like apt, dnf, or pacman, NPX may be outdated or missing. Using NVM or updating NPM is the most reliable option for compatibility.
If you're using NVM, the cleanest way to update is to install the latest Node.js version with:
nvm install node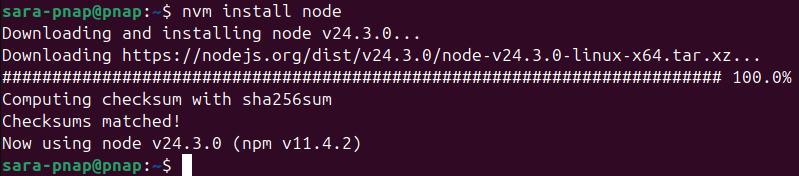
Once installed, switch your system to use the latest version:
nvm use node
This installs the latest Node.js and automatically includes the most recent compatible version of NPM, which provides NPX support.
Note: For details, refer to the tutorial about updating NPM mentioned at the beginning of this section.
On macOS, NPX is installed with NPM and follows the same rules. Whether you use the official Node.js installer or Homebrew, NPX is included automatically.
To check if NPX is available, enter:
npx --versionIf the npx command fails, it means the installed NPM version is outdated or corrupted. In most cases, updating NPM restores or installs NPX, since the two are bundled together.
The exact method depends on how Node.js was originally installed. Using NVM or updating NPM directly is the most reliable method for ensuring NPX compatibility.
However, if Node.js was installed using Homebrew, the best way is to update both Node.js and NPM with:
brew upgrade nodeThis ensures both tools get the latest versions available via Homebrew
Another option is using the n module, a Node.js version manager. While it supports fast switching and upgrades, it requires global installation and admin privileges and is generally more complex. For that reason, it's not recommended for most users.
Note: All update methods are explained in detail in our NPM update guide at the beginning of this section.
Purpose
While NPM and NPX are both part of the Node.js system and often used together, they serve fundamentally different purposes. Understanding what each tool does helps developers choose the right one in the right context, avoid misconfiguration, and streamline workflows.
Both tools interact with packages from the NPM registry, but their usage differs. NPM focuses on installing and managing packages, while NPX executes them directly. Recognizing this distinction is crucial in building scripts, automating tasks, and utilizing one-time tools.
The following sections explain the specific purpose of each tool.
NPM
The primary purpose of NPM is to install, manage, and organize dependencies for Node.js projects. It maintains a local record of packages required for a project and ensures consistency across environments by tracking exact versions in package-lock.json.
NPM handles project-wide dependency management, version control, and distribution of custom packages. It supports scripts, environment setup, and advanced configuration options, such as scoped packages and workspaces. Whether you're building an application or publishing a library, NPM provides the tools needed to manage dependencies efficiently at scale.
NPX
The purpose of NPX is to run Node.js packages without requiring permanent installation. It enables quick, temporary execution, which is ideal for one-off utilities, generators, or testing specific versions of CLI tools. This makes it useful for tools that don't need to persist in the project or system.
NPX also simplifies workflows by resolving binaries automatically from the local node_modules or fetching them on demand from the registry. Its goal is to reduce clutter, avoid unnecessary global installs, and make temporary tooling more accessible without manual setup.
Usage
Although NPM and NPX both interact with packages from the registry, their usage patterns differ significantly. Knowing when to use each tool helps avoid unnecessary installations, improve portability, and simplify development workflows.
The following sections compare how each tool works in practice.
NPM
NPM primarily installs packages into a project's local environment and manages dependencies. The most common command is:
npm install [package_name]For example, to install the Express web framework, run:
npm install express
This installs the latest version of Express into the project's node_modules directory and records it in package.json. Use npm fund to see a list of packages and URLs where you can learn more or contribute.
To install a package globally (making it available system-wide), use:
npm install -g [package_name]For example, to install a static file server globally, run:
npm install -g http-server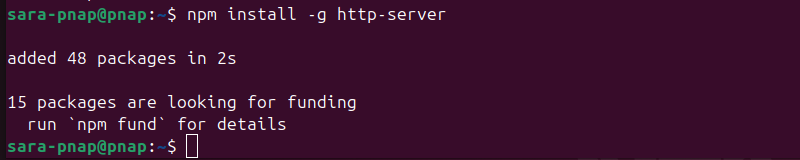
This allows you to launch the http-server command from any directory in the terminal.
To install a package as a development-only dependency, use:
npm install [package_name] --save-devFor example, to install ESLint for linting code during development, run:
npm install eslint --save-dev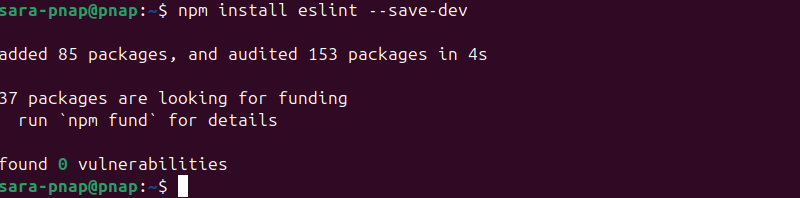
This adds ESLint to the devDependencies section in package.json.
To uninstall a package from the project, use:
npm uninstall [package_name]For example, to remove Express from your project, run:
npm uninstall express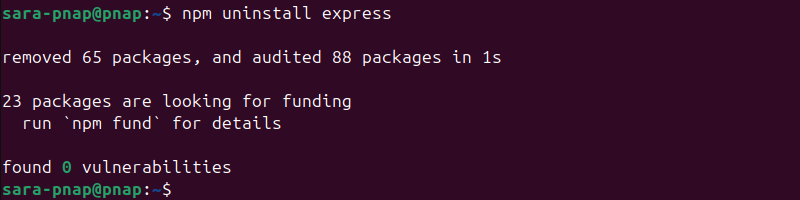
This deletes the package from node_modules and updates package.json and package-lock.json.
To list all top-level installed packages, run:
npm list --depth=0
This displays a flat list of all currently installed packages in the project without showing nested dependencies. In this case, the terminal shows the home directory (/home/sara-pnap), and ESLint v9.30.1 is the only top-level package.
NPX
NPX executes Node.js packages directly from the terminal without requiring permanent installation. It's ideal for one-off tasks, running CLI tools, or testing specific package versions.
To run a package without installing it, execute:
npx cowsay "Powered by NPX"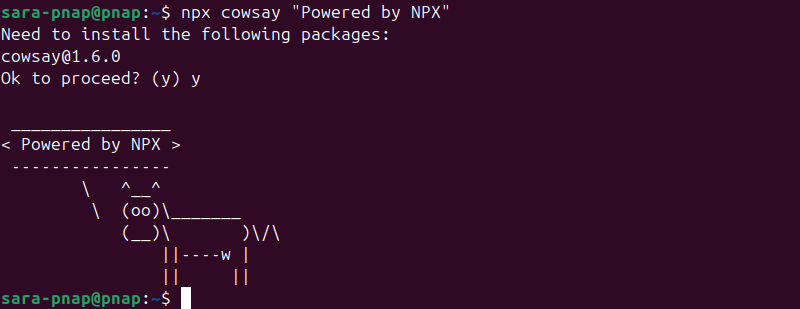
This downloads and executes the cowsay package in a temporary environment, then deletes it after the command finishes.
Moreover, to run a specific version of a package, type:
npx cowsay@1.5.0 "Version 1.5.0"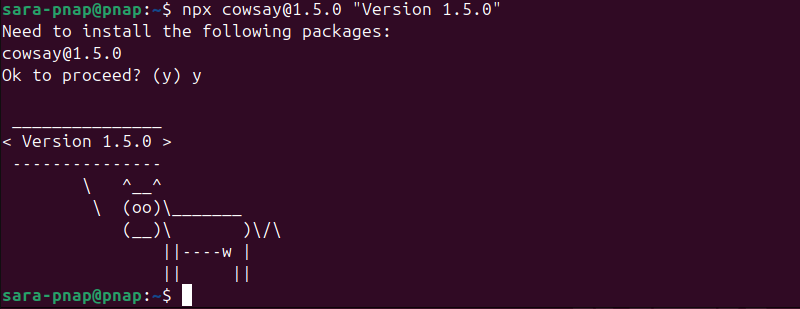
This ensures you're running the exact version without modifying your local dependencies.
NPX also checks the local node_modules/.bin directory for the requested binary and uses it if available, avoiding a download from the NPM registry. To demonstrate this, create a new project directory with mkdir, navigate to it using cd, and initialize it with NPM:
mkdir eslint-test<br>cd eslint-test<br>npm init -y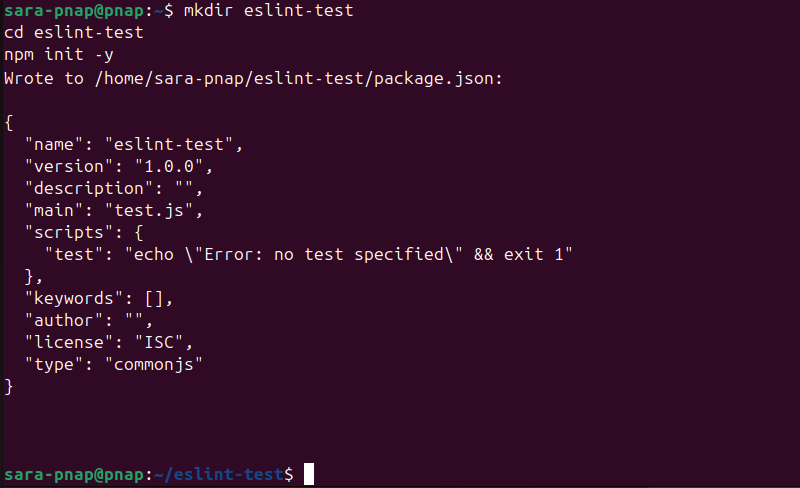
This sets up a minimal package.json file to manage dependencies. Next, install ESLint locally as a development dependency.
npm install eslint --save-dev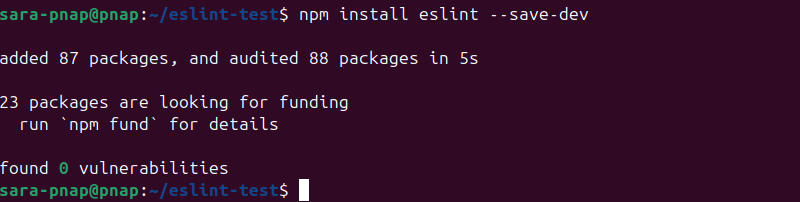
This adds ESLint to your node_modules directory and makes its executable available at node_modules/.bin/eslint:
Next, use echo to create a JavaScript test file with an unused variable to trigger a linter warning:
echo "var foo = 1" > test.jsThe command has no output. Run ESLint using NPX:
npx eslint .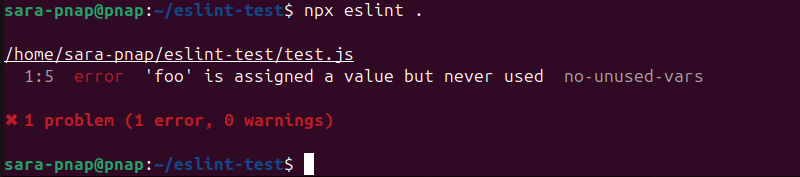
The output shows ESLint found an issue in the test file:
'foo' is assigned a value but never used.This warning comes from the no-unused-vars rule, which helps catch unused variables in code.
Since the ESLint binary exists in the local node_modules/.bin directory, NPX uses it directly instead of downloading a new copy. This behavior is typical for tools in the devDependencies section of the package.json file, which are packages for development purposes.
NPX also supports interactive command-line tools that prompt the user during execution. This is useful for scaffolding tools or project generators that require setup input from the terminal.
For example:
npx create-react-app my-app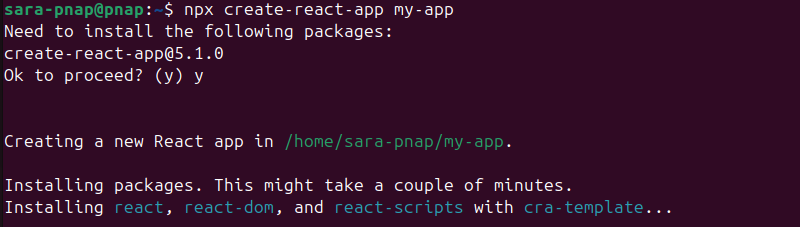
This runs the create-react-app package without prior installation. The tool prompts the user to configure the new project and then initializes a fully structured React application in the my-app directory.
Scripts
NPM scripts let developers automate routine tasks like testing, linting, or starting a server. They are defined in the scripts section of the package.json file and executed with NPM using:
npm run [script-name]NPM automatically adds locally installed packages to the execution path. Therefore, scripts run tools without a global installation. NPX also works inside scripts to run tools that aren't in the project dependencies.
The following sections explain how NPM and NPX work in scripts and provide practical examples.
NPM
When you define a script in package.json, NPM runs it using binaries from the local node_modules/.bin directory. This helps avoid polluting the global environment and ensures consistency across various environments.
To demonstrate, we’ll create two scripts:
- start. Runs a basic Node.js app.
- lint. Runs ESLint to check for code issues.
Follow these steps to accomplish this:
1. Create or locate your project directory. If you don't have a project yet, create one and navigate into it:
mkdir my-project
cd my-project
If you already have a project, navigate to its root directory.
2. Initialize a package.json file (if it doesn't exist). Run the following command to generate a minimal package.json:
npm init -y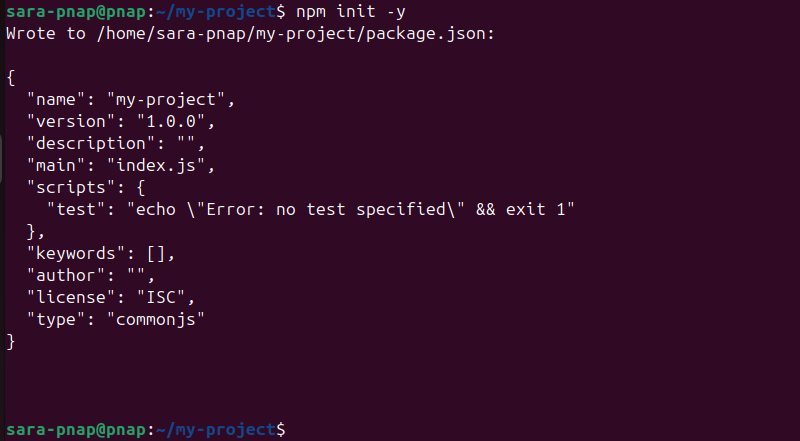
The command creates a file named package.json in the current directory
3. Open package.json in your preferred text editor. For example, with nano:
nano package.json4. Inside package.json, add a scripts object or modify it to include
"scripts": {
  "start": "node app.js",
  "lint": "eslint ."
},
Note: There is often a placeholder "test" script in this section. It's safe to replace it with the code above.
5. Save and exit the editor.
6. Create the files your scripts use. For example, create a simple app.js:
echo "console.log('Hello from app.js')" > app.jsThe command has no output
7. Install ESLint if you want to use the lint script:
npm install eslint --save-dev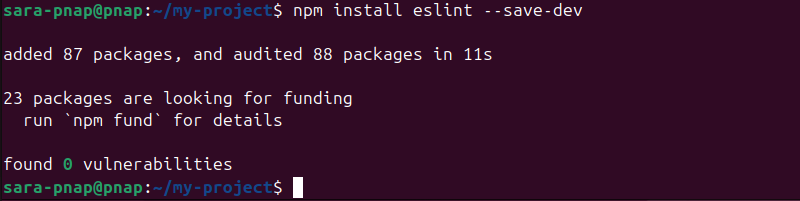
8. Run your scripts using NPM
npm run start
This runs ESLint and outputs lint warnings or errors
NPX
NPX lets you execute binaries from packages without adding them to package.json scripts or installing them globally. This is useful for one-off runs or temporary tasks.
To demonstrate, we'll run ESLint on a directory without defining an NPM script. Take the following steps:
1. Navigate to your project directory or create one ( the steps are the same as with NPM).
2. Ensure ESLint is installed within the directory. If not, run:
npm install eslint --save-dev3. Create a simple JavaScript file with a linting issue to demonstrate ESLint's output clearly. For example:
echo "var foo = 1;" > test.js4. Run ESLint using NPX from your project root directory:
npx eslint .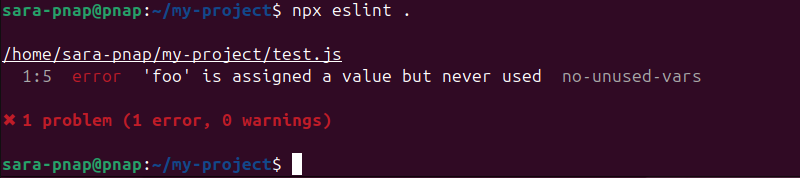
NPX uses the local ESLint binary if available, or downloads a temporary one if not.
If the code contains issues, such as unused variables, ESLint prints a list of problems directly in the terminal. In this case, the output shows the filename, the line and column of the issue, the error type, and the specific violated rule.
Node.js Compatibility
Both NPM and NPX are tied to the installed Node.js version. Understanding how they interact with Node.js is essential for keeping your tools stable and functional across environments.
The following section explains compatibility considerations for NPM and NPX separately.
NPM
NPM is bundled with Node.js and automatically installed when you set up Node.js via official installers, NVM, or Homebrew. The bundled version varies depending on the Node.js release. For example, the current Node.js version, which is 24.3.0, includes NPM v11.4.2.
NPM requires version alignment with Node.js, especially for newer features or CLI behavior. Installing Node.js through outdated package managers (e.g., apt, dnf) results in older NPM versions. Inconsistent versions cause issues with dependency resolution, lock files, or lifecycle scripts.
To confirm the installed version, use:
npm -v If outdated, update it using the same method you used to install Node.js (e.g., nvm install node, brew upgrade node, or re-download from nodejs.org).
NPX
NPX is part of NPM (not as a standalone package). Its availability directly depends on your NPM version. If NPM is broken or outdated, NPX may not function properly.
Older distributions (especially on Linux) often bundle NPM versions where NPX is missing, unusable, or outdated. Updating NPM usually resolves this. On systems managed with NVM or Homebrew, updating Node.js also upgrades both NPM and NPX.
Use the following to check availability:
npx --versionIf the command fails, update NPM using the methods recommended above, depending on your operating system.
Security
Security in package management refers to the potential risks associated with installing and running third-party code. Both NPM and NPX interact with packages from remote sources, which introduces vulnerabilities if not managed properly. Understanding how each tool handles package installation and execution is essential to mitigate security risks.
The following text explains the security features for NPM and NPX, highlighting the differences in how persistent versus temporary installations impact vulnerability exposure and trust management.
NPM
NPM installs packages permanently into the node_modules directory within your project or globally on the system. This means any vulnerable or compromised packages remain on the machine until explicitly removed or updated.
To address this, NPM offers tools like npm audit, which scan dependencies for known security issues and provide remediation suggestions.
For example, run:
npm audit
In this case, the command found zero vulnerabilities. However, because installed packages persist, there is a larger attack surface if dependencies are outdated or sourced from untrusted origins. Maintaining strict version control with package-lock.json and regularly running audits is critical to minimizing risks.
NPX
NPX runs packages on demand, which means it downloads and executes code temporarily without permanent installation. This temporary execution reduces the window during which vulnerable code remains on the system.
However, this convenience introduces trust challenges, as users sometimes unknowingly execute unverified or malicious packages directly from remote registries or GitHub.
Unlike NPM's persistent installs, NPX limits leftover vulnerabilities but requires users to be vigilant about verifying sources and understanding the commands they run.
Performance
Performance in package management covers how quickly and efficiently packages are installed, executed, and reused. Both NPM and NPX impact development speed and resource usage differently due to their installation and execution models.
The following text examines the performance capabilities of NPM and NPX, with a focus on install time, execution speed, and package reuse efficiency.
NPM
NPM installs packages permanently, either locally in the project’s node_modules directory or globally. This upfront installation takes more time initially, but enables faster and repeated usage because it caches binaries and dependencies locally.
Once installed, running scripts or commands that depend on these packages happens nearly instantly, without any download or setup at runtime.
However, this sometimes increases disk space usage and slows down package updates due to dependency tree complexity.
NPX
NPX excels at running packages without prior installation, which speeds up one-off commands or testing new tools.
When NPX doesn't find a package locally, it downloads it temporarily, which introduces latency for the first run. Subsequent executions in the same session use cached files, which improves speed.
Because NPX avoids permanent installs by default, it saves disk space and reduces cleanup overhead, but sacrifices some runtime speed. NPX is ideal for temporary use cases but less efficient for frequent commands.
Global vs. Local Behavior
Global and local installs determine where packages are and how users access them. This affects project isolation, system configuration, and ease of execution.
The following section explains how NPM and NPX behave differently with global and local packages.
NPM
NPM allows installing packages either locally (inside a project directory) or globally (available system-wide).
Local installs isolate dependencies to a single project, which prevents version conflicts and improves reproducibility.
Global installs, on the other hand, are useful for tools you want to access from any directory, but they risk mismatches between environments.
By default, NPM scripts prioritize local binaries. If a tool exists in the local node_modules directory, that version is used. Global versions are used only if a local one doesn't exist.
NPX
NPX uses a layered resolution strategy. It first checks the local node_modules directory for the binary. If it doesn't find it there, it checks globally installed packages. If still not found, it downloads a temporary version from the NPM registry and runs it without installing it permanently.
This flexibility allows developers to avoid global installs altogether, ensuring the correct version is used for each project or command without cluttering the system.
Project Cleanliness
Keeping projects clean and maintainable is critical in modern development workflows. NPM and NPX directly affect the size of your node_modules directory, the contents of package.json, and how easily you can clone, run, or clean up a project.
The following text explains how NPM and NPX affect project structure and disk usage.
NPM
When you install packages with NPM, it writes them to the node_modules directory and registers them in package.json.
Over time, this process bloats dependencies, especially if you don't remove unused or outdated packages. This increases repository size and causes issues with version conflicts, auditing, or CI/CD stability.
Using NPM to run tools requires you to add them as devDependencies or dependencies. This makes them persist in the project and requires manual updates or removal.
NPX
NPX avoids polluting the project with unnecessary files. It runs packages without permanently installing them, making it ideal for short-lived utilities or scaffolding tools.
Since NPX doesn't modify package.json unless explicitly instructed, the project stays lean, which means there are no leftover binaries, no cluttered dependency lists, and no extra cleanup.
This temporary execution model helps reduce bloat and simplifies onboarding, as contributors don't need to prune unused packages or manage dev tools they'll only run once.
NPM vs. NPX: Comparison Table and Overview
Node.js bundles NPM and NPX, which often go together, but they serve different purposes and behave differently in practice. These differences affect how you install, execute, maintain, and secure packages.
The following table presents a side-by-side comparison across all key areas covered in the previous sections:
| Feature | NPM | NPX |
|---|---|---|
| Installation | Installed with Node.js. Available system-wide immediately after installation. | Bundled with NPM. Availability depends on the installed NPM version. |
| Purpose | Installs and manages packages and dependencies for a project. | Executes packages temporarily without installing them permanently. |
| Usage | Adds packages to node_modules and records them in package.json. | Runs packages on demand without modifying package.json. |
| Scripts | Defines scripts in package.json and executes them with npm run. | Can run packages inside scripts without adding them to project dependencies. |
| Node.js Compatibility | Included with Node.js installers and NVM. Version tied to Node.js release. | Depends on NPM. If NPM is broken or outdated, NPX may be unavailable. |
| Security | Installs persistently, increasing risk if packages are outdated or untrusted. Offers npm audit. | Runs packages temporarily, reducing exposure but requiring trust in remote code. |
| Performance | Slower upfront due to full installation, but fast on repeated use. | Slower on first run (downloads binary), but fast for one-off, temporary usage. |
| Global vs Local Behavior | Supports local and global installs. Local binaries take precedence in scripts. | Uses local binary if available, otherwise checks global, then fetches a temporary copy from the registry. |
| Project Cleanliness | Adds dependencies to package.json and keeps them in node_modules. May cause bloat over time. | Does not modify project files unless explicitly instructed. Keeps projects lean and reduces cleanup overhead. |
Conclusion
This tutorial presented NPM and NPX, two command-line tools used for managing packages for Node.js. The text explained what each tool is, what its main features are, and how it works. The guide also elaborated on many differences between them.
Next, learn about Yarn, another Node.js package manager, and how it compares to NPM.