The Node Package Manager (npm) uses a caching mechanism to speed up package installations and reduce redundant downloads. While caching improves performance, it can cause issues, especially when packages become outdated, corrupted, or conflict with new installations.
This tutorial explains how npm caching works, why and when it's necessary, and how to clear the cache correctly.
How Does npm Caching Work?
npm stores downloaded packages and metadata in a local cache directory to avoid repeated downloads. The cache includes .tgz files for package contents and various index files for quick lookup.
By default, the cache is stored in the following location:
Linux/macOS
~/.npmWindows
%AppData%\npm-cacheWhen you install a package, npm checks the local cache before reaching out to the public registry (npm's central package server). If the required version already exists locally and passes integrity checks, npm uses the cached version.
This process accelerates installation times and reduces bandwidth usage, particularly in environments with frequent builds or installations.
npm Cache Validation
To complete the integrity check and ensure that a cached file has not been altered or corrupted, npm:
1. Generates a SHA-512 checksum of the cached package file.
2. Compares the checksum to the original hash stored when the package was first downloaded.
3. If the values match, the file is considered valid and is used for installation.
4. If the package fails the validation (or is not found in the cache), npm downloads a fresh copy from the registry. That copy is then added to the cache for future use.
This mechanism ensures efficiency, but it also introduces risks when the cache becomes outdated or corrupted.
Why Clear npm Cache?
Clearing the npm cache helps resolve installation issues caused by corrupted or outdated files. While npm is designed to manage its cache automatically, it doesn't always detect every problem. Over time, the cache accumulates broken packages, stale metadata, or incomplete downloads.
Common reasons to manually clear the cache include:
- Fixing failed installs. Packages sometimes fail to install due to corrupted cache entries or checksum mismatches.
- Resolving version conflicts. Cached dependencies from older versions cause npm to install the wrong package or fail silently.
- Cleaning up after interrupted operations. Crashes or aborted installs often leave partial files in the cache that interfere with future installs.
- Forcing fresh downloads. When testing new versions or switching registries, clearing the cache ensures you're not relying on stale files.
- Freeing up disk space. Large projects or frequent installs cause the cache to grow significantly over time.
npm rarely requires manual cache management, but clearing it is a quick and effective fix when unexplained issues arise.
How to Clear npm Cache?
Clearing the npm cache helps resolve issues caused by corrupted packages, stale metadata, or failed installations. It's also sometimes necessary when working in clean build environments or debugging package-related errors.
The primary command to clear the cache is:
npm cache clean --force
Note: The warning indicates you're bypassing npm's safety checks, which is standard behavior in v5 and later, and the command exits with minimal output unless an error occurs.
This command removes cached .tar.gz files, index metadata, and temporary files from the local cache directory. However, it doesn't delete anything from node_modules (where npm installs a project's dependencies), doesn't touch package-lock.json (a file that records exact dependency versions to ensure consistent installation), and does not affect globally installed packages.
It only affects the internal cache that npm maintains to speed up installs and reduce bandwidth usage.
To confirm whether the cache was cleared successfully, run:
npm cache verify
This command checks for leftover files and validates the cache's integrity. In this case, it shows the cache is empty. No content or index entries remain, which confirms a successful clean.
Since npm version 5, cache cleaning has been treated as a high-risk operation. Running npm cache clean without the --force flag does nothing. The flag confirms you intend to remove cached data, preventing accidental data loss that can affect performance.
The following table presents other common flags that modify the behavior of the npm cache clean command:
| Flag | Description |
|---|---|
--force | Required. Forces npm to clean the cache. Without this, the command has no effect (npm v5+). |
--all | Clears all cached data, including both valid and invalid entries. |
--dry-run | Performs a simulated clean. Lists what would be deleted without removing files. |
--loglevel | Sets the level of logging output (e.g., silent, warn, info). Useful to suppress or expand output during cleaning. |
--prefix | Defines a custom path to operate from, though rarely relevant for cache cleaning specifically. Included for completeness. |
Although the syntax remains the same across platforms, file permissions can behave differently.
On Linux and macOS, elevated privileges are rarely necessary. However, use sudo or root access if permission is denied. On Windows, running the Command Prompt or PowerShell as Administrator avoids permission errors during cleanup.
How to Clear the npm Cache in React?
React is a JavaScript library for building interactive user interfaces. It relies heavily on npm for managing dependencies, which makes it equally susceptible to cache-related issues, such as corrupted packages or version conflicts.
To clear the npm cache in a React project, you need to access the root directory of your React project.
If you created the app using npx create-react-app, the directory is usually named after the project. For example, you ran the following:
npx create-react-app myapp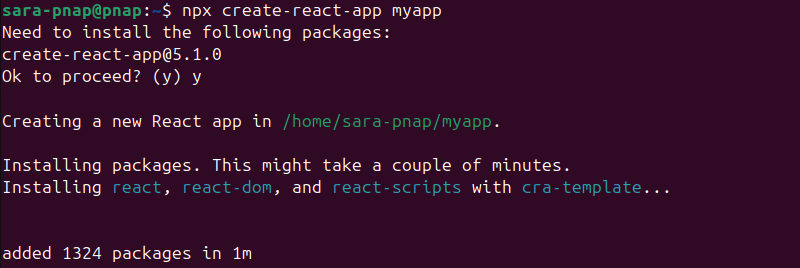
This means the directory is called myapp. Use cd to navigate into the directory:
cd myapp
Once you're in the project directory, run the following command to clear the npm cache:
npm cache clean --force
This ensures npm operates in the correct context. If clearing the cache doesn't resolve the issue, do a full reset of your local environment:
| Platform | Delete node_modules | Delete package-lock.json | Reinstall Dependencies |
|---|---|---|---|
| Linux/macOS | rm -rf node_modules | rm package-lock.json | npm install |
| Windows | rmdir /s /q node_modules | del package-lock.json | npm install |
| Removes the entire node_modules directory, deleting all locally installed packages. | Deletes the package-lock.json file to clear the locked dependency tree and force fresh resolution. | Reinstalls all dependencies from scratch and regenerates package-lock.json based on package.json. |
Troubleshooting Potential Issues When Clearing npm Cache
Clearing the npm cache may occasionally cause new issues, often related to permissions, flags, or underlying system configurations. The following tips show how to troubleshoot and resolve common problems when working with the npm cache:
- Permission errors (EACCES or EPERM). These errors occur when npm lacks permissions to access or delete cache files. To fix them, try using sudo on Linux or macOS systems, or run the Command Prompt or PowerShell as Administrator on Windows.
- The
--forceflag not used error. Starting from npm v5, cache cleaning is disabled by default to prevent data loss. To avoid this error, always include the--forceflag. - Command doesn't delete anything. Similar to the previous error. Happens if the cache clean command is run without
--forceor on older npm versions, where the command is inactive. Always add--forceto execute cache cleaning. - Cache not clearing completely. Sometimes,
npm cache clean --forcefails to fully clear the cache. Manually delete the cache directory withrm -rf ~/.npmon Linux/macOS orrmdir /s /q %AppData%\npm-cacheon Windows. - Corrupted cache remains after cleaning. Run
npm cache verifyto scan and remove invalid or incomplete cache entries that the command missed. - Command not recognized or failing silently. Indicates a broken or outdated Node.js/npm installation. Reinstall Node.js using the official installer or a version manager like nvm.
- Global installs are still broken after cache reset. Cache issues are not always the root cause. Delete node_modules and package-lock.json, then run
npm installto reset the environment. - Proxy or network-related errors. npm might fail to fetch or validate cached packages behind firewalls or proxies. Fix by configuring npm proxy settings or disabling strict SSL with
npm config set strict-ssl falseto bypass SSL certificate verification in restricted environments. - Incorrect use of
--dry-runflag. This flag simulates deletion without actually clearing the cache. Ensure you are not using--dry-runalone when troubleshooting. - npm version mismatch across environments. Different npm versions cause inconsistent cache behavior. Standardize npm versions using a version manager like nvm.
- Insufficient disk space. Low disk space prevents cache clearing or causes incomplete deletions. Verify disk space and free it if necessary.
- Read-only file system or restrictive environment. Running npm in read-only directories, containers, the Windows Subsystem for Linux (WSL), or network mounts like NFS or CIFS block cache operations. Move to a writable directory or adjust permissions.
- npm config errors. Custom npm configurations or corrupted config files interfere with cache commands. Reset configs with
npm config editor delete the config file if necessary. - npm: command not found. Happens when npm is not installed or not available in your system's PATH. On Linux or macOS, check with the which command. On Windows, ensure the Node.js directory is in the system PATH. Reinstall Node.js or set the PATH manually if needed.
- Cache doesn’t clear completely. Without the
--allflag, sometimes valid entries remain untouched. To fix the issue and remove all cached content, add the flag. - Custom cache directory not affected. If your system or project uses a custom cache location (via
NPM_CONFIG_CACHE), clearing the default cache won't help. Check the active cache directory withnpm config get cache, then clear it manually if needed.
Conclusion
This tutorial explained how to clear the npm cache on different systems. It also presented potential issues with clearing the npm cache and suggested solutions.
Next, learn the differences between npm and Yarn, two of the most popular Node.js package managers.