ClamAV is an open-source antivirus engine designed to detect trojans, viruses, malware, and other malicious threats on Linux systems. It is used on email servers, file servers, and security gateways to scan files and monitor for suspicious activity.
This tutorial will explain how to install, update, and use ClamAV on Ubuntu.
Prerequisites
- Ubuntu system (this tutorial uses Ubuntu 26.04).
- Access to the terminal.
- sudo or root privileges.
What Is ClamAV?
ClamAV is a command-line antivirus tool for Unix-based systems. It scans files and directories for different malware types. Maintained as an open-source project, ClamAV is a popular choice for Linux environments that require flexible and reliable malware detection.
Although it does not offer real-time protection, ClamAV supports automation and works well for on-demand or scheduled scans. It includes regularly updated virus definitions and tools for managing database updates.
System administrators integrate ClamAV into shell scripts, automation workflows, and cron jobs to maintain security without keeping CPU and memory usage low.
How to Install ClamAV on Ubuntu?
Installing ClamAV adds an extra layer of security to your system by enabling on-demand malware scanning of files, directories, and email attachments. It's a practical solution for users who need lightweight malware detection without background services or real-time scanning.
The installation process on Ubuntu is straightforward and uses official package repositories. As of this release, the steps are the same for all actively supported Ubuntu versions.
The following sections explain how to install ClamAV and its supporting components on Ubuntu.
Step 1: Update Package Index
Before installing new software, use apt to update the local package index and ensure access to the latest versions available in the repository.
sudo apt update
Step 2: Install ClamAV and ClamAV Daemon
Install the core ClamAV scanner and the optional clamav-daemon package, which runs the scanning engine as a background service. The clamav-daemon package provides the clamd service, which runs the scanning engine in the background. It does not monitor files in real time but allows faster on-demand scanning.
Run the following command:
sudo apt install clamav clamav-daemon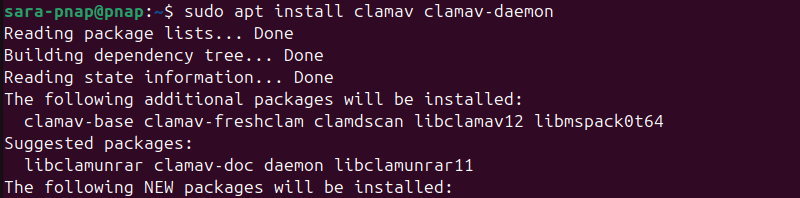
The output confirms installation and shows the packages being unpacked and configured.
Step 3: Check the ClamAV Version
Verify ClamAV is installed correctly by checking the version:
clamscan --version
The output shows the installed version of ClamAV.
How to Update the ClamAV Virus Database?
ClamAV relies on a frequently updated virus definition database to detect the latest threats. Without regular updates, the scanner fails to identify new or modified malware.
The following sections show how to manually or automatically update the ClamAV virus database on Ubuntu.
Step 1: Stop ClamAV Daemon
If the clamav-daemon service is running, stop it before updating the database manually. This prevents file lock conflicts during the update process.
Use the following command:
sudo systemctl stop clamav-freshclamThe command produces no output.
Step 2: Manually Update Virus Database
Use the freshclam command to download the latest virus definitions directly from ClamAV's servers.
sudo freshclam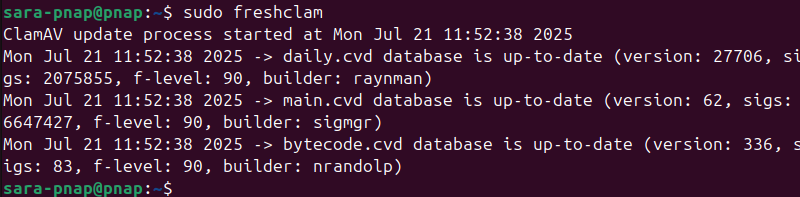
Step 3: Restart ClamAV Daemon
After the manual update, restart the daemon to use the latest virus definitions.
sudo systemctl start clamav-freshclamThis command produces no output.
Step 4: Enable Automatic Updates (Optional)
To keep the database updated automatically, enable the clamav-freshclam service. It checks for updates periodically and applies them in the background.
Run the following:
sudo systemctl enable --now clamav-freshclam
How to Install ClamAV GUI (Optional)
ClamTK is a lightweight graphical interface for ClamAV. It provides a simple user interface for running scans, managing scan results, and updating the virus database, all without requiring terminal commands. This makes ClamAV more accessible to users who prefer a simple interface over command-line tools.
While the GUI does not add new scanning features, it simplifies basic tasks and is useful for desktop environments or less experienced users.
The following sections explain how to install ClamTK on Ubuntu and launch the GUI.
Step 1: Install ClamTK from the Ubuntu Repository
Install ClamTK from the official Ubuntu repositories. This installs the GUI and its required components.
sudo apt install clamtk
Step 2: Install Recommended Add-On (Optional)
ClamTK offers additional features through optional plugins, including scheduled scans and integration with file managers like Nautilus or Thunar.
Run the following:
sudo apt install clamtk-gnome
Step 3: Launch ClamTK
After installation, launch ClamTK from the application menu or run it from the terminal.
clamtk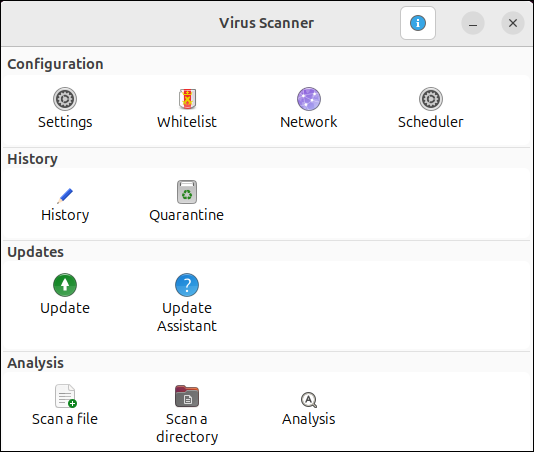
The GUI window opens with options to scan directories, view history, and manage settings.
How to Use ClamAV to Scan
ClamAV provides a command-line scanner called clamscan for scanning files, directories, and mounted storage. It performs basic one-time scans or assists with automated scripts and scheduled jobs. The tool supports various flags for controlling what gets scanned, how results are reported, and how infected files are handled.
The following sections outline common ways to scan files and directories using ClamAV on Ubuntu.
Scan a File or Directory Manually
ClamAV allows users to manually check individual files or directories for malware. This method is useful when testing newly downloaded files or running scans without automation.
To demonstrate the process, follow these steps:
1. Create a test directory and a sample text file using mkdir and echo:
mkdir ~/clamav-test
echo "This is a clean test file." > ~/clamav-test/sample.txt
The commands have no output
2. Copy the sample file to create a second file using cp:
cp ~/clamav-test/sample.txt ~/clamav-test/sample2.txtHaving multiple files better demonstrates the recursive scanning process. The command also has no output.
3. Use the clamscan command with the -r option:
clamscan -r ~/clamav-test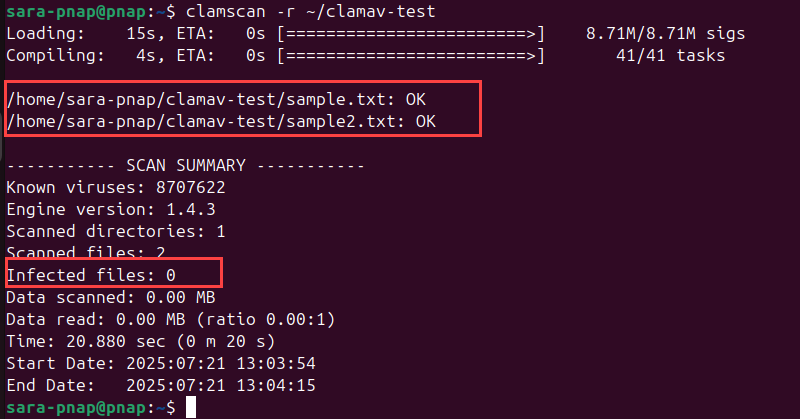
The -r flag tells ClamAV to scan inside the directory. The output lists the scanned files and indicates if any threats were found. If no malware is detected, the output includes the line:
Infected files: 0However, if ClamAV detects malware, the output is different. To demonstrate this, create the EICAR test file, a harmless file designed to trigger antivirus detection safely.
Run the following command to create it:
echo 'X5O!P%@AP[4\PZX54(P^)7CC)7}$EICAR-STANDARD-ANTIVIRUS-TEST-FILE!$H+H*' > ~/clamav-test/eicar.txtScan it with:
clamscan ~/clamav-test/eicar.txt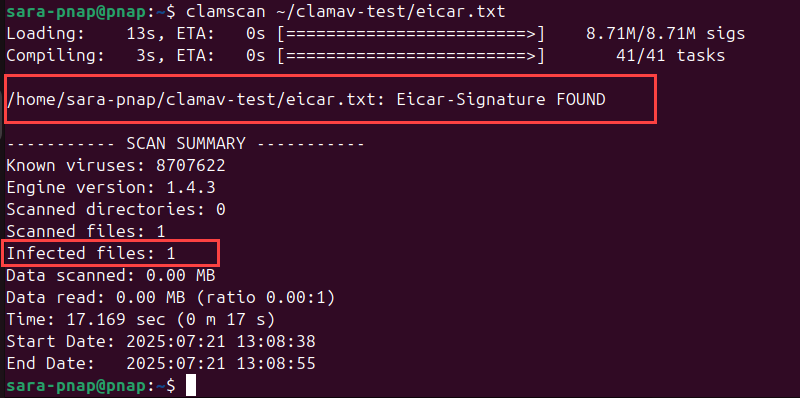
The output shows ClamAV detects the test file and reports it as infected.
Scan Recursively
ClamAV supports recursive scanning to check all files within a directory and its subdirectories. This is useful for scanning directories with multiple levels of content, such as backup or application directories.
Note: This example includes the previously created directory ~/clamav-test with the following files: sample.txt and sample2.txt.
To demonstrate how recursive scanning works, follow these steps:
1. Create a subdirectory subdir inside the existing ~/clamav-test directory and add a new file to it with:
mkdir ~/clamav-test/subdir
echo "Another clean test file." > ~/clamav-test/subdir/deepfile.txt
2. Run a recursive scan using the clamscan command with the -r option:
clamscan -r ~/clamav-test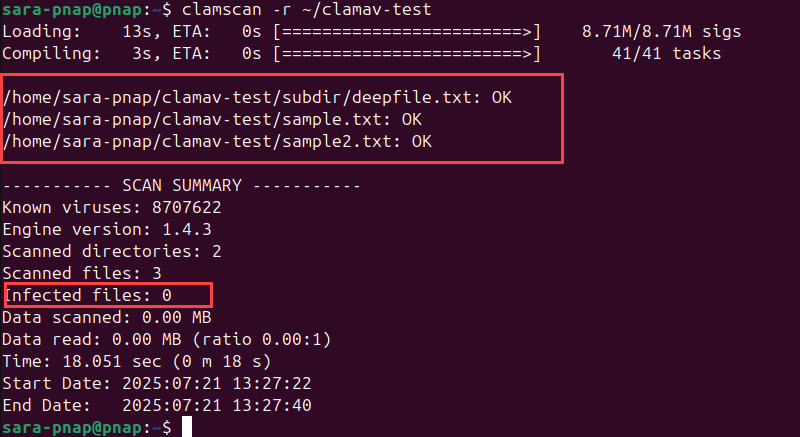
This command scans all files in ~/clamav-test, including those in subdir. The -r option tells ClamAV to enter and scan subdirectories. Without it, only the top-level files are checked.
The Scanned directories count confirms ClamAV scanned both the main directory and its subdirectory.

Scan and Show Only Infected Files
ClamAV can display only infected files during a scan, helping focus on threats without clutter from clean files.
To show this, take the following steps:
1. Run a scan using the --infected option on the test directory:
clamscan --infected -r ~/clamav-test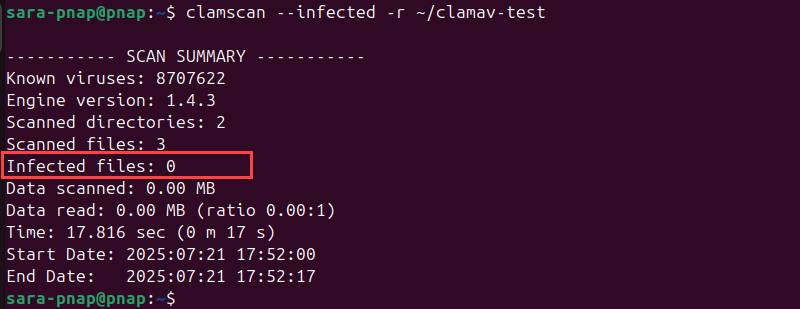
Since there are no infected files, this command produces no output other than the final summary, which shows 0 infected files.
2. To simulate an infected file, recreate the EICAR test file:
echo 'X5O!P%@AP[4\PZX54(P^)7CC)7}$EICAR-STANDARD-ANTIVIRUS-TEST-FILE!$H+H*' > ~/clamav-test/eicar.txt3. Rerun the scan with the --infected option:
clamscan --infected -r ~/clamav-test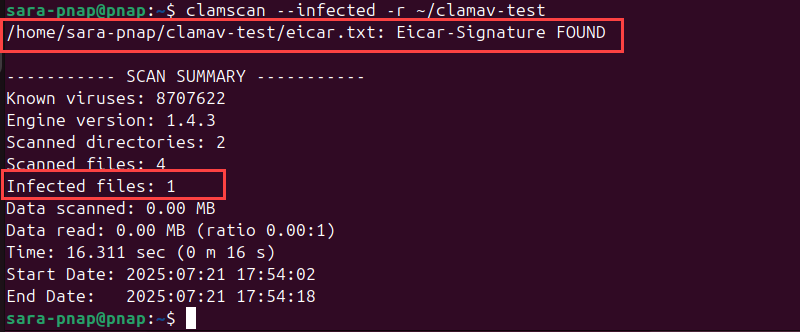
This time, ClamAV outputs only the infected file.
Scan and Save Results to a Log File
Saving scan results to a log file allows you to review or analyze the output later, which is helpful for long scans or managing multiple systems. Saving logs helps maintain records for security audits or troubleshooting.
To run a scan on the test directory and save the results to a log file, take the following steps:
1. Use the --log option with clamscan:
clamscan -r /home/sara-pnap/clamav-test --log=/home/sara-pnap/clamav-test/scan.log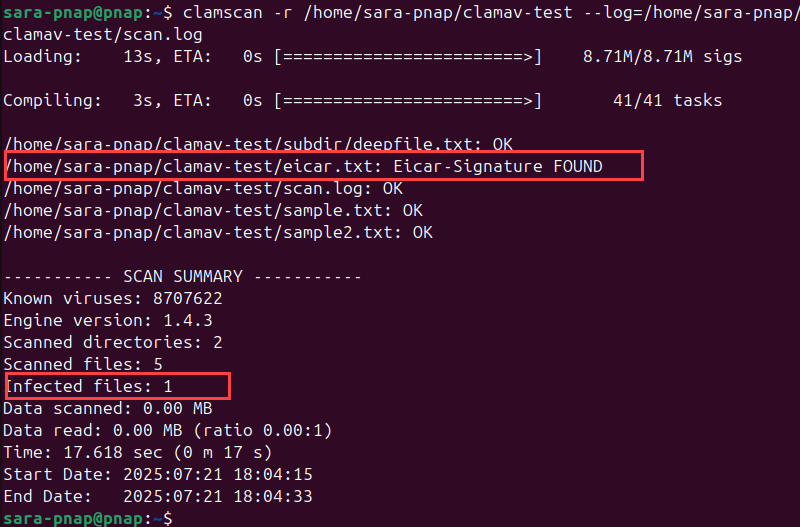
This command recursively scans the directory and writes detailed output to scan.log. It shows one infected file.
2. View the log file contents with the cat command:
cat /home/sara-pnap/clamav-test/scan.log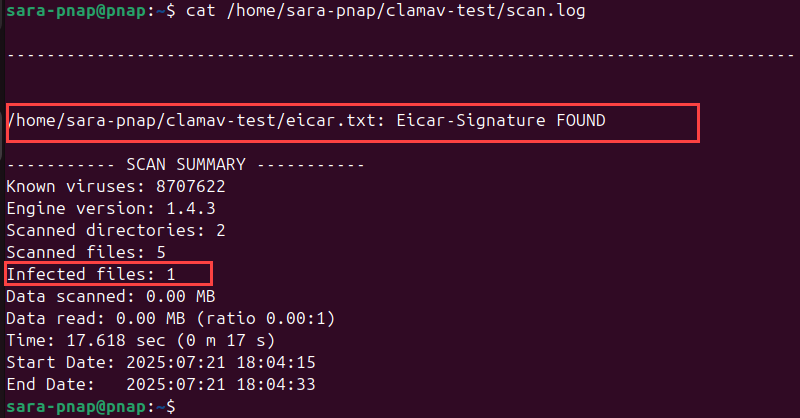
This displays the full scan report, including scanned files, any infections found, and summary information.
3. To scan a specific file (sample.txt) and save the scan results in a separate file, run:
clamscan /home/sara-pnap/clamav-test/sample.txt --log=/home/sara-pnap/clamav-test/sample_scan.log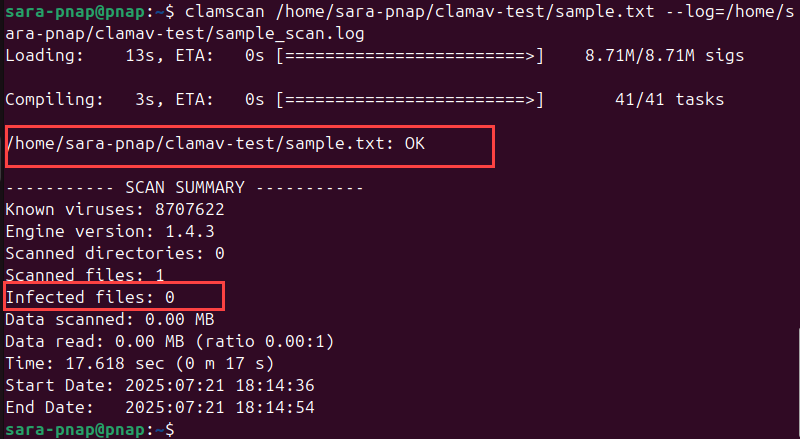
This demonstrates how to generate individual scan logs for specific files (instead of a single, recursive scan).
4. Verify the contents of the sample_scan.log with:
cat /home/sara-pnap/clamav-test/sample_scan.log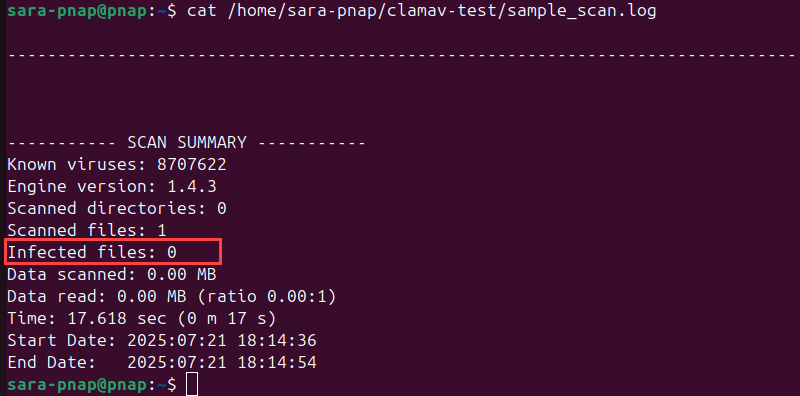
Scan and Remove Infected Files Automatically
ClamAV automatically removes infected files during a scan. This option is helpful for cleanup scripts or systems that require infected files to be deleted immediately. However, use it with caution, as deleted files cannot be recovered.
Take the following steps:
1. Recreate the EICAR test file to simulate an infected file (if not already present):
echo 'X5O!P%@AP[4\PZX54(P^)7CC)7}$EICAR-STANDARD-ANTIVIRUS-TEST-FILE!$H+H*' > /home/sara-pnap/clamav-test/eicar.txt2. Run a scan using the --remove option to delete infected files automatically:
clamscan -r /home/sara-pnap/clamav-test --remove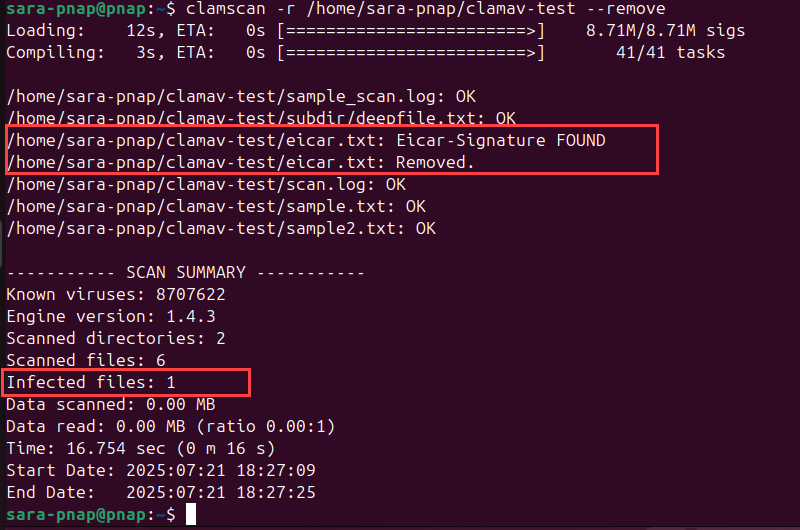
The output lists scanned files and shows if any were removed.
3. Confirm the file was deleted by listing the directory with ls:
ls /home/sara-pnap/clamav-test
This verifies eicar.txt is no longer present.
Use this option only when you are certain infected files don't need to be quarantined or reviewed.
Exclude Specific Files or Directories from Scan
ClamAV lets you exclude individual files or entire directories from scans. This is useful when you want to skip known safe files or prevent scanning large, unimportant directories.
To accomplish this, run a recursive scan and exclude sample.txt using the --exclude option. Note that --exclude expects a regular expression, not a literal file path.
Run the following:
clamscan -r /home/sara-pnap/clamav-test --exclude='sample\.txt'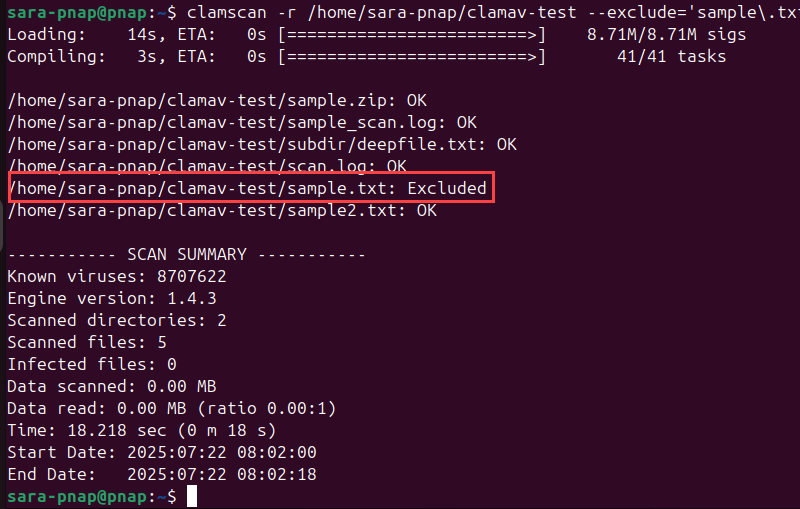
This scan skips sample.txt but checks all other files and directories in clamav-test/.
Another option is to exclude an entire directory using the --exclude-dir option. To skip the subdir/ directory, run:
clamscan -r /home/sara-pnap/clamav-test --exclude-dir='.*subdir'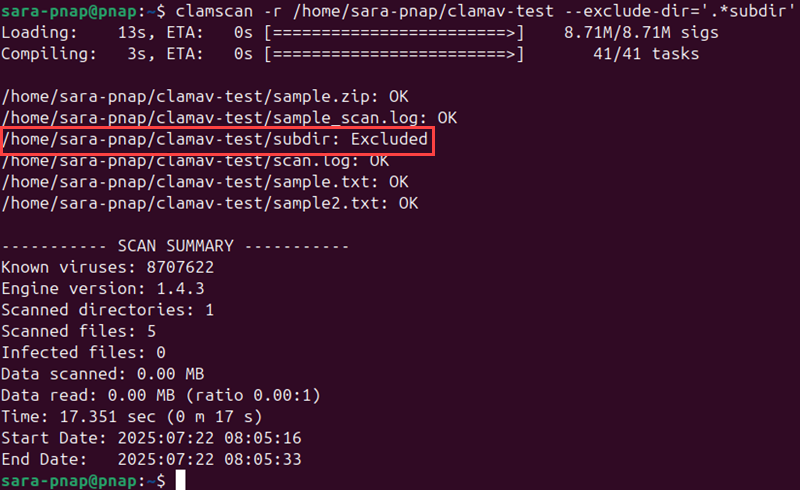
This command scans everything in clamav-test/ except the contents of subdir/.
Scan Archives with Custom Depth
ClamAV can scan inside compressed archive files such as ZIP and TAR. By default, ClamAV scans archives up to a limited depth. The --max-recursion option lets you increase the depth limit to scan deeply nested archives.
Take the following steps to scan inside an archive:
1. Use the zip command to create a ZIP archive with sample.txt:
zip /home/sara-pnap/clamav-test/sample.zip /home/sara-pnap/clamav-test/sample.txt
This creates sample.zip containing sample.txt.
2. Run a scan on the test directory. Use the --scan-archive option to enable archive scanning:
clamscan -r /home/sara-pnap/clamav-test --scan-archive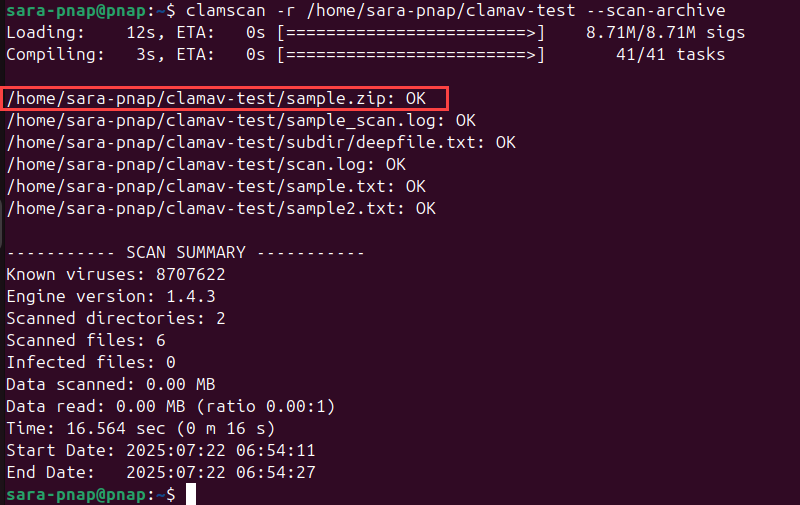
ClamAV inspects the contents of sample.zip, including regular files. The presence of archive contents in the results confirms ClamAV extracted and scanned them. If you exclude --scan-archive, archive files are skipped.
3. To change how deeply ClamAV scans nested archives, add the --max-recursion option with a numeric value.
For example:
clamscan -r /home/sara-pnap/clamav-test --scan-archive --max-recursion=5This sets the maximum archive nesting level to five. Increase the value if you expect deeply nested archive structures.
Schedule Scans with Cron
cron is a time-based job scheduler in Linux. It lets users run commands or scripts automatically at specified times or intervals. Use it to automate ClamAV scans, ensuring your system is regularly checked for malware without manual effort.
To schedule a daily scan, follow these steps:
1. Open your user's crontab file:
crontab -eThis opens the cron configuration file in the default text editor (usually Nano or Vim).
2. Add a cron job to run a daily scan at 2 AM. Insert the following line at the end of the file:
0 2 * * * clamscan -r /home/sara-pnap/clamav-test --log=/home/sara-pnap/clamav-test/daily_scan.log
This tells cron to run clamscan recursively on the test directory every day at 02:00, saving the scan output to daily_scan.log.
3. Save and exit the editor:
4. After 2 AM, verify the scan ran by checking the log file:
cat /home/sara-pnap/clamav-test/daily_scan.logConclusion
This tutorial explained what ClamAV is and how to download and install this antivirus on Ubuntu. It also showed how to install the ClamAV GUI version, ClamTK, and update the virus database. Additionally, this text presented several examples of how to scan files and directories with ClamAV.
Next, learn about the next-generation antivirus (NGAV) solutions that use advanced methods to detect and stop cyber attacks.