Transferring files between Linux systems is a common task in local network environments, development setups, and server maintenance. Whether you are copying backups, sharing documents, or syncing project files, Linux provides several tools for efficient and secure file transfer.
This tutorial will show how to transfer files between two Linux systems using different tools.
Prerequisites
- Two Linux systems that can reach each other.
- Access to the command line (terminal) on each system.
- Sudo or root privileges (required for certain tools).
Important Considerations Before Transferring Files Between Two Linux Systems
Before transferring files between two Linux systems, ensure the environment is configured correctly. A successful file transfer depends on network visibility, authentication setup, and the chosen method.
Use the checklist below to prepare both systems:
- Check IP addresses on both systems with the ip and hostname commands. Use
ip aorhostname -Ito identify IP addresses and confirm network access. - Verify network connectivity. Use the ping command to confirm the systems can reach each other. For example:
ping [remote_ip_address]- Confirm SSH access if required. Tools like
scp,sftp, andrsyncuse SSH to connect to the remote system. Test with:
ssh [username]@[remote_ip_address]- Check for required services or daemons. Some methods need server software running on the destination machine. For example:
- FTP. Requires an FTP server.
- Samba. Requires the Samba service.
- Web-based sharing. Requires Python or third-party tools.
- Open the necessary firewall ports. Make sure UFW or firewalld allows traffic for the chosen protocol. For example, port 22 for SSH, 21 for FTP, or 445 for Samba.
- Ensure proper permissions on source and destination paths. The user account running the transfer must have read access to the source file and write access to the target directory.
- Decide on the best transfer method. Choose based on security, speed, ease of use, and tool availability. For example, SSH-based tools are often preferred for secure, encrypted transfers.
How to Transfer Files Between Two Linux Systems
Linux provides several methods for transferring files between systems. However, some tools are built into most distributions, while others require setting up additional services.
In the following examples, we use two Ubuntu systems on the same network:
- Primary (local) system. The first machine, sara-pnap@pnap (IP: 192.168.56.103), acts as the source of files for transfer.
- Secondary (remote) system. The second machine, pnap-test@pnap-test (IP: 192.168.56.104), acts as the destination for receiving files.
The examples below demonstrate how to use each method in real-world scenarios.
Transfer Files via scp
The scp command (Secure Copy) is used to transfer files between systems over SSH. It works similarly to the cp command. However, instead of copying files locally, scp transfers them securely over the network and encrypts both the file contents and authentication.
The command is suitable for simple, one-time file transfers, especially when setting up persistent sync tools like rsync is unnecessary.
Note: You do not need to manually SSH into the remote system before using scp. The scp command establishes an SSH connection automatically when transferring files. However, ensuring the SSH service is running and accessible on the remote machine is required.
The following steps explain how to transfer files using scp between two Linux systems.
Step 1: Create a Sample File to Transfer
On the primary system, use echo to create a sample file to use in the transfer:
echo "Test file for scp transfer" > /home/sara-pnap/Documents/sample.txtThe command has no output but creates a text file named sample.txt in the Documents directory.
Step 2: Verify the Sample File Exists
Check that the file was created successfully with ls:
ls -l /home/sara-pnap/Documents/sample.txt
Note: To verify whether a created or transferred file or directory exists, use the ls -l command.
Step 3: Ensure SSH is Enabled on Both Systems
The receiving system must have the SSH service running. Therefore, check the status with:
sudo systemctl status ssh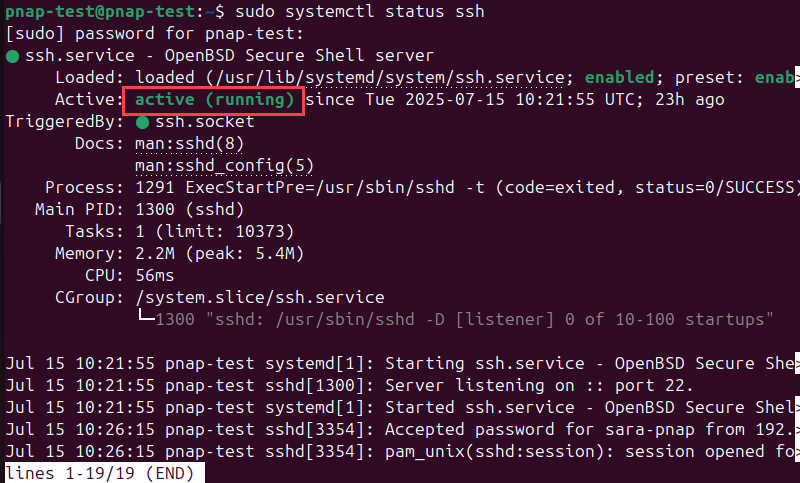
The command confirms the SSH service is running. If it's not, start and enable it with:
sudo systemctl enable --now sshStep 4: Transfer a File from the Local System to a Remote System
Use scp to send a file from the primary system to the secondary system:
scp /home/sara-pnap/Documents/sample.txt pnap-test@192.168.56.104:/home/pnap-test/
Enter the password when prompted. The file appears in the remote user's Home directory
Step 5: Transfer a File from the Remote System to the Local System
To copy the same file back from the secondary system to the primary system, run the following:
scp pnap-test@192.168.56.104:/home/pnap-test/sample.txt /home/sara-pnap/Desktop/
This places the file in the Desktop directory on the local machine.
Step 6: Transfer a Directory
Use mkdir to create a test directory with sample content:
mkdir /home/sara-pnap/Projects

echo "Test project file" > /home/sara-pnap/Projects/test.txt
Transfer the directory to the remote machine using the -r flag:
scp -r /home/sara-pnap/Projects pnap-test@192.168.56.104:/home/pnap-test/
This command copies the entire Projects directory and its contents to the remote Home directory.
Transfer Files via rsync
The rsync command is a powerful tool for synchronizing files and directories between systems over SSH. Furthermore, it provides more flexibility than scp, including incremental transfers, compression, and options to preserve file metadata.
Consequently, this method is suitable for recurring transfers or large datasets, especially when changes are frequent and efficiency matters.
The following steps explain how to transfer files using rsync between two Linux systems.
Step 1: Create a Sample File to Transfer
On the primary system, create a file for transfer:
echo "Test file for rsync transfer" > /home/sara-pnap/Documents/rsync-test.txtThe command creates a file in the Documents directory.
Step 2: Ensure rsync is Installed
Check whether rsync is available on both systems:
rsync --version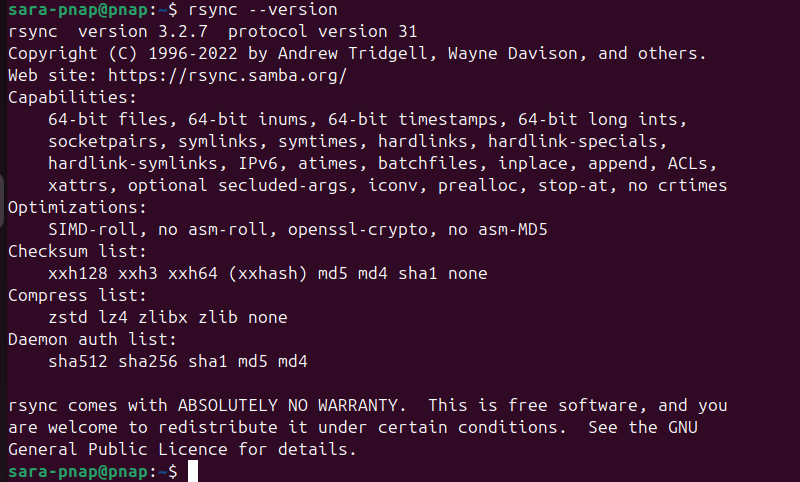
In this case, the command is installed. If rsync is missing, install it with:
sudo apt install rsyncStep 3: Transfer a File to the Remote System
Use rsync to send the file from the primary to the secondary system:
rsync /home/sara-pnap/Documents/rsync-test.txt pnap-test@192.168.56.104:/home/pnap-test/The command produces no output, but transfers the file over SSH, thereby preserving timestamps and permissions.
Step 4: Transfer a File from the Remote System to the Local System
To copy the file back to the primary system, run:
rsync pnap-test@192.168.56.104:/home/pnap-test/rsync-test.txt /home/sara-pnap/Desktop/The file appears in the Desktop directory on the primary system. However, there is no output.
Step 5: Transfer a Directory
Create a sample directory and file:
mkdir /home/sara-pnap/Projects-rsync
echo "Rsync project file" > /home/sara-pnap/Projects-rsync/file1.txt
Transfer the entire directory with:
rsync -r /home/sara-pnap/Projects-rsync pnap-test@192.168.56.104:/home/pnap-test/Transfer Files via FTP
File Transfer Protocol (FTP) is a standard network protocol used to transfer files between systems over a TCP-based network. However, by default, it is not encrypted.
For the transfer to work, one machine must run an FTP server to receive files, and the other connects to it as a client. This example uses vsftpd, a secure and lightweight FTP server commonly used on Linux systems.
The following steps demonstrate a basic FTP file transfer between two Linux systems.
Step 1: Create a Sample File to Transfer
On the primary system, create a text file to upload via FTP:
echo "FTP test file" > /home/sara-pnap/Documents/ftp-test.txtThe file is created in the local user's Documents directory.
Step 2: Install the FTP Server
On the secondary system, install the vsftpd package:
sudo apt install vsftpd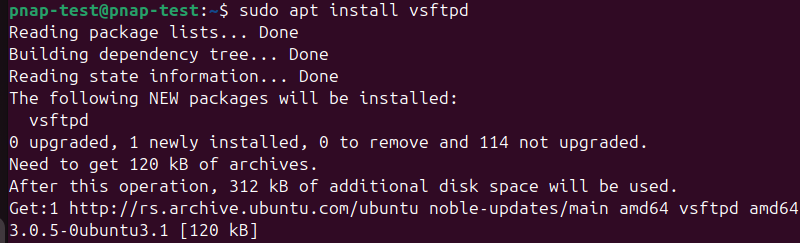
Step 3: Allow FTP Traffic Through Firewall
Enable incoming FTP connections through the UFW firewall on the secondary system:
sudo ufw allow 21/tcp
This command opens port 21, which FTP uses by default.
Step 4: Connect to the FTP Server from the Client
From the primary system, connect using the ftp command:
ftp 192.168.56.104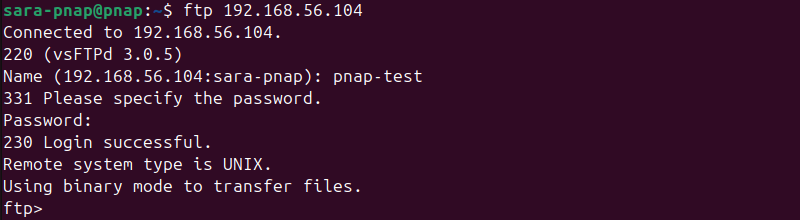
When prompted, enter the credentials for the remote system.
Step 5: Upload a File to the FTP Server
After logging in, upload the sample file with the put command:
put /home/sara-pnap/Documents/ftp-test.txt ftp-test.txt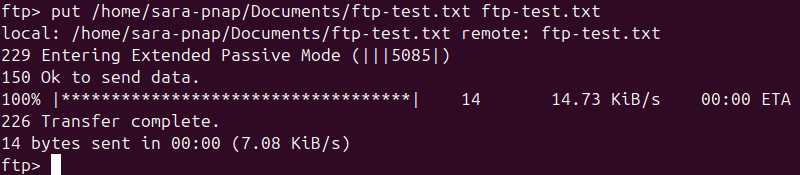
This transfers the file to the remote user's Home directory and saves it as ftp-test.txt.
Step 6: Download a File from the FTP Server
To retrieve a file from the FTP server, use the get command:
get ftp-test.txt
This command downloads the file to the current working directory on the local system.
Note: FTP does not support transferring directories recursively.
Transfer Files via sftp
Secure File Transfer Protocol (SFTP) is a secure alternative to FTP that runs over SSH. It encrypts both commands and data, which provides confidentiality and integrity.
Therefore, use SFTP to transfer files between Linux systems when SSH access is available.
Step 1: Create a Sample File to Transfer
On the primary system, create a file:
echo "SFTP test file" > /home/sara-pnap/Documents/sftp-test.txtStep 2: Connect to the Remote System Using SFTP
From the primary system, start an SFTP session to the secondary system:
sftp pnap-test@192.168.56.104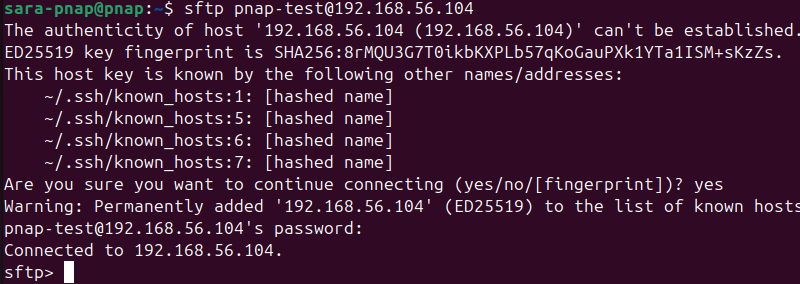
Enter the password when prompted.
Step 3: Upload a File to the Remote System
In the SFTP prompt, upload the file:
put /home/sara-pnap/Documents/sftp-test.txt
This transfers the file to the remote user's Home directory.
Step 4: Download a File from the Remote System
Download the file with the get command:
get sftp-test.txt
The file downloads to the current working directory on the primary system.
Step 5: Transfer a Directory
Directory transfers via SFTP use the same syntax, but with the -r flag.
For example, upload a directory named Test from the local system with this command:
put -r /home/sara-pnap/Documents/TestTransfer Files via Samba
Samba primarily enables file sharing between Linux and Windows systems using the SMB/CIFS protocol.
However, on Linux-to-Linux networks, Samba is used to create persistent shared directories accessible by multiple systems with proper permissions. This method is suitable for collaborative projects or when ongoing access to shared data is required.
The recommended method to transfer files using Samba is to mount the share with the mount -t cifs command. Follow the steps in the sections below to set up the share and complete the transfer.
Step 1: Install Samba on the Secondary System
On the secondary system, update packages and install Samba:
sudo apt install samba
Step 2: Create a Shared Directory
Create a directory to share and use chmod to set permissions:
mkdir -p /home/pnap-test/Sharedchmod 777 /home/pnap-test/SharedThe chmod command gives full read, write, and execute permissions to everyone. The commands have no output.
Step 3: Configure the Samba Share
Open the Samba configuration file using a text editor. To do it with Nano, run:
sudo nano /etc/samba/smb.confAdd the following section at the end of the file:
[Shared]
   path = /home/pnap-test/Shared
   browsable = yes
   read only = no
   guest ok = no
   valid users = sambauser
Save and exit the editor.
Step 4: Restart Samba
Restart the Samba service to apply changes:
sudo systemctl restart smbdStep 5: Allow Firewall Access
Allow Samba traffic through the firewall:
sudo ufw allow 'Samba'
Step 6: Access the Samba Share from the Primary System
Install required client utilities with:
sudo apt install cifs-utils smbclient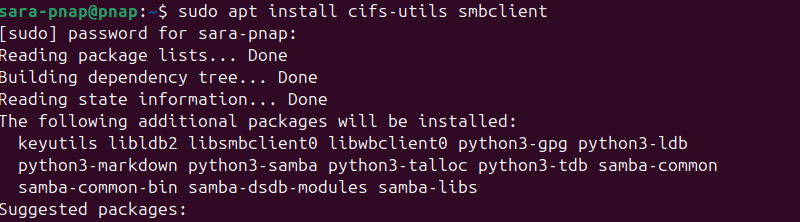
Step 7: Create a Samba Credentials File
To avoid exposing the Samba username and password in the terminal or shell history, create a credentials file with the following content:
sudo nano /etc/samba-credsAdd the following lines:
username=sambauser
password=samba123
Set strict permissions on the file to protect credentials:
sudo chmod 600 /etc/samba-credsThis ensures only the root user can read or write the file, which is important because the file contains plaintext credentials. Consequently, this file is later used by the mount command to authenticate securely.
Step 8: Transfer a File Through Samba Share
Create a sample file locally on the primary system:
echo "Sample Samba transfer file" > /home/sara-pnap/Documents/samba-sample.txtCreate a mount point and mount the Samba share:
sudo mkdir -p /mnt/samba
sudo mount -t cifs //192.168.56.104/Shared /mnt/samba -o credentials=/etc/samba-creds,vers=3.0
The commands provide no output.
Note: The vers=3.0 option specifies the SMB protocol version. Some modern Linux systems do not support older versions (such as SMB1) by default, so setting the version explicitly helps avoid compatibility issues.
Copy the sample file to the mounted Samba share using cp:
cp /home/sara-pnap/Documents/samba-sample.txt /mnt/samba/When finished, unmount the share:
sudo umount /mnt/sambaNote: There is also the smbclient tool that provides an FTP-like shell interface to Samba shares with commands such as put and get for file transfers. However, it handles directories poorly and is less practical for typical file operations.
Transfer Files via Web-based Sharing
Web-based file sharing offers multiple methods for transferring files between Linux systems using standard web protocols. Among these, common approaches include HTTP file servers, WebDAV, and cloud storage solutions.
However, for quick, simple transfers without complex setup, Python's built-in HTTP server is effective and widely supported. To transfer a file this way, take the following steps:
Step 1: Create a Sample File to Share
On the primary system, create a test file:
echo "Sample file for web-based sharing" > /home/sara-pnap/Documents/web-share-sample.txtStep 2: Ensure Python is Installed on the Primary Machine
Verify the primary machine has Python installed with:
python3 --version
If Python is missing, install it with:
sudo apt install python3Step 3: Start an HTTP Server
Navigate to the directory with the file using cd and launch Python's HTTP server:
cd /home/sara-pnap/Documents
python3 -m http.server 8000
This starts an HTTP server on port 8000 in the current directory.
Step 4: Download the File from the Secondary System
On the secondary system, download the file using curl or wget. For example, with curl:
curl -O http://192.168.56.103:8000/web-share-sample.txt
The file downloads to the current directory.
Step 5: Stop the HTTP Server
On the primary system, stop the server by pressing ctrl+c.
Note: This method works well for temporary file sharing on a trusted network. However, it does not provide authentication or encryption by default. Therefore, for persistent or secure sharing, consider WebDAV or cloud platforms like Nextcloud.
Conclusion
This tutorial explained how to transfer files and directories between two Linux systems. Additionally, it outlined the prerequisites and conditions necessary for the transfer to occur.
Next, learn how to mount remote file systems on Linux and Windows.