When establishing a remote connection between a client and a server, security is the primary concern. For Linux users, the best practice for accessing and managing a server remotely is to use the Secure Shell (SSH) protocol.
SSH encrypts all data transferred between machines, ensuring no sensitive information is compromised.
This tutorial shows how to enable and configure SSH on Ubuntu and troubleshoot common errors.
Prerequisites
- A machine running Ubuntu (see how to install Ubuntu 26.04).
- A user account with root privileges.
- Command-line access.
How to Enable SSH on Ubuntu
The SSH server is not installed by default on all Ubuntu versions. To install and enable SSH on Ubuntu, follow the steps below:
1. Open the terminal and check if an SSH server is already installed on the machine. Run the following ssh command:
ssh localhost
If the SSH "Connection Refused" message appears, it means SSH is not installed.
2. To ensure the latest SSH version is installed, update the package repository index:
sudo apt update3. Install the OpenSSH software package by running:
sudo apt install openssh-server -y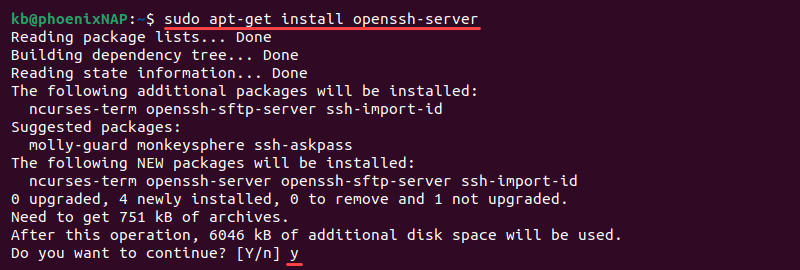
4. Verify the installation was successful and that SSH is running:
sudo service ssh status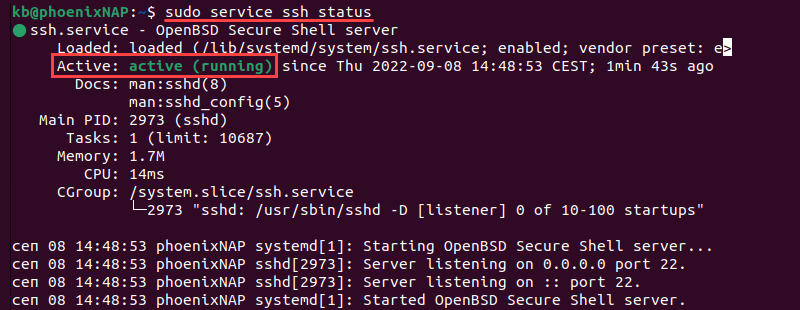
The confirmation message shows the service is active (running). If the service is not running, start it with:
sudo service ssh start5. Return to the command line prompt with q.
Ubuntu SSH Configuration
The default SSH configuration options can be modified. You can change the default port (generally a good idea, as a precautionary security measure), disable the root user, or make other configuration adjustments.
The sections below show how to configure an SSH installation.
Edit SSH Configuration File on Ubuntu
After installing OpenSSH on Ubuntu, edit its configuration file to significantly improve connection security. Follow the steps below:
1. Open the SSH configuration file using a text editor such as nano:
sudo nano /etc/ssh/sshd_config2. Change the default port number. For example, set the service to listen on the TCP port 2973 instead of the default TCP port 22. In the configuration file, find the line that specifies Port 22 by default, uncomment the line, and change it to the port you want:
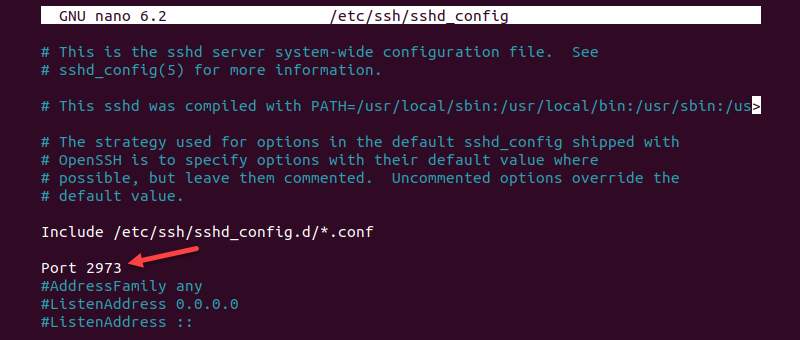
Note: Changing the default port number is an SSH security best practice. Everyone is aware of the default port number so changing it is a recommended security precaution.
Disable Root Login
Another critical security precaution is to disable remote root access. That way, the root user cannot be invoked remotely, significantly improving security.
1. In the configuration file, find the following line:
PermitRootLogin_yesUncomment and change the line to:
PermitRootLogin_noIf the line does not exist, add it to the file.
2. For the changes to take effect, restart the SSH service with the following command:
sudo systemctl restart sshd.serviceConfigure Firewall: Change Default Port
To change the default port, configure the firewall to allow traffic via the specified port. The example uses Port 2973.
The default firewall configuration tool in Ubuntu is UFW. Configure UFW to allow traffic through port 2973 with the following command:
sudo ufw allow from any to any port 2973 proto tcp
Some firewalls may require allowing traffic to the machine's public IP address.
Note: The port 2973 is the port number we have defined in the Configure SSH section. If you used the default port 22, then it is not necessary to put the port number.
How to Connect to Ubuntu via SSH
With SSH enabled, log in to the remote machine. Open the terminal and use the following syntax to log in:
ssh [username]@[public_IP] -p[port_number][username]is the username of the account on the remote server.[public_IP]is the public IP address of the remote server or computer.-p[port_number]is the SSH port number to use.
For example:
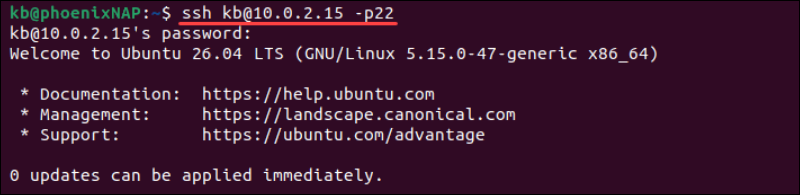
Change the username and IP address to the username and IP address of the Ubuntu computer on which you have installed SSH.
To find the IP address of the remote machine, open the terminal on the machine and run the following command:
ip a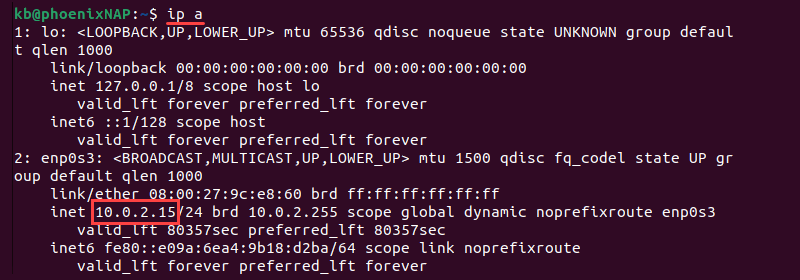
The command displays the public IP address of the machine where SSH was installed.
Note: Read more about secure remote access best practices.
Common SSH Commands for Ubuntu
After enabling SSH on Ubuntu, several key commands can enhance the remote management experience. These commands allow users to efficiently connect, manage, and secure their remote sessions.
Note: This section lists the few most common commands. For more information, refer to our guide to SSH commands with 25 examples and a free, downloadable cheat sheet.
1. Connect to a remote machine:
Connect to a remote machine via SSH using the following syntax:
ssh [user]@[remote_host]Replace [user] with the username and [remote_host] with the IP address or hostname.
2. Use a specific port for SSH:
Connect to a remote machine using a specific port with:
ssh -p[port_number] [user]@[remote_host]The -p option allows specifying a custom port number to use to establish an SSH connection. Specify it if you have changed the connection port in the SSH configuration file.
3. Copy files between local and remote machines:
Use the scp command to seamlessly copy files between local and remote machines. The syntax is:
scp [file] [user]@[remote_host]:/path/to/destination[file]- The name of the file to copy from the local system.[user]- The username on the remote server.[remote_host]- The IP address or hostname of the remote server./path/to/destination- The directory on the remote server to copy the file to.
4. Add an SSH key to a remote machine:
The ssh-copy-id command sets up key-based authentication by copying the public SSH key to a remote server. It enables logging in to the server without using a password, making the connection both more convenient and secure.
The syntax is:
ssh-copy-id user@remote_hostThe command transfers your public key (~/.ssh/id_rsa.pub) to the remote server. Make sure to generate the SSH keys beforehand.
Note: For more information, refer to our guide to passwordless SSH.
5. Check the SSH connection status:
Use the -v option (verbose mode) to display detailed information about the SSH connection process. The option is useful for troubleshooting connection problems or understanding what happens during authentication and session setup. The syntax is:
ssh -v [user]@[remote_host]Note: Learn everything about SSH port forwarding (SSH tunneling).
Troubleshooting Common SSH Errors on Ubuntu
Several common errors can occur when using SSH to connect to remote servers. Below are solutions that combine network, DNS, and configuration-related troubleshooting steps.
Hostname Resolution Failed
This error occurs when the client cannot resolve the SSH host to a network address. Although it is usually related to DNS issues, the problem could also stem from a typo or a misconfigured /etc/hosts file. The error looks similar to the following:
ssh: Could not resolve hostname example.com: Name or service not knownTo resolve the issue, try one of the following:
- Check hostname spelling. Verify the hostname. Small typos can lead to connection failures.
- Ping the server. Use the ping command to verify that the hostname resolves correctly on the machine.
- Use the IP address. As a temporary workaround, try to connect directly using the server's IP address instead of the hostname.
- Check DNS resolution. Use a third-party tool like whatsmydns.net to verify whether DNS records are propagating correctly outside the network. You can also check DNS configuration locally by reviewing the /etc/resolv.conf file or the DNS settings for the machine.
Connection Timeout
A connection timeout occurs when the client attempts to establish a connection, but the server does not respond within the allotted time. The cause could be a firewall blocking the connection, an incorrect IP address, or a network issue. The error looks similar to the one below:
ssh: connect to host 203.0.113.0 port 22: Connection timed outTo resolve the issue:
- Verify the IP address. Double-check that the IP address or hostname you are connecting to is correct.
- Check network restrictions. Some networks may block port 22 or custom SSH ports. Test SSH connectivity to a known-working server on the same port to verify whether the issue is network-specific.
- Use alternative ports. If your SSH server uses a non-standard port, specify it in your command.
- Ping the server. Use the
pingcommand to test if the server is reachable. - Check firewall rules: On the server, ensure that SSH traffic is allowed through the firewall. If you are using UFW, run:
sudo ufw allow sshPermission Denied
The "permission denied" error occurs when the server rejects your public key for authentication. It is usually caused by an incorrect key configuration or incorrect permissions on the remote server. The error looks like the following:
Permission denied (publickey)Solution:
- Ensure your public key is copied correctly. Use
ssh-copy-idfrom the section above to copy your key to the remote server. - Check file permissions. Ensure that the .ssh directory and authorized_keys file on the remote server have the correct permissions. Use the chmod command to change the file permissions:
chmod 700 ~/.ssh
chmod 600 ~/.ssh/authorized_keys
Connection Refused
The connection refused error means the client could reach the host, but the SSH server is not accepting the connection. The error could be due to the SSH service being down, listening on a different port, or firewall rules blocking the connection. An example of the error is below:
ssh: connect to host 203.0.113.0 port 22: Connection refusedTo resolve the issue:
- Verify SSH is running on the server. Make sure that the SSH service is up and running:
sudo systemctl status sshIf the command returns an inactive status, start it with:
sudo systemctl start ssh- Ensure correct port usage. If you configured SSH to run on a different port, specify it in the SSH command when connecting.
- Firewall configuration. Ensure that the firewall rules on the remote server allow SSH connections on the SSH port.
How to Disable SSH on Ubuntu
To temporarily disable SSH on Ubuntu, run:
sudo service ssh stopStart the SSH service with:
sudo service ssh startTo completely disable SSH after reboot:
sudo systemctl disable sshEnable SSH on Ubuntu after reboot with:
sudo systemctl enable sshConclusion
This tutorial showed how to enable SSH on Ubuntu, configure and secure the server, and troubleshoot common SSH issues. Now you can establish a reliable, secure protocol between you and a remote device.
Next, learn how to fix the "ssh_exchange_identification: read: Connection reset by peer" error.