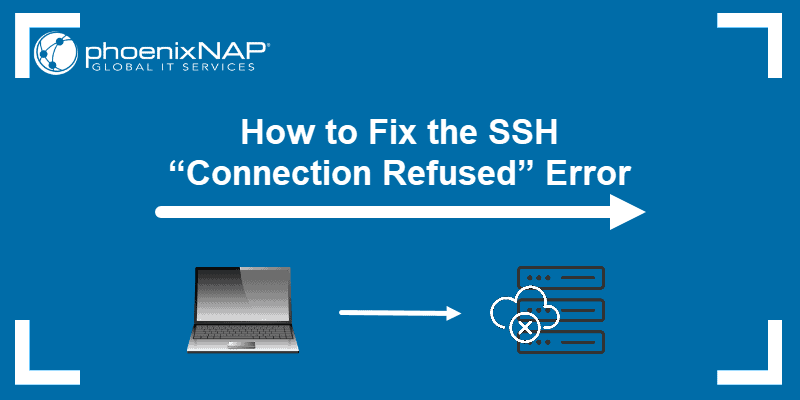
While SSH enables a secure remote connection between a client and a server, problems sometimes arise. The SSH Connection refused error occurs when attempting to establish a secure shell connection to a remote server, indicating a communication issue.
In this tutorial, you will find the most common reasons for the SSH Connection refused error.
Why Is Connection Refused When I SSH?
There are many reasons the Connection refused error occurs when trying to SSH into the server. Identifying why the system refused the SSH connection is the first step toward solving the problem.
Below are the most common causes of SSH connection denial.
Cause 1: SSH Client Not Installed
Before troubleshooting other issues, check whether SSH is properly installed. Without the SSH client set up, accessing a server is impossible.
To check whether the SSH client is installed on the system, type the following into the terminal:
ssh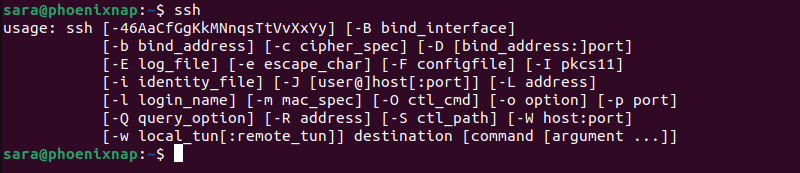
If the terminal provides the ssh command options list, the SSH client is installed on the system. However, if the terminal displays "command not found," you must install the OpenSSH Client.
Solution 1: Install SSH Client
To install the SSH Client on your machine, open the terminal and run one of the commands listed below.
For Ubuntu/Debian systems:
sudo apt install openssh-clientFor CentOS/RHEL systems:
sudo yum install openssh-clientNote: For a step-by-step installation guide, check out How to Install OpenSSH on CentOS or How to Enable SSH on Ubuntu.
Cause 2: SSH Daemon Not Installed on Server
The SSH daemon (sshd) is responsible for authenticating the client and establishing a secure connection. Therefore, a server refuses an incoming connection if sshd is missing or the configuration is invalid.
To check whether SSH is set up on the remote server, run the command:
ssh localhost
If the output responds with Connection refused, install SSH on the remote server.
Solution 2: Install SSH on Remote Server
To install SSH on a remote server on Ubuntu/Debian systems, run:
sudo apt install openssh-server
Cause 3: Wrong Credentials
Typos or incorrect credentials are common reasons for an SSH connection being refused. This includes errors in the specified username or password, or a wrong IP address. Any discrepancies result in authentication failure and cause the connection to be refused.
Solution 3: Check and Fix Credential Errors
After checking whether the username or password are typed correctly, verify you are using the correct server IP address. Use the ping command followed by the IP address to check if the server is reachable. Run:
ping [server_ip_adress]
The output shows a stable network connection between the machine and the server.
Note: While you can SSH into a remote system using password authentication, experts recommend switching to public key authentication (passwordless SSH login). If you want to set up public key authentication, refer to How to Set Up Passwordless SSH Login.
Cause 4: SSH Service Is Down
The SSH service needs to be enabled and running in the background. If the service is down, the SSH daemon cannot accept connections.
To check the service status, enter:
sudo service ssh status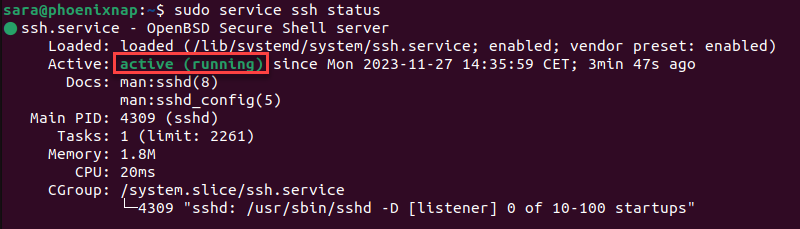
The output shows the service is active. If the terminal responds that the service is down, follow the steps below to enable it.
Solution 4: Enable SSH Service
If the system shows the SSH daemon isn't active, start the service by running:
systemctl start sshdTo enable the service to run at boot, run the command:
sudo systemctl enable sshdIf one or both commands are successful, there is typically no output,
Cause 5: Firewall Is Preventing SSH Connection
SSH sometimes refuses a connection due to firewall restrictions. The firewall protects the server from potentially harmful connections. However, if SSH is set up on the system, configure the firewall to allow SSH connections.
Ensure the firewall does not block SSH connections, as this can sometimes cause a Connection refused error.
Solution 5: Allow SSH Connections Through the Firewall
To fix the abovementioned issue, use ufw (Uncomplicated Firewall), the command-line interface tool for managing firewall configuration.
Type the following command in the terminal window to allow SSH connections:
sudo ufw allow ssh
Cause 6: SSH Port Is Closed
When attempting a connection to a remote server, SSH sends a request to a specific port. To accept this request, a server must open the SSH port. To check whether the port is listening, run:
sudo lsof -i:22
The output shows the STATE is set to LISTEN and the port is open.
However, if the port is closed, the server refuses the connection. Another way to check whether the port is open is with:
grep Port /etc/ssh/sshd_config
The output shows that both lines of the output are commented, meaning the port is closed. In that case, the next step is opening it.
Note: Changing the default SSH port is a good way to add extra protection to the server. Learn more by referring to our article How to Change the SSH Port
Solution 6: Open SSH Port
To enable port 22 to LISTEN to requests, use the iptables command:
sudo iptables -A INPUT -p tcp --dport 22 -m conntrack --ctstate NEW,ESTABLISHED -j ACCEPTThe command doesn't produce any output when successful. Another way is to open ports through the GUI by altering the firewall settings.
Cause 7: Random SSH Issues
Various issues or glitches, such as configuration changes, temporary glitches, or software updates, also hinder SSH connections.
Restarting the SSH service is a common way to address these issues. When the service is restarted, it frequently resolves many problems.
Solution 7: Restart SSH
To restart the SSH service and potentially resolve any underlying issues affecting SSH connections, use the following command:
sudo service ssh restartExecuting this command restarts the SSH service and provides an opportunity to address any hidden glitches with SSH connections.
Note: PuTTY users occasionally experience the Connection Refused error. If you encounter this error as a PuTTY user, it is likely attributed to the reasons mentioned above.
SSH Debugging and Logging
To analyze SSH problems in Linux, enable verbose or debug mode. When enabled, SSH prints out detailed debugging messages that help troubleshoot connection, configuration, and authentication issues.
There are three verbosity levels:
- level 1 (
-v) - level 2 (
-vv) - level 3 (
-vvv)
Therefore, instead of accessing a remote server using the syntax ssh [server_ip], add the -v option:
ssh -v [server_ip]![ssh -v [server_ip] terminal output](https://phoenixnap.com/kb/wp-content/uploads/2020/11/ssh-v-server-ip-terminal-output.png)
Alternatively, use level 2 for more authentication information:
ssh -vv [server_ip]Finally, use level 3 for the most detailed output, including debugging messages related to packet processing.
ssh -vvv [server_ip]SSH Security Practices
SSH security practices protect the system, data, and networks from various threats. They build a strong security foundation and lower the risk of successful attacks.
The following are standard security practices:
- Use strong passwords. Choose intricate passwords that combine uppercase and lowercase letters, numbers, and special characters.
- SSH key authentication. Instead of passwords, use SSH public-private key pairs for authentication.
- Disable root login. Ban direct root access to minimize security risks.
- Update SSH regularly. Keep the SSH software up to date to fix known vulnerabilities.
- Enable automatic updates. Set up the system to automatically install SSH updates as soon as they become available. This ensures the timely application of essential security patches for maintaining the system's security.
- Limit user access. Restrict SSH access to authorized users only.
- Use non-standard ports. Change the default SSH port to improve security.
- Implement Two-Factor Authentication (2FA). Add an extra layer of security with two-factor authentication, which requires users to provide two separate forms of ID before gaining access to an account.
- Encrypt SSH traffic. Encrypting SSH traffic is a fundamental security measure that encodes the data between a client and a server during an SSH session.
Conclusion
This article lists common reasons for the SSH Connection refused error. To troubleshoot the issue, review the list and ensure all settings are configured correctly.
Another common issue you may encounter is SSH Failed: Permission Denied. Learn the cause of this error and how to fix it in our article on how to fix SSH Failed Permission Denied.