Jupyter Notebook is an open-source, interactive development environment primarily used with Python. It's used to create documents with live code, equations, text, and visualizations.
The notebook environment is an essential tool for data scientists, machine learning specialists, and academic researchers.
This guide explains how to install Jupyter Notebook on Linux, Windows, and macOS using different methods.
Prerequisites
- Python 3 installed.
- Access to the command line/terminal.
Note: To install Python 3, follow one of our guides for your operating system:
How to Install Jupyter Notebook on Linux
There are three ways to install Jupyter Notebook on Linux:
- In a virtual environment, using the PIP package manager (recommended).
- Via Anaconda.
- With the APT package manager (not recommended)
Warning: Installing with APT can clash with the system Python installation and cause dependency issues.
If you choose to install it using apt, run:
sudo apt install jupyter-notebookOnce the installation is completed, run Jupyter Notebook with:
jupyter notebookOtherwise, follow one of the recommended methods below.
Install Jupyter Notebook on Linux via pip
To install Jupyter Notebook on Linux using pip:
1. Open the terminal and create a virtual environment:
python3 -m venv [venv-name]
Replace [venv-name] with the environment name/path. The command creates a directory with that name and the isolated Python environment.
2. The directory contains the virtual environment activation script. Activate the environment with:
source [venv-name]/bin/activate
The terminal switches to the virtual environment.
3. Use pip to install Jupyter and its components:
pip install jupyter
Wait for the installation to complete.
4. To run Jupyter Notebook, use:
jupyter notebook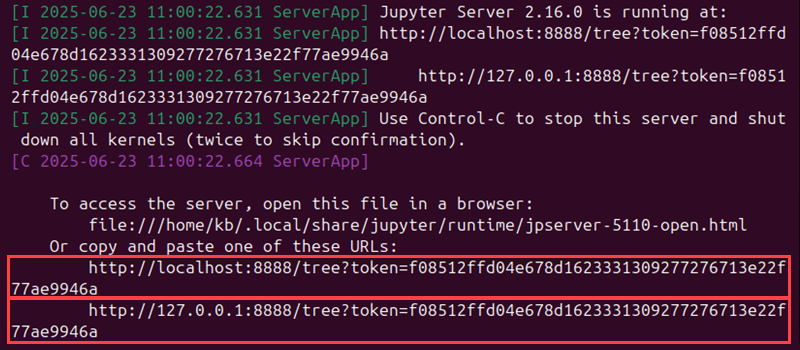
The command runs the server as a web browser app. If the application does not open, copy and paste one of the suggested URLs from the output manually.
5. To exit, return to the terminal and press CTRL + C.

Press y to confirm the server shutdown and close Jupyter Notebook.
Install Jupyter Notebook on Linux via Anaconda
Jupyter Notebook is automatically installed with the Anaconda installation. For more details, see how to install Anaconda on Ubuntu.
Note: If using Miniconda, Jupyter Notebook is not included by default. It requires manual installation via conda. The steps for this method are in the Windows section.
Once installed, run the notebook environment through the terminal:
jupyter notebookThe command runs the notebook server via the default browser.
Alternatively, run the notebook via the Anaconda GUI:
1. Open the Anaconda Navigator program:
anaconda-navigator
The command works from the activated (base) environment.
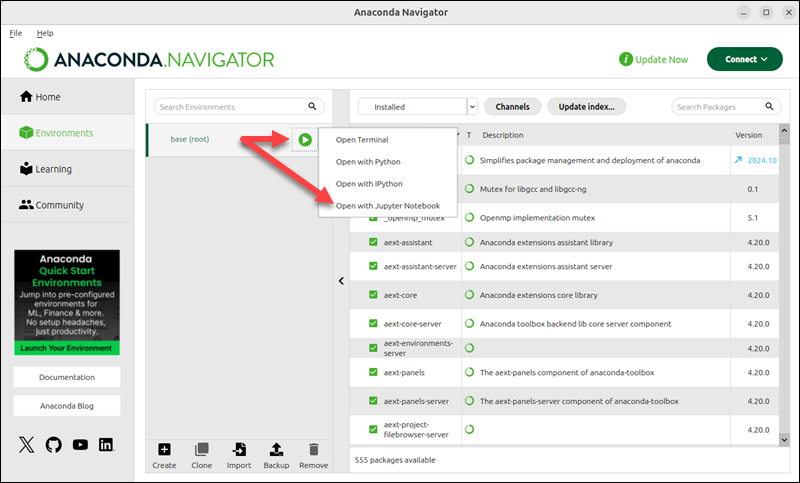
2. Switch to the Environments page.
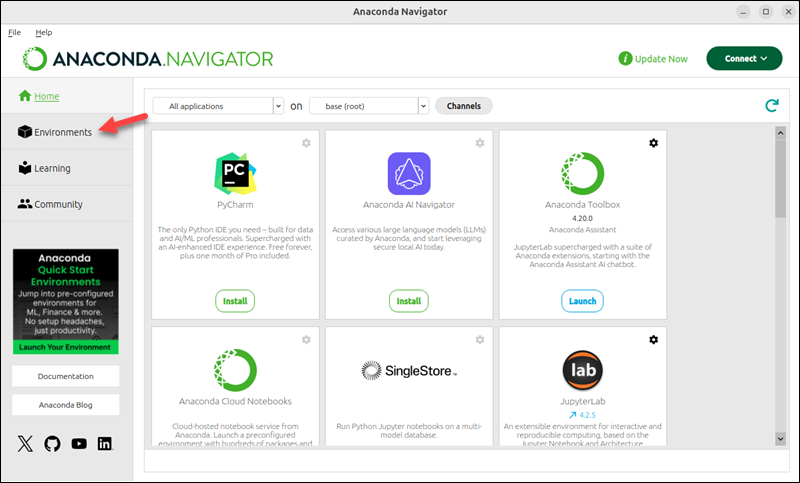
3. The base (root) environment is on the environments list by default. Click the Run button and select Open with Jupyter Notebook.
Alternatively, create a new environment or import an existing one using one of the buttons at the bottom of the environments list.
How to Install Jupyter Notebook on Windows
Windows users have several options when installing Jupyter Notebook:
- Via PIP package manager (recommended).
- Using Miniconda.
- With Anaconda.
The steps for running Jupyter via Anaconda are identical to Linux (covered in the previous section). The other two methods are described in the sections below.
Install Jupyter Notebook on Windows via pip
To install Jupyter Notebook on Windows using pip, do the following:
1. Open the command prompt and make a virtual environment:
python -m venv [venv-name]Choose a virtual environment name and replace [venv-name] in the command.
2. Run the activation script:
[venv-name]\Scripts\activate
The command activates the virtual environment.
3. Install Jupyter with:
pip install jupyter
The program is installed inside the virtual environment.
4. To run a Jupyter Notebook server locally, use:
jupyter notebook
The command only works inside the virtual environment. It opens as an in-browser app. If not, copy and paste one of the links from the output into a web browser.
5. To close the Jupyter Server session, press CTRL + C twice.
Install Jupyter Notebook on Windows using Miniconda
Miniconda is a lightweight version of Anaconda. To install Jupyter with this method:
1. Open the Anaconda prompt.
2. Create a conda environment (similar to a virtual environment):
conda create -n [environment-name] python=[version]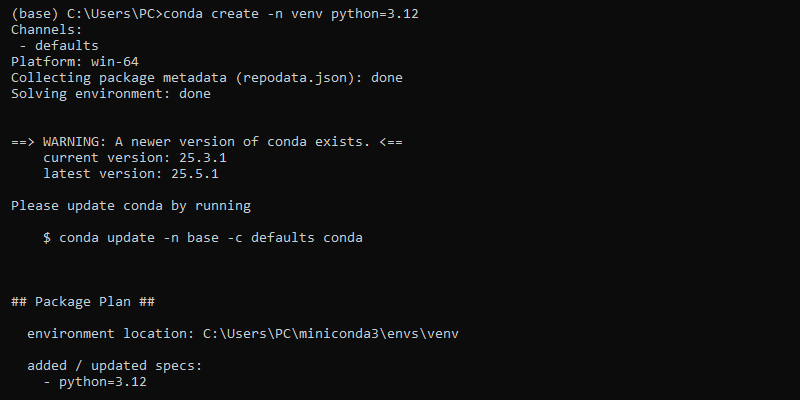
Replace the [environment-name] and Python version in the command. Press y to confirm the installation.
3. Activate the environment with:
conda activate [environment-name]
The command activates and switches to the environment.
4. Install Jupyter:
conda install jupyter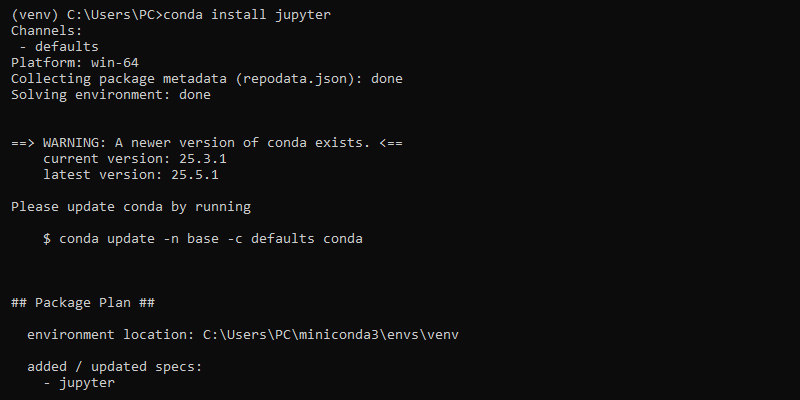
The conda package manager automatically installs all required dependencies. When prompted, press y and Enter to confirm the installation.
5. Start the Jupyter server with:
jupyter notebookThe command opens the notebook environment in a browser.
How to Install Jupyter Notebook on macOS
Jupyter Notebook is also available for macOS systems. There are two ways to install it:
- Using a virtual environment and PIP.
- With Homebrew (requires installing Homebrew on Mac).
Select a method that suits your environment and follow the steps below.
Install Jupyter Notebook on macOS via pip
To install via pip, do the following in the terminal:
1. Create a virtual environment using:
python3 -m venv [venv-name]The command does not produce an output. It creates a directory called [venv-name] and populates it with virtual environment data.
2. Switch to the environment with:
source [venv-name]/bin/activate
The command runs the activation script and changes to the virtual environment.
3. The virtual environment contains the PIP package manager, which can install Jupyter:
pip install jupyter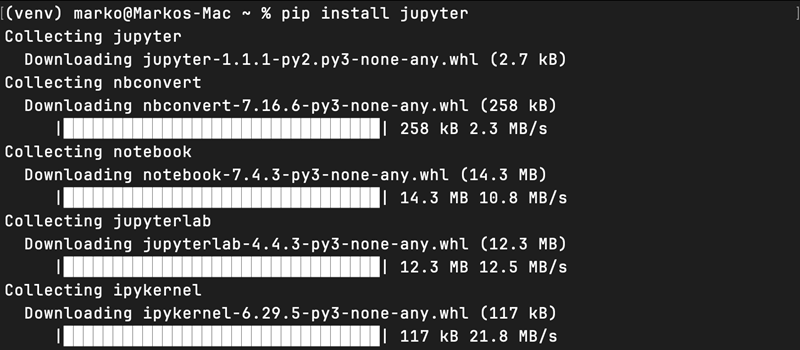
The package manager also installs all required dependencies.
4. Start the Jupyter Notebook server with:
jupyter notebook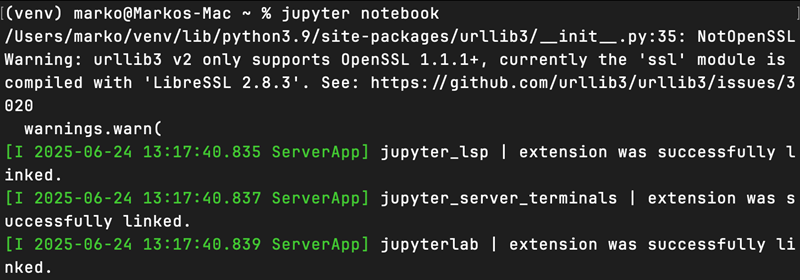
The notebook environment runs in the browser and is ready to use.
Install Jupyter Notebook on macOS via Homebrew
Homebrew is a practical and quick way to install Jupyter Notebook on macOS. Do the following:
1. The Homebrew repository contains the appropriate package:
brew install jupyterlab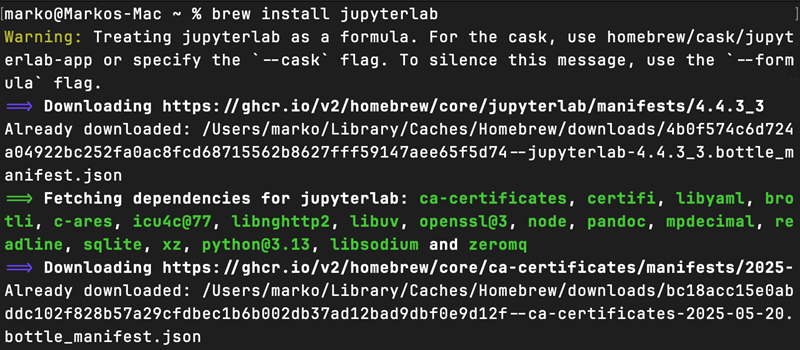
Wait for the installation to complete.
2. Once ready, start the environment with:
jupyter notebook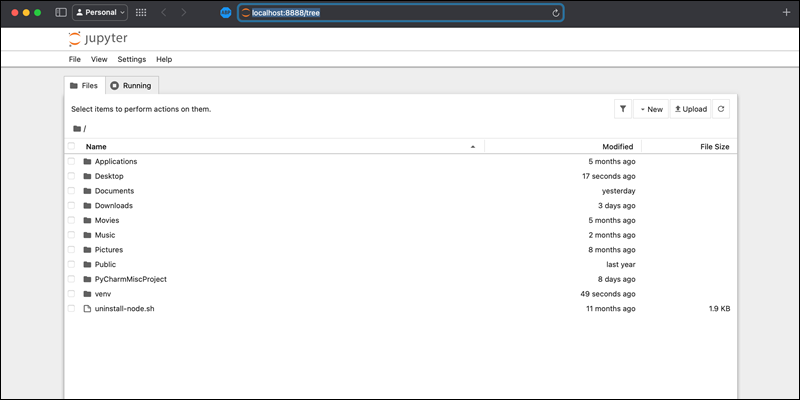
The command runs the server and opens the notebook environment in the browser.
Conclusion
This guide showed how to install Jupyter Notebook on Linux, Windows, and macOS. Each system has several different methods for installing the notebook environment.
Next, get started using the scientific Python library with our SciPy tutorial, or check out our top Python machine learning libraries.