Jupyter Notebook is a popular Python environment for data scientists, engineers, and analysts. The interactive environment simplifies data exploration, visualization, and debugging.
Apache Spark is a data processing tool for large datasets whose default language is Scala. Apache provides the PySpark library, which enables integrating Spark into Jupyter Notebooks alongside other Python libraries such as NumPy, SciPy, and others.
This guide contains step-by-step instructions on how to install and run PySpark on Jupyter Notebook.
Prerequisites
- Python 3 installed.
- pip package manager installed.
- Java version 8 or higher installed (see how to check the Java version).
Note: If you need to install Java, follow one of our step-by-step guides for your OS:
Install Jupyter Notebook
To install Jupyter Notebook, use a package manager such as Conda or pip. The steps below demonstrate how to install it using pip:
1. Open the terminal (CTRL+Alt+T).
2. Check the Python version to confirm it is installed on the system:
python3 --version
The command prints the Python version number. If Python is not available on the system, follow one of our guides below to install it:
3. Check the pip version to see if it is installed on the system:
pip --version
4. Install Jupyter Notebook with:
pip install jupyterWait for the installation to complete.
5. Confirm the Jupyter Notebook installation completed correctly. Run the program with the following command:
jupyter-notebookThe instance opens in the browser on http://localhost:8888/tree.
Install PySpark
There are two ways to install PySpark and run it in a Jupyter Notebook. The first option allows choosing and having multiple PySpark versions on the system. The second option installs PySpark from the Python repositories using pip.
Both methods and the steps are outlined in the sections below.
Option 1: Manual Download
Install PySpark on Linux from the Apache Spark website in a few simple steps:
1. Download the package using the following curl command:
curl -o spark.tgz https://dlcdn.apache.org/spark/spark-3.5.0/spark-3.5.0-bin-hadoop3.tgz
The command downloads Spark version 3.5.0 as a tar.gz file (spark.tgz). For a different version, navigate to the Spark Downloads page and select the desired version.
2. Extract the downloaded spark.tgz file with:
tar -xzvf spark.tgz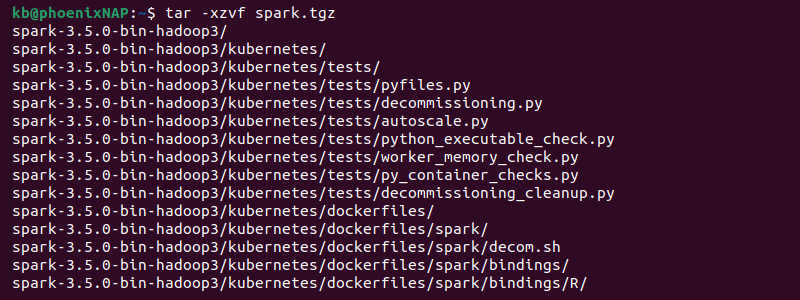
Remove the -v option to avoid displaying the extraction progress.
3. Move the extracted package to the /opt directory:
sudo mv spark-3.5.0-bin-hadoop3 /opt/spark-3.5.0This approach allows storing multiple Spark versions on the same system.
4. Create a symbolic link to reference the downloaded version:
sudo ln -s /opt/spark-3.5.0 /opt/sparkThe symbolic link references the specified spark version without the version number.
5. Open the .bashrc file (or the appropriate file if using a different shell type) and add Spark to PATH:
export SPARK_HOME=/opt/spark
export PATH=$SPARK_HOME/bin:$PATH
6. Source the file to apply the changes:
source ~/.bashrcAlternatively, apply the changes by restarting the terminal.
7. Check the PySpark installation with:
pyspark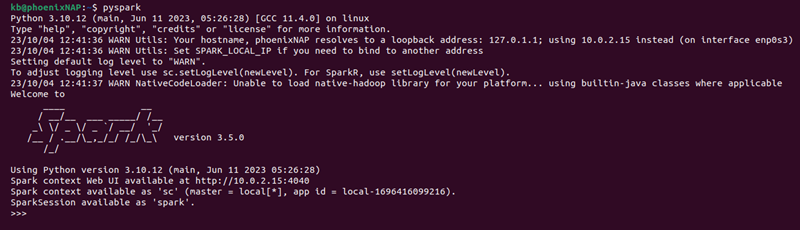
The PySpark session runs in the terminal.
Option 2: Using pip
To install PySpark using pip, run the following command:
pip install pysparkUse the pip installation locally or when connecting to a cluster. Setting up a cluster using this installation may result in issues.
Run PySpark in Jupyter Notebook
Depending on how PySpark was installed, running it in Jupyter Notebook is also different. The options below correspond to the PySpark installation in the previous section. Follow the appropriate steps for your situation.
Option 1: PySpark Driver Configuration
To configure the PySpark driver to run in a Jupyter Notebook automatically, do the following:
1. Open the .bashrc (or appropriate shell configuration file) for editing.
2. Add the following PySpark environment variables to the file:
export PYSPARK_DRIVER_PYTHON=jupyter
export PYSPARK_DRIVER_PYTHON_OPTS='notebook'
Save and close the file.
3. Update the shell information with:
source ~/.bashrcAlternatively, restart the terminal.
4. Run PySpark with:
pyspark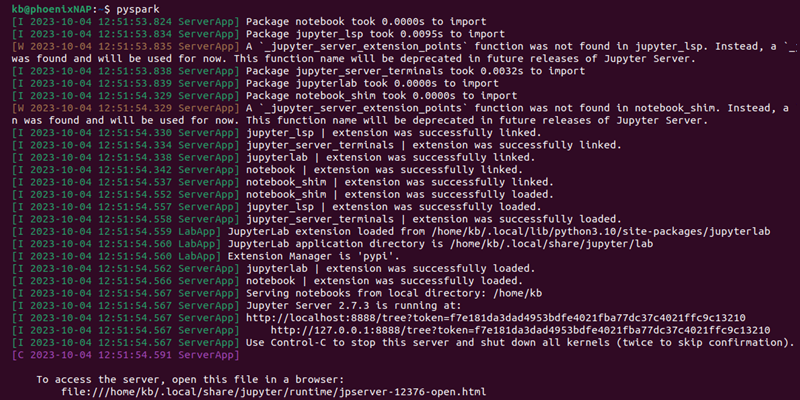
The command runs PySpark in a Jupyter Notebook environment.
Option 2: Load PySpark via findspark
To enable using PySpark from a Jupyter Notebook using the findspark library, do the following:
1. Install the findspark module using pip:
pip install findsparkThe module helps load PySpark without performing additional configuration on the system.
2. Open the Jupyter Notebook via the terminal:
jupyter-notebookWait for the session to load and open in a browser.
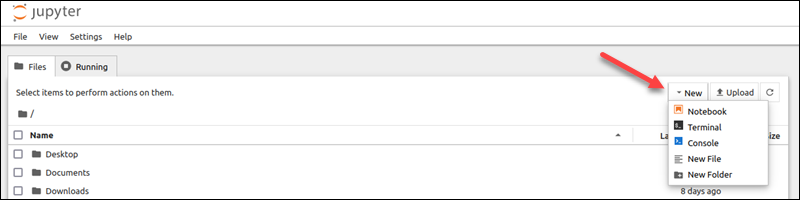
3. Click New->Notebook.
4. Import the findspark module, initialize the module, and import pyspark. Copy and paste the following into the notebook cell:
import findspark
findspark.init()
import pyspark
Press Shift+Enter to run the cell. The notebook does not show any errors, indicating the import was successful.
Why Use PySpark in Jupyter Notebook?
There are several reasons why PySpark is suitable for a Jupyter Notebook environment. Some advantages of combining these two technologies include the following:
- Easy to use. Jupyter is an interactive and visually-oriented Python environment. It executes code in step-by-step code blocks, which makes it perfect for experimenting, exploring, and testing data gathered from PySpark.
- Powerful data processing. PySpark's APIs provide a high-level interface for data processing. For example, the DataFrame API provides an interface similar to SQL and simplifies tasks with structured data. Other APIs enable distributed machine learning, which integrates well with other Python machine learning libraries.
- Collaborative. Jupyter Notebooks are used to document data analysis tasks and workflows. The notebook environment allows combining code, text, and visualizations into a single, shareable document.
Conclusion
After reading this guide, you've successfully installed PySpark, which you can run in a Jupyter Notebook environment.
Check out our Spark BMC demo script on GitHub to create a Spark cluster with just a few commands. The script provisions three Bare Metal Cloud servers (two worker nodes and one master node) via API calls.