Java is a popular programming language for a wide range of applications, from enterprise software to games. Its robustness, versatility, extensive libraries, and strong community support make it a top choice for many development teams.
This step-by-step guide will show you how to install Java on CentOS and Rocky Linux.
Prerequisites
- A maintained/supported version of CentOS or Rocky Linux.
- Command-line access.
- Administrative privileges on the system.
Note: For other operating systems, refer to the following tutorials:
Java Versions
Java is distributed through three major platforms:
- Java Standard Edition (Java SE) provides the core libraries for basic functionality such as input/output, networking, and security.
- Java Micro Edition (Java ME) is designed for application development on resource-constrained devices such as mobile phones and smart cards.
- Java Enterprise Edition (Java EE or Jakarta EE) is used in large-scale, distributed enterprise applications.
The Java SE platform consists of two open-source Java packages:
- Java Development Kit (Open JDK) for developing and programming with Java.
- Java Runtime Environment (Open JRE) for running Java-based applications.
The commercial SE implementation is called Oracle Java. The Oracle JDK can be downloaded for free from the official Oracle website. However, the free license only allows non-commercial use of the software.
Install Java on CentOS and Rocky Linux
The following sections provide steps to install OpenJDK, OpenJRE, and Oracle Java on a CentOS or Rocky Linux system.
Install OpenJDK
Proceed with the steps below to install OpenJDK on your system:
1. Update the package repository list:
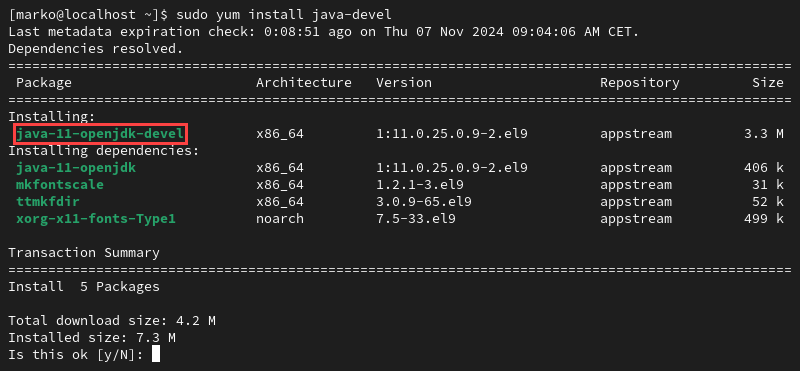
sudo yum update2. Install the Java Development Kit with the following command:
sudo yum install java-develThe output shows the version of OpenJDK that is to be installed on the system. Type Y and press Enter to start the installation.
Install OpenJRE
Java Runtime Environment (OpenJRE) is a subset of OpenJDK. Therefore, the java-devel package includes both tools. Install OpenJRE by typing:
sudo yum install java-develInstall Oracle Java
The official Oracle JDK is unavailable for download from a local repository. Install it by following the steps below:
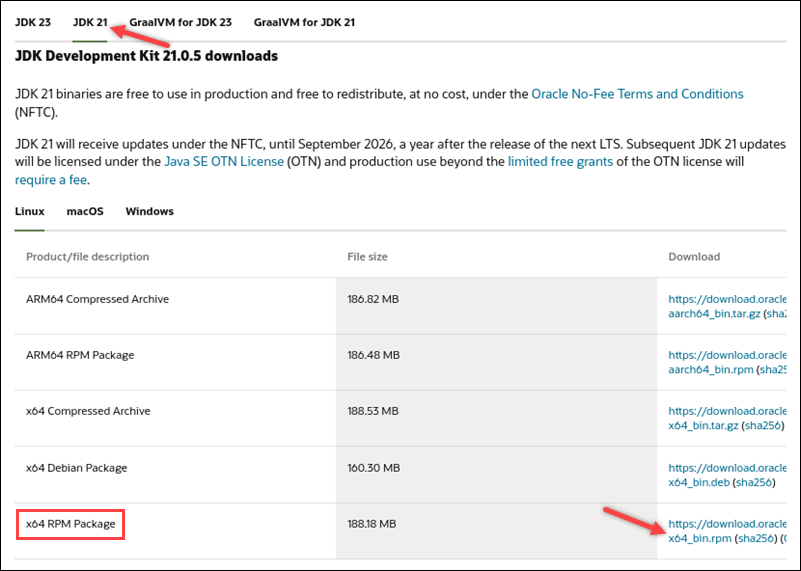
1. Visit the Java SE Downloads page.
2. Select the desired Java SE version on the webpage and click the download link for the RPM package.
3. After the download is complete, install the package with the command below:
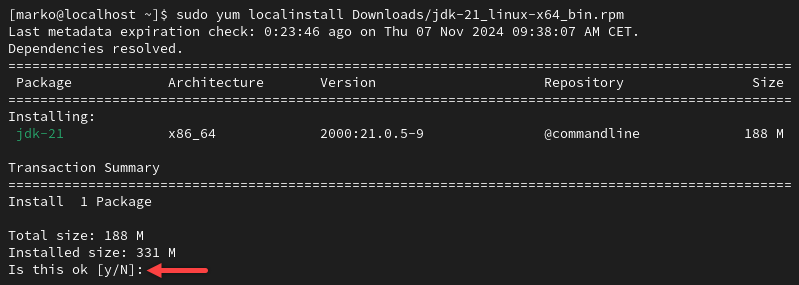
sudo yum localinstall [path]/jre-[version]-linux-x64.rpmFor example, to install the jdk-21_linux-x64_bin.rpm package located in the Downloads subdirectory, type the following:
sudo yum localinstall Downloads/jdk-21_linux-x64_bin.rpmEnter Y and wait for the installation to finish.
Verify Java Is Installed on Your System
The following command shows which Java release is the default on the system and confirms the installation was successful:
java –versionThe system prints the version number and other relevant information.

Install Specific Version of Java
Install other Java versions by adding the version number to the installation command. To see the available versions, list them with yum search:
yum search openjdk-develThe output lists the versions hosted in the repository.

To install a specific version, use the following command:
sudo yum install java-[version]-openjdk-develReplace [version] with the actual version number. For example:
sudo yum install java-17-openjdk-develHow to Set Default Java Version
Multiple versions of Java can coexist on a system. The user can decide which one is the default one. To do so:
1. List the installed versions on your computer:
sudo alternatives --config javaThe example image below shows three installed alternatives: OpenJDK 11, Oracle Java 21, and OpenJDK 21.
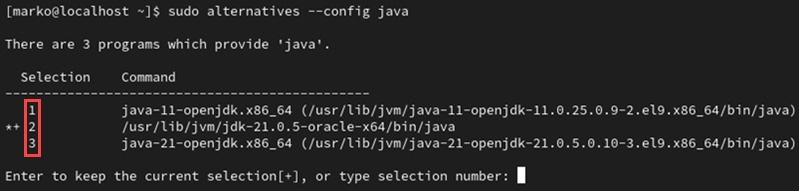
2. Type a number from the Selection column and press Enter.
How to Set JAVA_HOME Environment Variable
Setting the JAVA_HOME environment variable helps other applications access the Java installation path. Proceed with the steps below to set the environment variable:
1. Locate the Java installation:
sudo update-alternatives --config javaThe output shows the path for each Java package installed on the system.
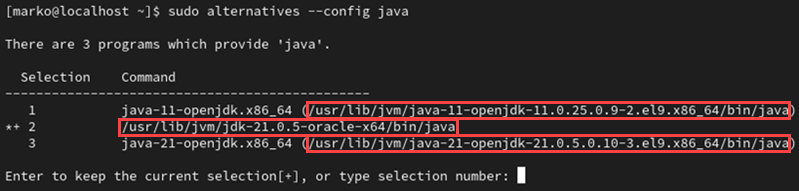
2. Select and copy the path you want to add to the variable.
3. Open the .bash_profile file with a text editor such as Nano:
nano .bash_profile4. At the bottom of the file, add a line that specifies the value of JAVA_HOME:
JAVA_HOME="/your/installation/path/"For example, to copy the installation path for Java 11 listed in the example image above, type the following:
JAVA_HOME="/usr/lib/jvm/java-11-openjdk-11.0.3.7-0.el7_6.x86_64/bin/java"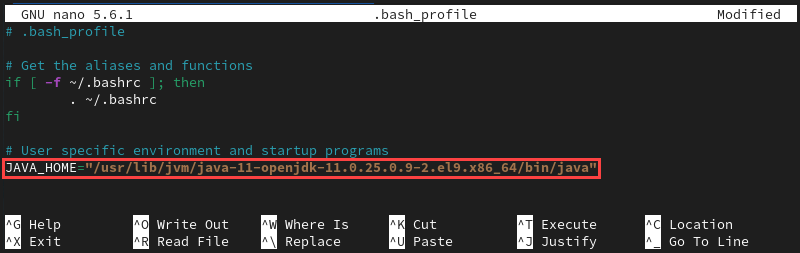
5. Save the file and exit.
Note: Learn the difference between .bashrc and .bash_profile.
6. Apply the changes:
source .bash_profileHow to Uninstall Java on CentOS and Rocky Linux
To remove any of the Java packages installed, use the yum remove command:
sudo yum remove javaConfirm the process by typing Y and pressing Enter.
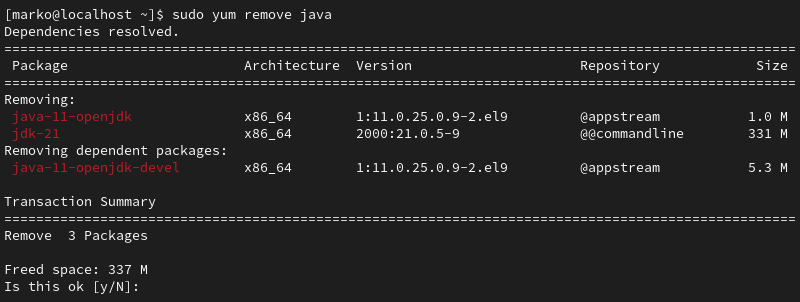
The command above removes all the installed Java instances from the system. To uninstall a specific Java version, add the version number in the command. For example, to remove OpenJDK 11, use the following command:
sudo yum remove java-11-openjdk-develConclusion
This tutorial taught you how to install Java on CentOS and Rocky Linux. The article also showed how to change the default version and set the home environment variable.
If you are interested in Java programming, read our article on the best Java IDEs.