Java is an object-oriented programming language that takes a platform-independent approach to application development by using virtual machines. Java apps are compiled to run on Java Virtual Machines (JVM) regardless of the underlying OS.
Java-based apps and applets are created using a software development environment (SDE) known as the Java Development Kit (JDK). The JDK comes with the Standard Edition of the Java API and a collection of components for running Java applications called the Java Runtime Environment (JRE).
This article shows you how to install the Java Development Kit (JDK) and the Java Runtime Environment (JRE) on macOS.
Prerequisites
- A system running macOS 10.7.3 and above.
- Administrative access to the system.
Install Java on Mac
Multiple Java Development Kit builds are available for download and installation. Oracle maintains the original, closed source Oracle JDK, but the company also helps develop the open source version of the environment called OpenJDK.
The differences between Oracle JDK and OpenJDK are primarily in licensing, and this tutorial shows you how to install both versions on macOS.
Note: Since OpenJDK is open source, multiple developers produce versions of this SDE, including Microsoft, Azul, Red Hat, etc.
Option 1: Install Oracle JDK
Oracle JDK is available for download on Oracle's website. Follow the steps below to download and install it on Mac.
1. Browse to Oracle's Java Downloads page.
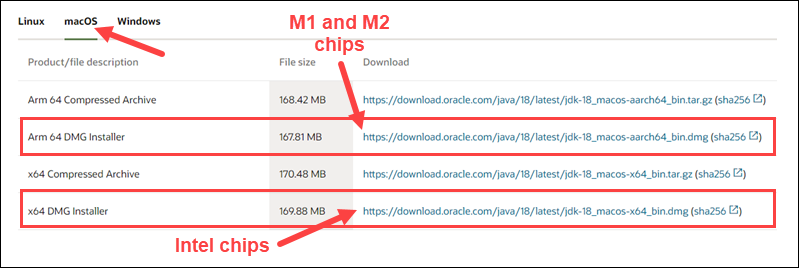
2. Select the macOS tab and download the DMG installer for your processor architecture.
- If you have an M1 or M2 Mac, choose the Arm 64 installer.
- Intel-based Mac owners should choose the x64 installer.
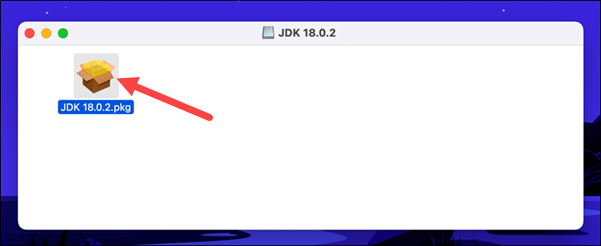
3. Open the downloaded DMG file and run the PKG file inside.
4. Select Continue on the installer's introductory screen.
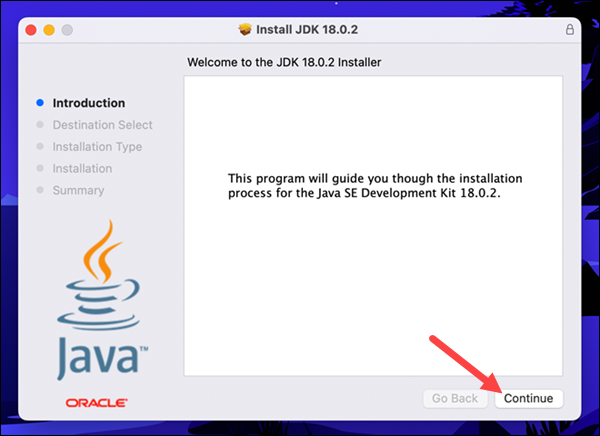
5. Select Install in the window that appears.
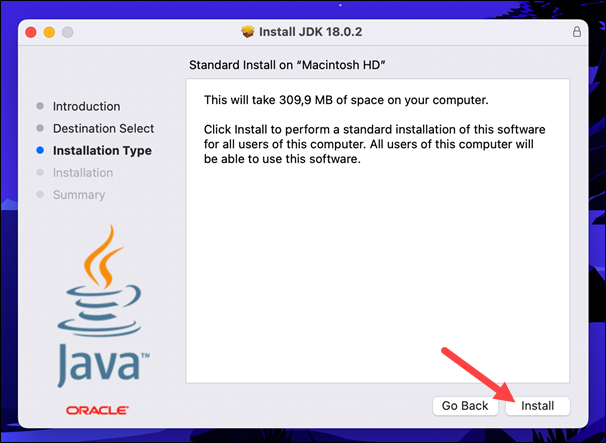
6. Provide your administrative credentials to start the JDK installation.
7. Wait for the installer to finish copying the files, then select Close.
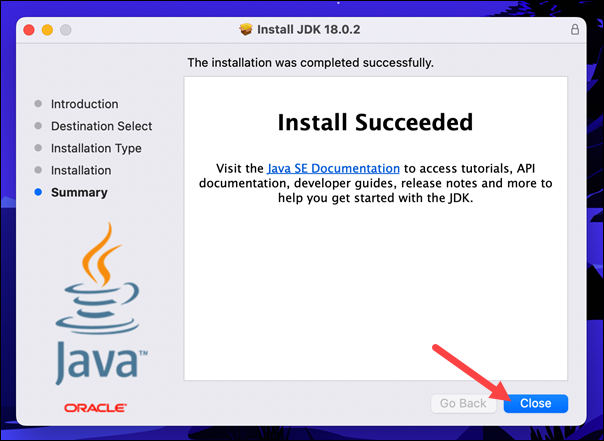
8. Confirm JDK was installed successfully by running java -version in the terminal:
java -version
Option 2: Install OpenJDK
The alternative option is to install OpenJDK with Homebrew. OpenJDK is open-source, production-ready, and offers the same features as Oracle's commercial implementation.
Install OpenJDK with Homebrew by following the steps below:
1. Update the Homebrew formulae by typing:
brew update2. Use the following command to install OpenJDK:
brew install openjdk@[version]For [version], specify the version you wish to install. For example, to install OpenJDK 18, type:
brew install openjdk@18
Option 3: Install JRE on Mac
The Java Runtime Environment (JRE) is a part of the JDK installation. If you only want install JRE without the entire development kit, follow the steps below:
1. Browse to the Java website.
2. Click the Download Java button.
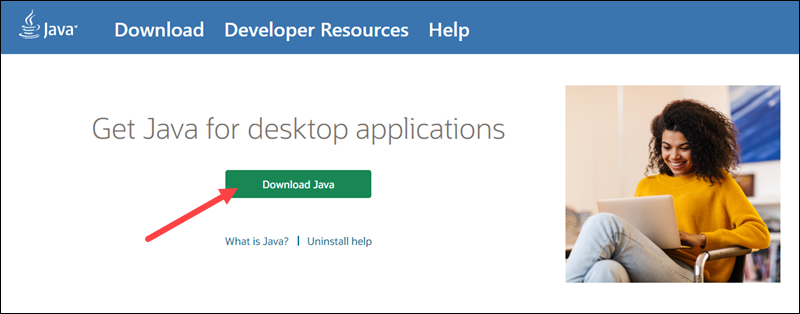
3. On the next page, click the Download Java button and wait for the DMG installer to download.

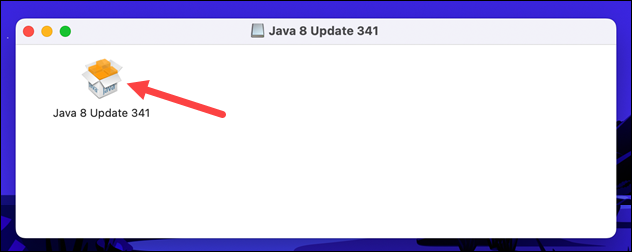
4. Open the DMG file and double-click the file inside.
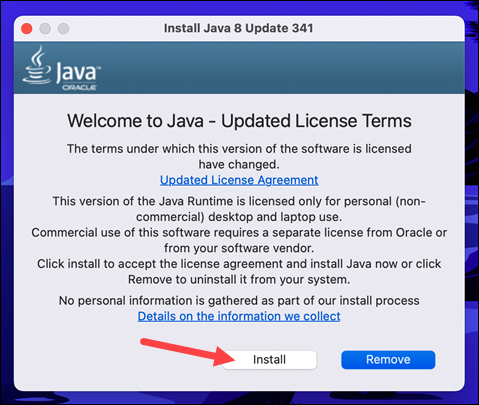
5. Select Install and authenticate to start the installation process.
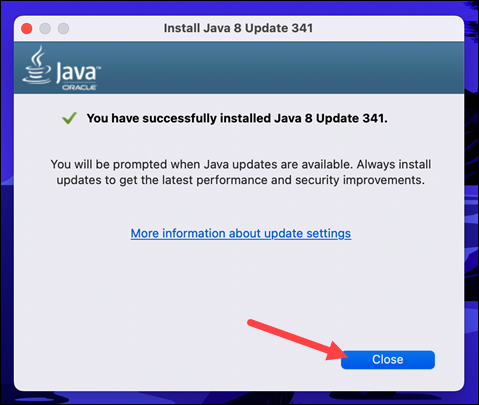
6. Select Close to finish the installation.
Note: PNAP's Bare Metal Cloud servers offer an optimized, cloud native environment for your core app services and the entire software development life cycle. See the pricing and find the instances that best suit your project.
How to Set Java Path on Mac
The Homebrew installation of OpenJDK requires exporting the JAVA_HOME variable and adding the Java installation to the path.
1. To permanently export the JAVA_HOME variable, add it to the .zshenv file by typing:
echo "export JAVA_HOME=/opt/homebrew/opt/openjdk" >> ~/.zshenv2. To permanently add the Java installation to the PATH variable, run:
echo "export PATH="/opt/homebrew/opt/openjdk/bin:$PATH"" >> ~/.zshenv3. Use the source command to apply the changes to the current session.
source ~/.zshenv4. Confirm the success of the operation by checking the Java version:
java -version
Note: For further information, follow our guide on how to set environment variables in macOS.
How to Uninstall Java on Mac
To uninstall Oracle JDK, follow the steps below:
1. In a terminal window, navigate to the JavaVirtualMachines directory:
cd /Library/Java/JavaVirtualMachines2. List the contents of the directory:
lsThe directory contains JDK installations. The example below shows a system with JDK 18.0.2 installed.

3. Delete an installation by typing its version number. For example, to uninstall JDK 18.0.2, type:
sudo rm -rf jdk-18.0.2.jdkNote: If you installed OpenJDK using Homebrew, you can uninstall it with the following command:
brew uninstall openjdk@[version-number]
Conclusion
This tutorial provided installation instructions for installing the Java Development Kit and Java Runtime Environment on macOS. If you are interested in Java development, check out our pick of the best Java IDEs or learn about the Java List Interface.
