Java is one of the most popular programming languages. It is used for developing a wide range of applications across a plethora of different platforms.
In this tutorial, we will provide a step-by-step guide to installing Java on Fedora.

Prerequisites
- A system running Fedora (Workstation or Server)
- DNF installer
- A user account with sudo privileges
- Access to the terminal/command line
Install OpenJDK on Fedora
OpenJDK is an open-source implementation of Java. Follow these steps to install OpenJDK:
Step 1: List Java Versions
List the available versions of OpenJDK with:
dnf search openjdk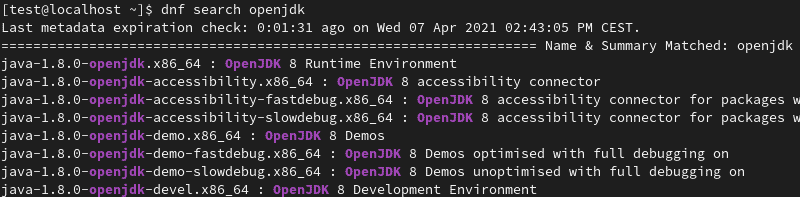
You can copy the java version you want to install to complete the next step faster.
Step 2: Install OpenJDK
1. Install OpenJDK with the dnf command using the following syntax:
sudo dnf install [package name]Where [package name] is the name of the installation file for the version of OpenJDK you want to install. The LTS release is always a good choice.
For instance, to install OpenJDK 8, use:
sudo dnf install java-1.8.0-openjdk.x86_64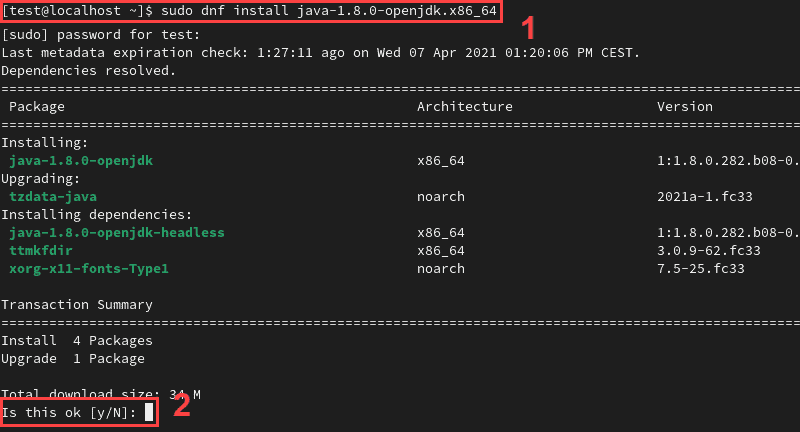
2. When prompted, type Y and press Enter to confirm the installation.
Note: If you are using the YUM installer, the syntax for installing OpenJDK is sudo yum install [package name].
Step 3: Check Java Version
Check the Java version on your system to confirm the installation:
java --version
Install Oracle JDK (Oracle Java SE)
Oracle JDK is largely based on the same code as OpenJDK, although it does contain some proprietary code. Follow these steps to install Oracle JDK on your system:
Step 1: Download Oracle JDK
1. Go to the Oracle JDK download page and open the download link for the version of Oracle JDK you want to install.
In this example, we will use Java SE 16.

2. Download the compressed archive using the provided link.

3. Move the downloaded file into your Home directory.
Step 2: Install Oracle JDK
1. Create a directory named java in /usr/local:
sudo mkdir -p /usr/local/javaThis is where Java SE 16 will be installed.
2. Change into the Downloads directory:
cd DownloadsCopy the installation file from your Downloads directory into the newly created java directory:
sudo cp -r jdk-16_linux-x64_bin.tar.gz /usr/local/java3. Change into the java directory:
cd /usr/local/java4. Extract the installation file:
sudo tar xvzf jdk-16_linux-x64_bin.tar.gzExtracting the file creates a directory named jdk-16 inside the java directory.
If you are unfamiliar with tar.gz files, check out our guide on extracting tar.gz files in Linux.
5. Open the PATH file by using:
sudo nano /etc/profile6. Add the following lines to the end of the PATH file:
JAVA_HOME=/usr/local/java/jdk-16
PATH=$PATH:$HOME/bin:$JAVA_HOME/bin
export JAVA_HOME
export PATH
7. Press Ctrl + X, then type Y and press Enter to confirm the changes and close the PATH file.
8. Update the list of available Java versions by using:
sudo update-alternatives --install "/usr/bin/java" "java" "/usr/local/java/jdk-16/bin/java" 1
sudo update-alternatives --install "/usr/bin/javac" "javac" "/usr/local/java/jdk-16/bin/javac" 1
sudo update-alternatives --install "/usr/bin/javaws.itweb" "javaws.itweb" "/usr/local/java/jdk-16/bin/javaws.itweb" 1
9. Make Java SE 16 the default version with:
sudo update-alternatives --set java /usr/local/java/jdk-16/bin/java
sudo update-alternatives --set javac /usr/local/java/jdk-16/bin/javac
sudo update-alternatives --set javaws.itweb /usr/local/java/jdk-16/bin/javaws.itweb
10. Reload the system-wide PATH file by using:
source /etc/profile11. Reboot your system for the changes to take effect:
rebootStep 3: Check Java Version
Perform another check of the Java version to confirm the installation was successful:
java --version
Switch from One Java Version to Another
If you have multiple Java versions installed on your system, you can list them by using the alternatives command:
sudo alternatives --config javaThe currently active version is marked with a + sign.
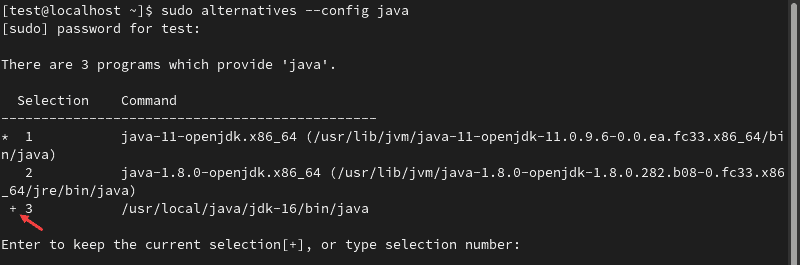
To switch to another version, type the appropriate number and press Enter.
Conclusion
After following this guide, you should have the version of Java of your choice installed on your Fedora system. You can also use the provided instructions to switch between multiple versions of Java.