The Java Development Kit (JDK) is a set of software tools for developing Java applications. The toolkit includes a compiler for converting Java code into bytecode, a collection of class libraries, documentation for integrating Java APIs, and the Java Runtime Environment (JDE) for executing Java code.
The JDK provides developers with the resources they need to create Java applications and applets in one neat package.
Find out how to install the Java Development Kit on Windows.

Prerequisites
- A system running Windows.
- A network connection.
- Administrator privileges.
Note: Develop your core app services on PNAP's Bare Metal Cloud servers to ensure superior performance. It is cloud native and the perfect environment for the entire SDLC.
Check if Java Is Installed
Multiple Java versions on the same system can cause conflicts when applications attempt to use different versions. Additionally, outdated versions can pose significant security risks over time.
Before installing the latest Java Development Kit, check if a Java version is already installed on Windows:
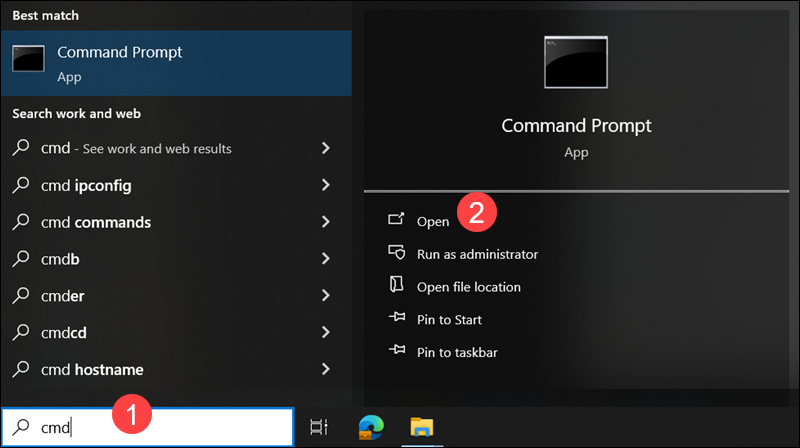
1. Type cmd in the Windows search bar.
2. Open the command prompt.
3. Enter the following command to check the Java version in Windows:
java -version
In this example, the message states that Java is not recognized as an internal or external command, which indicates that Java is not installed. If the system displays a Java version number, remove the old Java installation before proceeding.
Download Java for Windows
OpenJDK is an open-source project that provides source code for implementing the Java platform. Many companies, including Oracle, offer distributions of OpenJDK as installers or binaries.
Note: While OpenJDK and Oracle JDK are similar in build, keep in mind that Oracle JDK is a commercial product and that Oracle offers paid support plans.
To download the latest Java Development Kit installation file for Windows:
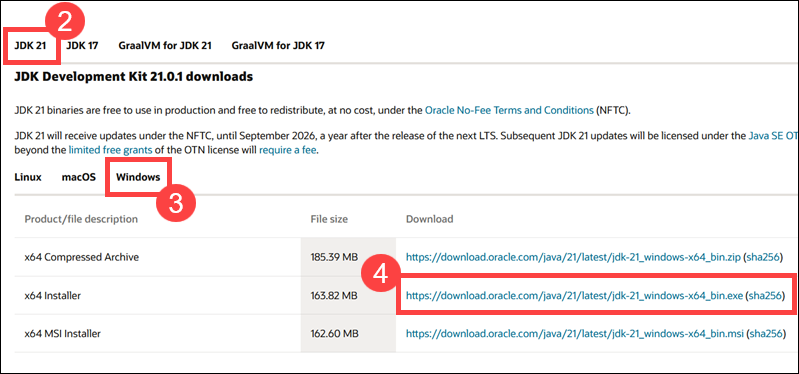
1. Open a web browser and navigate to the Oracle Java Downloads page.
2. Select the latest JDK version. In this example, the latest available version is JDK 21.
3. Access the Windows tab.
4. Click the x64 Installer download link.
Wait for the download to complete.
Note: If you need to set up Java on a different system, check out our tutorials for installing Java on Ubuntu, Fedora, Raspberry Pi, and CentOS.
Install Java on Windows
To install Java on your Windows system:
1. Double-click the downloaded Java file to start the installation.
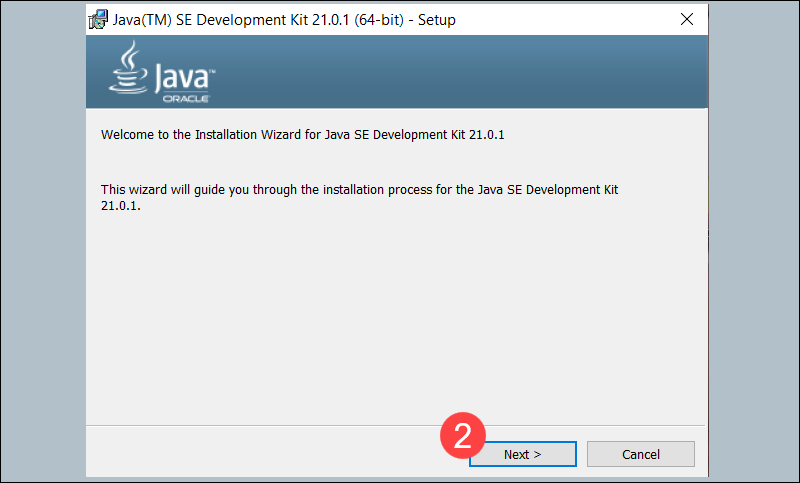
2. Once the installation wizard welcome screen appears, select Next to proceed.
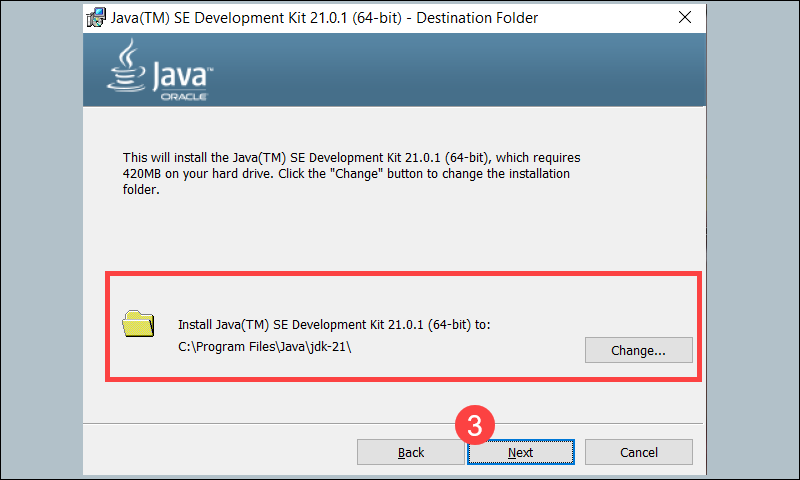
3. Choose the destination folder for the Java installation files, or stick to the default path and click Next.
4. The installation process is complete when the Successfully Installed message appears. Click Close to exit the wizard.
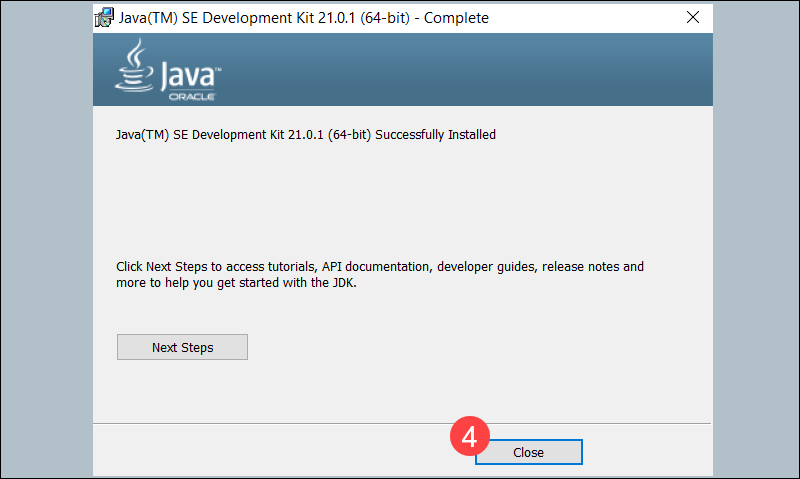
You have successfully installed JDK 21 on your Windows system. To enable program compiling from any directory, you must set up Java environment variables.
Set Environmental Variables in Java
Follow the steps in the sections below to configure Java environment variables in Windows.
Step 1: Add Java to System Variables
This step ensures that Java is accessible from the command line in any directory.
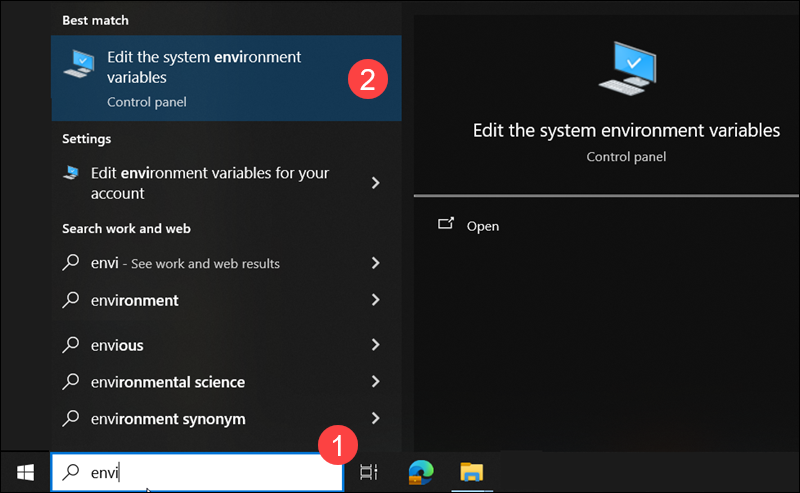
1. Open the Start menu and search for environment variables.
2. Select Edit the system environment variables.
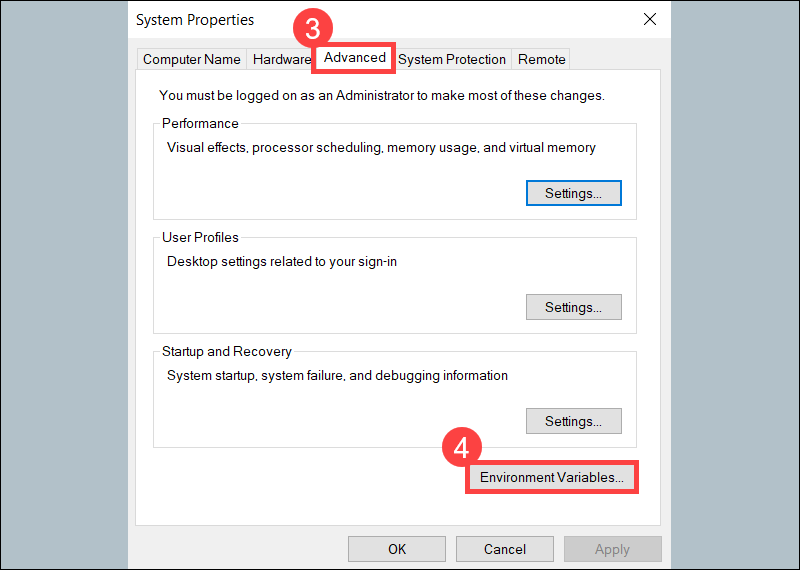
3. Select Advanced in the System Properties window.
4. Click Environment Variables.
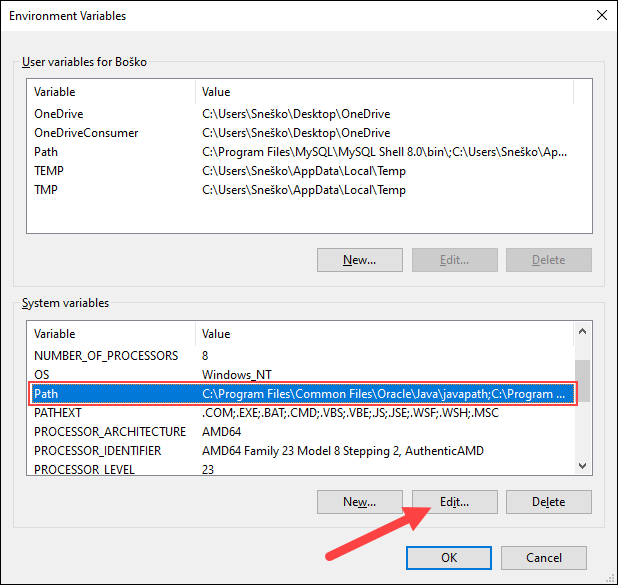
5. Select the Path variable in the System variables category and click Edit.
6. Click New.
7. Enter the path to the Java bin directory.
8. Click OK to save the changes and exit the variable editing window.
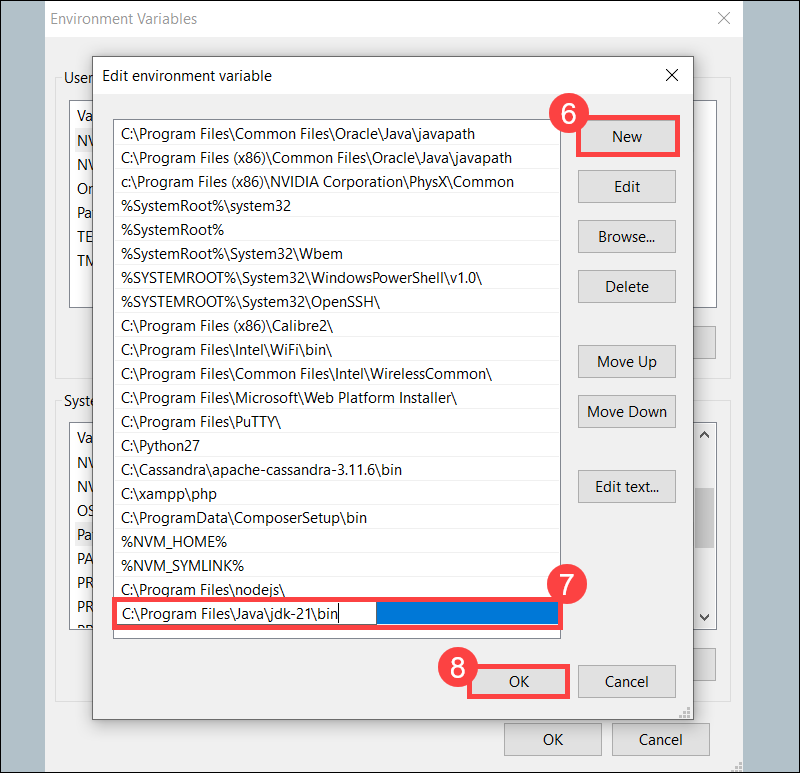
Note: The default path for JDK 21 is C:\Program Files\Java\jdk-21\bin.
Step 2: Add JAVA_HOME Variable
Some applications require the JAVA_HOME variable to point to the JDK installation directory. Follow the steps below to create the variable:
1. Click New under the System variables category to create a new variable.
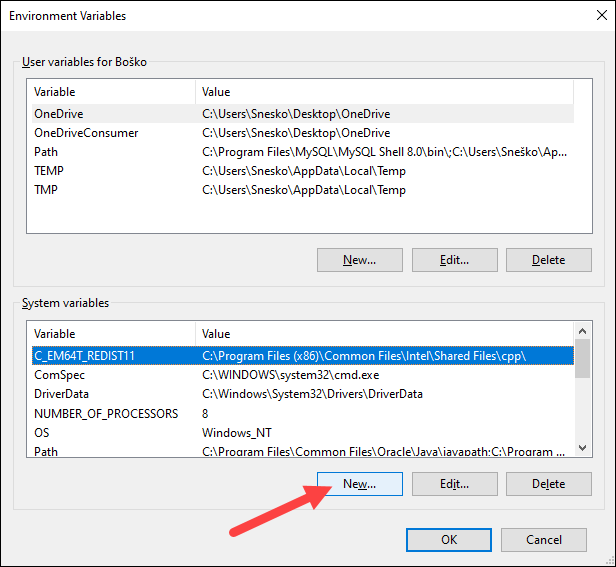
2. Name the variable JAVA_HOME.
3. Enter the path to your Java JDK directory in the variable value field.
4. Click OK.

Confirm the changes by clicking OK in the Environment Variables and System properties windows.
Test Java Installation
Verify that Java is installed by entering the java -version command in the command prompt:

If installed correctly, the command outputs the Java version. To ensure everything works, write and compile a simple Java program by following the steps in the sections below.
Step 1: Write Test Java Script
1. Open a text editor like Notepad or Notepad++ and create a new file.
2. Enter the following code and click Save:
class HelloWorld{
	public static void main(String args[]){
		System.out.println("Hello world!");
		}
}
3. Name the file and save it as a Java source file (*.java).
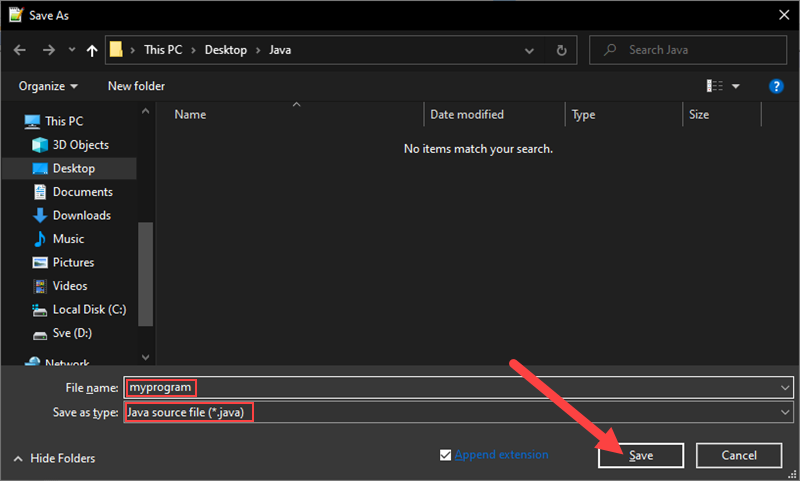
Note: When using Notepad, select All files for the Save as type option and add the .java extension to the file name.
Step 2: Compile Test Java Script
Access the Windows command prompt and complete the following steps:
1. Navigate to the directory where your Java file is saved.
2. Use the following command to compile the program:
javac myprogram.javaReplace myprogram.java with your file name.

After a successful compilation, the program generates a .class file in the same directory.
2. Run the program using the following syntax:
java HelloWorld
The output shows that the program runs correctly, displaying the Hello world! message.
Conclusion
This tutorial showed how to install the Java Development Kit on a Windows system and provided an example Java script.
To learn more about Java, read our list of best Java IDEs or learn how to convert string to integer in Java.
