Node.js is a popular back-end JavaScript runtime for creating web servers and scalable network apps. Node Package Manager (NPM) helps Node.js users manage dependencies, automate workflows, and share reusable code.
This tutorial shows you how to install NPM and Node.js on Mac using Homebrew or the official PKG installer.
Prerequisites
- Command-line access.
- Administrative privileges on the system.
Note: For other operating systems, check out the following guides:
Install NPM and Node.js on Mac Using Homebrew
The recommended way to install Node.js on Mac is via Homebrew, a package manager for macOS. Follow the steps below to learn how to use Homebrew to install, update, and uninstall Node.js and NPM.
Install and Update Homebrew
Before starting the installation, ensure that Homebrew is installed on the system and that the packages are up-to-date:
1. Go to Homebrew's official website and copy the link shown on the page.

2. Paste the command into the terminal. Press Enter to confirm that you want to install Homebrew, and wait for the installation to finish.
Note: Do not copy the command from the screenshot since it may change in the future. Always visit the website for the up-to-date command.
3. Update the package list by entering:
brew update
Install Node.js and NPM on Mac
With Homebrew installed, follow the procedure below to install Node.js and NPM:
1. Enter the install command:
brew install nodeHomebrew downloads and installs Node.js and NPM packages and their dependencies.

2. Confirm that you successfully installed Node.js by checking the version:
node -vThe system displays the Node.js version as the command's output.

3. Check the installed version of NPM by typing:
npm -vThe NPM version number is displayed.

Update Node.js and NPM on Mac
1. Before you proceed with upgrading the Node.js installation, update Homebrew's repositories by typing:
brew update2. When the update completes, enter the following command:
brew upgrade nodeThe output in the example shows that the newest version of Node.js has already been installed on the system.

Note: For additional details, check out our in-depth articles on how to update Node.js and how to update NPM.
Uninstall Node.js and NPM on Mac
Uninstall both Node.js and NPM with the brew uninstall command:
brew uninstall node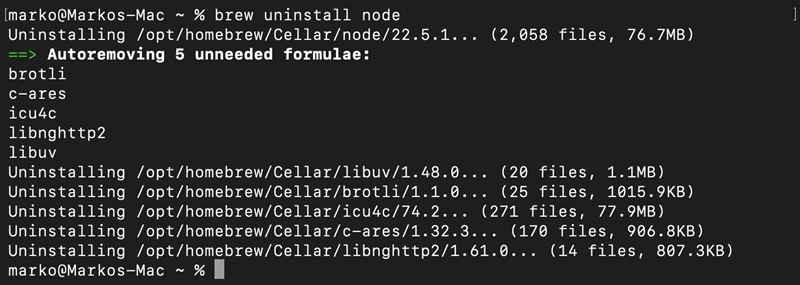
Homebrew uninstalls tools and removes unnecessary formulae.
Install NPM and Node.js on Mac Using PKG Installer
The Node.js website lets users download a PKG installer to install Node.js and NPM using the macOS GUI. The sections below contain PKG installation instructions.
Download Node.js PKG Installer
Before installing Node.js and NPM with a PKG installer, download the correct version of the installer. Follow the steps below:
1. Go to the official Node.js download page.
2. Choose the Node.js version to download.
3. Select macOS from the list of available operating systems.
4. Select ARM64 or X64 package, depending on your system.
5. Click the Download Node.js button to start the download.
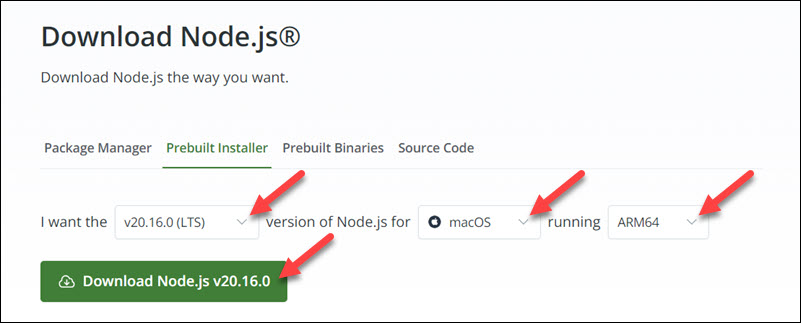
Note: The Node.js PKG installer includes NPM.
Run Node.js PKG Installer
Once the download finishes, locate the PKG installer file on the system. Then follow the installation procedure below:
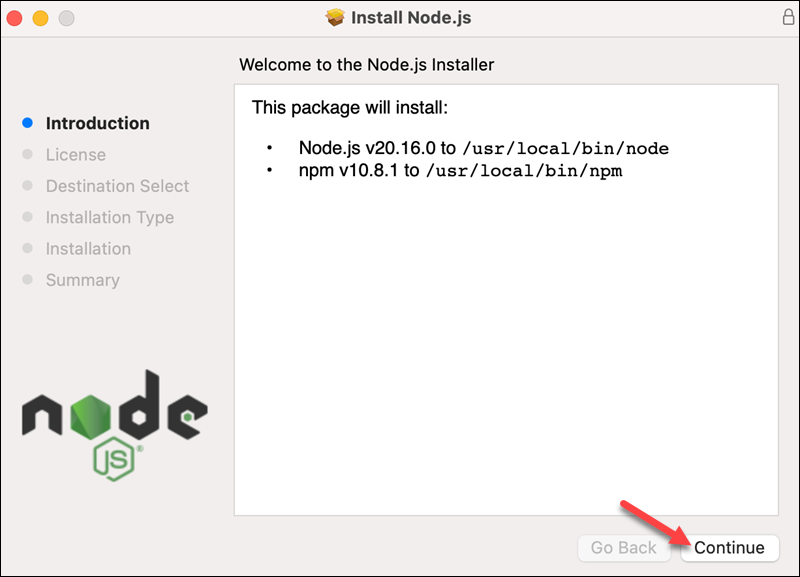
1. Start the installer and select Continue in the Introduction dialog.
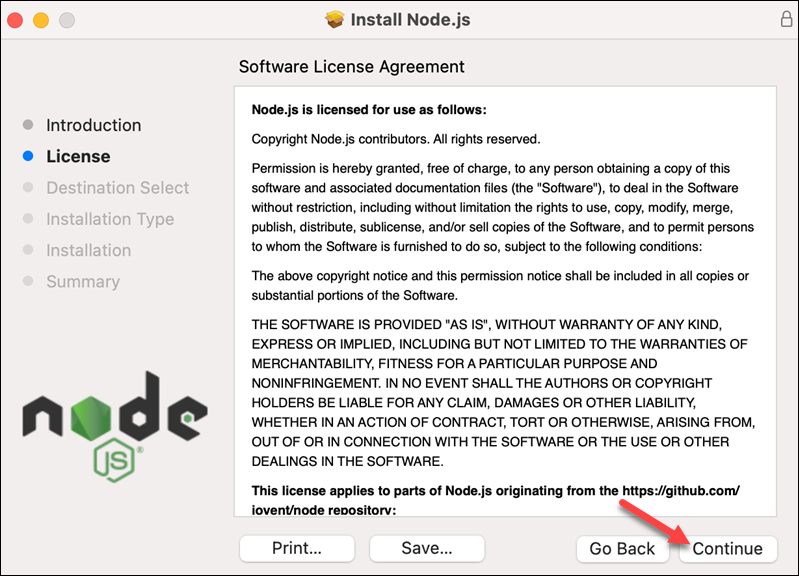
2. Read the Software License Agreement and select Continue. Confirm that you agree with the terms.
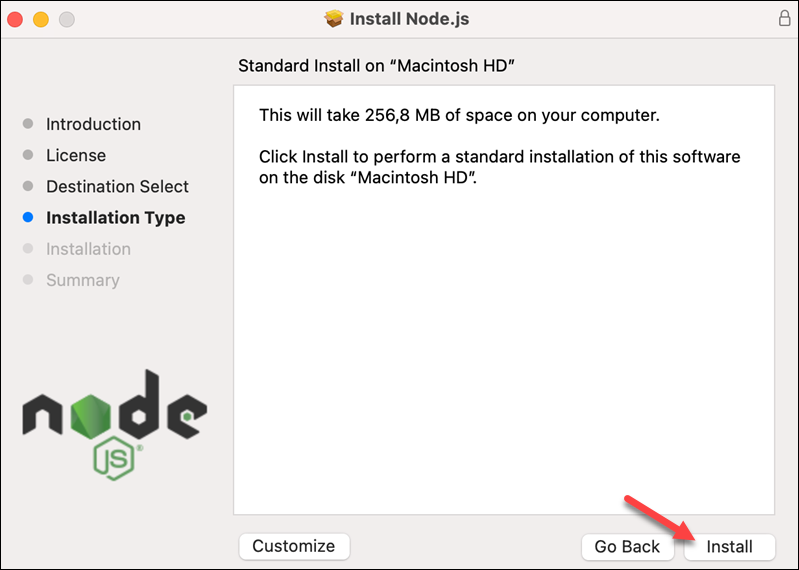
3. Click Install in the Installation Type dialog to start the installation.
4. Wait for the installation to finish, then select Close to exit the installer.
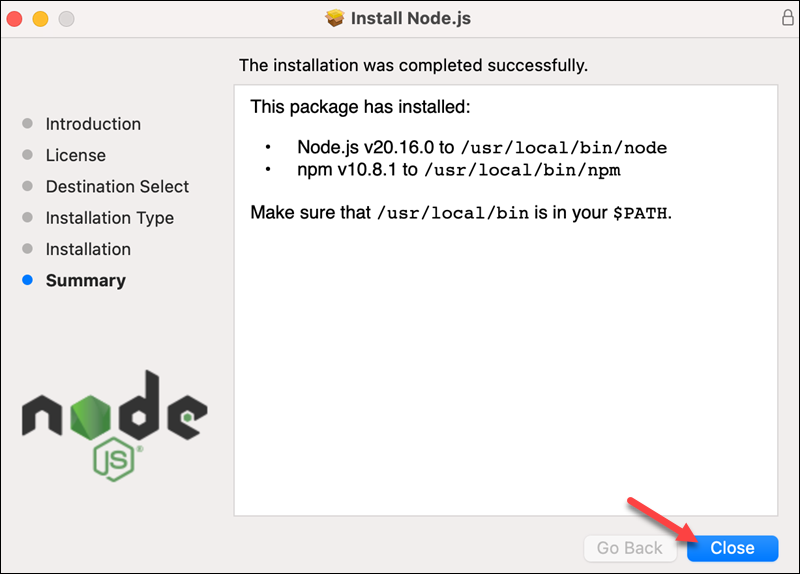
Node.js and NPM are now installed on the system.
Note: To update the PKG version of Node.js, download a newer version and repeat the installation process.
Conclusion
After reading this tutorial, you should know how to install Node.js and NPM on macOS. The article included steps to install Node.js using Homebrew and the official PKG installer.
To learn more about the MEAN stack, which features Node.js, read LAMP vs. MEAN: Which is Better?
