Python is a widely used high-level programming language. It is also one of the most popular and flexible server-side languages.
Windows does not install the Python programming language by default. However, you can install Python on Windows in a few steps.
This guide will provide step-by-step instructions on how to install and set up Python on Windows.
Prerequisites
- A system running Windows with administrator access.
- Access to the command prompt or PowerShell.
- Access to a web browser.
Python Installation on Windows
The installation requires you to download the official Python .exe installer and run it on your system. The sections below explain several options and details during the installation process.
Step 1: Select Python Version
Deciding on a version depends on what you want to do in Python. The two major versions are Python 2 and Python 3, but Python 2 is outdated and no longer supported.
If you're working on a legacy project, you may need Python 2, but for everything else, Python 3 is the better choice. Also, choose a stable release over the newest one, as newer versions may have bugs and issues.
Step 2: Download Python Executable Installer
To get Python on Windows, open a web browser and:
1. Access the Downloads section of the official Python website.
2. Locate the Download Python 3.13.2 button, which, in this case, is the latest stable version.
Note: The version varies depending on the latest stable Python version.
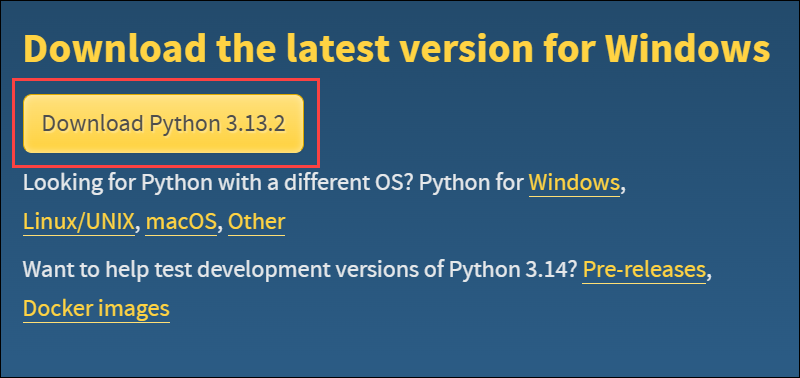
3. Click the button to download the file. The link automatically downloads the 64-bit version. For the 32-bit version, navigate to the release page and scroll down to the Files section.
Note: Windows now includes winget by default, allowing users to install Python without manually downloading the .exe file. Use the following command: winget install Python.Python
If you choose this option, skip to Step 4.
Step 3: Run Executable Installer
Run the executable installer to configure important settings, such as adding Python to the system PATH and choosing installation options.
The steps below guide you through the installation process:
1. Run the downloaded Python Installer.
2. The installation window shows two checkboxes:
- Admin privileges. The parameter controls whether to install Python for the current or all system users. Installing Python for all users requires admin rights. This option allows you to change the installation folder for Python.
- Add Python to PATH. The second option places the executable in the PATH variable after installation. You can also manually add Python to the PATH environment variable later.
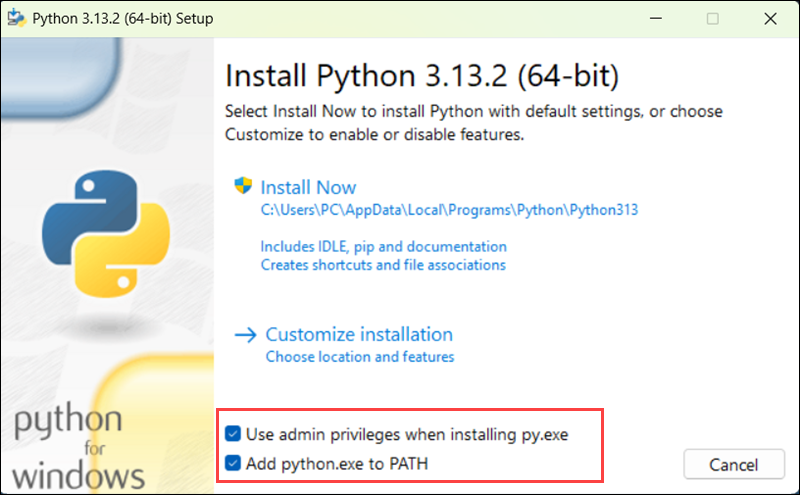
For the most straightforward installation, we recommend ticking both checkboxes.
3. Select the Install Now option for the recommended installation (in that case, skip the next two steps).
The default installation installs Python to C:\Users\[user]\AppData\Local\Programs\Python\Python[version] for the current user. It includes IDLE (the default Python editor), the pip package manager, and additional documentation. The installer also creates necessary shortcuts and file associations.
Customizing the installation allows changing these installation options and parameters.
To adjust the default installation options, choose Customize installation instead and proceed to the following step.

4. Choose the optional installation features. Python works without these features, but adding them improves the program's usability.
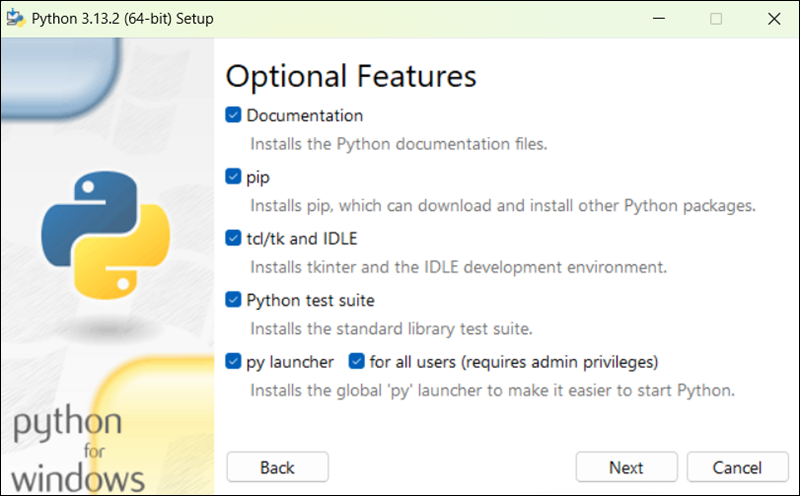
Click Next to proceed to the Advanced Options screen.
5. Choose whether to install Python for all users.
If you select Install for all users, the installer places Python in C:\Program Files\Python[version]. This location requires administrator privileges, so installing or modifying packages later may need admin rights.
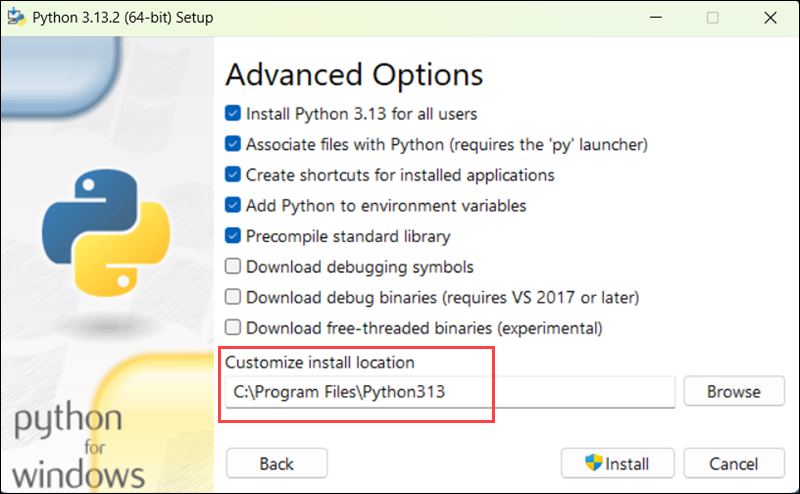
Note: Some users prefer C:\Python[version] because it avoids spaces in the path.
Other advanced options include creating shortcuts, file associations, and adding Python to PATH. After picking the appropriate options, click Install to start the installation.
6. Select whether to disable the path length limit. This option allows Python to bypass the 260-character MAX_PATH limit.
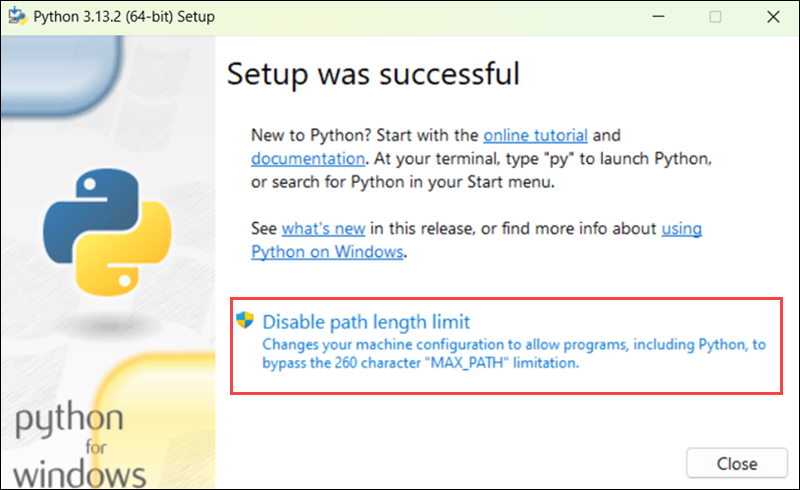
The option does not affect any other system settings, but disabling it resolves potential name-length issues. We recommend selecting the option and closing the setup.
Step 4: Add Python to PATH (Optional)
If the Python installer does not include the Add Python to PATH checkbox or you have not selected that option, add Python to PATH manually.
This alleviates the need to use the full path to access the Python program in the command line. It instructs Windows to review all the folders added to the path environment variable and to look for the python.exe program in those folders.
To add Python to PATH, do the following:
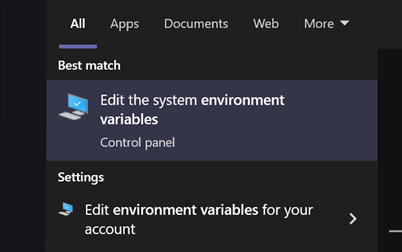
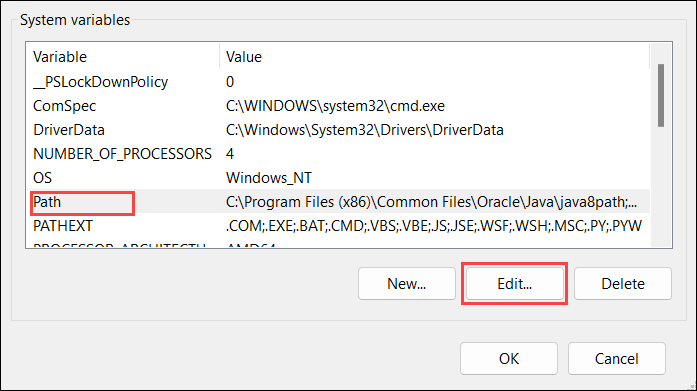
1. In the Start menu, search for Environment Variables and press Enter.
2. Click Environment Variables to open the overview screen.
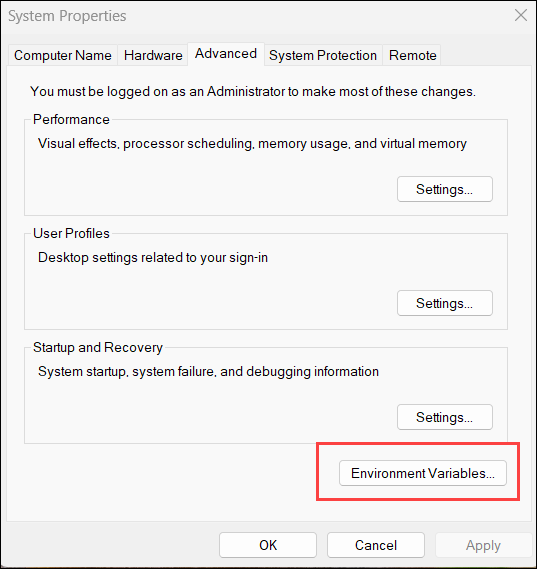
3. The action opens the Environment Variable tab. In the Environment Variables window, there are two sections: User Variables (affecting only the current user) and System Variables (affecting all users on the PC).
Since the system gets Python for all users, modify the System Variables section.
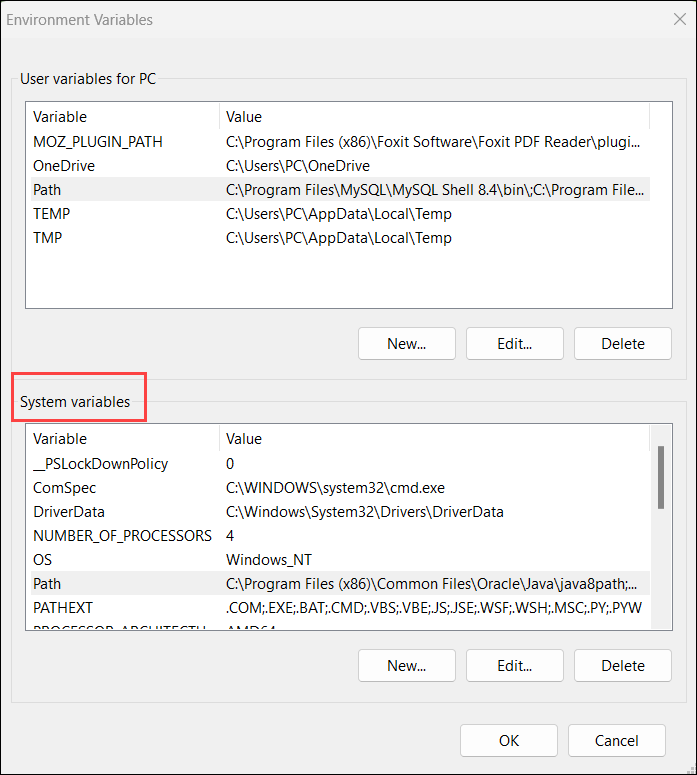
4. Scroll down to find the Path variable under System Variables.
5. Select the Path variable and click Edit. This opens the Edit Environment Variable window.
6. In the Edit Environment Variable window, click New to add a new entry to the path and add the following:
- C:\Program Files\Python311\
Another way is to double-click the empty field.
Note: Adjust the path based on your Python version.
7. Click New again and add the following path:
- C:\Program Files\Python311\
- C:\Program Files\Python311\Scripts\
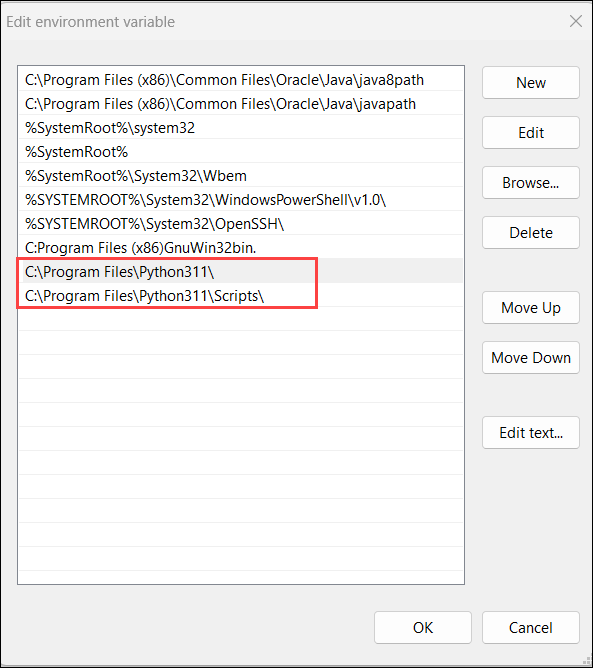
Warning: Do not combine Python's main folder and the Scripts folder in the same line in the Path variable. They should be entered separately in two lines. The Python folder contains the python.exe executable, while the Scripts folder includes utilities like pip.
8. Click OK to save the changes. If the command prompt is open, restart it to ensure the changes take effect.
Step 5: Verify Python Is Installed on Windows
The first way to verify that Python is installed successfully is through the command line. Open the command prompt and run the following command:
python --version
The output shows the Python version.
The second way is to use the GUI to verify the Python installation. Follow the steps below to run the Python's Integrated Development and Learning Environment or IDLE:
1. Navigate to the folder where Python is.
2. Double-click python.exe (the Python interpreter)
3. The interpreter opens the command prompt and shows the following window:
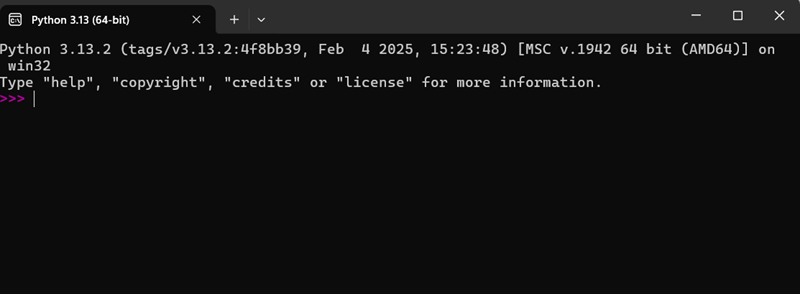
This launches the Python interpreter directly in the command prompt, which allows you to run Python commands interactively in a text-based environment.
4. Use IDLE for a more user-friendly, graphical interface. To access it, click the IDLE icon.

IDLE provides a graphical interface with features like code editing, syntax highlighting, and a built-in interactive shell
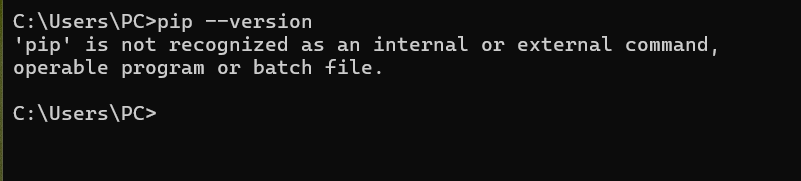
Step 6: Verify pip is Installed on Windows
pip is Python's package manager used to install and manage additional libraries and dependencies. To verify whether pip is on the system, enter the following command in the command prompt:
pip --version
If it is installed successfully, the command prompt shows the pip version number, the executable path, and the Python version.
When using the Customize installation option in Python, even if you check the box to install pip, it is not always correctly configured. If pip has not been installed, you get an error message instead of a version number.
To install pip, see our article How to Install pip on Windows.
Step 7: Install virtualenv (Optional)
Python software packages install system-wide by default. Consequently, whenever a single project-specific package is changed, it changes for all your Python projects.
The virtualenv package enables making isolated local virtual environments for Python projects. Virtual environments help avoid package conflicts and enable choosing specific package versions per project.
To install virtualenv, run the following command in the command prompt:
pip install virtualenv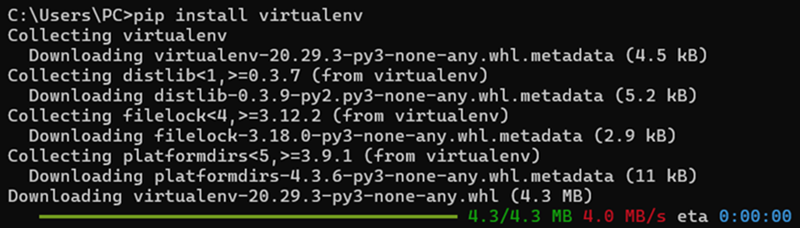
Wait for the installation to complete. Once done, it is installed on the system and available for use.
Note: Another option for managing a virtual environment is to use venv, which is built into Python and doesn't require installation. You can create a virtual environment with: python -m venv myenv.
Conclusion
This tutorial explained how to install Python on Windows. It also elaborated on the differences between the manual and automatic installation.
If you already have Python installed and want to update to a newer version, check out our article on how to upgrade Python.