pip is a package management tool for Python that allows you to install and manage software packages from the Python Package Index (PyPI). The name pip originated as an acronym for Pip Installs Packages.
Most modern Python versions include pip by default. However, if it is missing, you can install it manually.
This guide explains how to install, upgrade, and configure pip on Windows. Read the tutorial or watch the video below for a complete walkthrough.
Prerequisites
- A Windows system.
- Access to Command Prompt or PowerShell.
- Python installed and added to PATH.
Note: Python is usually preinstalled on Windows. If not, the easiest method to get it is with Windows Package Manager. To install Python with winget, run: winget install Python.Python.
Check if pip Is Installed on Windows
Python's latest versions include pip, but some installations may not. Before installing pip on Windows, check if the system already has it.
Launch the command prompt and type the following command:
pip --version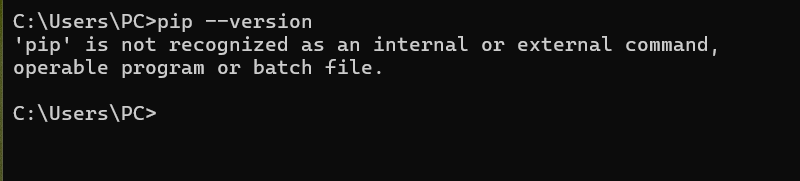
If pip is installed, the output displays the installed version. In case the system responds with an error message like the one above, follow one of the methods in this tutorial to install it.
Note: Check out our other guides to learn how to install pip on other operating systems:
Method 1: Install pip on Windows Using ensurepip
The ensurepip module is built into Python and can install pip if it's missing. It's useful in environments where pip was not included by default, such as embedded Python installations.
To install pip, run the following command:
python -m ensurepip --upgrade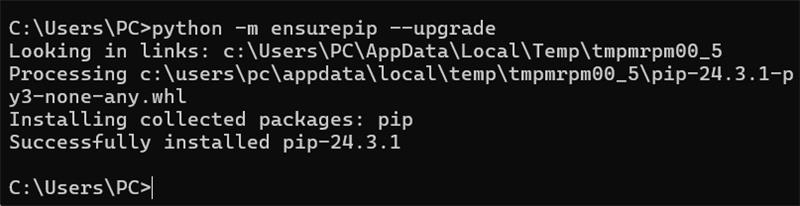
After the installation completes, verify the pip installation with:
pip --version
Note: If the command isn't recognized, try using pip3 instead or ensure Python is added to your PATH.
Method 2: Install pip on Windows Using get-pip.py
To install pip using this method, download the get-pip.py script using curl, then run it. Follow the steps below to install pip using this method.
Step 1: Download pip get-pip.py
Download the get-pip.py script with the following command:
curl https://bootstrap.pypa.io/get-pip.py -o get-pip.py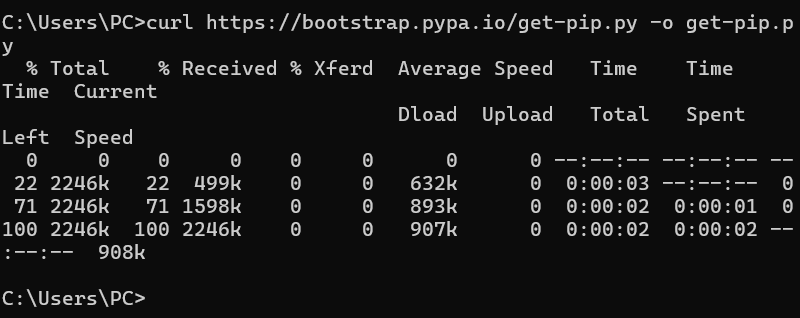
Note: To check if the link in the command is up to date, visit the official site for get-pip.py. If you can access the file directly and it doesn't print any errors, the link is still valid.
Step 2: Install pip on Windows
If you used the get-pip.py script to download pip, run the following Python command to install it:
python get-pip.py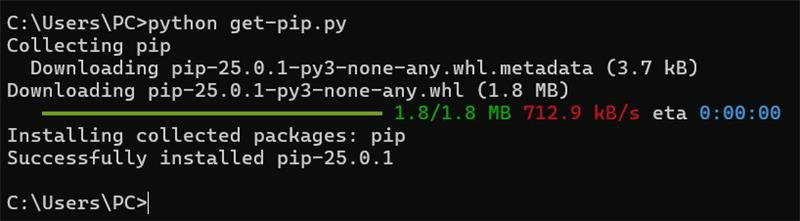
Note: In some cases, get-pip.py outputs the installation location. If this happens, note the PATH to use when adding pip to your system's PATH variable.
Step 3: Verify Installation
To test whether the installation was successful, type the following command:
pip --version
Step 4: Add pip to PATH
To run pip from any location and as a standalone command, add it to Windows environment variables.
Before modifying environment variables, check whether pip is already in your system's PATH. Run this command:
where pip
If the command returns a valid PATH, skip this step. If the command cannot find the PATH, it returns the error:

Follow these steps to add pip manually:
1. Locate the pip installation directory, which is, by default, in the Scripts subdirectory of your Python installation. A typical path is:
C:\Users\[YourUsername]\AppData\Local\Programs\Python\PythonXX\ScriptsReplace [YourUsername] with your actual Windows username and PythonXX with the Python version.
In this tutorial, the path is:
C:\Users\PC\AppData\Local\Programs\Python\Python313\ScriptsNote it because you will need it in the coming steps.
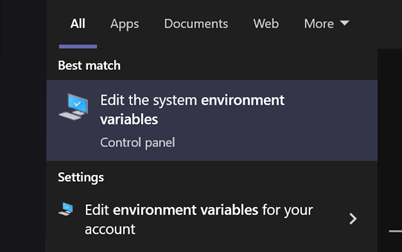
2. Open the Start menu, search for Environment Variables, and press Enter.
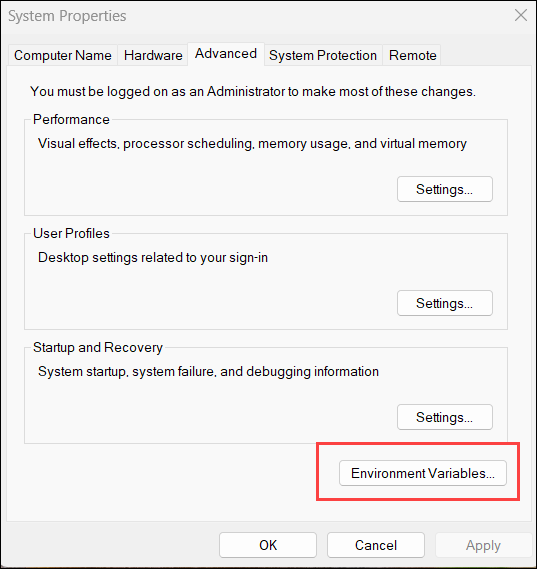
3. Click the Environment Variables button.
4. Double-click the Path variable to edit it.
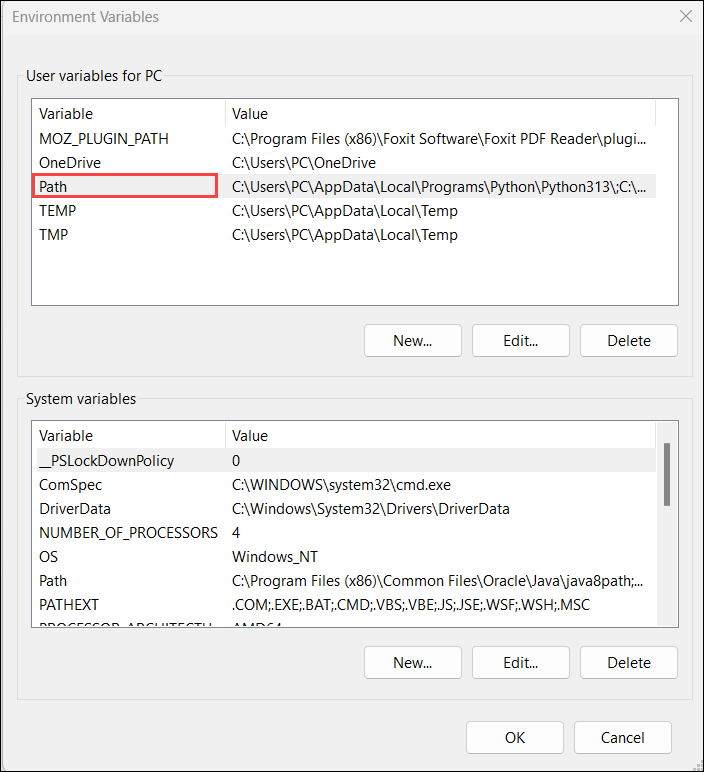
Note: Modify User variables for a single user or System variables to apply changes for all users.
5. Select New and add the directory where pip is installed, which you located and noted earlier,
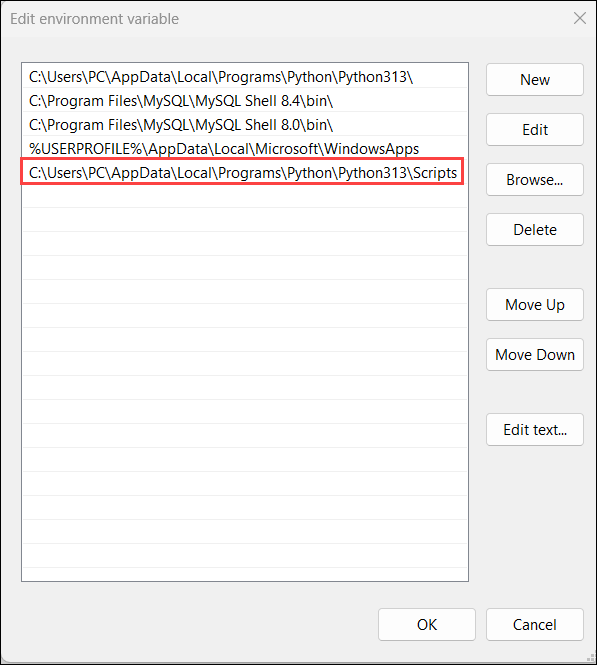
6. Click OK to save the changes.
7. Open a new command prompt session and run the following command to test the changes:
pip help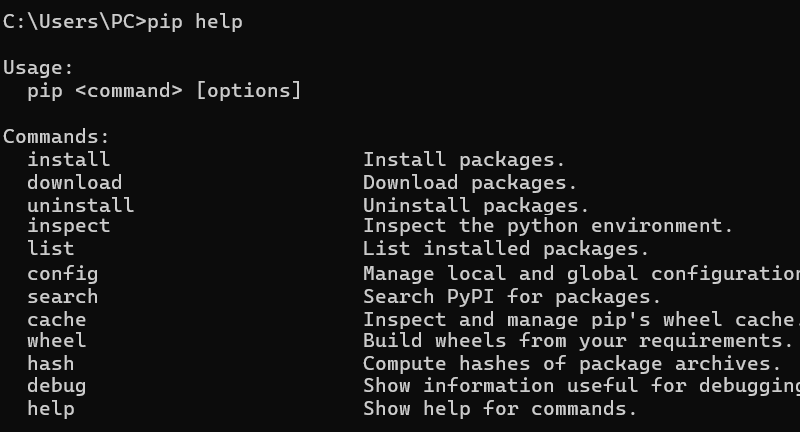
If the command does not work, try using pip3 instead of pip. Alternatively, add the directory where Python is installed to PATH and repeat the process.
Step 5: Configuration
The configuration file for pip exists in several locations on the system, including global, user-specific, and site-specific paths.
The configuration provides insight into how pip is set up and helps find installation problems or unexpected behavior.
To see the current configuration settings, run:
pip config -v list
The command shows the possible global, user, and site locations for the pip.ini configuration file. If you need to adjust pip's behavior, edit the appropriate pip.ini file based on these locations.
Upgrade or Downgrade pip on Windows
New versions of pip are released occasionally. These updates improve functionality or are necessary for security purposes.
To upgrade pip on Windows, run:
pip install --upgrade pipDowngrading is necessary if a new version of pip starts performing badly. To downgrade pip to a prior version, specify the version you want.
Use the following syntax:
python -m pip install pip==[version_number]Conclusion
This guide explained two ways to install pip on Windows and elaborated on how to add pip to PATH when necessary. Additionally, it showed how to upgrade or downgrade pip.
Next, check out our guide and learn how to install NumPy, a powerful Python library for numerical computing, using pip.