GRUB Customizer is a graphical user interface (GUI) tool that allows you to modify the Grand Unified Bootloader (GRUB) without manually editing configuration files. It rearranges boot entries, sets the default operating system (OS), adjusts the timeout value, and customizes the menu's appearance.
This tutorial will show you how to install, use, and uninstall GRUB Customizer on Ubuntu.

Prerequisites
- Ubuntu system.
- Access to the command line (terminal).
- sudo or root privileges.
Installing GRUB Customizer on Ubuntu
GRUB Customizer is a tool for managing the GRUB bootloader through a graphical interface, which makes it easier to modify boot entries, set kernel parameters, and back up current settings.
The installation requires adding a Personal Package Archive (PPA), a software repository that lets users install applications not included in the standard Ubuntu repositories. In newer Ubuntu versions, GRUB Customizer is not included in the default repositories, so adding the PPA is necessary.
Currently, GRUB Customizer installation on Ubuntu is only possible via the command line. No GUI method is available.
The following sections will guide you through installing GRUB Customizer and launching it for the first time.
Step 1: Add GRUB Customizer PPA
Before installing, add the PPA for GRUB Customizer. This tells Ubuntu where to find the software, but it does not fetch any package information yet.
To do this, run the following command with sudo:.
sudo add-apt-repository ppa:danielrichter2007/grub-customizer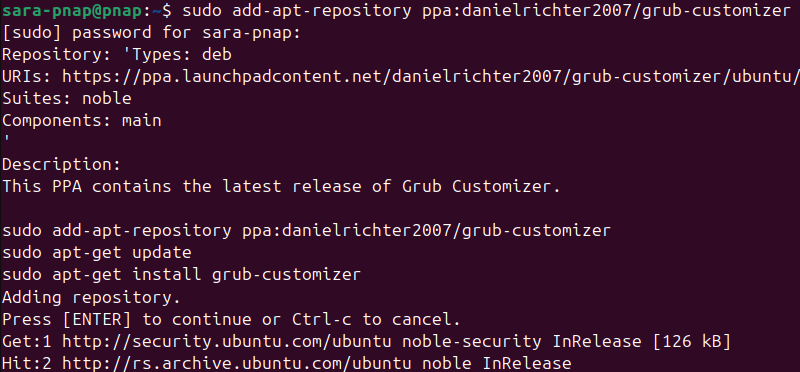
Step 2: Update the Repository Information
Update your system's package list to include the new repository. This ensures Ubuntu gets the latest version of GRUB Customizer.
Run apt with update to accomplish this:.
sudo apt update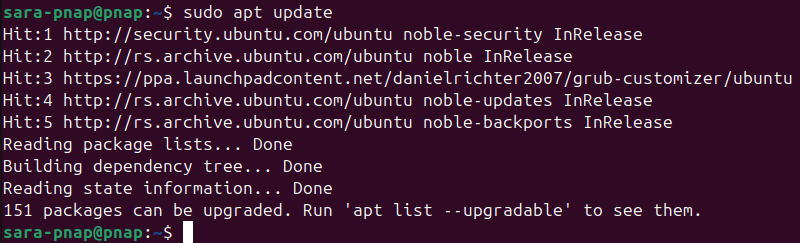
Step 3: Install GRUB Customizer
With the repository added and updated, install GRUB Customizer using this command:
sudo apt install grub-customizer
Step 4: Launch GRUB Customizer
Once installed, launch the program to verify it works. Run the following:
sudo grub-customizer
This opens the GRUB Customizer GUI window.
Using Grub Customizer
GRUB Customizer simplifies bootloader management in Ubuntu. Instead of editing configuration files manually, which sometimes leads to errors and boot problems, the tool provides a safe way to make changes. It is helpful for dual-boot systems, customizing kernel options, and adjusting the boot menu to match personal preferences.
The following sections present the most practical ways to use GRUB Customizer.
Reorder Boot Menu Entries
When Ubuntu is installed alongside another operating system, such as Windows, the system is in a dual-boot setup. In this case, the GRUB bootloader manages the startup process and displays a menu where you choose the operating system to load.
GRUB Customizer, which runs inside Ubuntu, allows you to change the order of this menu so you are able to place your preferred system at the top. The process is helpful if you frequently use one operating system over the other and want it selected automatically without having to scroll through the menu each time.
To change the order of boot menu entries in GRUB Customizer, follow these steps:
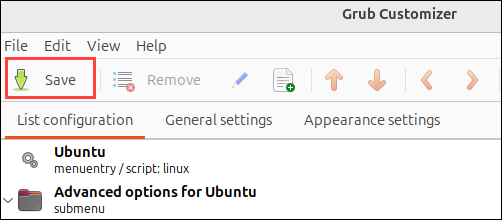
1. Open GRUB Customizer. The left panel shows all available boot entries in the current order.
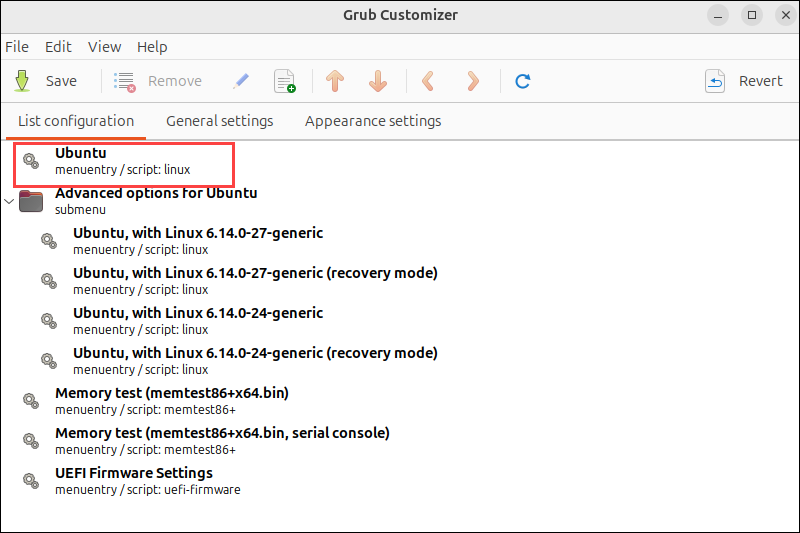
Note: The example uses a single-OS setup in which the GRUB menu usually contains only Ubuntu and the Advanced options for Ubuntu submenu with recovery entries. In a dual-boot system, this list also includes entries for other operating systems, such as Windows, which can be reordered.
2. Select the entry you want to move. In this case, we'll use Ubuntu since it's the only OS.
3. Use the Move up or Move down option in the menu to move the OS higher or lower in the list.
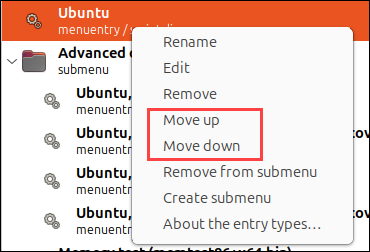
Another way is to use the arrow buttons in the top menu to accomplish the same.

4. Once the order is set, click Save to apply the changes.
5. Close the program and reboot your system to see the new boot order in action.
Set Default Operating System
In a dual-boot system, GRUB Customizer allows you to specify which OS should boot automatically when the timeout expires. By default, GRUB boots the first entry in the menu when the timer runs out.
However, setting a default operating system explicitly ensures a specific entry always loads automatically, even if it is not the first one in the list.
To set the default operating system, take the following steps in the GRUB Customizer:
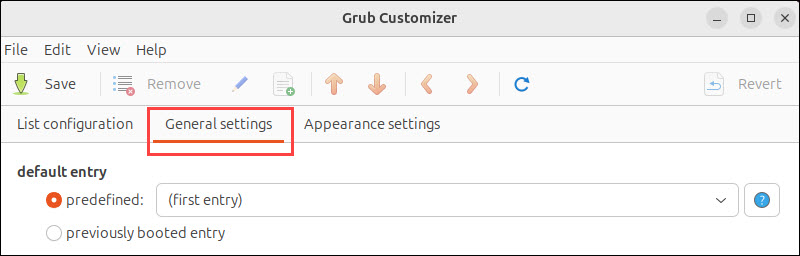
1. Navigate to the General settings tab below the top menu.

Under the Default entry section, you'll find two options:
- Predefined. Allows you to select any OS from the menu to be the default.
- Previously booted entry: Automatically boots the last OS you used.
2. Click Predefined.
3. Choose the desired OS from the drop-down list.

4. Click Save to apply the changes.
5. Close the program and reboot the system to verify the chosen operating system boots by default.
Adjust the GRUB Timeout Value
The timeout value determines how long the GRUB menu is displayed before the default operating system boots automatically. By default, GRUB waits a few seconds before starting the first menu entry, but you can change this behavior to make the menu stay longer, shorter, or not appear at all.
To adjust the timeout value in GRUB Customizer, take the following steps:
1. Go to the General settings tab under the top menu of the GRUB Customizer.
2. Scroll down to the Visibility section.
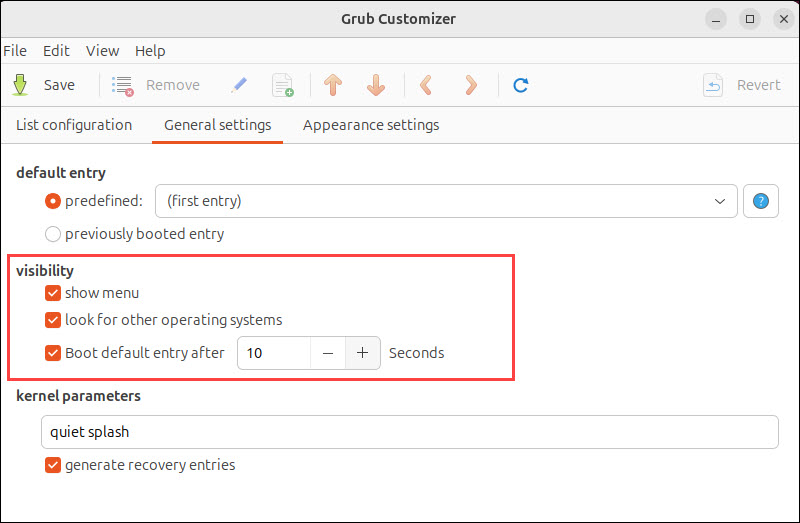
3. Enable the box saying Boot default entry after x seconds.
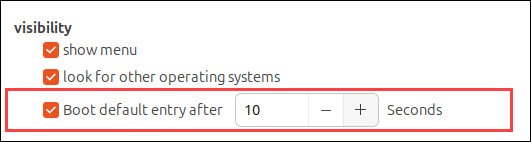
4. Set the number of seconds for the countdown. If you enter zero, the system boots the default entry immediately. However, if you clear this checkbox, the system waits indefinitely until you choose an entry.
5. Save the changes.
The next time you restart your system, GRUB uses the updated timeout value.
Edit Kernel Parameters
Kernel parameters let you control the Linux kernel behaviour during boot. To set kernel parameters with GRUB Customizer, take the following steps:
1. Go to the General settings tab.
2. Locate the kernel parameters field.
3. Add or remove parameters in the text box. For example, enter quiet splash for a clean boot screen or remove them to see detailed messages.
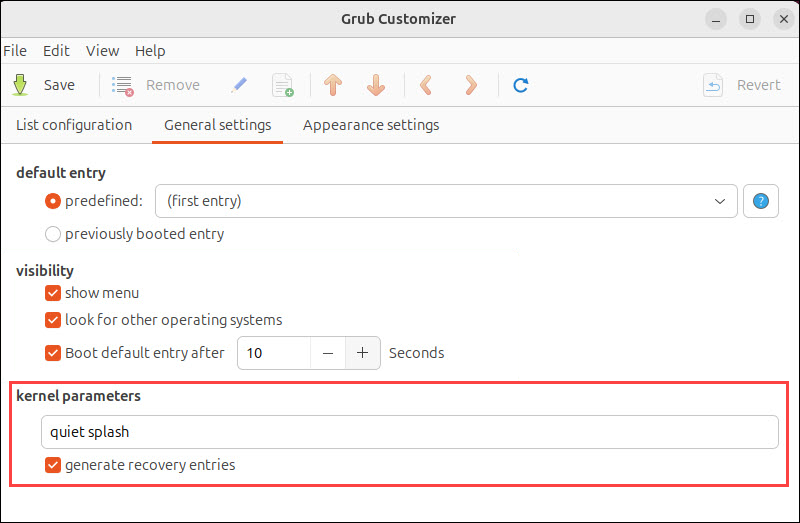
4. Click Save to apply the change, then reboot to test the new settings.
Below the text box, the Generate recovery entries option adds extra GRUB menu items for each kernel. These let you boot into a minimal recovery mode with troubleshooting tools.
Change GRUB Background Image and Font
Customize the GRUB menu by setting a background image and font. To do that, take the following steps:
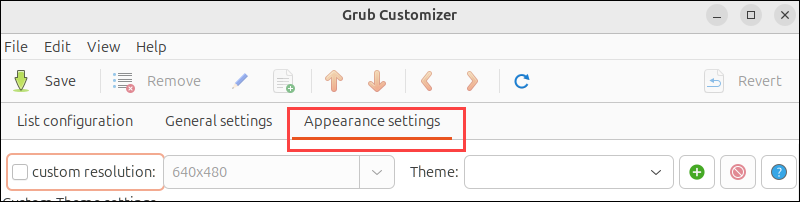
1. Open the Appearance settings tab in GRUB Customizer.
2. Locate Custom Theme Settings on the left panel.
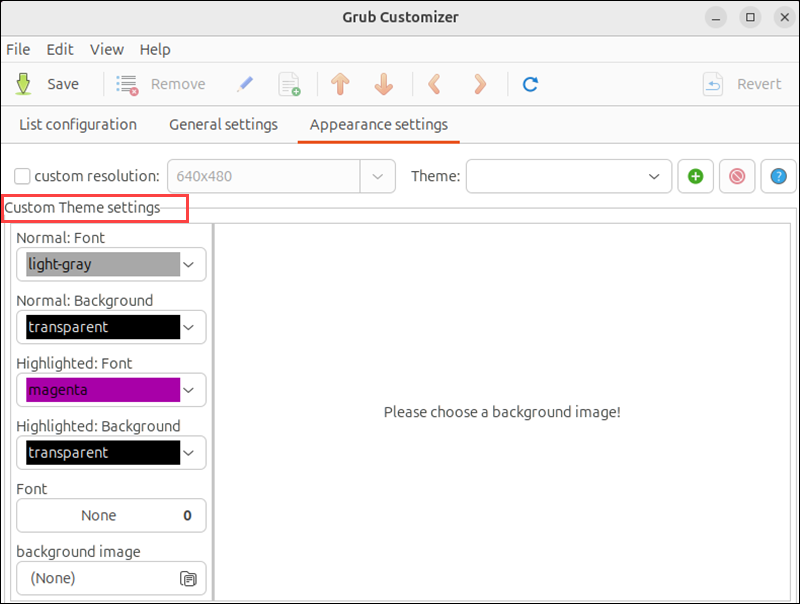
3. Choose font colors that suit your preferences. You can change the following colors:
- Normal: Font
- Normal: Background
- Highlighted: Font
- Highligted: Background

4. Change font type and size by clicking on the Font drop-down list.
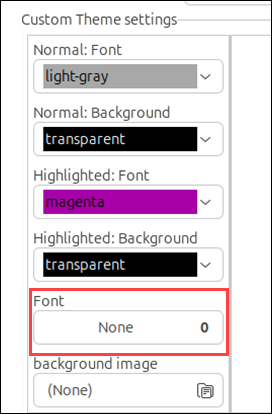
The pop-up window offers several different font styles, and the slider at the bottom lets you set the text size.

5. Click the Select button at the top once done.
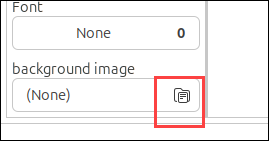
6. Go to the Background image section at the bottom.
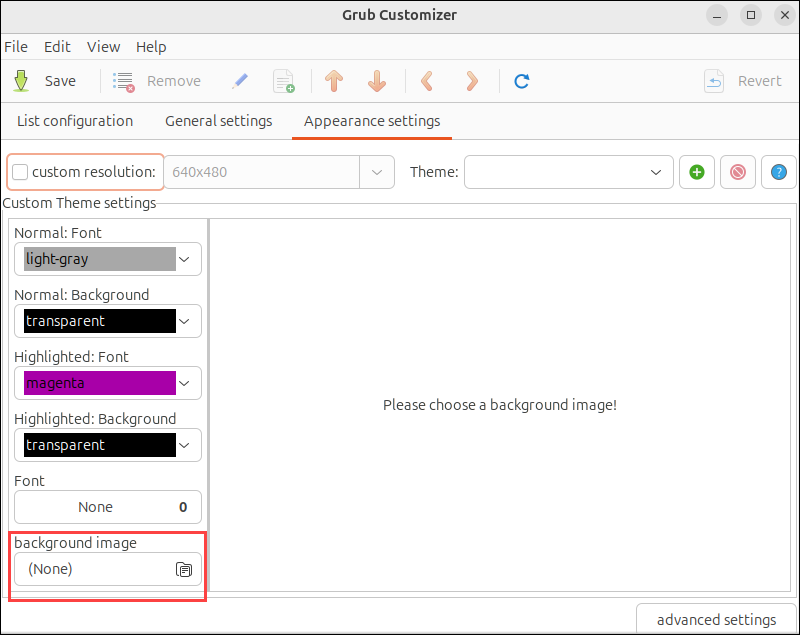
7. Click the field to browse and find an image from your system. Supported formats include PNG, TGA, and JPG.
8. Click Save to apply the change.
9. Reboot to see the new background.
Uninstall GRUB Customizer
If you no longer need GRUB or want to remove the PPA to keep your system clean, uninstall GRUB Customizer. Removing ensures there are no leftover files or sources that affect future updates.
Take the following steps to uninstall GRUB:
1. Remove the GRUB Customizer package:
sudo apt purge grub-customizer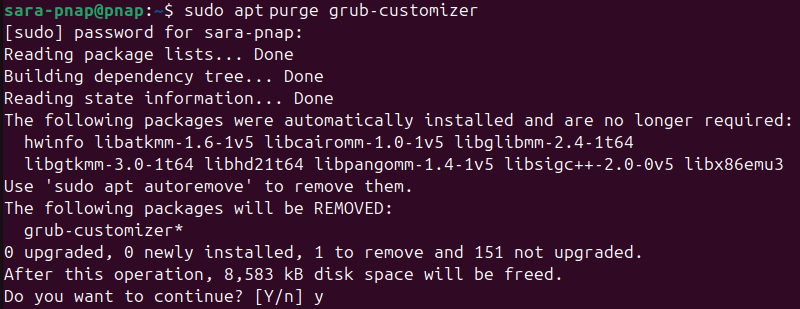
2. Clear residual dependencies:
sudo apt autoremove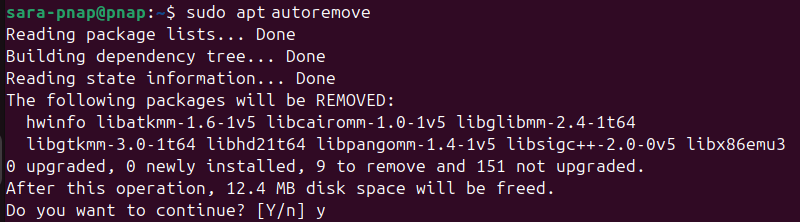
3. Remove the GRUB Customizer PPA:
sudo add-apt-repository --remove ppa:danielrichter2007/grub-customizer 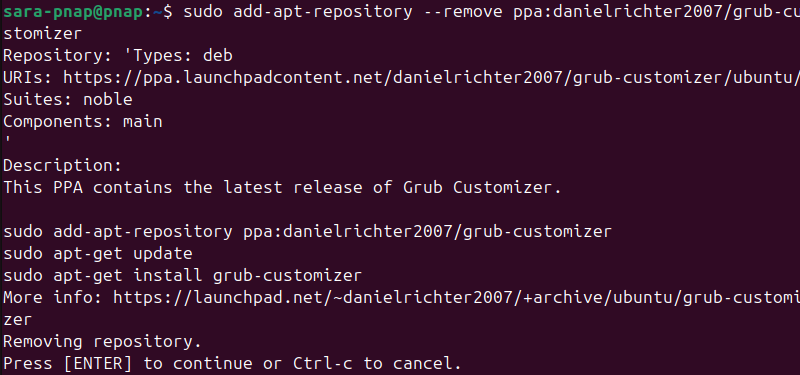
4. Update the system repository:
sudo apt update5. Regenerate the GRUB configuration (optional but recommended):
sudo update-grub 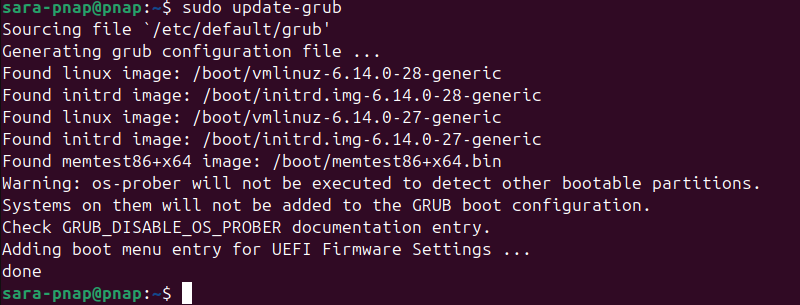
This step ensures GRUB remains properly configured and any changes GRUB Customizer made are correctly reflected in the system's bootloader.
Conclusion
This tutorial explained what Grub Customizer is and its purpose. It also elaborated on how to install and use this tool on Ubuntu. Moreover, the article presented steps for uninstalling GRUB Customizer from this Linux distribution.
Next, learn how to fix Linux boot failure using GRUB Rescue commands.