The Linux kernel is the foundation of the Linux operating system and plays a crucial role in its performance. Linux developers continually enhance the kernel through patches and updates, improving security, functionality, and speed.
Staying current with these developments is vital to ensure the machine operates optimally.
This article will show you how to update the Linux kernel in Ubuntu using three different methods.

Prerequisites
- A Ubuntu system.
- Access to the terminal.
- A user account with sudo privileges.
Method 1: Use System Update Process
The system update process is a straightforward way to update all packages, including the Linux kernel, to the latest available versions.
Before starting, check the current kernel version with the uname command:
uname -r
The output consists of:
- 6.11.0. The kernel version number.
- 37. The kernel's specific release or build number.
- generic. The kernel flavor. Generic is a common choice for regular desktop and server systems.
Step 1: Update System Packages
Use sudo apt update to update the local package index. The command retrieves information about the latest available package versions from the repositories configured on the system:
sudo apt update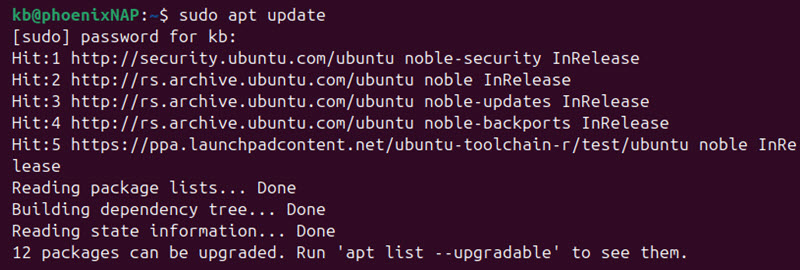
If there's a newer kernel version, the command finds it and marks it for download and installation. However, the command does not install or upgrade any packages.
Step 2: Run the upgrade
To upgrade the installed packages to the latest versions available in the repositories, including the kernel, run:
sudo apt upgrade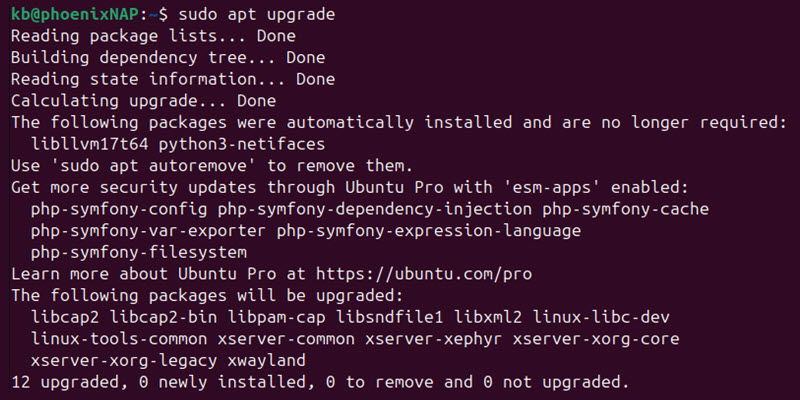
This command installs the latest Linux kernel version, if available. Verify with uname -r:
uname -rIf the output doesn't change, the kernel is already up to date.
Note: If, apart from updating the kernel verion, you're also upgrading to a new Ubuntu release (e.g., moving from Ubuntu 20.04 to 22.04 or 24.04), use sudo apt-get dist-upgrade. This command handles dependency changes and manages major system upgrades. You can also check out our step-by-step tutorial for upgrading from older Ubuntu versions to Ubuntu 26.04.
Method 2: Force Ubuntu Kernel Update with System Update Process
Sometimes, a newer kernel is released but not tested with your Ubuntu version. For instance, if you use Ubuntu 24.04 and know that Ubuntu 24.10 has a newer kernel version available.
This method allows upgrading the kernel, but the process requires more work, including backing up important files.
Step 1: Use Software Updater
After backing up important files, follow these steps:
1. Search for the Software Updater app. Press the super key (the Windows key on most keyboards) and enter the name in the search bar.

2. Launch the Software Updater.
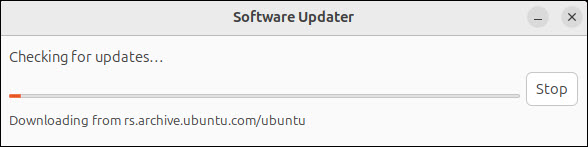
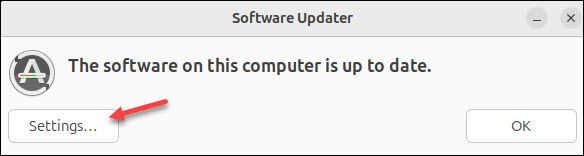
The app immediately checks for updates.
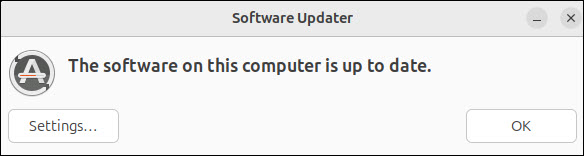
3. Confirm if no updates are needed or if you must perform necessary updates. In our case, the system is up to date.
4. Click the Settings button and proceed to step 2 below.
A new window appears for configuring software and updates.
Step 2: Configure Software Updater
Follow these steps to configure software and update settings:
1. Navigate to the Updates tab.
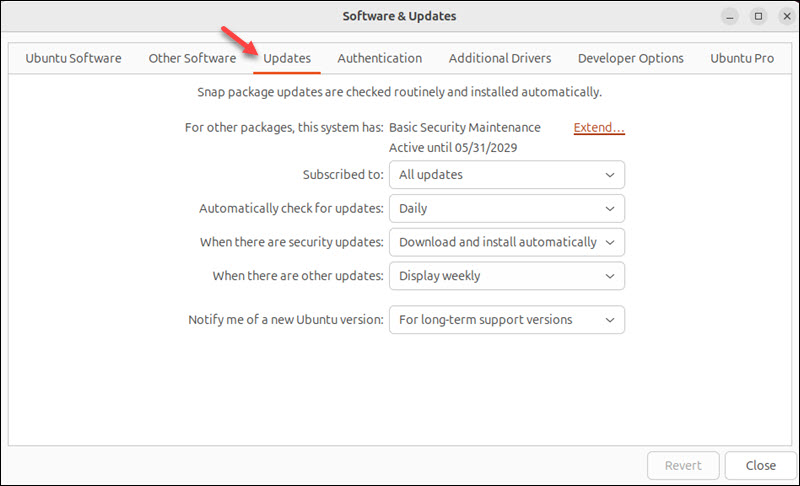
Note: Starting with Ubuntu 26.04, the Software & Updates app is no longer installed by default on some desktop editions. Canonical is gradually moving more system configuration and software source management into the App Center.
To install the classic Software & Updates application manually, run:
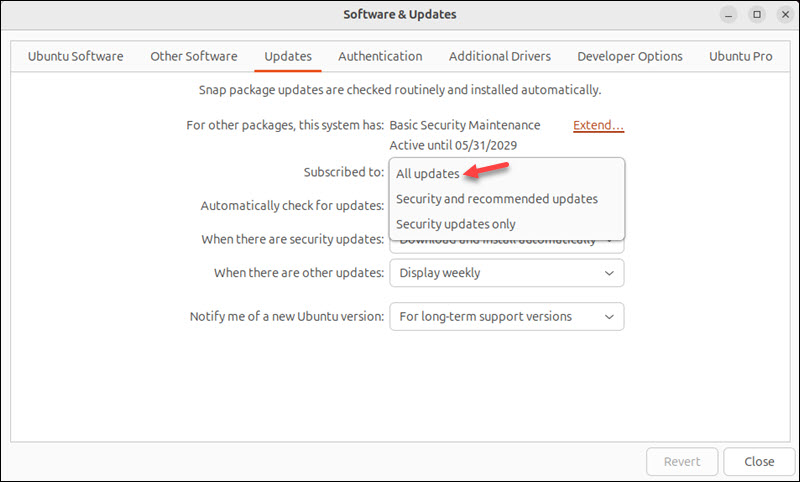
sudo apt install software-properties-gtk2. Open the Subscribed to drop-down menu and choose All updates.
3. At the bottom of the tab, look for a drop-down menu Notify me of a new Ubuntu version. Choose one of these options:
- For long-term support versions. When stability is critical, and you prefer a more predictable and thoroughly tested environment.
- For any new version. If you are comfortable with occasional changes, enjoy trying out new features, and tolerate potential issues.
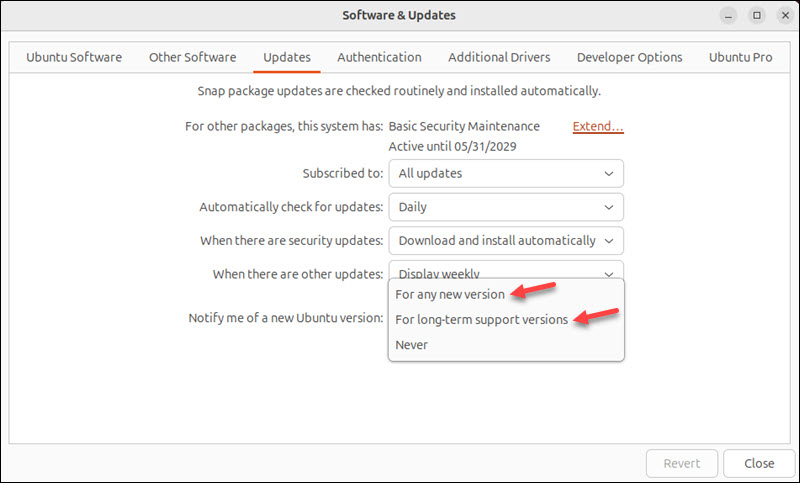
Avoid selecting Never.
5. Click Close, then reopen the window. If the system has updates, the app offers the option to upgrade to the newest version.
Step 3: Force the Upgrade
If the system does not offer an upgrade, force it with:
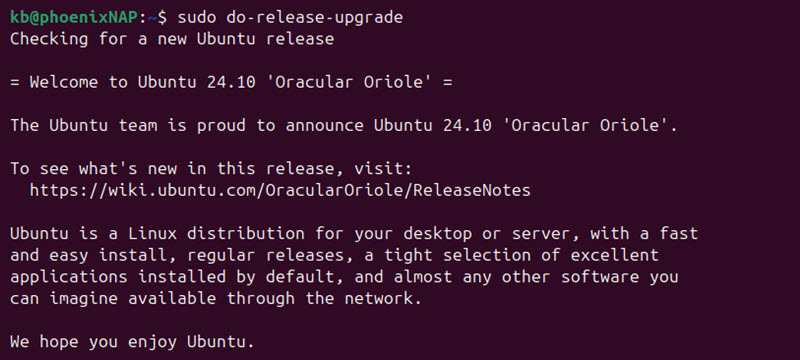
sudo do-release-upgrade
Note: The sudo do-release-upgrade command sometimes prints ERROR: failed to read '/etc/update-manager/release-upgrades', or it will not upgrade to a non-LTS development release. To fix this, access /etc/update-manager/release-upgrades in your text editor of choice and replace the line Prompt=lts with Prompt=normal.
If an update is available, the system displays release notes for the new kernel and Ubuntu versions. In the example below, the terminal shows details about the new Ubuntu version, Ubuntu 24.10 Oracular Oriole.
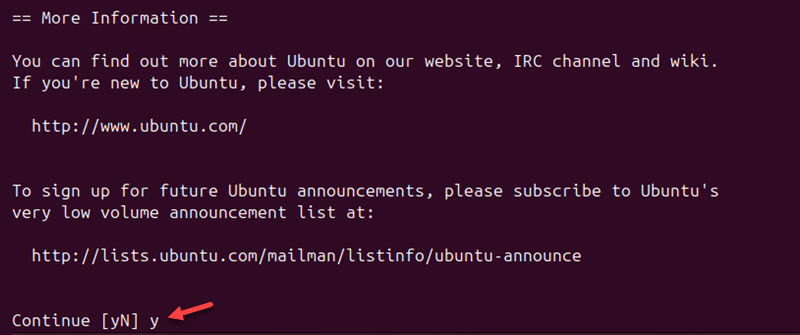
To upgrade, scroll down to the bottom and choose y to get the latest Ubuntu and kernel versions.
Method 3: Manually Update the Kernel (Advanced Procedure)
To upgrade to the latest (untested) kernel and accept the risks, there's another procedure for selecting and installing a new kernel using the Mainline tool.
This user-friendly tool simplifies updating the Linux kernel, but it does not come preinstalled on most Linux systems. Follow the steps below to install Mainline and update the kernel.
Step 1: Install and Launch Mainline
If you do not have Mainline on your system, follow the steps below to install it:
1. Add the PPA maintained by cappelikan to the list of software sources or repositories with:
sudo add-apt-repository ppa:cappelikan/ppa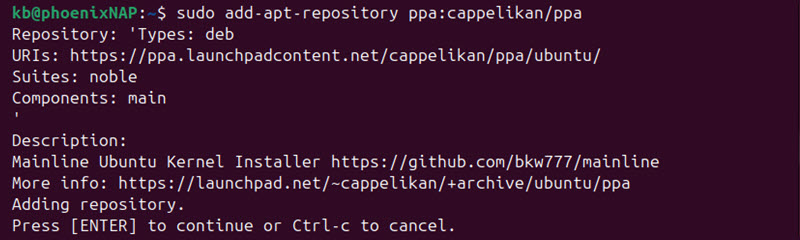
This PPA contains the Mainline Kernel Installer. Adding this PPA makes the Mainline software available for installation on the Ubuntu system. Press Enter to continue.
2. Refresh the APT repository database with:
sudo apt update3. Install Mainline with:
sudo apt install mainline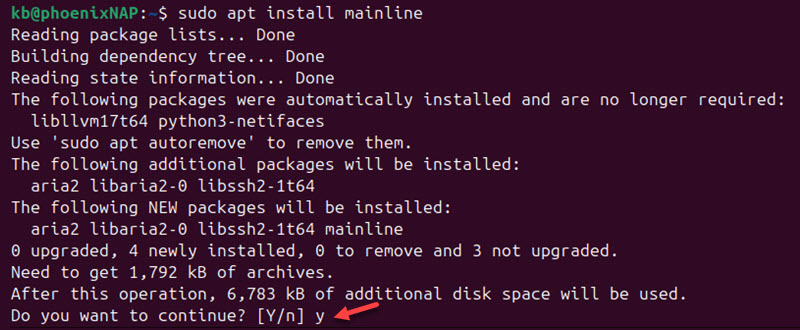
Press y to confirm the installation and wait for it to complete.
4. Open the applications menu and search for Mainline.

The Mainline Kernel interface launches and displays available Linux kernel versions.
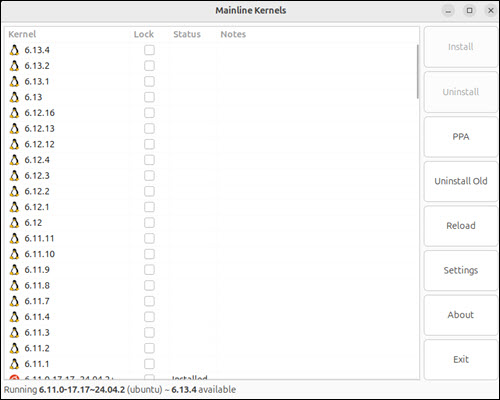
Step 2: Install Kernel
To get a specific kernel, find it on the list and select it. Next, click the Install button on the right-hand side.
Once the kernel finishes installing, reboot the system.
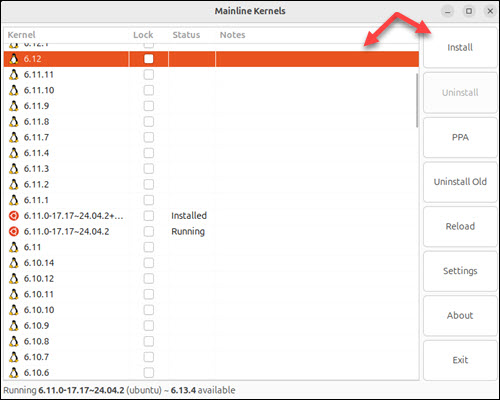
Step 3: Uninstalling Kernel
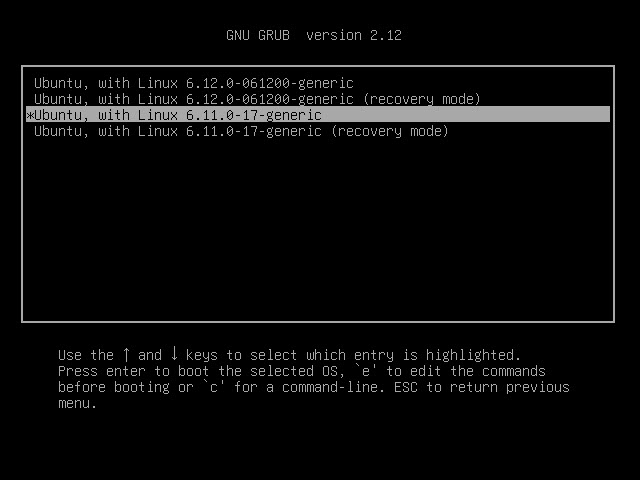
If there's a problem with the kernel, select the previous kernel version from the boot screen to revert the process:
1. Reboot the system and hold the Shift or Esc key, depending on the Linux distribution.
2. Select Advanced options for Ubuntu.
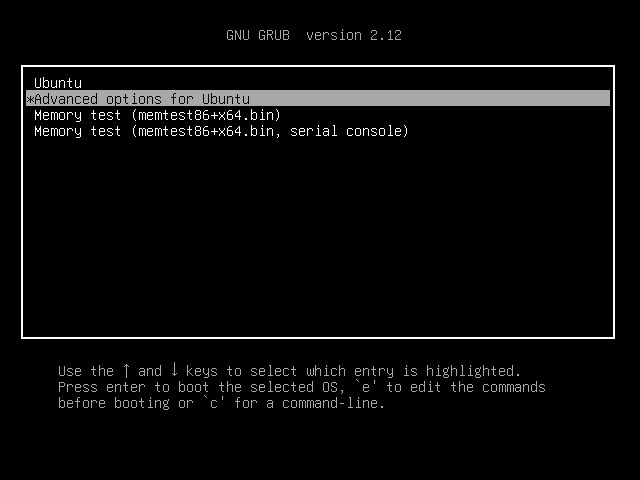
3. Choose the previous kernel (identified by the version number).
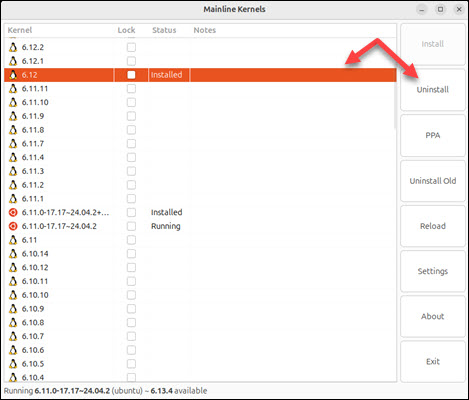
Another way is to use Mainline to remove old kernels on Ubuntu. To do that, click the previously installed (or any older) kernel version and choose Uninstall on the right-hand side.
Conclusion
This guide showed how to update the Linux kernel using several different methods. We also showed how to remove an older kernel version.
Next, learn how to build a Linux kernel from scratch.