Pip is a package management system for installing and managing Python software packages. It stands for Pip Installs Packages. Pip allows you to install libraries and tools from the Python Package Index (PyPI) or other repositories.
In this article, learn how to install and manage Pip on Ubuntu.

Prerequisites
- An Ubuntu system.
- Access to a user account with sudo privileges.
- Access to the terminal.
Note: If you are using Python in a virtual environment created with pyvenv or virtualenv, then Pip is available regardless of the version of Python in use. This also applies to Python 2.7.9 or newer (Python series 2) and Python 3.4 or later (Python series 3).
Install Pip for Python 3
Ubuntu comes with Python 3 installed by default, but it does not come with Pip. To install Pip for Python 3 on Ubuntu, take the following steps:
1. Update the repository package list with:
sudo apt update
2. Install Pip for Python 3 and all the dependencies for building Python modules by running the following command:
sudo apt install python3-pip
3. To verify the installation, use this command:
pip3 --version
4. To upgrade pip3 to the latest version, add --upgrade to the command just like for any other PyPI package:
sudo pip3 install --upgrade pip
Pip Commands
Pip commands are essential tools for managing Python packages. They allow users to install, upgrade, and uninstall software libraries with ease. The table below covers the most essential Pip commands.
| Command | Description |
|---|---|
pip3 install --upgrade | Upgrades a software package to the latest version. |
pip list | Lists installed packages |
pip list --outdated | Lists outdated packages and shows the latest versions available. |
pip3 search [Search_Term] | Searches for a particular package. |
pip3 install [Package_Name] | Installs the latest version of a software package. |
pip3 uninstall [Package_Name] | Removes a Python package. |
pip3 show [Package_Name] | Prints additional package details. |
pip download [Package_Name] | Downloads a package without installing it. |
Set up Python Virtual Environments (Optional)
Setting up Python virtual environments lets you create isolated spaces for different projects, ensuring each project has its own dependencies and Python version.
Follow these steps to set up Python virtual environments:
1. Install the python-venv module. This module is required to create a Python virtual environment. python-venv allows you to create a directory containing its own Python installation and libraries, separate from the global Python environment.
Run the following command to install it:
sudo apt install python3-venv
2. Use the cd command to change the directory to a location where you want to store your virtual environment. For example:
cd /users/sara/python
3. Enter the following command to create a virtual environment in that path:
python3 -m venv my_test_environmentThe command has no output.
Replace my_test_environment with your project name. This environment includes Python, Pip, the Python library, and supporting files.
4. Activate the virtual environment with the following command:
source my_test_environment/bin/activate
The command line changes to indicate that you are within the new Python virtual environment.
5. Use Pip to install a module only within this environment. The syntax is:
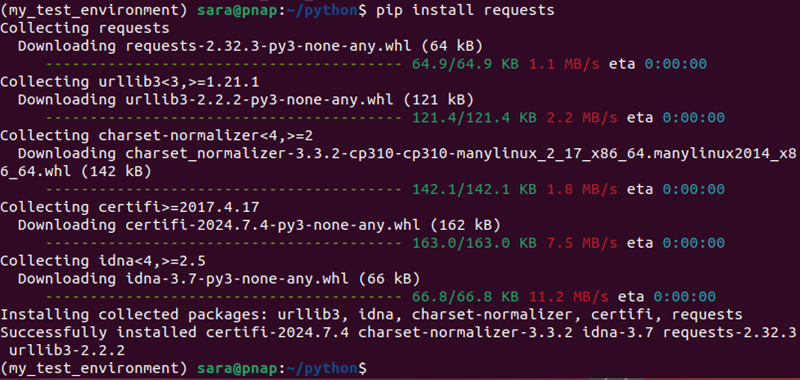
pip install module_nameFor example, run:
pip install requests
Conclusion
This guide explained how to install Pip on Ubuntu for Python 3. It also elaborated on how to create and set up Python virtual environments.
Next, learn how to install NumPy, a library for the Python programming language that adds support for large, multi-dimensional arrays and matrices.


