Public key authentication is a secure method for SSH login. Instead of a password, it uses a cryptographic key pair to authenticate users.
A strong password can help prevent brute-force attacks, but public key authentication provides robust cryptographic security and supports automated, passwordless logins.
Learn how to implement and configure public key authentication from scratch.
Prerequisites
- Access to the command line or terminal window.
- Access to the local and remote servers.
- Sudo or root privileges on the local and remote servers.
- SSH enabled on the remote server.
Note: Use the following guides if you need to enable SSH on Ubuntu or Debian.
How to Use Public Key Authentication with SSH
SSH public key authentication is a four-step process:
1. Generate a private and public key, known as the key pair. The private key must be stored securely on the local machine.
2. Copy the corresponding public key to the remote server to enable key-based authentication.
3. The remote server stores the public key in the authorized_keys file and marks it as authorized.
4. Access the remote server by proving ownership of the corresponding private key during login.
Follow the sections below for the breakdown of every step in this process.
Step 1: Generate SSH Key Pair
Generate an SSH key pair on the local machine using an SSH client such as OpenSSH or PuTTY. For more detailed and OS-specific tutorials, check out our in-depth guides:
- How to Generate SSH Keys on Ubuntu
- How to Generate & Set Up SSH Keys on Debian
- How to Generate SSH Key in Windows 10 or 11
The basic instructions for Linux, macOS, and Windows are outlined below.
Linux and macOS
To generate a key pair in Linux and macOS:
1. Open the terminal and use the following command to check for existing keys:
ls -l ~/.ssh/id*If a key pair already exists, the output displays the contents of the .ssh directory.

If there are no existing keys, the output indicates the directory does not exist.

Note: Generating new keys overwrites existing ones unless you specify a new file name during the setup.
2. Use the mkdir command to create the .ssh directory and set the correct permissions (700):
mkdir -p ~/.ssh && chmod 700 ~/.ssh3. Generate the SSH key pair:
ssh-keygenThe output message confirms the key pair is being generated.
4. The default directory and filename for the private key is /home/[username]/.ssh/id_rsa. Press Enter to use the default path or enter a new filename to avoid overwriting existing keys.

5. Enter a passphrase to encrypt the private key and add an extra security layer. Press Enter and re-enter the passphrase when prompted. The passphrase is now required when you use the private key for authentication.

Note: A passphrase is sufficient for most user-based scenarios. If you need to automate key-based authentication, consider using key management tools like Ansible, Puppet, or SaltStack to manage SSH keys across systems efficiently.
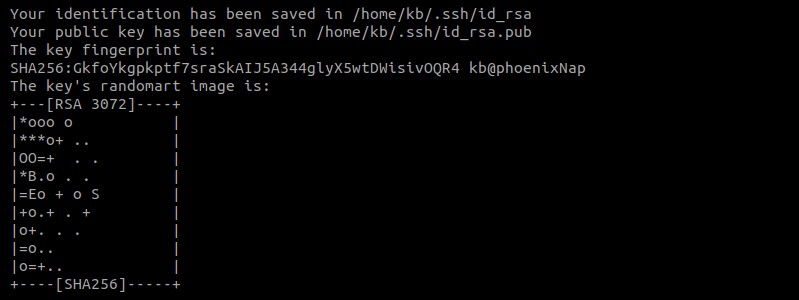
6. The system informs you where the newly generated keys are stored and provides a digital and graphical representation.
7. Verify the keys by checking the contents of the .ssh directory:
ls -l ~/.ssh/
The directory contains two files: the private key (id_rsa) and the public key (id_rsa.pub).
Windows
To generate a key pair in Windows:
1. Type cmd in the Windows search box and press Enter to open the Command Prompt.
2. Enter the following command to generate the key pair:
ssh-keygen The default path for storing SSH keys in Windows is C:\Users\<username>\.ssh\. If you want to store keys in another location, type in the custom path when prompted. Otherwise, press Enter to save the keys in the default path.

If keys already exist in this location, confirm the overwrite. Type Y to confirm and press Enter to continue the setup.
3. Enter and confirm a passphrase to encrypt the private key.
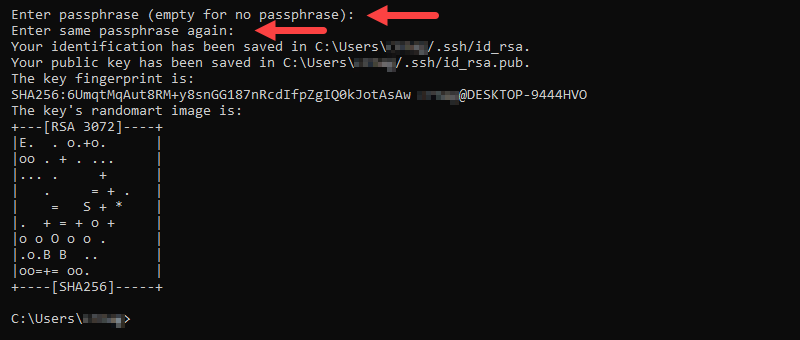
The passphrase is required whenever you use this key for authentication.
Step 2: Add Public Key to User
To configure the remote server for SSH and SFTP users:
1. Access the remote server and create the .ssh directory with the correct permissions (700):
ssh [username]@[hostname_or_ip] "mkdir -p ~/.ssh && chmod 700 ~/.ssh"2. Use the touch command to create the authorized_keys file in the .ssh directory and set its permissions to 600:
touch ~/.ssh/authorized_keys && chmod 600 ~/.ssh/authorized_keys3. On Linux, you can use the following command to copy the public key directly to the remote server:
ssh-copy-id [username]@[hostname_or_ip]Note: For other operating systems, open the authorized_keys file using a text editor and paste the public key contents into the file. For multiple users and keys, add each new key in a new line. Save the changes and close the file.

The output shows the number of keys automatically copied to the server, along with further instructions.
Step 3: Log In
Log in to the remote server from the local machine using the following command:
ssh [username]@[hostname_or_ip]Note: If you do not specify a username, SSH uses the currently logged in user.
If you set a passphrase in the previous step, the system prompts you to enter it to unlock the private key.
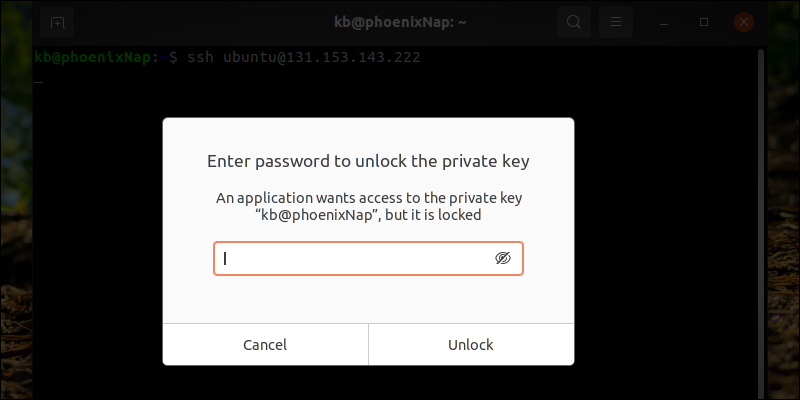
Once verified, you are logged into the remote server via SSH.

Step 4: Disable Password Authentication (Optional)
If the SSH key-based authentication works, you can disable server password authentication to protect the remote server from brute-force attacks.
The following steps explain how to set up passwordless SSH logins:
1. Log in to the remote server.
2. Open the sshd_config file with a text editor:
sudo nano /etc/ssh/sshd_config3. Locate the PasswordAuthentication yes line and change it to PasswordAuthentication no. Uncomment the line by removing the hashtag (#).
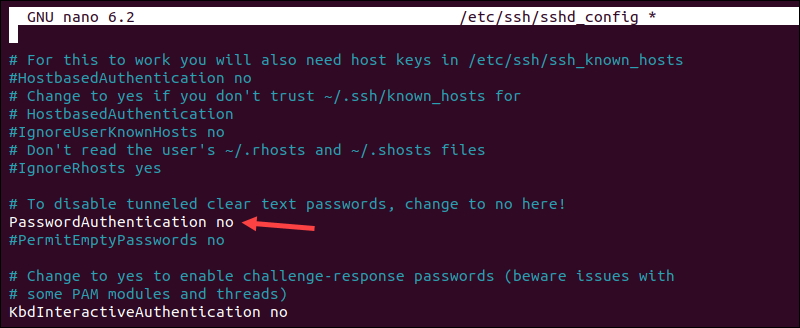
4. Save the changes and exit the text editor.
5. Restart the SSH service to apply the changes:
sudo systemctl restart sshdThe SSH daemon now ignores authentication requests that do not include private/public key pairs.
Why Use Public Key Authentication with SSH?
Public key authentication is a safer and recommended way to connect via SSH compared to regular password-based logins.
Key benefits include:
- Robust security. The SSH key pair is harder to hack. A 1024-bit key is roughly equivalent to a 12-character password, but modern best practices recommend using 2048-bit or 4096-bit keys for enhanced protection.
- Hard to predict. SSH keys are generated using computer algorithms based on randomness, making them difficult to guess or predict.
- Small attack surface. Only the machine that stores the private key can establish a connection, which reduces exposure to attacks.
- The private key is private. Public key authentication never transmits the private key to the server. Even if the remote server is compromised, the attacker cannot access the private key stored on the local machine.
- Multi-factor authentication. Adding a passphrase to the private key provides an additional layer of security, requiring users to enter both the key and the passphrase to authenticate.
- Automation. Public key authentication enables passwordless, automated logins for applications, scripts, and other processes, like backups and deployments.
Conclusion
You have successfully set up public key authentication for SSH. Whether accessing a remote server via SSH or using SFTP to transfer files, the key pair enhances security.
Secure your SSH connection further by applying Linux SSH Security Best Practices.
