Puppet is an open-source configuration management tool used to perform administrative tasks and server management remotely. It automates infrastructure provisioning, ensures system consistency, reduces manual effort, and improves deployment efficiency across multiple servers.
The official Puppet Server packages are designed to support Linux distributions exclusively.
In this tutorial, you will learn to install Puppet on Ubuntu on master and client nodes.

Prerequisites
- Two systems running Ubuntu (one for the master node and one or more for client nodes).
- A user account with root privileges.
- Java installed (preferably Java 17).
How to Install Puppet on Ubuntu
The Puppet installation process for all Ubuntu versions is the same. This tutorial uses Ubuntu 24.04, the latest LTS version, but it also works with previous OS versions.
Note: Ubuntu 20.04 LTS (Focal Fossa) will reach its end of life (EOL) on April 2025 for standard support. After this date, it will no longer receive security updates, bug fixes, or official support unless enrolled in Ubuntu Pro for extended maintenance. Users are encouraged to upgrade to a supported version to maintain system security and stability.
Follow the steps below to install Puppet on Ubuntu.
Step 1: Set up Hostname Resolution
Before starting the Puppet installation, set a unique hostname on each node. With Puppet, master and client nodes communicate using hostnames. Follow the steps below:
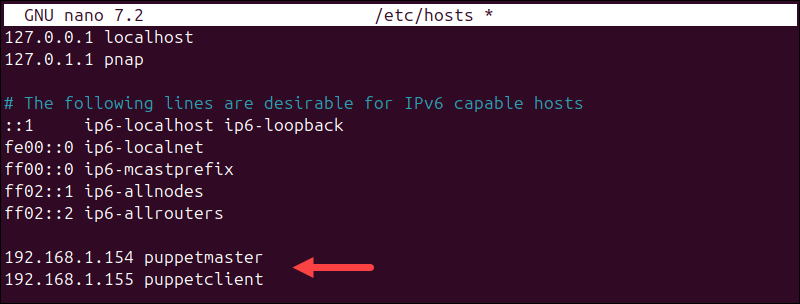
1. Open the hosts file on each node via a text editor. For example, use nano:
sudo nano /etc/hosts2. Paste the following lines at the end of each hosts file on both machines:
[puppet client ip] puppetclient
[puppet master IP] puppetmaster
Replace [puppet client ip] with the client node IP address. Replace [puppet master ip] with the master node IP address.
For example:
To ensure you entered the right IP addresses, check them with the ifconfig command:
inconfig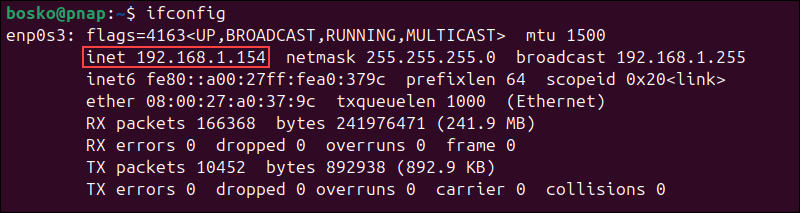
3. Save and exit the file on both machines.
Step 2: Install Puppet Server (Master Node)
The master node, also known as the Puppet Server, manages configuration policies and distributes them to client nodes (agents). It compiles manifests into catalogs that define the desired system state and ensure agents apply the correct configurations.
Follow the steps below to install Puppet Server:
1. Update the package repository index:
sudo apt update2. Install the Puppet server with the following command:
sudo apt install puppet-master -yWait for the process to complete.
3. Check the program version to verify it is installed correctly:
puppet --version
4. Next, open the puppetserver file in a text editor:
sudo nano /etc/default/puppetserver5. Modify the Xms and Xmx values in the following line to change the memory settings to 1GB:
JAVA_ARGS="-Xms1g -Xmx1g -Djruby.logger.class=com.puppetlabs.jruby_utils.jruby.Slf4jLogger"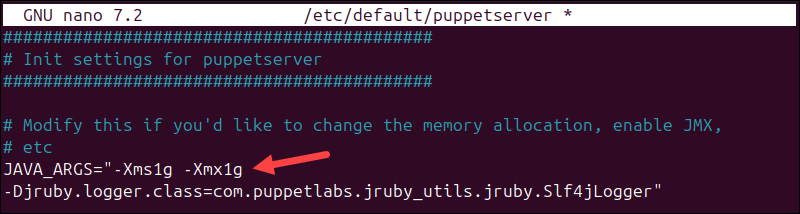
6. Save and exit the file.
7. Start the Puppet service.
sudo systemctl start puppetserver8. Enable the Puppet service to start on boot with:
sudo systemctl enable puppetserver9. Check if the Puppet service is running with:
sudo systemctl status puppetserver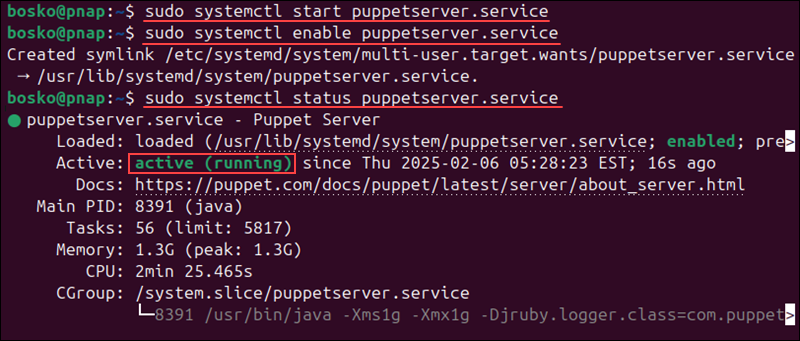
The output should state that the service is active (running).
Step 3: Install and Configure Puppet Agent (Client Node)
The client node, or Puppet Agent, is a machine that retrieves configurations from the Puppet Server and applies them to maintain the desired system state.
Follow the steps below to install and configure the Puppet agent:
1. Update the package repository index:
sudo apt update2. Install the Puppet agent with:
sudo apt install puppet-agent -y3. Open the Puppet configuration file:
sudo nano /etc/puppet/puppet.conf4. Add the following lines to the end of the Puppet configuration file to define the Puppet master information:
[main]
certname = puppetclient
server = puppetmaster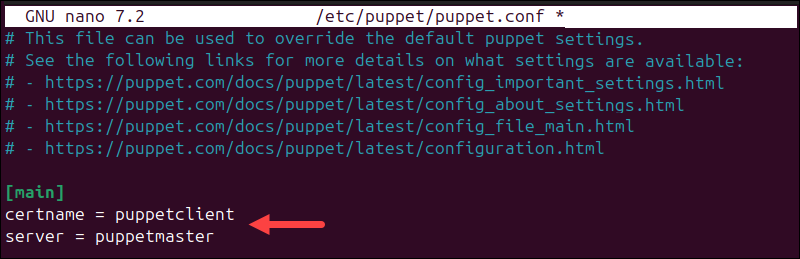
5. Save and exit the file.
6. Start the Puppet service with the following command :
sudo systemctl start puppet7. Set Puppet to launch on system boot:
sudo systemctl enable puppet8. Check if the Puppet service is running with:
sudo systemctl status puppet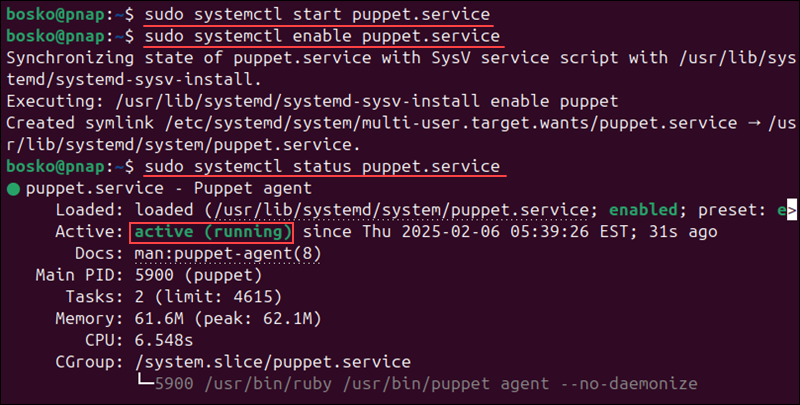
The output should show active (running).
Step 4: Sign Puppet Agent Certificate
Sign the Puppet Agent certificate to establish a secure connection between the Puppet Agent and the Puppet Master, ensuring trusted communication. It also verifies the agent's identity with the master, preventing unauthorized nodes from connecting.
Using the Puppet master node:
1. List all the available certificates:
sudo /usr/bin/puppetserver ca list --all
2. Sign the certificates with:
sudo /usr/bin/puppetserver ca sign --allThe command either has no output or confirms the certificate is successfully signed.
Troubleshooting a Puppet Installation
Following the steps above generally results in a successful installation. However, users sometimes encounter issues during installation.
The sections below describe the two most common Puppet installation issues and their solutions.
Issue 1: DNS Misconfiguration
When installing Puppet, a common issue is misconfigured DNS. Correct DNS configuration is crucial for a successful installation.
Solution
Ensure DNS is configured correctly for the installation to fix this issue. Use tools such as nslookup or dig to verify DNS resolution.
Confirm the agent can reach the primary server using the designated hostname. To validate this, perform a network test from the agent machine.
Issue 2: Security Settings Misconfiguration
Another potential problem during Puppet installation is misconfigured security settings, including firewall configurations.
Solution
Ensure the firewall settings are correctly configured to allow Puppet-related traffic. Verify that the primary server allows inbound traffic on ports 8140 and 443, which are crucial for Puppet communication.
If the primary server has multiple network interfaces, ensure it allows traffic via the IP address corresponding to the valid DNS names. Avoid restricting traffic to internal interfaces only.
Conclusion
After following this tutorial, you have fully set up Puppet master and client nodes on Ubuntu. This configuration management tool automates server infrastructure management and configuration.
Next, learn how Puppet compares to Terraform or how to install Ansible on Ubuntu, a configuration management tool that uses SSH and YAML playbooks.