Ansible is an agentless Infrastructure as Code tool that allows you to control and monitor multiple servers from a central location. Its key advantage over similar platforms is that it uses SSH and YAML configuration files and does not require additional specialized software to manage hosts.
This tutorial explains how to install and configure Ansible on Ubuntu.

Prerequisites
- Ubuntu installed.
- SSH enabled on the control node and hosts.
- Command-line access.
- A user with administrative privileges.
How Do I Install Ansible on Ubuntu?
Installing Ansible on Ubuntu requires setting up an Ansible control node and connecting it to one or more Ansible hosts.
Step 1: Configure Ansible Control Node
The Ansible control node is a system used to connect to and manage Ansible host servers. To set up the control node on the main server:
1. Create an administrator-level user for the control node. Use the adduser command:
sudo adduser [username]2. When prompted, define a strong account password.

Optionally, provide more details about the user by answering questions. Press Enter to skip a question.
3. Use the following usermod command to assign superuser privileges to the account:
sudo usermod -aG sudo [username]Membership in the sudo group allows the user to run sudo to perform administrative tasks.
4. Switch to the newly created user on the control node:
sudo su [username]Note: The Ansible control node can be a dedicated server, a local machine, or a virtual machine running Ubuntu.
Step 2: Set up an SSH Key pair
The Ansible control node uses SSH to connect to hosts. Generate an SSH key pair for the Ansible user by executing the following steps:
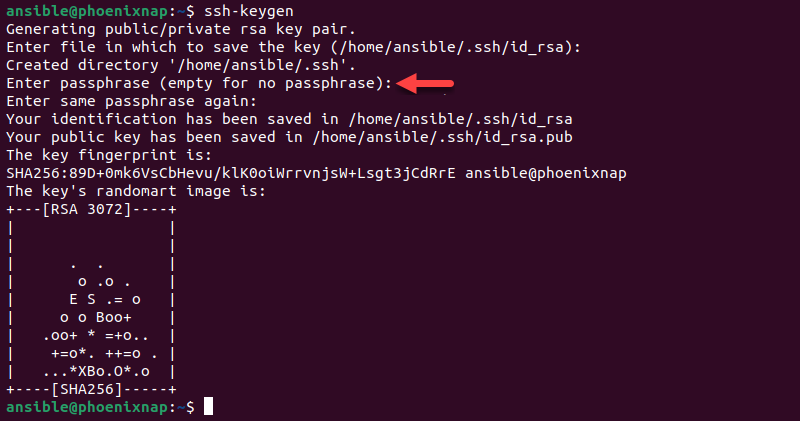
1. Enter the command below using the Ansible control node command line:
ssh-keygenNote: If an SSH key pair with the same name already exists, SSH displays a warning asking the user to decide whether to overwrite it. Overwriting makes the previous SSH key pair unusable, so ensure the old keys are no longer needed before confirming.
2. When prompted, provide a passphrase. While adding a strong passphrase is recommended, pressing Enter lets the user skip passphrase creation.
The system generates the public/private key pair and prints the randomart image.
Step 3: Configure an Ansible Host
Ansible hosts are remote servers managed by the Ansible control node. Each host must have the control node's SSH public key in its authorized_keys directory. Apply the steps below for each new Ansible host:
1. Use the following ssh-copy-id command on the control node to copy the public key to a host:
ssh-copy-id [username]@[remote-host]Replace [username] with an existing administrative user on the host system and [remote-host] with the remote host domain or IP address. For example, to copy the key to the user ansible on the host with the local IP address 192.168.0.81, type:
ssh-copy-id ansible@192.168.0.812. Type yes and hit Enter when asked whether to continue connecting to an authenticated host.
3. Enter the remote host account password.
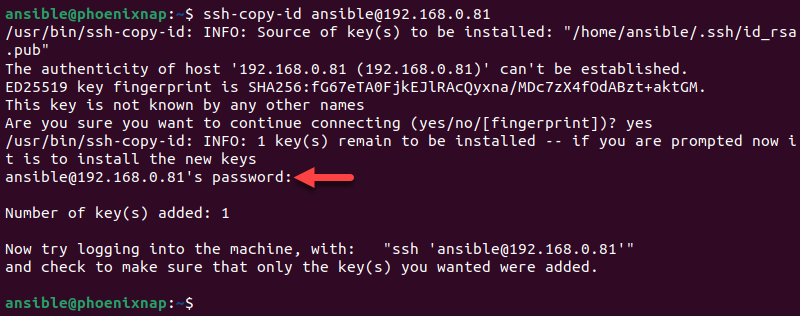
The utility uploads the public key to the remote host account.
Step 4: Install Ansible
Use the APT package manager to install the Ansible package on the control node system:
1. Ensure the package index is up to date:
sudo apt update2. Install Ansible on Ubuntu with the following command:
sudo apt install ansible -yStep 5: Verify the Installation
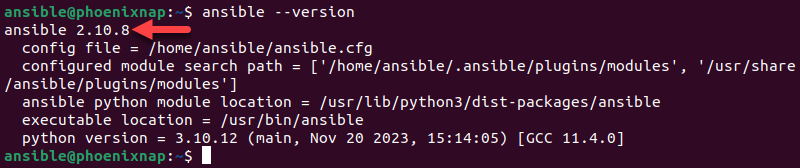
Check that Ansible was successfully installed on your Ubuntu system using the ansible command:
ansible --versionThe output displays the Ansible version number, the configuration file location, the executable path, and other information.
Step 6: Set up the Inventory File
Once Ansible is installed on the control node, create an inventory file to allow Ansible to communicate with remote hosts. The inventory file contains all the information about the remote hosts managed through the Ansible control node.
Note: For an in-depth overview of creating files on remote hosts, refer to our article How to Create a File in Ansible.
Follow the steps below to create an inventory file on the control node:
1. If it doesn't already exist, create the ansible subdirectory in the etc directory:
sudo mkdir -p /etc/ansible2. Use a text editor such as Nano to create a file named hosts:
sudo nano /etc/ansible/hosts3. Add remote hosts that the control node will manage. Use the following format:
[category]
[server-ip-or-hostname]
The [category] line allows you to create custom categories to organize available hosts. The following example adds a remote host using its local IP address 192.168.0.81 and sorts it into the servers category:

4. Save the file and exit.
5. Enter the command below to check the items in the inventory:
ansible-inventory --list -yThe output lists the hosts:

Step 7: Test the Connection
To ensure the Ansible control node can connect to the remote hosts and run commands, use the following ansible command to ping the hosts from the control node:
ansible all -m pingNote: When a user connects to the remote hosts for the first time, Ansible asks for confirmation that the hosts are authentic. To confirm the authenticity, enter yes when prompted.
The output confirms the successful connection.

The Ansible control node is now configured to manage the connected remote hosts.
Note: After installing Ansible on Ubuntu, you may want to run shell commands across your managed nodes. Our Ansible shell module guide explains how to do this effectively.
Conclusion
After following the steps in this guide, you have successfully installed Ansible on Ubuntu and can execute commands and playbooks on remote hosts. The guide provided instructions for setting up the Ansible control node and connecting it with the hosts via SSH.
Get started with Ansible playbooks by reading Ansible Playbook: Create and Configure Playbooks.