The dig command in Linux is used to gather Domain Name System (DNS) information. It stands for domain information groper and helps troubleshoot DNS problems.
This guide will help you understand and use the Linux dig command with practical examples.

Prerequisites
- A system running Linux (this tutorial uses Ubuntu 22.04).
- A user account with sudo or root privileges.
- Access to the terminal.
dig Command Syntax
The dig command syntax is:
dig [server] [name] [type]The command consists of:
[server]. The hostname or IP address to which the query is directed.[name]. The DNS of the server to query.[type]. The DNS record type to retrieve. By default (or if left blank),diguses the A record type.
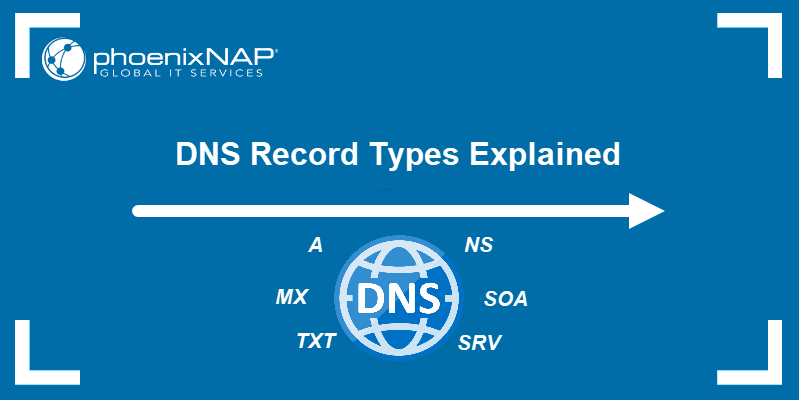
Common DNS record types are:
A. Address record that directly maps a hostname to an IP address.MX. Mail Exchange that maps message transfer agents for the domain.SIG. Signature record used in encryption protocols.
For more information, refer to our comprehensive guide to DNS record types.
dig Command Options
The dig command has plenty of different options. The dig options are presented in the table below:
| Option | Description |
|---|---|
+short | Provides a short answer to the query. |
+noall +answer | Displays only the answer section of the query. |
+stats | Displays statistics about the query. |
+trace | Traces the path from the root DNS servers to the authoritative servers for a domain. |
+nocmd | Omits the initial command line from the output. |
+nssearch | Performs an NS query for the specified domain and checks all listed name servers for consistency. |
@server | Queries the specified DNS server. |
-t type | Specifies the type of DNS record to query (e.g., A, MX). |
-p port | Uses the specified port number for the query (default is 53). |
-q name | Queries the specified domain name. |
-k filename | Specifies a TSIG key file for secure DNS queries. |
+[no]question | Controls the display of the question section of the query. |
+[no]answer | Controls the display of the answer section of the query. |
+[no]authority | Shows or hides the authority section. |
+[no]additional | Displays or hides the additional section. |
+[no]comments | Shows or hides the comments in the output. |
+[no]stats | Displays or hides the statistics. |
+[no]ttl | Controls the display of TTL values. |
+[no]recurse | Toggles recursion for the query. |
dig Command Examples
The dig command queries the DNS for information about domain names and their associated records, such as IP addresses, mail servers, and name servers. It is a valuable tool for diagnosing DNS issues and verifying DNS configurations. The following text explains the dig command basic usage.
DNS Lookup
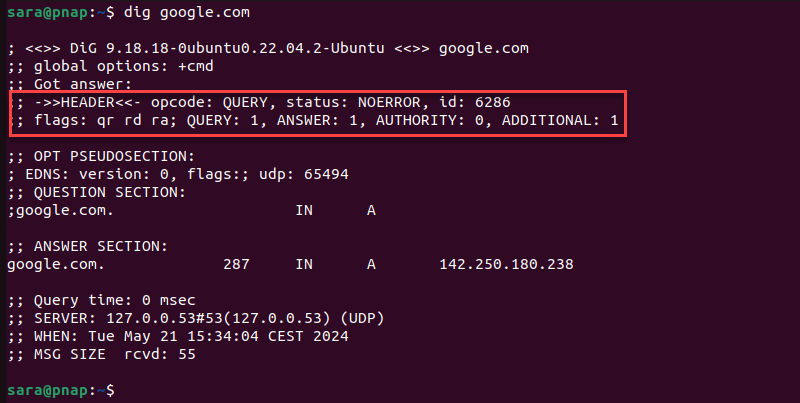
The dig command enables you to search for a domain name. For example, to perform a DNS lookup for the domain google.com, run the following command:
dig google.com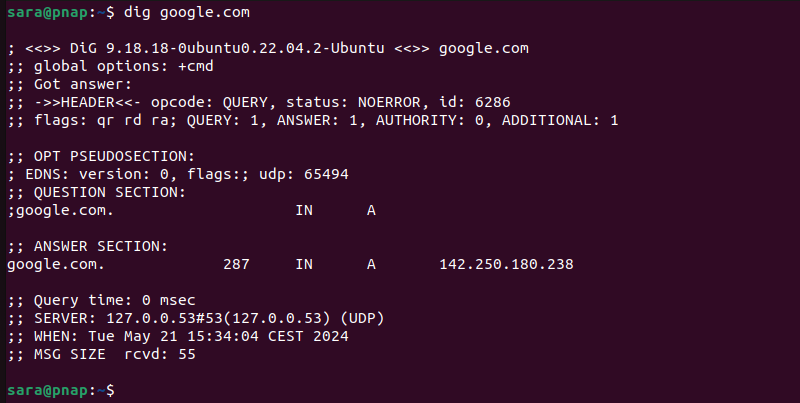
The most important section is the ANSWER SECTION:
- The first column lists the name of the server that was queried.
- The second column is the Time to Live, a set timeframe after which the record is refreshed.
- The third column shows the query class. In this case,
INstands for Internet. - The fourth column displays the query type. In this case,
Astands for an A (address) record. - The final column displays the IP address associated with the domain name.
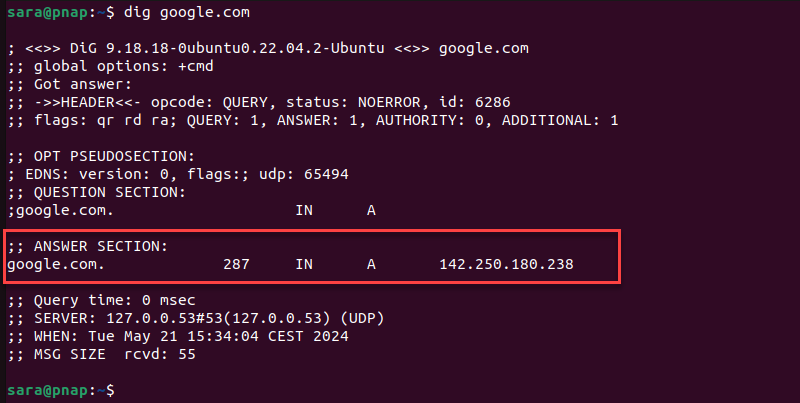
Other lines mean the following:
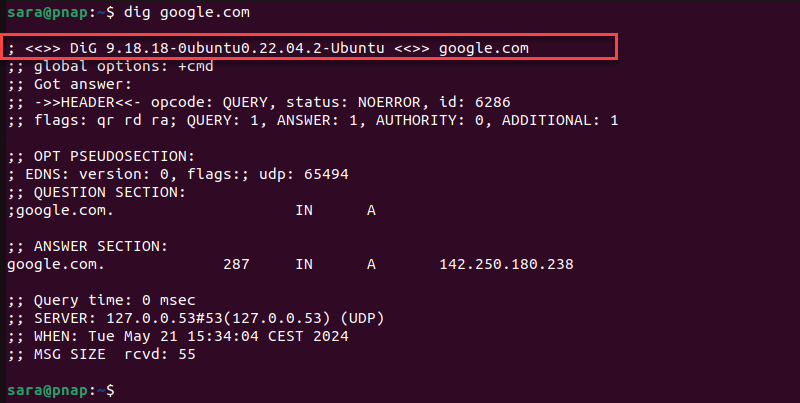
- The first line displays the
digcommand version.
- The
HEADERsection in thedigoutput summarizes the DNS query and response details. It includes information about the query type (e.g., standard query), the response status (e.g.,NOERRORfor a successful response), and flags indicating key attributes like recursion. Additionally, it lists the questions, answers, authoritative records, and additional records counts in the DNS response.
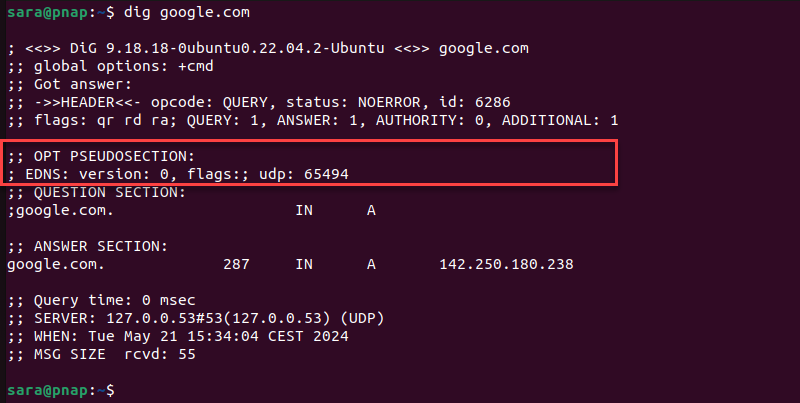
- The
OPT PSEUDOSECTIONdisplays advanced data:EDNS. Extension system for DNS, if used.flags. Specified flags. In this case, it's blank because no flags were specified.udp. udp packet size.
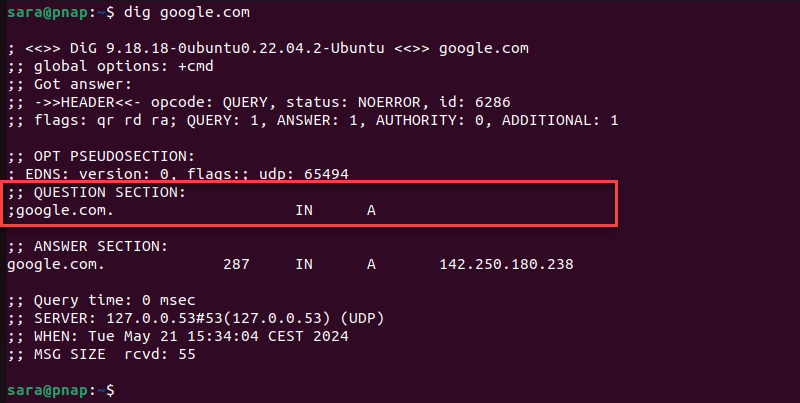
- The
QUESTION SECTIONdisplays the query data that was sent:- The first column is the domain name queried.
- The second column is the query type (
IN= Internet). - The third column specifies the record (
A= Address) unless otherwise specified.
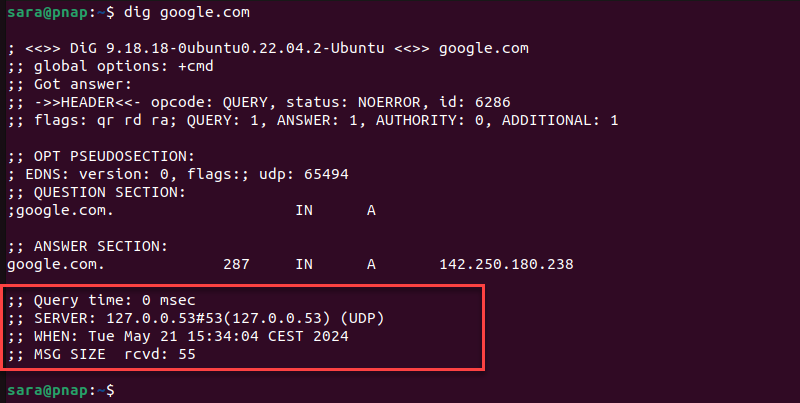
- The statistics section shows metadata about the query:
Query time. The amount of time it took for a response.SERVER. The responding DNS server IP address and port.WHEN. The time when the command was run.MSG SIZE rcvd. The size of the reply from the DNS server.
Note: Although useful, frequent DNS lookups may negatively affect website performance, which is why it's important to learn how to reduce DNS lookups.
Specify DNS server
By default, dig uses the local configuration to decide which nameserver to query. Use the following command to specify Google's domain server:
dig @8.8.8.8 google.com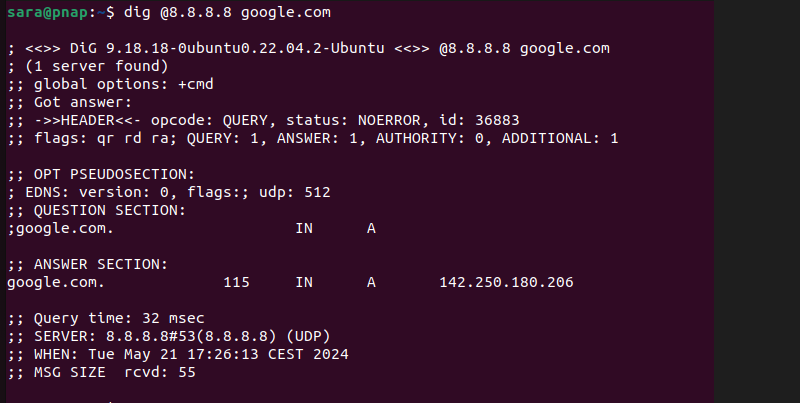
Note: Other domain nameservers can be specified here, such as your server hosting provider or the internet service provider's DNS server.
For more information, refer to our guide on how to set a DNS nameserver on Ubuntu.
Return All Query Results
To return all the query results, use the following:
dig google.com ANY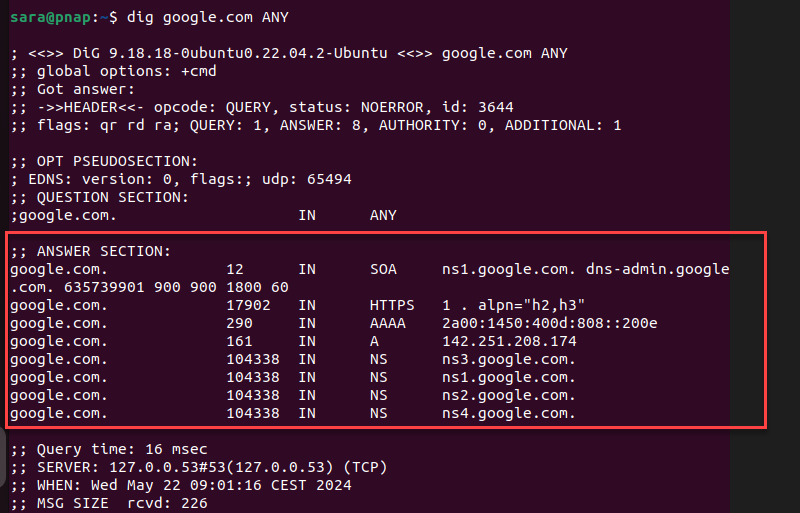
The system lists all google.com DNS records it finds, along with the IP addresses.
Search for a Record Type
To search for a specific DNS record type using dig, specify the record type after the domain name. For example, use the dig command to query for an A record of the google.com domain:
dig google.com A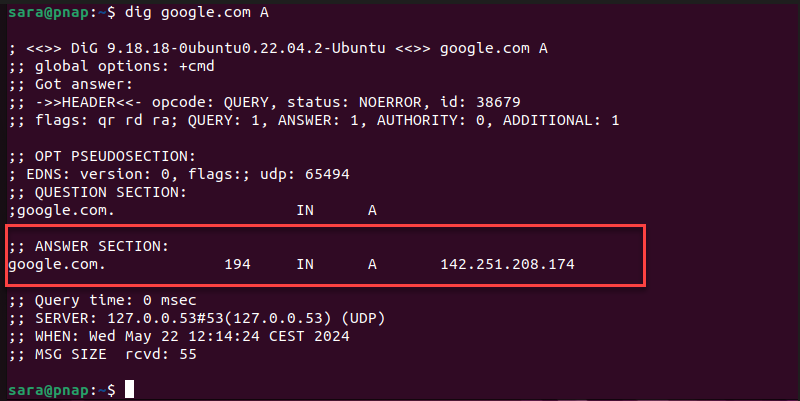
The answer section shows the DNS record type as A.
Print a Short Output
To display only the IP address associated with the domain name, enter the following:
dig google.com +short
Print Only the ANSWER Section
Run +noall +answer with the dig command to access concise output stored in the ANSWER SECTION:
dig google.com +noall +answer
List Different Servers
The +trace option lists every different server the query goes through to its final destination. For example, run the following:
dig google.com +trace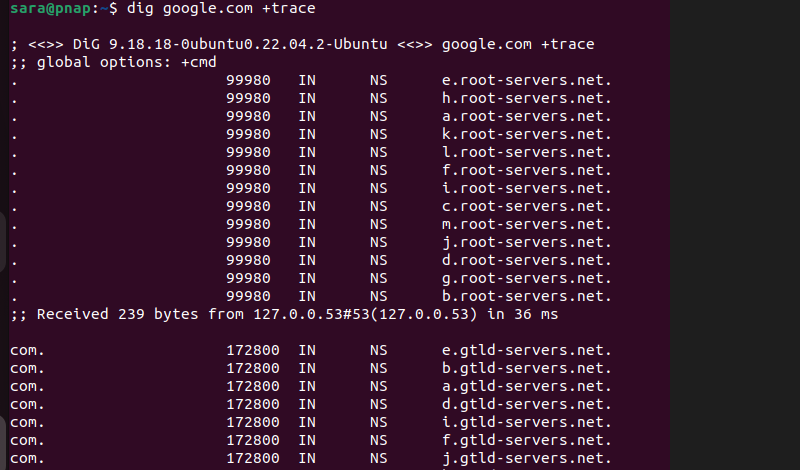
Do a Reverse DNS Lookup
The dig command offers an option to look up a domain name by its IP address. For instance, to find the domain name of the 142.250.180.206 IP address, type the following:
dig -x 142.250.180.206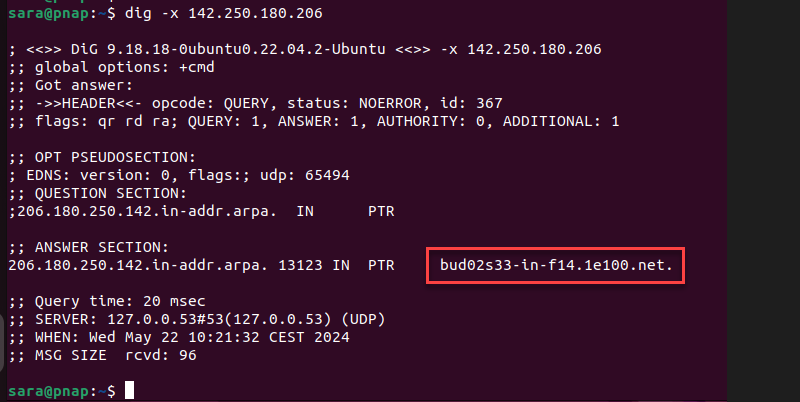
The domain name for the IP address 142.250.180.206 is bud02s33-in-f14.1e100.net.
Note: To learn more about how to use an IP address to find a domain name, check out our article about Reverse DNS lookup (rDNS).
Query the Nameserver
Query the nameservers for a domain with the dig command by specifying the NS (Name Server) record type. For example, query the DNS to find the nameservers responsible for the google.com domain with:
dig google.com NS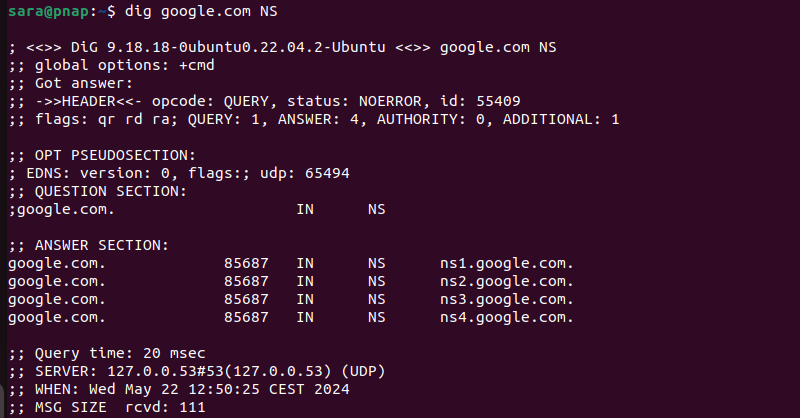
The nameservers for google.com are listed under the ANSWER SECTION with the record type NS.
Find Multiple Entries
To look up multiple entries, take the following steps:
1. Create a file in a text editor to list the domain names you want to look up. For example, to create a file in Nano, run:
sudo nano domain_research.txt2. Add several websites to the file. For instance, add google.com, yahoo.com, and phoenixnap.com. Note that each domain name should be in a new line:
google.com
yahoo.com
phoenixnap.com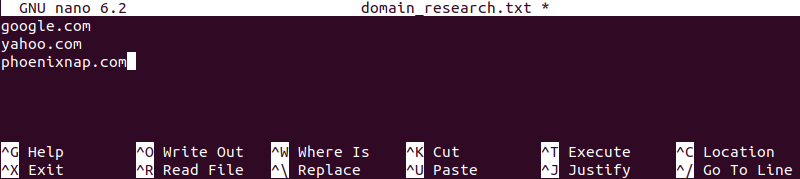
3. Save the file and exit.
4. To look up the DNS records for the domains listed in the file, specify the file using the -f option with the dig command:
dig -f domain_research.txt +short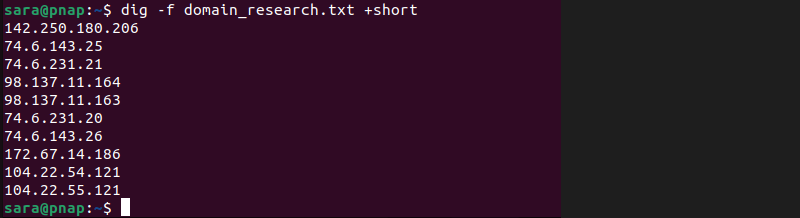
Note: The +short option keeps the results manageable. Any other option can be used instead.
Permanently Adjust Default Options
The information displayed by dig is altered in the ~/.digrc file. To adjust the default options, take the following steps:
1. Open the file in a text editor, in this case Nano:
sudo nano ~/.digrc2. Add the following lines:
+noall
+answer
3. Save and exit the file.
4. Run the dig command:
dig google.com
The output is the same as if you manually added +noall and +answer in the terminal.
Conclusion
This article explains the use of the dig command in Linux through practical examples. If you'd like to use the command on a Windows system, check out our guide on how to install dig on Windows.
Next, learn how to flush DNS cache to delete all saved DNS lookup information or discover other Linux network commands.