Configuring a firewall is an essential security step. Linux has various utilities, such as iptables, that help users set up and manage firewalls. However, the iptables utility can be complex when setting up a simple network security layer.
The Uncomplicated Firewall (UFW) tool is implemented on top of iptables and provides a user-friendly alternative for configuring a firewall in Ubuntu.
In this tutorial, you will learn how to set up firewall protection on an Ubuntu system with UFW.
Prerequisites
- A system running Ubuntu (we will be using Ubuntu 24.04).
- A user account with sudo privileges.
- Access to a command line/terminal window.
Install UFW on Ubuntu
UFW comes preinstalled on Ubuntu. However, if it was removed or requires reinstalling, follow the steps below. Choose between installing UFW with the APT package manager or using the source code.
Install UFW via APT
To get the most recent stable UFW version, install it via APT.
1. Run the following apt command to install UFW:
sudo apt install ufw
Wait for the installation to complete.
2. Confirm the firewall is installed by checking its version:
sudo ufw version
The program version shows in the terminal, indicating the installation was successful.
Install UFW from Source Code
To install a specific UFW version, install it from the source code. This method requires having Python 3.4+ with PIP.
1. Navigate to the UFW launchpad downloads page. It contains the downloads for different UFW versions.
2. Choose a release to download. Click the link to download the file, or copy the URL and run the wget command. For example:
wget https://launchpad.net/ufw/0.33/0.33/+download/ufw-0.33.tar.gz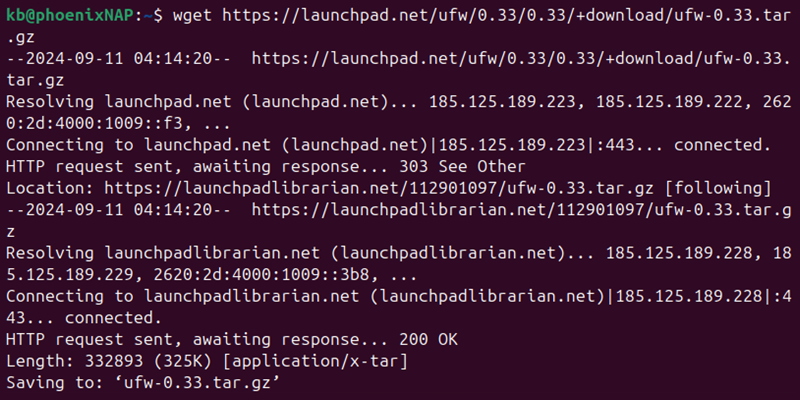
If using a different version, replace the URL in the command. The process downloads the file from the remote server.
3. Extract the tar.gz file with:
tar -xvf ufw-0.33.tar.gz4. Navigate to the program directory:
cd ufw-0.335. Run the Python setup script:
sudo python3 ./setup.py install
The command copies the files and installs the program.
Note: If there are any missing packages, install them and re-run the script.
6. Verify the installation:
sudo ufw version
The command shows the UFW program version, confirming the installation is functional.
Set up and Configure UFW on Ubuntu
The UFW firewall initially denies all incoming traffic and allows all outgoing traffic. This approach minimizes the risk of unwanted access while allowing communication with external servers and services. The firewall is initially disabled since the firewall rules can block traffic and block access to a remote server.
Before configuring the firewall, define which incoming connections are safe and trusted. For example, allow SSH if it's used for remote access or HTTP/HTTPS if working with a web server. Any unexpected traffic should be considered unwanted.
Below are some common workflows when setting up UFW.
Configure UFW to Support IPv6
If the system uses IPv4 and IPv6, modify the UFW configuration file to support both protocols:
1. Open the default UFW configuration file using nano or any other text editor:
sudo nano /etc/default/ufw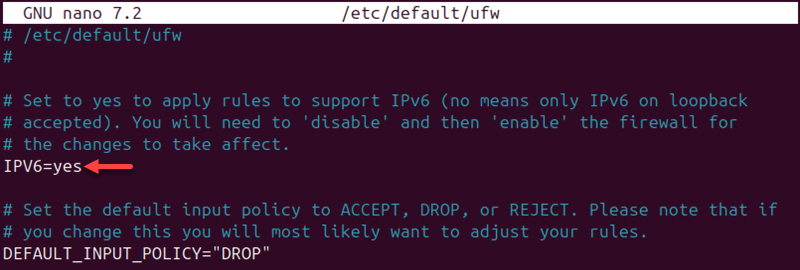
2. Check the IPV6 value. If the value is no, change it to yes to enable IPv6 use.
3. Save and close the file.
Set Up Default UFW Policy
The default UFW configuration is set to allow all outgoing connections and deny all incoming connections. The two rules are typical for personal computers, which do expect any incoming requests.
To deny incoming connections:
sudo ufw default deny incoming
Allow outgoing connections with:
sudo ufw default allow outgoing
The two commands return the status of UFW to the default settings.
Allow SSH Connections
If you connect to the server remotely, set up UFW to allow incoming SSH connections. Configure UFW to allow SSH connections with the command:
sudo ufw allow ssh
The command adds a rule for IPv4 (and IPv6 if enabled) to allow incoming and outgoing traffic from SSH connections.
Enable UFW
After configuring the settings, disable and enable the UFW firewall to apply the changes. Disable UFW with:
sudo ufw disableEnable the firewall again with the following command:
sudo ufw enable
The commands output the firewall status after each action. The firewall is now active and enabled on startup.
Check UFW Status
To check UFW status and show detailed information, run the following command:
sudo ufw status verbose
The output shows the status, default settings, and open ports.
Working with UFW Rules
UFW is a rule-based firewall. The rules define the extent of communication the server has with other machines.
Specify which connections are allowed and which are denied to control firewall settings further.
Allow Incoming Connections on Other Ports
Depending on the server's purpose, allow specific incoming connections for additional firewall control. Create UWF rules to add the connections to the firewall configuration. Below are some commonly used setup commands.
1. Set your server to listen to HTTP with:
sudo ufw allow httpAlternatively, use port number 80 for HTTP connections:
sudo ufw allow 80The rule is visible in the UFW status:
sudo ufw status verbose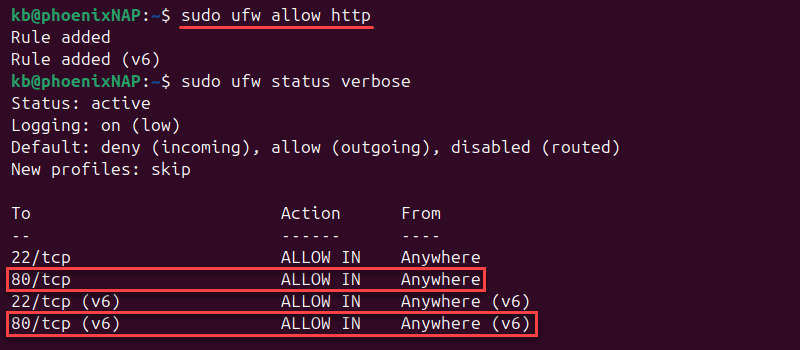
The command allows traffic on HTTP port 80 and adds rules for IPv4 and IPv6.
2. To enable HTTPS connections, use:
sudo ufw allow httpsAlternatively, use port number 443 for HTTPS connections:
sudo ufw allow 443Check the UFW status to confirm the new rule is visible:
sudo ufw status verbose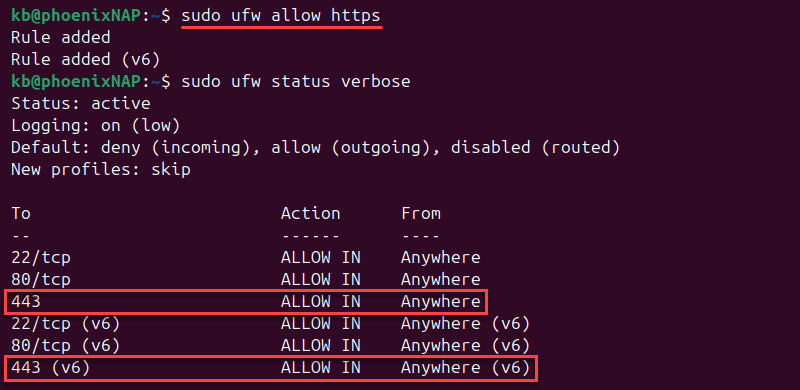
The enabled HTTPS connections on port 443 are visible for IPv4 and IPv6.
3. To set a rule that allows access to all ports from a specific IP address, run:
sudo ufw allow from [IP_address]Use this method to set a rule to allow all traffic from a remote server to a local machine or from a remote machine to a local server.
4. To allow access from a particular machine to a specific port, run the command:
sudo ufw allow from [IP_address] to any port [port_number]The rule limits access to the specified port only.
5. To allow access to a port range, specify the range values and the protocol type (TCP or UDP). For instance, the following command allows connections from ports 2000 to 2004 for TCP:
sudo ufw allow 2000:2004/tcpChange the protocol to allow connections from ports 2000 to 2004 for UDP with the following:
sudo ufw allow 2000:2004/udpDeny Incoming Connections on Other Ports
To create a deny rule to forbid connection from a specific IP address, run the command:
sudo ufw deny from [IP_address]Alternatively, deny access to particular ports by typing:
sudo ufw deny from [IP_address] to any port [port_number]Use the two commands to block traffic from suspicious IP addresses or secure a specific port.
Deleting UFW Rules
The UFW firewall allows deleting rules. There are two ways to remove a rule:
1. Display a list of all the rules and find the assigned number of the rule. First, display the rules as a numbered list:
sudo ufw status numbered
The output lists the rules added so far. Each rule has a number according to the order in which it was set.
Delete a rule using the following syntax with the appropriate rule number:
sudo ufw delete [rule_number]The command removes the rule from the list, and the numbers change accordingly.
2. An alternative way to delete a rule is to specify it word for word:
sudo ufw delete [rule]For example, to remove a rule that allows connection to port 2000, use the command:
sudo ufw delete allow 2000The command removes the specified rule from the list.
Application Profiles
Packages installed with APT create a profile in the /etc/ufw/applications.d directory. The profile provides information about the software and its preconfigured UFW settings.
To list all application profiles, use:
sudo ufw app list
To see more information about a specific package (along with open ports), run:
sudo ufw app info '[profile_name]'For example, to show the application profile for Apache, run:
sudo ufw app info 'Apache'
The output shows the profile information, a short application description, and the ports the app uses.
Note: Learn how to use GUFW, a graphical user interface for UFW, to configure a firewall.
Conclusion
This guide showed how to set up and use UFW on Ubuntu. Ensuring stable firewall protection is the first step to protecting your server, and UFW simplifies this process by acting as a front end for iptables.
Learn more about server protection through our 21 Server Security Tips article.

