Firewalls are crucial for securing computer networks and preventing unauthorized access. The system helps control network traffic according to specified rules and helps protect against network security threats.
The GUFW is the GUI for UFW (uncomplicated firewall). It provides a simple way to configure a firewall on an Ubuntu system.
This article shows how to set up the UFW through a GUI.
Prerequisites
- A system running Linux (the guide uses Ubuntu 22.04).
- Access to the command line/terminal.
- A user with sudo privileges.
What is GUFW?
The GUFW (graphical uncomplicated firewall) is the graphical user interface for UFW. The GUI version of the tool helps control the built-in firewall system on Ubuntu through a simple interface.
The simple interface enables creating firewall rules and managing settings with minimal effort. GUFW allows controlling incoming and outgoing network traffic based on specified criteria.
How to Set Up Firewall With GUFW
Since GUFW does not come preinstalled on the system, the steps below show how to install and set up the interface from scratch. Follow the steps below to install and learn how to use GUFW.
Install GUFW
There are two ways to install GUFW. The first option covers installation via a few terminal commands, while the second installation method uses the Software Center (Ubuntu Center).
Choose one of the two options and follow the steps.
Option 1: Install GUFW Via Terminal
To install GUFW via terminal, open the terminal (CTRL+ALT+T) and do the following:
1. Enable the Universe repository with the following command:
sudo add-apt-repository universe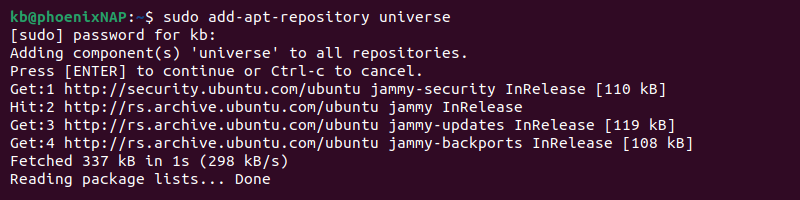
The command asks for the sudo password. Press Enter to start the installation.
Note: If using a root account for the first time or don't remember the password for sudo, learn how you can change the root password on Ubuntu.
2. Update the repository with the apt package manager:
sudo apt update -y3. Lastly, install GUFW with the following command:
sudo apt install gufw -y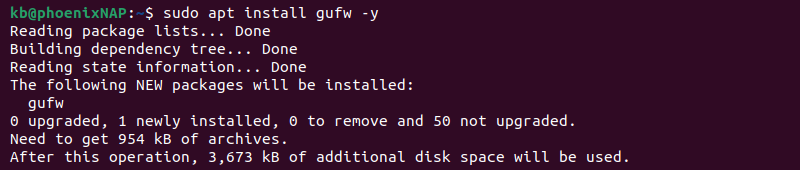
When the installation completes, the GUFW is ready to use.
Option 2: Install GUFW Via Software Center
The GUFW is available through the Software Center (Ubuntu Center). Follow the steps from this method to install the program through the GUI:
1. Run the Software Center (Ubuntu Center).
2. Open the search bar in the top left corner and type GUFW in the search bar.
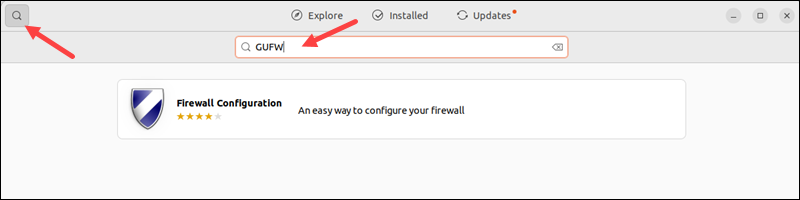
The search results display the Firewall Configuration package.
3. Select the package and click Install.
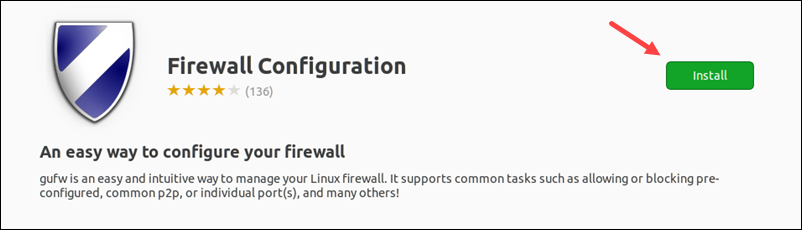
Wait for the installation to complete. Once done, the GUFW is ready to use.
Turn on Firewall
To open the Firewall Configuration, enter the following command in the terminal:
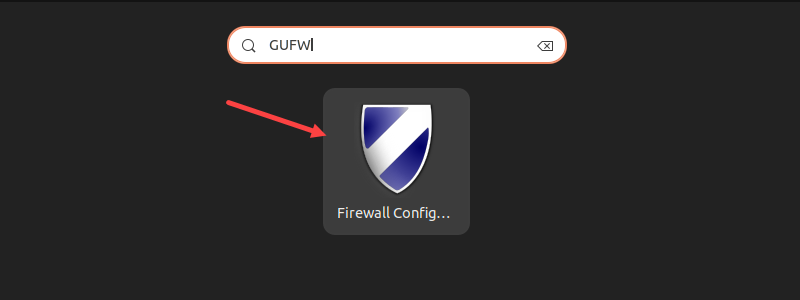
sudo gufwAlternatively, use the search bar on your Ubuntu system and type in GUFW. The first search result is the Firewall Configuration program. Click the icon to launch the application.
The program menu shows different parameters that are simple to set up and customize.
The Status switch controls whether the firewall is running.
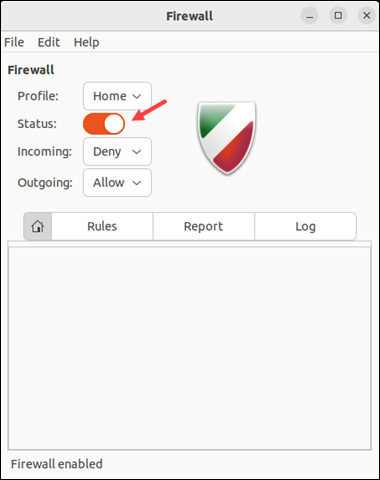
Toggle the firewall status to enable or disable the firewall. The firewall logo changes color, and the bottom of the window shows the current firewall status.
GUFW Profiles
GUFW profiles are preconfigured firewall settings. Profiles provide different security levels and network controls based on everyday situations. Create custom rules for each profile and switch settings as you change connections.
The preconfigured profiles on GUFW are:
- Home. This profile sets incoming connections to Deny and outgoing to Allow. It allows all outgoing connections and only essential incoming connections from services such as SSH or web connections. The profile is suitable for a home network.
- Office. The incoming and outgoing connections are the same as the Home profile. The Office profile is suitable for a corporate setting and allows restricting incoming connections according to business needs.
- Public. The profile is the most restrictive, rejecting all incoming connections and allowing all outgoing. Use this profile when connecting to a public Wi-Fi to protect the system from threats.
In addition to the three basic profiles, GUFW allows the creation and removal of profiles. To create a custom profile or remove an existing profile, do the following:
1. Go to Edit -> Preferences.
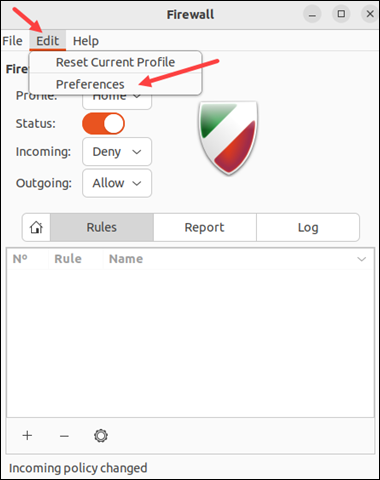
2. Click the plus button (+) to add a new profile.
3. Locate the new profile on the list. Double-click the name and enter a custom name for the profile.
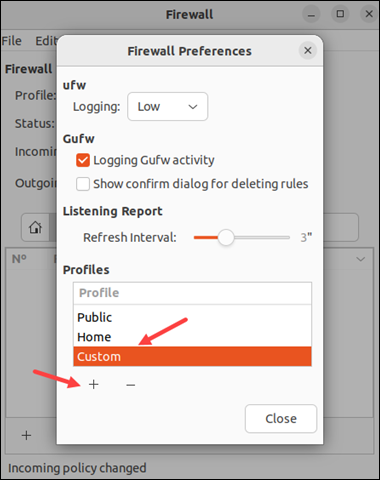
4. Select a profile from the list and click the minus button (-) to remove it.
GUFW Rules
Every GUFW profile allows the addition of custom rules. The firewall rules require knowledge of the network environment and security requirements. Update and manage rules regularly to control the network traffic.
The available network rule policies in GUFW are:
- Allow. Accepts all traffic entry on a port.
- Deny. Denies all traffic entry on a port.
- Reject. Denies all traffic entry on a port and informs the requester.
- Limit. Denies traffic if more than six attempts have happened in the previous thirty seconds.
The sections below demonstrate how to add and edit GUFW rules.
Adding GUFW Rules
To add a GUFW rule, do the following:
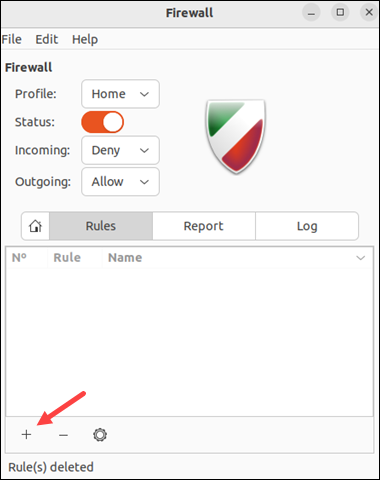
1. Select the appropriate profile for the rule.
2. Click the plus button (+) to open the firewall rule window.
3. The window shows three tabs for adding rules:
- Preconfigured. The most straightforward and user-friendly way to add new rules.
- Simple. An easy way to add a firewall rule with additional options.
- Advanced. Provides a detailed setup for handling traffic from specific IP addresses, subnets, and interfaces.
Start by adding Preconfigured rules.
4. Choose the Policy for the rule from the dropdown list.
5. Select the direction for the policy (In, Out, or Both).
6. Choose the Category and Subcategory to filter the applications list. Alternatively, use the search bar to find the application.
7. Once ready, click the Add button to add the new rule and Close to exit the window.
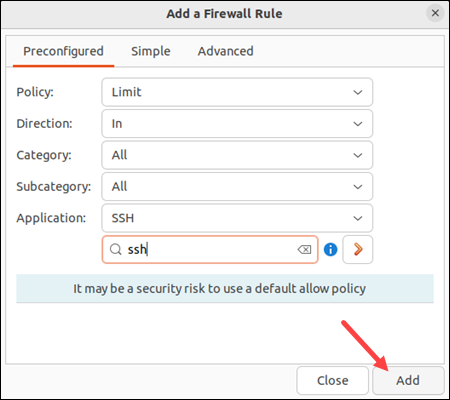
8. GUFW automatically adds rules for IPv4 and IPv6.
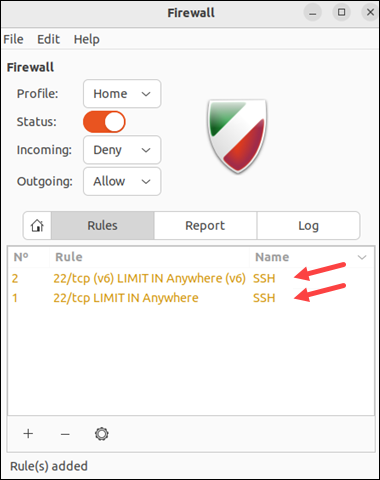
The preconfigured options automatically detect which ports to target. For example, an SSH rule automatically enables SSH on the TCP port 22.
Editing GUFW Rules
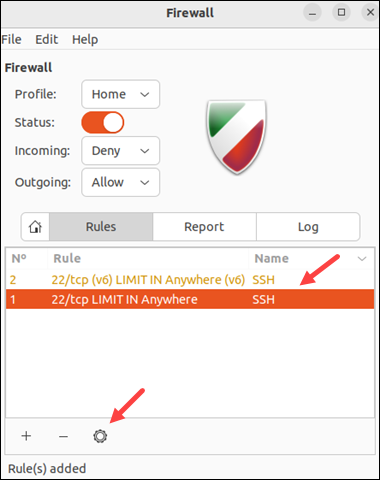
To edit an existing GUFW rule, do the following:
1. Select a rule from the list.
2. The gear icon opens the editing window.
3. Make the desired changes and click the Apply button.
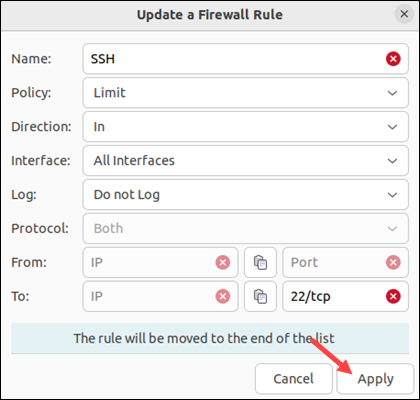
Editing a rule moves it to the end of the list.
Conclusion
After reading this guide, you know how to install and set up GUFW. The graphical alternative is easier to use than the UFW in the terminal. A properly configured firewall enables traffic control and provides an essential security layer on the system.
To learn more about server security and protection, check out our list of server security tips.