The SSH "Permission Denied" error appears after modifications are made to permission-related settings on the SSH server. Common scenarios include installing new packages, creating new users, or altering SSH configuration. These changes can disrupt the SSH authentication process, leading to access issues.
This tutorial shows how to troubleshoot the "SSH Failed Permission Denied" error and reconnect to your SSH server.
Prerequisites
What Causes SSH Permission Denied (publickey,gssapi-keyex,gssapi-with-mic)?
The SSH "Permission Denied" error appears when trying to SSH into a server. The text following the "Permission Denied" statement lists the authentication methods that failed during the connection attempt. Although the error suggests that the public key is the issue, it can be misleading.
Several factors can cause this error:
- Misconfigured SSH. The SSH configuration file (sshd_config) might not be set up correctly to allow key-based authentication. Public key authentication might be disabled, or the path to the authorized keys file is incorrect.
- Insufficient permissions. The authorized_keys file may have inadequate permissions. This file contains the list of public keys for clients allowed to SSH into the server. If the permissions are too open or restrictive, the SSH server might refuse to use them for authentication.
How to fix SSH Permission Denied
There are several ways to fix the SSH "Permission Denied" error. The following text elaborates on these methods.
Solution 1: Checking and Adjusting Key Mismatch
Users sometimes choose the wrong key when working with many SSH keys. To confirm that you are using the correct private and public keys, generate a hash of both.
For each key on the server and client machine, run the following command:
ssh-keygen -lf [/path/to/key]
The output includes the following parts:
- Key length. The number of bits in the key.
- Algorithm. The hashing algorithm used for the fingerprint (e.g., SHA256).
- Fingerprint. The fingerprint of the key.
- Key Owner. The user and server associated with the key.
- Comment. The optional comment associated with the key.
- Key type. The type of the SSH key (e.g., RSA, DSA, ECDSA, ED25519).
Compare the client and server fingerprints. If the fingerprints match exactly, then the SSH keys are identical, indicating that the client machine's key matches the server's corresponding key. Move on to the next solution, as the key mismatch is not the problem.
If the keys don't match, that can lead to authentication failure. To fix this, do the following:
1. Use the ssh-keygen command to create a new key pair on the client machine. For example:
ssh-keygen -t rsa -b 4096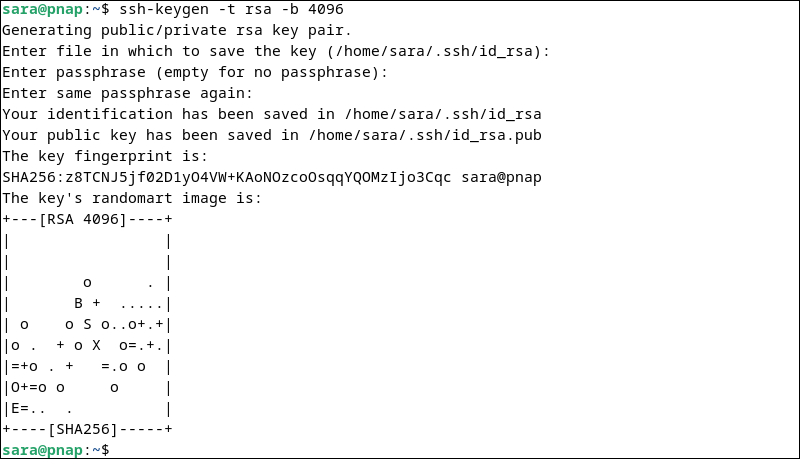
During the key generation process, you will be prompted to enter a file in which to save the key. By default, it will be saved in ~/.ssh/id_rsa.
2. After creating the new key pair, place the public key in the authorized_keys file on the server:
ssh-copy-id -i ~/.ssh/id_rsa.pub sara@pnap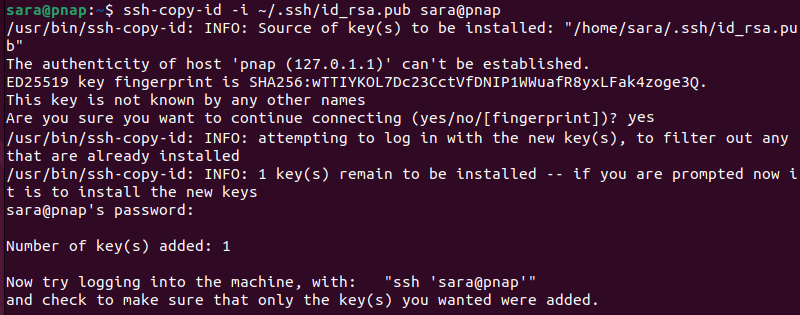
Replace sara@pnap and the key name with your actual username, server address, and key name.
3. Confirm that the public key has been added to the authorized_keys file on the server. To do this, log into the server and check the contents of ~/.ssh/authorized_keys.
Solution 2: Checking and Adjusting Key Permissions
Properly managing permissions is crucial for secure SSH authentication. The following text shows how to set permissions for private keys, the authorized_keys file, and the .ssh directory.
Private Key Permissions
The private key is stored on the client machine, and only the owner should have read and write permissions. Follow these steps on the client machine to set the correct permissions:
1. Navigate to the SSH directory:
cd ~/.ssh/
2. Set the read and write permissions:
chmod 600 id_rsa
Replace id_rsa with your private key file name.
Note: For more information, see our in-depth guide on Linux file permissions.
authorized_keys File Permissions
The authorized_keys file stores a public key previously authorized for authentication. It is in the .ssh directory on the server. To prevent unauthorized write access, set the permissions to 600 or 640.
Take the following steps:
1. Navigate to the SSH Directory:
cd ~/.ssh/.
2. Set the file permissions with:
chmod 600 authorized_keys
The command has no output.
.ssh Directory Permissions
To set .ssh directory permissions, navigate to the directory on both the client and server machine. Restrict access to the owner only with:
chmod 700 ~/.sshThe command has no output.
Solution 3: Checking and Adjusting Server Configuration Settings
The SSH "Permission Denied" error can also indicate that the server is not accepting the provided authentication methods. Check and adjust the server configuration settings to resolve this issue:
1. Log in to the server using another user account.
2. Open the SSH server configuration file in a text editor, typically located at /etc/ssh/sshd_config:
sudo nano /etc/ssh/sshd_config3. Ensure that PubkeyAuthentication is enabled:

4. Verify the path to the authorized_keys file. The default setting should be:
AuthorizedKeysFile .ssh/authorized_keys
5. Check the port settings if SSH runs on a non-standard port (standard is 22).
6. Save the file and exit.
7. Restart the SSH service to apply the changes:
sudo systemctl restart sshdWait for the service to start before continuing.
Conclusion
This tutorial showed how to troubleshoot the "SSH Permission Denied (publickey,gssapi-keyex,gssapi-with-mic)" error. After troubleshooting, SSH into your server to confirm the error is resolved.
Next, learn how to fix the SSH Connection Refused error.