The Z Shell (Zsh) is an interactive Unix shell that can be used as a command interpreter for shell scripting. Zsh benefits include command-line completion, shared history, improved globbing, intelligent tab completion, spelling correction, and a rich set of plugins and themes.
In this tutorial, you will learn to install and configure the Z Shell on Ubuntu.

Prerequisites
- A system running Ubuntu.
- An account with root privileges.
- Command-line access.
Install Zsh on Ubuntu
While the default shell on Ubuntu is Bash, Zsh is available as a community-maintained package in Ubuntu's official Universe repository.
Follow the steps below to install and use Zsh on Ubuntu.
Step 1: Update Package Information
Updating the package repositories ensures the system has the most up-to-date information about software packages and their dependencies.
Run the following command:
sudo apt updateWhen prompted, enter the password and press Enter. Wait for the process to complete.
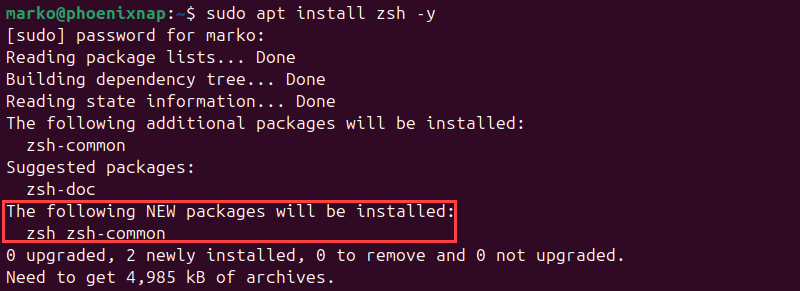
Step 2: Install Zsh
Install Zsh on Ubuntu by typing the command below:
sudo apt install zsh -yAPT lists the packages included in Z Shell's installation and then sets up Zsh.
Step 3: Check Installation
Check if Zsh has been installed correctly by checking the program version. Run the following command:
zsh --versionThe output shows the version information.

Configure Zsh on Ubuntu
Zsh allows users to personalize the shell environment, boost productivity with intelligent tab completion, and leverage its flexible scripting capabilities.
This section explains how to configure Zsh as the default shell in Ubuntu.
Note: Learn how to set environmental variables in ZSH.
Initial Configuration
Unlike Bash and other shells, Zsh requires initial manual configuration. To start Zsh, type the shell name in the terminal and press Enter:
zshThe image below shows the configuration options that Zsh offers on the first startup:
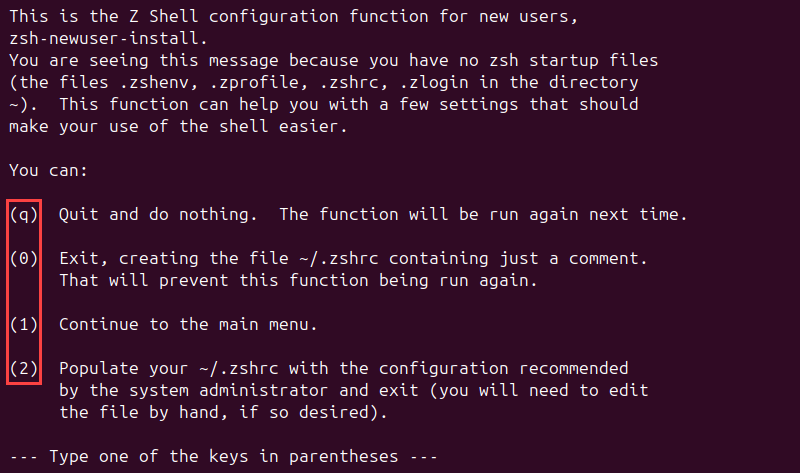
- Press q to exit the configuration and start again the next time you enter Zsh.
- Press 0 to create an empty .zshrc configuration file and configure everything from scratch.
- Press 1 to go to the main menu and configure each setting individually.
- Press 2 to populate the .zshrc configuration file with the default parameters, which you can later change manually in the .zshrc file.
After you complete the setup, the changes are saved, and the Zsh prompt appears. The configuration wizard appears only the first time the user runs the shell, but you can be restart it with the command below:
zsh-newuser-installSet Zsh as Default Shell
Use the chsh (change shell) command to change the default login shell:
chsh -s [path] [user][path]specifies the path to the shell you want to use.[user]specifies the user for which you want to change the default shell. Not specifying the user changes the default shell for the current user.
If you are unsure of the shell path, utilize the which command to specify the Zsh path automatically:
chsh -s `which zsh`Enter the sudo password when prompted and press Enter.
The command changes the default shell to Zsh for the current user. To start using Zsh, reboot the system.
Install Oh My Zsh
Oh My Zsh is an open-source framework that adds features and more functionality to the Z Shell. It is designed to enhance the command-line experience and make it more enjoyable and productive. Oh My Zsh provides a collection of themes, plugins, and scripts that can be easily installed and managed.
Note: A Git installation on the system is necessary for Oh My Zsh. See how to install Git on Ubuntu.
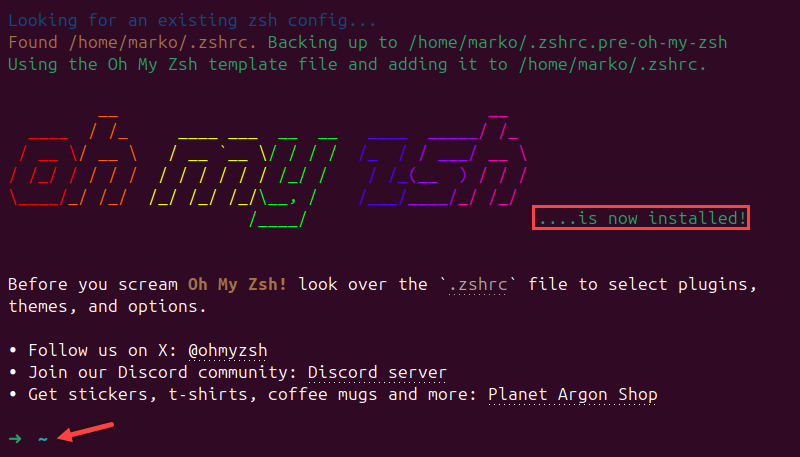
Install Oh My Zsh by running the following command:
sh -c "$(wget https://raw.github.com/ohmyzsh/ohmyzsh/master/tools/install.sh -O -)"The script installs Oh My Zsh, and the new shell prompt appears.
Add Custom Theme
Oh My Zsh offers a collection of over 150 terminal themes. Users can preview each theme on the Oh My Zsh GitHub theme page. Follow the steps below to add a theme to the terminal:
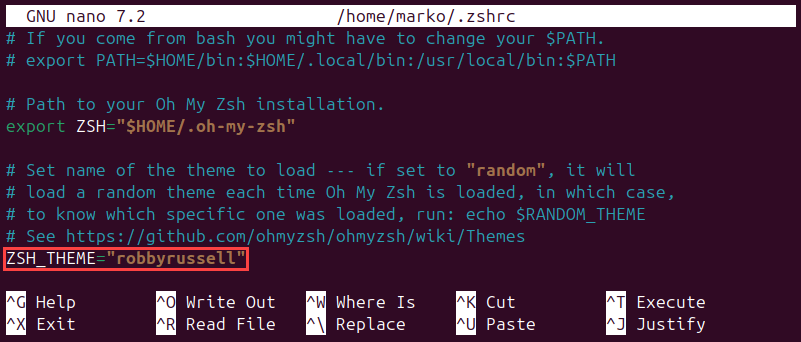
1. Open and edit the .zshrc configuration file using a text editor like nano:
nano ~/.zshrcNote: The .zshrc file in Zsh serves the same purpose as the .bashrc configuration file in Bash.
2. Locate the following line:
ZSH_THEME="robbyrussell"The line defines which theme the terminal uses. The default one is robbyrussell.
3. Change the value to match the new theme name. For example:
ZSH_THEME="jonathan"4. Save the file and restart the terminal to load the theme:

The terminal now uses the specified theme.
Enable Auto-Suggestions
Enable the auto-suggestions plugin to get command suggestions based on the Zsh command history. Follow the steps below:
Note: See how to use the Linux history command.
1. Add the auto-suggestion plugin repository first. Run the following command to clone the repository:
git clone https://github.com/zsh-users/zsh-autosuggestions ${ZSH_CUSTOM:-~/.oh-my-zsh/custom}/plugins/zsh-autosuggestions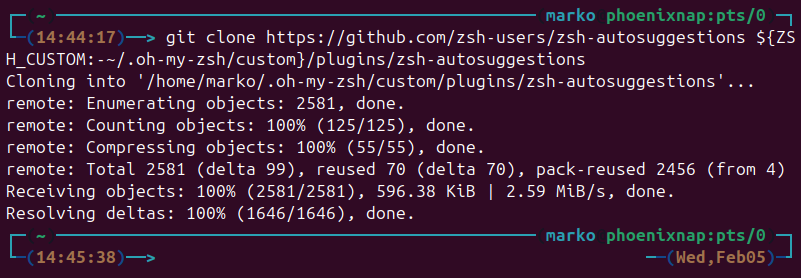
2. Open the .zshrc configuration file using a text editor:
nano ~/.zshrc3. Scroll down to the plugins section of the file and activate the auto-suggestion plugin by adding it to the list of plugins, as shown below:
plugins=(git zsh-autosuggestions)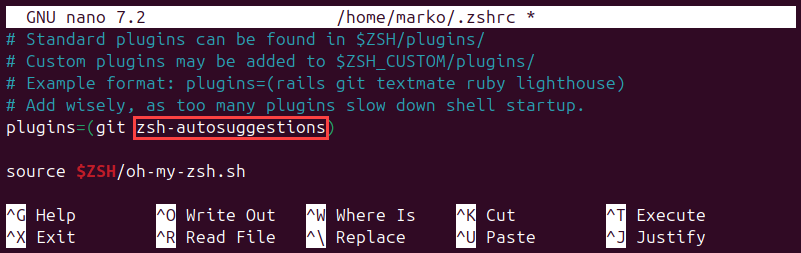
4. Save the changes and exit the file.
5. Restart the terminal.
When you start typing a command, use the right arrow key to accept the suggestion and automatically complete the command:

Enable Syntax Highlighting
Syntax highlighting provides numerous benefits, including improved code readability, error detection, language recognition, productivity, and aesthetics. Use the following steps to add syntax highlighting to Zsh:
1. Clone the plugin repository by running the following command:
git clone https://github.com/zsh-users/zsh-syntax-highlighting.git ${ZSH_CUSTOM:-~/.oh-my-zsh/custom}/plugins/zsh-syntax-highlighting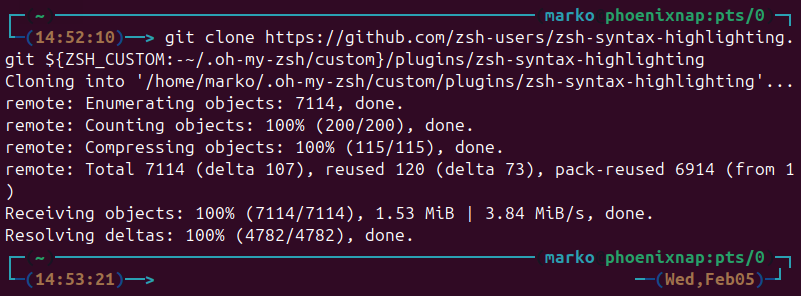
2. Open the .zshrc file:
nano ~/.zshrc3. Scroll down to the plugins section and add zsh-syntax-highlighting to the list of plugins:
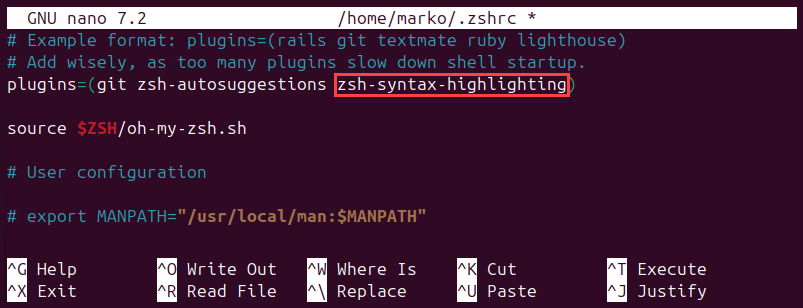
4. Save the changes and exit the file.
5. Restart the terminal to enable syntax highlighting. For example, typing a correct command highlights it in green, while mistyping it highlights it in red.

The example above shows how highlighting works with the echo command.
Uninstall Zsh on Ubuntu
If you decide to remove Zsh and revert to the old shell, follow the steps below:
1. Purge the zsh package from the system by running the following command:
sudo apt --purge remove zshWhen prompted, type y and press Enter to confirm you want to remove Zsh.
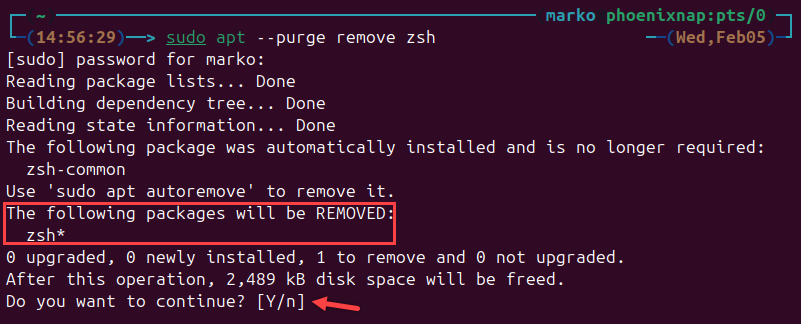
Purging a package removes the package and deletes any associated configuration files and dependencies automatically installed with the package.
2. Change the default shell back to Bash (or any other you want):
chsh -s `which bash`3. Reboot the system for the changes to take effect.
Conclusion
This article showed how to install and configure the Zsh shell on Ubuntu. While Bash is still widely used and remains the default shell on many Linux distributions, Zsh offers numerous advantages and is becoming increasingly popular.
Next, customize Zsh using the Powerlevel10k theme or learn about shell types in Linux and their features.