The history command in Linux displays a list of commands used in a terminal session. history allows users to reuse any listed command without retyping.
This tutorial explains how the history command works and different ways to use it.

Prerequisites
- A system running Linux (this tutorial uses Ubuntu 22.04).
- An account with root or sudo privileges.
- Command-line access.
history Command Syntax
The history command syntax is:
history [options]The command can be run without any options, but adding them provides useful functionalities.
history Command Options
The history command works with different options that change its output. The table below presents commonly used options:
| Option | Description |
|---|---|
-c | Clear the entire history list. |
-d offset | Delete a specific entry from the command history. The offset is the position number of the command in the history list. |
-a | Append the new history lines (those entered since the beginning of the current session) to the history file. |
-n | Read all unread history lines from the history file into the current session. |
-r | Read the history file and append its contents to the current history list. |
-w | Write the current history list to the history file. |
-p | Expand history for each argument and display the result without storing it in the history list. This option allows the user to see how the history expansions would be interpreted without adding them to the history list. |
-s | Store the arguments in the history list as a single entry. |
history Command Examples
The history command is used to view and manage previously executed commands in the terminal, making it easier to repeat past commands. The following text presents history use case examples.
List Commands Used in the Terminal Session
Running the history command without options displays the list of commands used since the start of the terminal session:
history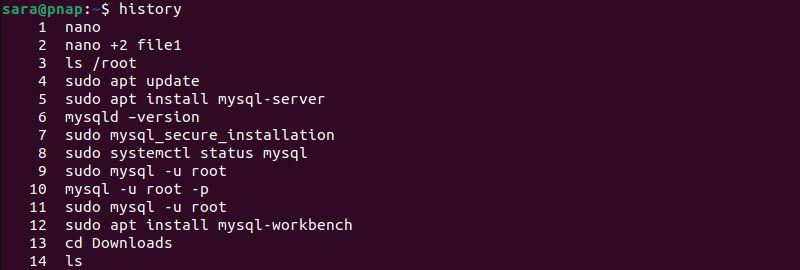
Limit the Number of Entries
Display the command history list with a limited number of entries by appending that number to the history command. For instance, to show only the latest five entries, use:
history 5
Search Commands in History
To find specific commands in the command history, pipe history with the grep command. For example, find the ls command with:
history | grep "ls"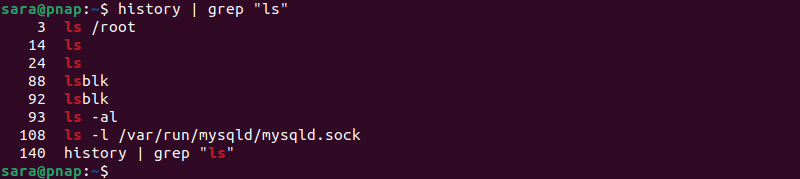
Use Date and Timestamps
The .bashrc file stores the Bash shell settings. Modifying this file allows changing the history command output format.
To change these settings, open the .bashrc file using a text editor such as Nano:
sudo nano .bashrcChange the output format to include the date and timestamps by adding the following line to the .bashrc file:
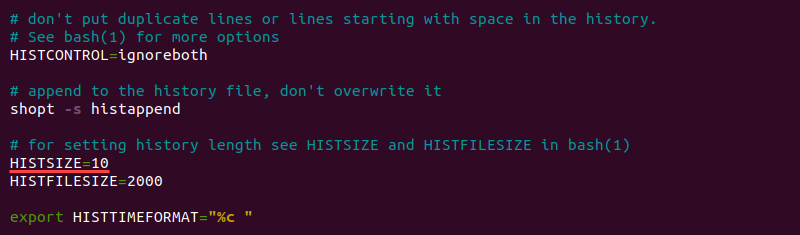
export HISTTIMEFORMAT="%c "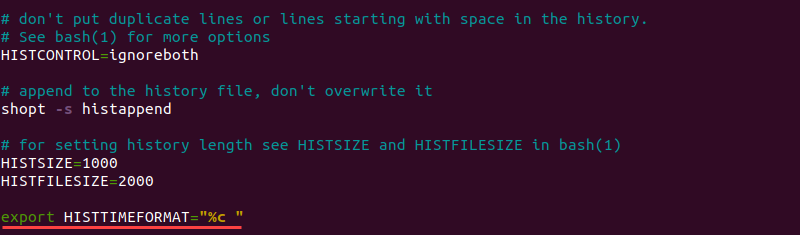
Note: The blank space before the closed quotation marks prevents the timestamp from connecting to the command name, making the history list easier to read.
Using different arguments after HISTTIMEFORMAT allows the user to customize the level of detail in the timestamp:
%d. Day.%m. Month.%y. Year.%H. Hour.%M. Minutes.%S. Seconds.%F. Full date (Y-M-D format).%T. Time (H:M:S format).%c. Complete date and timestamp (Day-D-M-Y H:M:S format).
Save the changes to the .bashrc file, relaunch the terminal, and run the history command to confirm the new output format:
history
View the Size of the History Buffer
The .bashrc file contains two entries that control the history buffer size:
HISTSIZE. The maximum number of entries for the history list.HISTFILESIZE. The maximum number of entries in the .bash_history file, the file that stores the history command list.
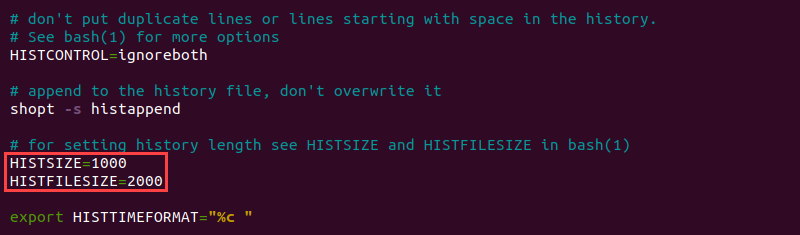
Editing the HISTSIZE and HISTFILESIZE values changes how the Bash shell displays and saves the command history. For instance, changing the HISTSIZE value to 10 makes the history command list show a maximum of 10 latest entries.
Save the changes to the .bashrc file, relaunch the terminal, and run the history command to confirm the new output format:
history
Repeat a Command
The history command prints a list of previously used commands. To reuse any command from that list, use the exclamation point (!) and the number of the command. For example, run the third command from a list with:
!3
Add a dash (-) before the command number to run a specific command from the end of the list. For instance, to reuse the seventh last command, use:
!-7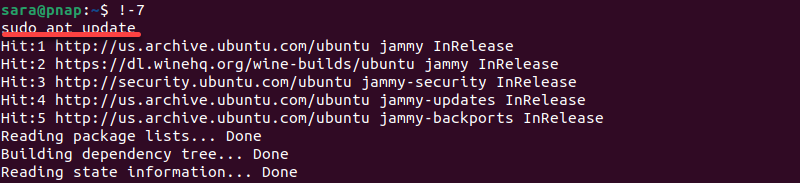
Use double exclamation points to repeat the last command:
!!
Search a Command by String
Adding a string after the exclamation point runs the latest command that starts with that string. For example, to reuse the latest command that begins with sudo, use:
!sudo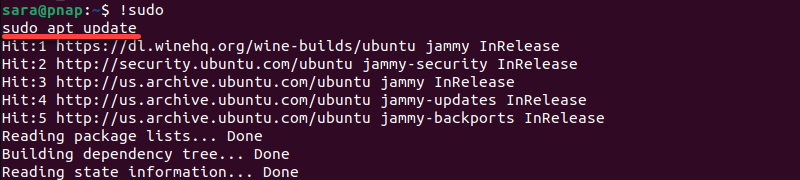
Using this method causes problems if the shell runs an unexpected command, especially when searching for a command that starts with sudo. As a precaution, add the :p argument to display the command without running it, allowing the user to review it and decide whether to execute it.
!sudo:p
To search for a command that contains a string but does not start with it, add a question mark next to the exclamation point. For instance, to reuse the last command that contains ls, enter:
!?ls
In the example above, the shell reuses the last command that contains the ls string, even though the command starts with sudo.
Change the Executed Command
Use the following syntax to fix a typo in a previous command:
^[old string]^[new string]^For instance, the sudo atp update command is misspelled:

Use the syntax above to change atp into apt:
^atp^apt^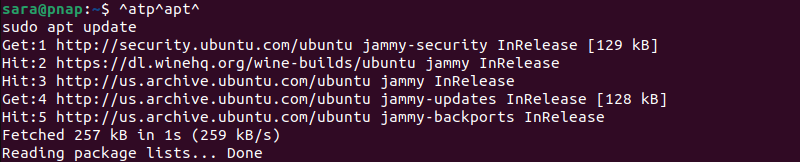
Prevent Recording Commands in History
To prevent recording commands in the history list, temporarily disable recording by using:
set +o historyTo re-enable recording, use:
set -o historyThe commands have no output
Delete History
Use the -d option with the history command to delete a command from the history list. For instance, delete the command with the number 34 (located by running history 5).
history -d 34
The command has no output. Verify the change by running history 10:
history 10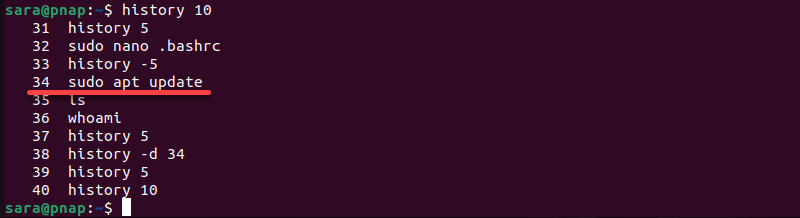
Use the -c option to clear the whole history list:
history -cUpdate the History File
The Bash shell saves any updates to the command history list when the terminal session ends. The history command also allows saving changes manually while in the terminal session.
Using the -a option lets the user manually append the command history entries from this session to the .bashrc_history file:
history -aThe command has no output. Another method is to use the -w option to save the entire history list to the .bashrc_history file:
history -wThis command has no output.
Conclusion
This tutorial explained how to use the history command in Linux to view, edit, and delete the command history list and reuse commands from it.
To learn more about Linux commands, check out our Linux commands cheat sheet.