The Linux diff command compares two files line by line and displays the differences. This command-line utility lists changes you must apply to make the files identical.
Learn more about the diff command, its syntax, options, and use-case examples.

Prerequisites
- A Linux system (this tutorial uses Ubuntu 22.04).
- Access to the terminal.
diff Command Syntax
The syntax for the diff command is:
diff [option] file1 file2diff works without any options but needs two file names to provide an output.
diff Options
Use options to modify the output and make it easier to understand. The following table presents common diff command options.
| Option | Description |
|---|---|
-i | Ignores case. |
-u | Prints output without any redundant context lines. |
-c | Outputs several lines of context around the lines that differ. |
-a / --text | Views files as text and compare them line-by-line. |
-b / --ignore-space-change | Ignores white spaces when comparing files. |
--binary | Compares and writes data in binary mode. |
-d--minimal | Modifies the algorithm (for example, to find a smaller set of changes). |
-e / --ed | Makes output a valid ed script. |
-E / --ignore-tab-expansion | Ignores tab extension when comparing files. |
-l / --paginate | Runs the output through pr to paginate it. |
-N / --new-file | Treats a missing file as present but empty. |
-q / --brief | Outputs whether files differ without specifying details. |
-s / --report-identical-files | Outputs when the files are identical. |
-w / --ignore-all-space | Ignores white space when comparing files. |
--version | Shows the current diff command versions. |
--help | Provides additional info about the command. |
diff Output Format
When working with diff, it is crucial to know how to interpret the output.
diff output modes include:
- Default
- Context
- Unified
diff Default Output
The following are instructions for interpreting the default diff output:
- Lines starting with
<. Refers to the content in the first file. - Lines starting with
>. Refers to the content in the second file. - Line numbers. Correspond to the first file.
- A symbol. Symbols indicate how the first file needs to be edited to match the second file. The output displays:
a(add)c(change)d(delete)
- Line numbers corresponding to the second file.
diff Context Output
The following are instructions for interpreting the context output format:
- A line starting with
***. Provides timestamp and info about the first file. - A line starting with
___. Provides timestamp and info about the second file ****************. A separator.- A symbol.
-(minus). Indicates the content to be deleted from the first file.+(plus). Indicates the content to be added to the first file.!(exclamation mark). Indicates the content to be changed to the corresponding line from the second file.
diff Unified Output
The unified diff output is a more compact version of the context output. The only differences between the two are:
- Omitted context lines.
- Line range indication.
@@ line-ranges @@is used to describe the line ranges.
diff Command Examples
To show how the diff command works, create two sample text files. Take the following steps:
1. Create a Linux file named example1.txt using the Nano text editor or a text editor of your choice.
sudo nano example1.txt2. Once the file is created, add the following lines to it:
Apple
Orange
Banana
Watermelon
Chery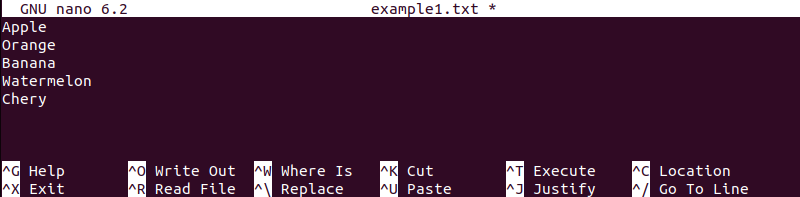
3. Save and exit the file. Hold Ctrl + X and confirm by pressing Y.
4. Create an example2.txt file with:
sudo nano example2.txt5. Add the following content to the file:
Orange
Peach
Apple
Banana
Melon
Cherry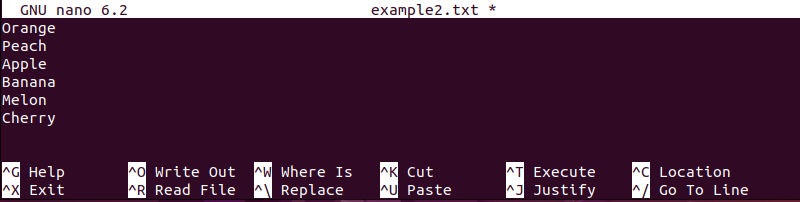
6. Save the changes and exit.
After creating these two files, you can start comparing them. The following text elaborates on different practical examples of the diff command.
Note: To display the contents without opening the file for editing, use the cat command.
Compare Two Files
With the two sample files ready, use the diff command to see how they differ and how to make them identical. Run the following:
diff example1.txt example2.txt 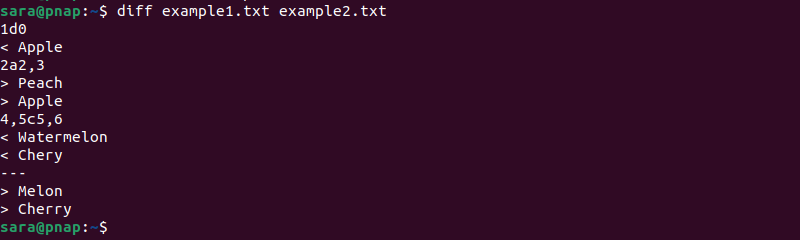
The output lists instructions on how to modify the first file to have the same content as in example2.txt.
The following is the output explanation for our sample files:
1d0. The first line (1) from the first file should be deleted (d). If not, it appears in line0in the second file.< Apple. The content you need to delete (as referred to with1d0).2a2,3. In line2of the first file, add (a) lines2and3(2,3) from the second file.> Peach,> Apple. The content you need to add (as referred to with2a2,3).4c5. The fourth line (4) from the first file should be changed (c) to the fifth line (5) from the second file.< Watermelon. The content you need to change.> Melon. What you need to change it to.
Note: Once you have the output instructions, you can use the patch command to save the output and apply the differences.
Print Output in Context Form
The context format (-c) is a diff command option that outputs several lines of context around the lines that differ. To display the difference between the files in the context form, use the command:
diff -c example1.txt example2.txt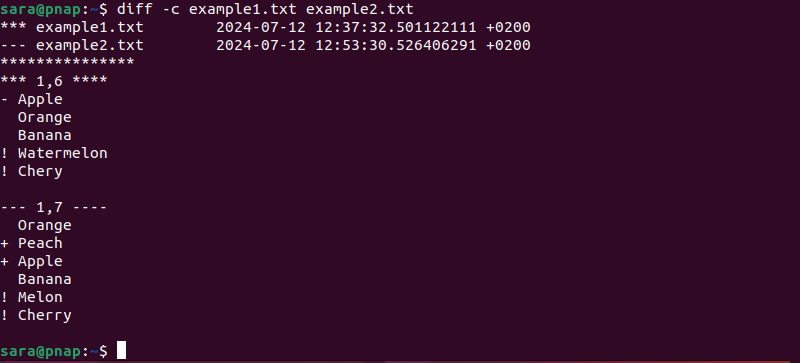
The output includes:
- The first two lines. They display the name and timestamp of both files.
****************. Used as a separator.- Two information lines. Display information about the first and the second file, starting with
***and ---. *** 1,6 ****and--- 1,7 ----. Indicate the line range of the files.- Content of the files. The beginning of each line instructs how to modify example1.txt to make it the same as example2.txt. If the line starts with:
-(minus), it needs to be deleted from the first file.+(plus), it needs to be added to the first file.!(exclamation mark), it needs to be changed to the corresponding line from the second file.
Therefore, in the example above, delete Apple from the first line, replace Watermelon with Melon in line four, and add Peach and Apple to lines two and three.
Display More Compact Output
The unified format (-u) is an option that displays output in a more compact way. Instead of elaborating on each change, changes are grouped together in a few lines of context.
Run the following command to test:
diff -u example1.txt example2.txt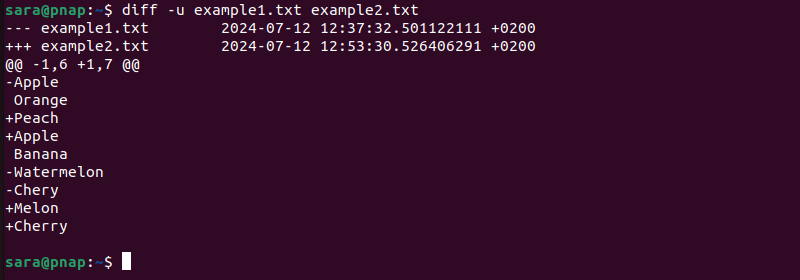
The output includes:
- Lines displaying information about the files. The first file info begins with
---, while lines indicating the second file start with+++. - The first two lines. Display the name and timestamp of both files.
@@ -1,5 +1,6 @@. Show the line range for both files.- The files' content. The lines also include symbols that instruct you how to modify example1.txt. to make it identical to example2.txt. The symbols are:
-(minus). The line needs to be deleted from the first file.+(plus). The line needs to be added to the first file.- No symbol. The line remains the same.
In the example above, the output instructs that Apple and Watermelon should be removed, whereas Peach, Apple, and Melon should be added.
Ignore Case
By default, diff is case-sensitive. If you want it to ignore case, add the -i option to the command:
diff -i file1 file2For example, create file1.txt with the following lines:
Apple
Orange
Banana
Watermelon
Cherry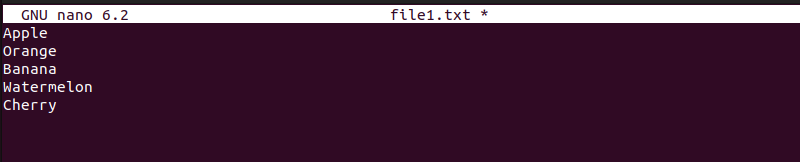
Create file2.txt with the content:
Apple
orange
Banana
watermelon
Cherry
Running diff with no additional options prints the differences between files.
diff file1.txt file2.txt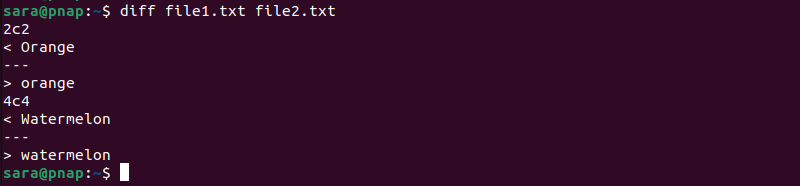
However, if you add the -i option, there is no output, as the command doesn't detect any differences in case.
diff -i file1.txt file2.txt
Print Command Version
To check the version of diff running on your system, run the command:
diff --version
Display Help Message
To output diff usage instructions run:
diff --help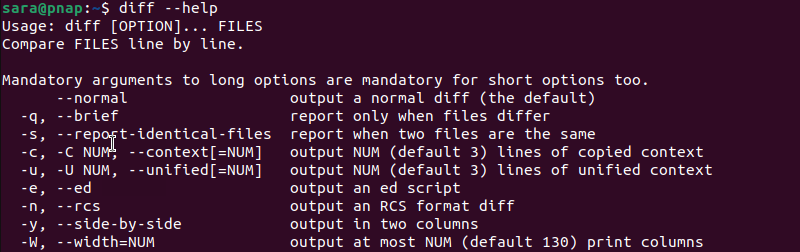
Conclusion
The diff command helps you compare files and instructs you on how to modify them. This article showed you how to interpret its instructions to make the compared files identical.
Next, learn how to change the color of diff output.