Node.js is a lightweight, cross-platform JavaScript server runtime environment for building fast, scalable network applications. It offers various JavaScript modules, supports consistent and integrated development, and comes with Node Package Manager (NPM) for managing package dependencies.
This tutorial will show you how to install Node.js and NPM on Ubuntu using three different methods.

Prerequisites
- Ubuntu installed (The procedures below have been tested on Ubuntu 26.04 LTS).
- Command-line access.
- A user with sudo privileges.
Note: Keeping Node.js up-to-date is essential for security and performance. See How to Update Node.js on Linux for a complete guide.
3 Ways to Install Node.js and NPM on Ubuntu
The following sections provide instructions for installing Node.js and NPM on Ubuntu using three different methods:
- Ubuntu repository.
- Node Version Manager (NVM).
- NodeSource repository.
Select a method and follow the steps below to complete the installation.
Option 1: Install Node.js and NPM from the Ubuntu Repository
Install Node.js and NPM from the Ubuntu repository by using the following procedure:
1. Update the package repository information:
sudo apt update2. Install Node.js and NPM with the following command:
sudo apt install nodejs npm3. Confirm that the installation was successful by checking the Node.js version on the system:
nodejs -v
4. Perform the version check for NPM:
npm -v
Option 2: Install Node.js and NPM with NVM
Another way to install Node.js and NPM is with the Node Version Manager (NVM), a practical tool for managing multiple Node.js versions on the system.
Follow the steps below to install Node.js and NPM using NVM:
1. Download the NVM installation script from GitHub using the curl command:
Note: If curl is not present on the system, install it with sudo apt install curl.
curl -o- https://raw.githubusercontent.com/creationix/nvm/v[version]/install.sh | bashReplace [version] with the latest version number on the official NVM GitHub page. For example, to install version 0.40.1, type the following:
curl -o- https://raw.githubusercontent.com/creationix/nvm/v0.40.1/install.sh | bashThe script auto-executes, clones the NVM repository, and adds the NVM path to the shell.

2. Restart the terminal.
3. Check if the installation was successful by verifying the NVM version:
nvm --version
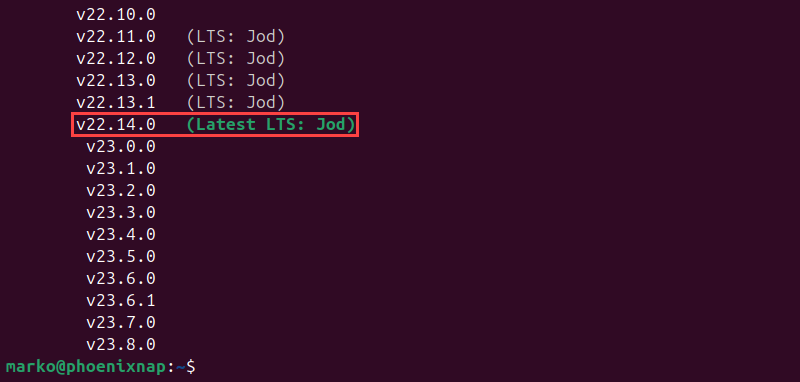
4. Find a list of all the available Node.js versions with the command:
nvm ls-remoteThe output lists Node.js versions, including the latest Long-Term Support (LTS) version.
5. Use the nvm install command and provide a version number in the argument. For example:
nvm install 22.14.0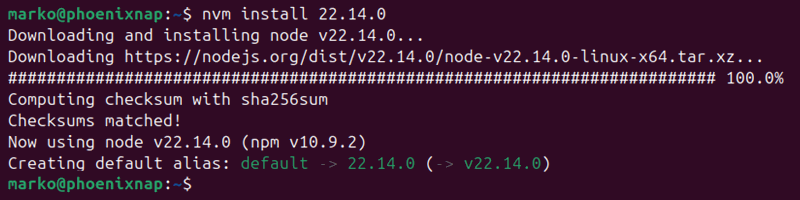
6. Enter the following command to view all the installed versions on the system:
nvm lsThe output lists installed Node.js versions along with other related information.

7. Check the currently active version with the command below:
node -v 8. Switch between installed Node.js versions with the following command:
nvm use [version]For example:
nvm use 22.14.0
Option 3: Install Node.js from NodeSource Repository
Install Node.js and NPM from the NodeSource repository by adding the relevant PPA (Personal Package Archive) for Ubuntu:
1. Use the following bash script to enable NodeSource:
curl -sL https://deb.nodesource.com/setup_[version].x | sudo -E bash -Replace [version] with the desired version number. For example, to install version 23, type the following:
curl -sL https://deb.nodesource.com/setup_23.x | sudo -E bash -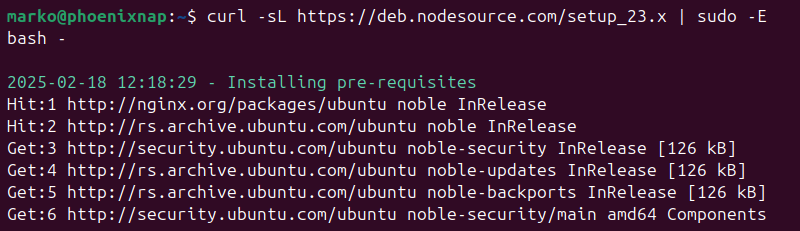
3. Install Node.js and NPM with the command below:
sudo apt install nodejsInstalling Development Tools
Once you have Node.js and NPM set up, install the development tools. This automation toolkit allows compiling and installing native add-ons from NPM.
To install development tools, run the command:
sudo apt install build-essentialRemove Or Uninstall Node.js on Ubuntu
The uninstallation method for Node.js and NPM depends on how the tools were installed:
- For Node.js versions installed with NPM, run the
nvm uninstallcommand appended by the version number. For example, to uninstall version 23.5.0, run the command:
nvm uninstall 23.5.0- For Node.js versions installed using APT, use the command below:
sudo apt remove nodejs To uninstall Node.js and remove any of its configuration files, use the command:
sudo apt purge nodejsNote: Learn how to build a Node.js app with Docker.
Conclusion
This tutorial taught you how to install Node.js and NPM on Ubuntu. It also provided instructions for removing or uninstalling these tools.
Node.js is part of the MEAN stack. Read our article to learn to install and set up MEAN stack on Ubuntu.