Nginx (pronounced engine-x) is a powerful and widely used open-source web server and reverse proxy server. It is known for its high performance, scalability, and efficiency in handling concurrent connections.
This tutorial teaches you how to install Nginx on Ubuntu 22.04, manage Nginx processes, and set up server blocks. The text also explains Nginx's important files and processes.
Requirements
- Ubuntu 22.04.
- Sudo or root privileges.
- Access to the terminal.
Install Nginx on Ubuntu 22.04
Understanding how to install and configure Nginx is essential for system administrators, web developers, and anyone managing web servers or web applications on Ubuntu.
The following steps elaborate on the installation process.
Step 1: Update Ubuntu Repositories
Nginx is, by default, available in the Ubuntu package index. Ensuring you get the latest Nginx version is important for the installation process. To get the latest version, first update the repository with this command:
sudo apt update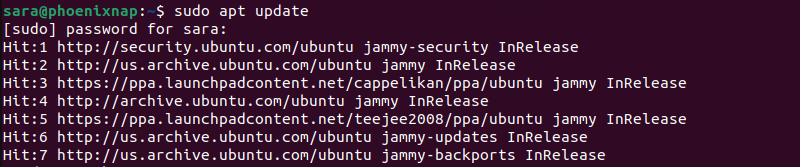
Step 2: Install Nginx
After updating repositories, begin the Nginx installation. Run the following command to install the latest version:
sudo apt install nginx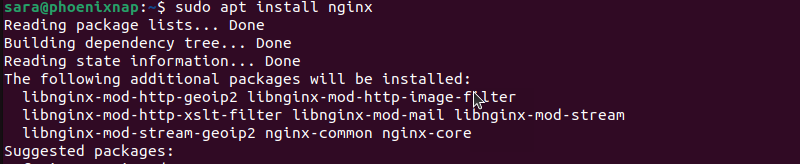
The command installs Nginx and any required dependencies to the server.
Step 3: Configure the Firewall
Upon installation, Nginx automatically registers itself as a service with ufw (Uncomplicated Firewall), simplifying the process of granting access to Nginx.
Nevertheless, confirm the firewall permits incoming traffic to the Nginx service with the following command:
sudo ufw app list
The output displays a list of available application profiles registered with the ufw on the system. These profiles have predefined rules that allow or deny traffic for specific services or applications.
In this example, there are application profiles for:
- CUPS. Stands for Common Unix Printing System. Contains rules that allow traffic related to printer services.
- Nginx Full. Designed for the Nginx web server and allows both HTTP and HTTPS traffic.
- Nginx HTTP. Allows only HTTP traffic for the Nginx web server.
- Nginx HTTPS. Allows only HTTPS traffic for the Nginx web server.
- OpenSSH. Created for the OpenSSH server, which is used for secure remote access to the system. It allows SSH traffic.
After confirming the required application profiles are listed, use these profiles with the ufw command to enable or disable access to the associated services. For instance, you might allow access to the Nginx Full profile to permit HTTP and HTTPS traffic or allow only HTTP traffic using the Nginx HTTP profile.
However, it's recommended only to grant the minimum necessary permissions for the application to function correctly. Therefore, enable only the most restrictive profile, which in this case is Nginx HTTP.
To accomplish that, run the following:
sudo ufw allow 'Nginx HTTP'
Step 4: Verify the Change
To ensure HTTP traffic is allowed, use the sudo ufw status command:
sudo ufw status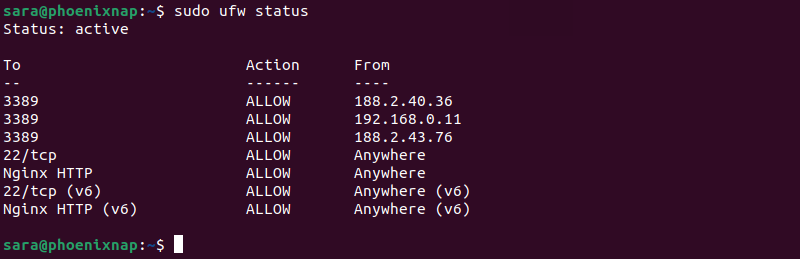
The output shows the service is active.
Step 5: Check Ngnix Status
Once the installation completes, Nginx starts up. Make sure the service is running:
sudo systemctl status nginx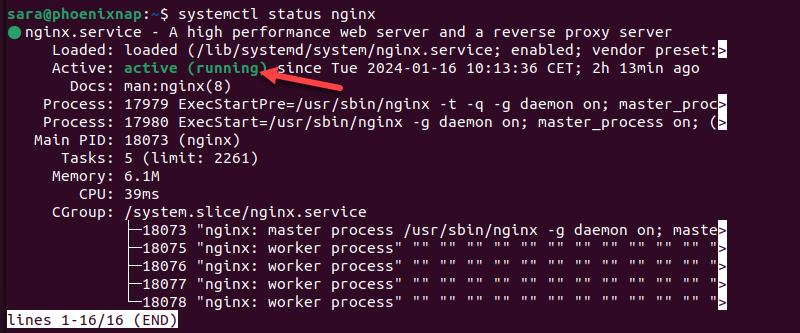
The output shows Nginx is active. However, in some cases, Nginx won't start by default, as shown in the example below.

If that is the case, start Nginx with:
sudo systemctl start nginxThe command has no output. Verify the change by rechecking the Nginx status.
Step 6: Access the Nginx Landing Page
Another way to verify the software is running correctly is to navigate to the server's IP address via a web browser.
Access any web browser and type in:
http:// [your_ip_adress]In our example, this is:
http://10.0.2.15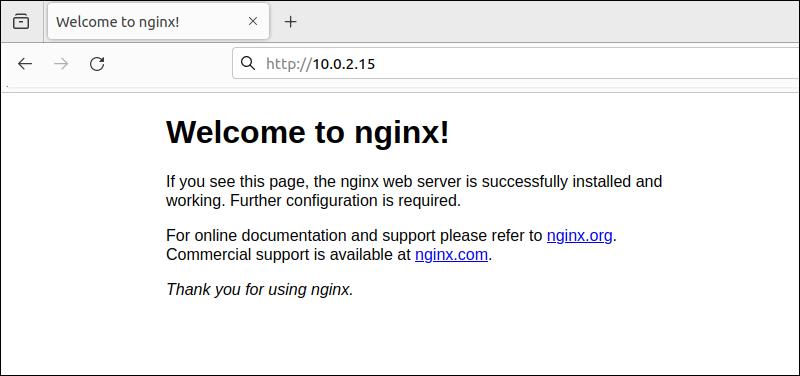
If successful, the browser shows the Nginx landing page.
Manage Nginx Process on Ubuntu
With the web server operational, users can run various commands to manage the Nginx process. Note that none of the following commands provide any output. Here are some examples:
1. To stop the web server, enter:
sudo systemctl stop nginx2. When the server is not active, start it with:
sudo systemctl start nginx3. To stop and then start the service again, execute:
sudo systemctl restart nginx4. When making changes to the Nginx web server configuration, such as modifying settings in its configuration files, users often must apply those changes to the running instance of Nginx. Reloading Nginx allows users to do this without disrupting active connections to the server. To accomplish that, run the following:
sudo systemctl reload nginx5. By default, Nginx starts automatically during server boot. To deactivate this behavior, run:
sudo systemctl disable nginx6. To enable the service for automatic startup upon boot, execute:
sudo systemctl enable nginxSet up Server Blocks
Server blocks in Nginx serve as containers for configuration details, allowing the hosting of multiple domains from a single server. Each server block represents a specific configuration for how the server should handle requests for a particular domain or IP address.
By default, Nginx on Ubuntu 22.04 has one enabled server block configured to serve documents from the directory at /var/www/html. While suitable for a single site, this setup becomes unmanageable when hosting multiple sites.
The following are the steps to set up server blocks in Nginx on Ubuntu.
Step 1: Create Directories
Establish a directory structure within the /var/www directory to systematically organize the website's content. This method provides the advantage of having a designated directory for each website, simplifying the web server file management and organization.
When you avoid modifying the /var/www directory directly, you ensure its preservation as the default directory.
For instance, create a sample directory, example1.com, using the mkdir command with the -p flag. Including the -p flag ensures the creation of the specified directory and any parent directories. Run the following command:
sudo mkdir -p /var/www/example1.com
The command has no output. However, to verify the directory is created, use the ls command:
ls /var/www
The output shows a newly created directory (example1.com) within /var/www. This directory organizes and stores the files associated with its respective website.
Step 2: Assign Permissions
Use the chown command to set directory ownership to the user who initiates the command. Execute the following command:
sudo chown -R $USER:$USER /var/www/example1.com
The $USER environment variable adopts the current user username, establishing the ownership of the current user and their primary group.
The chmod command changes the permissions of a file or directory. To confirm the owner possesses read, write, and execute permissions while allowing only read and execute permissions to groups and others, use the following command:
sudo chmod 750 /var/www/example1.com
The three digits represent permissions for the owner, group, and others:
- 7. Represents the owner's permissions. In binary, 7 is 111, meaning read (4), write (2), and execute (1) permissions are granted.
- 5. Represents the group's permissions. In binary, 5 is 101, meaning read and execute permissions are granted, but write permission is not.
- 0. Represents others (everyone else) and indicates no permissions.
Use chown to grant the Nginx user the required permissions to access the website directory. The www-data is a common username associated with the web server process on many Linux systems. Assigning ownership to the web server user ensures it has the necessary permissions to access and serve the files.
Execute the following commands:
sudo chown -R www-data /var/www/example1.com
Step 3: Create a Sample HTML Page
Create a sample index.html page using a text editor of choice. For instance, with Vim:
sudo vim /var/www/example1.com/html/index.htmlAdd the following sample HTML to the newly created file:
<!DOCTYPE html>
<html lang="en">
<head>
    <meta charset="UTF-8">
    <meta name="viewport" content="width=device-width, initial-scale=1.0">
    <title>Welcome to example1.com!</title>
</head>
<body>
    <header>
        <h1>Example1.com</h1>
    </header>
    <main>
        <p>Congratulations! You've successfully reached the example1.com server.</p>
    </main>
    <footer>
        <p>Thank you for visiting example1.com!</p>
    </footer>
</body>
</html>
Save and exit the file.
Step 4: Configure the Server Block
Create a server block configuration file. Instead of modifying the default configuration file directly, make a new one. For instance, example1.com:
sudo vim /etc/nginx/sites-available/example1.comNext, paste the following code into the file:
server {
    listen 80;
    listen [::]:80;

    root /var/www/example1.com/html;
    index index.html index.htm index.nginx-debian.html;

    server_name example1.com www.example1.com;

    location / {
        try_files $uri $uri/ =404;
    }
}
Save and exit the file.
Step 5: Create a Symbolic Link
Establish a symbolic link from its configuration file to the sites-enabled directory to activate the server block. Nginx references this directory during startup to determine which server blocks are to be enabled.
Execute the following command:
sudo ln -s /etc/nginx/sites-available/example1.com /etc/nginx/sites-enabled/
Step 6: Deactivate the Default Configuration
Nginx includes a configuration file by default. Deactivate it to prevent potential conflicts among configuration files. Use the following command:
sudo unlink /etc/nginx/sites-enabled/default
Step 7: Test Nginx Service
There are two ways to test the Nginx service. The first one is :
sudo nginx -t
The output confirms Nginx is working. The second way to verify this is to test the simple web page made earlier. Enter the following in the web browser:
http://[your_domain]For instance:
http://10.0.2.15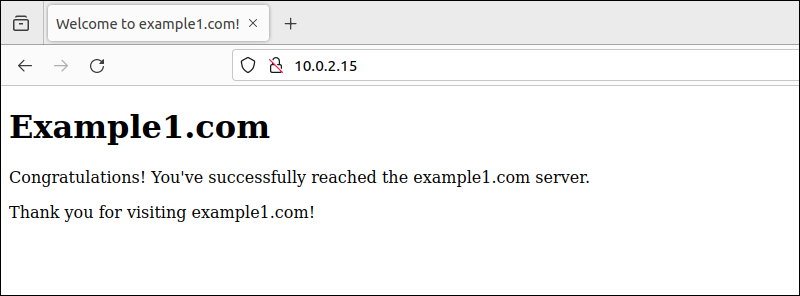
The example website is now in the place of the Nginx landing page.
Step 8: Restart the Nginx Service
If the test shows Nginx working properly, restart the service before using it further. Run the following:
sudo systemctl restart nginx
The command has no output, but it restarts Nginx.
Important Nginx Files and Directories
Understanding the critical files and directories with Nginx configuration and related data is crucial for effective Nginx management.
Here are the key Nginx files and directories:
- /etc/nginx/nginx.conf - The main Nginx configuration file contains directives for global settings, worker processes, error logging, and other fundamental configurations.
- /etc/nginx/sites-available - The Nginx sites configuration directory holds individual configuration files for each server block defined on the server. These files define settings for various hosted websites or applications.
- /etc/nginx/sites-enabled - The directory contains symbolic links to configuration files in the sites-available directory. Nginx uses this directory to enable or disable specific server blocks.
- /var/www/html - The Nginx HTML root directory stores web files for the default server block. Nginx serves files from this location when accessed directly via the server's IP address.
- /etc/nginx/modules-available - This directory manages installed Nginx modules, each typically having its configuration file stored here.
- /var/log/nginx - Nginx logs directory stores log files, including access and error logs. These logs are essential for troubleshooting and monitoring the web server.
- /run/nginx.pid - Nginx PID File contains the Process ID (PID) of the main Nginx process. System tools and processes use this information to manage and control the Nginx process.
Conclusion
After reading this article, you now know how to install, set up, and manage Nginx on Ubuntu 22.04.
Next, learn how to install an SSL certificate on the Nginx server.