n8n is an open-source workflow automation tool that enables connecting services and APIs to create custom workflows. It provides a visual, node-based interface for building automations.
Deployment with Docker is a recommended approach for self-hosting n8n. This method encapsulates the application and all its dependencies into a single, isolated container, ensuring consistency and portability.
This article will show you how to install n8n on Docker using real and tested examples.
Prerequisites
- Docker installed (see our tutorials for installing Docker on Ubuntu, Debian, Rocky Linux, and Windows).
- Docker Compose installed.
Benefits of Using Docker to Host n8n
Running n8n in a Docker container has the following deployment and maintenance benefits:
- Portability. Docker containers work consistently across different environments, from a local machine to a production server.
- Consistency. Docker containers prevent dependency conflicts by bundling all required components.
- Simplified Updates. Upgrading n8n is straightforward. It involves pulling the latest Docker image and restarting the container.
- Security. Containers provide an isolated environment, minimizing the attack surface and capturing potential security vulnerabilities.
How to Install n8n on Docker
Setting up n8n using Docker requires a single server with Docker and Docker Compose installed. This section explains the process of setting up a persistent self-hosted n8n instance.
Self-Host with Persistent Install
Follow the steps below to create a persistent n8n instance using Docker Compose:
1. Create and go to an n8n project directory:
mkdir ~/n8n && cd ~/n8n2. Create a subdirectory for storing persistent data:
mkdir n8n_data3. Set the correct ownership for the data directory to prevent permission errors:
sudo chown -R 1000:1000 n8n_data4. Create a compose.yml file using a text editor such as Nano:
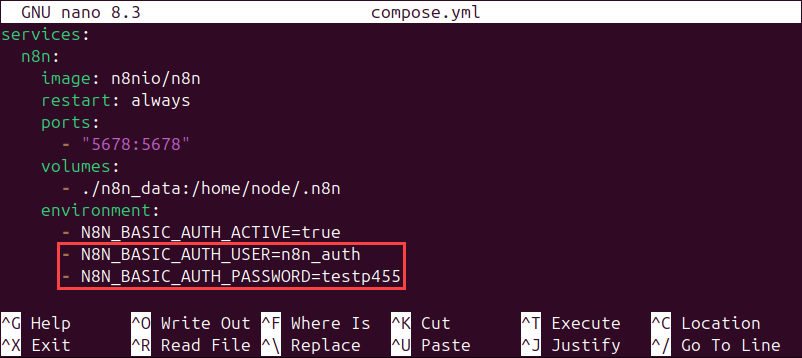
nano compose.yml5. Create a service configuration. The example below sets up n8n with basic authentication.
services:
  n8n:
    image: n8nio/n8n
    restart: always
    ports:
      - "5678:5678"
    volumes:
      - ./n8n_data:/home/node/.n8n
    environment:
      - N8N_BASIC_AUTH_ACTIVE=true
      - N8N_BASIC_AUTH_USER=[username]
      - N8N_BASIC_AUTH_PASSWORD=[password]
The example shows the file for user n8n_auth with the password testp455.
6. Save the file and exit.
7. Start the n8n container in detached mode:
docker compose up -d
8. Access the n8n instance in a web browser by navigating to the following address:
http://localhost:5678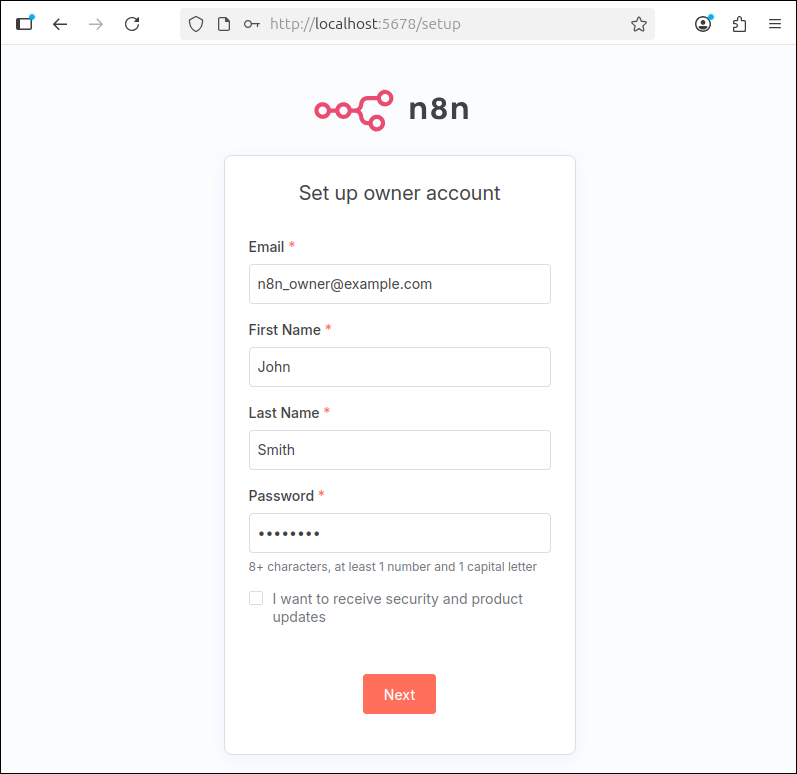
Set Up a Reverse Proxy and HTTPS
For production, exposing n8n via a reverse proxy with HTTPS is a necessary security step. This process requires a web server, such as Nginx, and a tool like Certbot for SSL certificates.
Follow the steps below to set up SSL on n8n:
1. Create a compose.yml that includes services for n8n, Nginx, and Certbot. Below is an example of one such file:
services:
  n8n:
    image: n8nio/n8n
    restart: always
    container_name: n8n
    environment:
      - N8N_HOST=[domain]
      - N8N_PROTOCOL=https
      - WEBHOOK_TUNNEL_URL=https://[domain]/
      - EXPRESS_TRUST_PROXY=true
      - TZ=[server_location]
    volumes:
      - /home/ubuntu/n8n/data:/home/node/.n8n
    ports:
      - '5678:5678'
    networks:
      - n8n_proxy_net

  nginx:
    image: nginx:1.21-alpine
    restart: always
    container_name: nginx
    volumes:
      - ./nginx/conf.d:/etc/nginx/conf.d
      - ./certbot/www:/var/www/certbot
      - ./certbot/conf:/etc/letsencrypt
    ports:
      - '80:80'
      - '443:443'
    depends_on:
      - n8n
    networks:
      - n8n_proxy_net

  certbot:
    image: certbot/certbot
    restart: unless-stopped
    container_name: certbot
    volumes:
      - ./certbot/www:/var/www/certbot
      - ./certbot/conf:/etc/letsencrypt
    command: certonly --webroot -w /var/www/certbot --email [email] -d [domain] --non-interactive --agree-tos
    networks:
      - n8n_proxy_net

networks:
  n8n_proxy_net:
    driver: bridge
Replace domain, server_location, and email with the data relevant to the deployment. Save the file and exit.
The file defines the following services:
- n8n. Sets the required environment variables to ensure n8n works correctly with a reverse proxy and HTTPS. The
WEBHOOK_TUNNEL_URLvariable is necessary for webhooks to function. - nginx. Maps ports 80 and 443 from the host to the container and mounts volumes for configuration and SSL certificates.
- certbot. Automatically runs the command to obtain a certificate using the
--webrootmethod. This method uses the nginx volume for the ACME challenge.
2. Create a configuration file named default.conf inside the ./nginx/conf.d/ directory:
nano ./nginx/conf.d/default.confThis file tells Nginx how to handle incoming traffic and direct it to the n8n container.
3. Paste the following code into the file, replacing domain with a domain name:
server {
    listen 80;
    server_name [domain];

    location /.well-known/acme-challenge/ {
        root /var/www/certbot;
    }

    location / {
        return 301 https://your.domain.com$request_uri;
    }
}

server {
    listen 443 ssl;
    server_name [domain];

    ssl_certificate /etc/letsencrypt/live/your.domain.com/fullchain.pem;
    ssl_certificate_key /etc/letsencrypt/live/your.domain.com/privkey.pem;

    ssl_protocols TLSv1.2 TLSv1.3;
    ssl_ciphers HIGH:!aNULL:!MD5;
    ssl_prefer_server_ciphers on;

    location / {
        proxy_pass http://n8n:5678;
        proxy_set_header Host $host;
        proxy_set_header X-Real-IP $remote_addr;
        proxy_set_header X-Forwarded-For $proxy_add_x_forwarded_for;
        proxy_set_header X-Forwarded-Proto $scheme;
    }
}
The file consists of the following server blocks:
- The first server block listens on port 80. It's primarily used for the Certbot ACME challenge to verify the domain ownership. After the certificate is obtained, it redirects all HTTP traffic to HTTPS.
- The second server block listens on port 443 for HTTPS traffic. It specifies the paths to the SSL certificate and key files, which are managed by Certbot. The
proxy_passdirective forwards traffic to the n8n container.
4. Start n8n using Docker Compose:
docker compose up -dInstall Using Portainer
Portainer is a graphical user interface (GUI) for managing Docker containers. Follow the steps below to deploy n8n on Docker using Portainer:
1. Access the Portainer dashboard for the relevant environment.
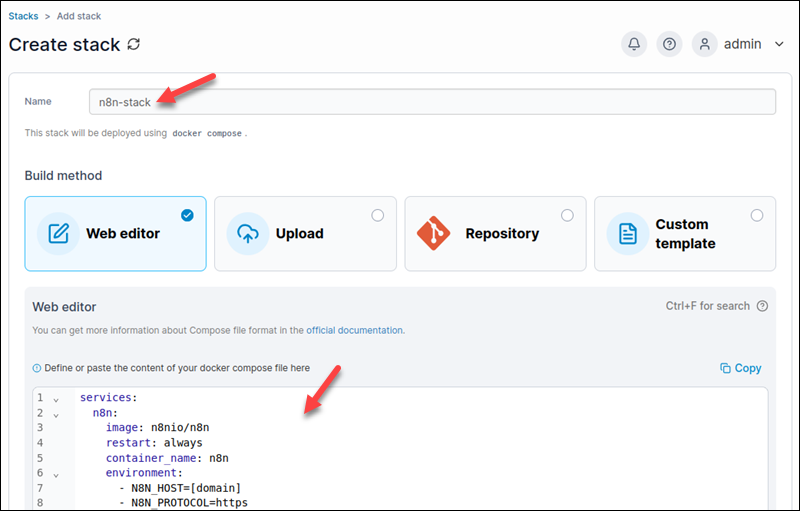
2. Navigate to Stacks and click Add stack.

3. Provide a name for the stack.
4. Paste the Docker Compose configuration from the previous section into the web editor.
5. Click Deploy the stack at the bottom of the page.
Using n8n with PostgreSQL
SQLite, the open-source, relational database management system (RDBMS), that comes as a default option in n8n is sufficient for local development and testing. For production environments, it is recommended to use solutions such as PostgreSQL.
To use n8n with PostgreSQL, modify the compose.yml file to include a PostgreSQL service. Configure the n8n service to connect to the PostgreSQL container using environment variables.
Below is an example code for PostgreSQL integration with n8n:
services:
  postgres:
    image: postgres:16
    restart: always
    environment:
      - POSTGRES_USER=n8n
      - POSTGRES_PASSWORD=n8n_password
      - POSTGRES_DB=n8n
    volumes:
      - db_data:/var/lib/postgresql/data
  n8n:
    image: docker.n8n.io/n8nio/n8n
    restart: always
    ports:
      - "5678:5678"
    volumes:
      - n8n_data:/home/node/.n8n
    environment:
      - DB_TYPE=postgresdb
      - DB_POSTGRESDB_HOST=postgres
      - DB_POSTGRESDB_PORT=5432
      - DB_POSTGRESDB_DATABASE=n8n
      - DB_POSTGRESDB_USER=n8n
      - DB_POSTGRESDB_PASSWORD=n8n_password
    depends_on:
      - postgres
volumes:
  n8n_data:
  db_data:
Note: For other n8n installation tutorials, visit our other guides How to Install n8 Locally, How to Install n8n on Windows and How to Install n8n on Ubuntu.
Using n8n with Tunnel
The n8n tunnel is a local development feature that creates a public URL for a locally running instance, allowing it to receive webhooks from external services. While useful for development and testing, this feature is not recommended for production.
To use the n8n tunnel, start the n8n container with the --tunnel option:
docker run -it --rm --name n8n -p 5678:5678 n8nio/n8n start --tunnelThe command outputs a unique, publicly accessible tunnel URL.
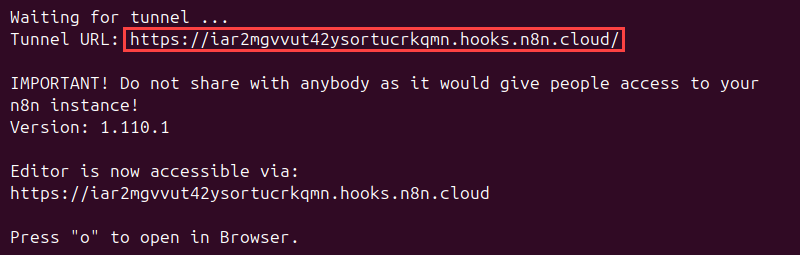
Use this URL to receive webhooks from third-party services.
Managing n8n with Docker: Best Practices
While Docker simplifies the deployment of n8n, the following best practices ensure the setup is secure, reliable, and easy to maintain:
- Persistent data. Always use Docker volumes or bind mounts to ensure persistence of workflows, credentials, and other data across container restarts.
- Environment variables. Use an ENV file to manage environment variables outside the compose.yml file. This practice prevents sensitive data from being committed to version control.
- Security.
- Enable basic authentication using environment variables.
- Deploy n8n behind a reverse proxy with HTTPS.
- Keep the Docker host and n8n container up to date.
- Backups. Implement a regular backup strategy for the n8n data volume and, if using, the PostgreSQL database volume.
Conclusion
This tutorial provided steps for installing n8n, a workflow automation tool. It also showed you how to make your n8n deployment more secure with HTTPS and SSL, and offered advice on best practices when working with n8n on Docker.
Next, read about server automation and learn how to achieve greater agility by automating infrastructure.