Apache Hadoop is a framework for processing and storing big data. It is designed to be deployed across a network of hundreds or even thousands of dedicated servers. All these machines work together to deal with the massive volume and variety of incoming datasets.
Deploying Hadoop services on a single node is a great way to get acquainted with basic commands and concepts.
This easy-to-follow guide explains how to install Hadoop on Ubuntu and set up a single-node deployment.

Prerequisites
- Access to a terminal window/command line.
- Sudo or root privileges on local/remote machines.
- Ubuntu version 26.04 installed.
Install JDK on Ubuntu
The Hadoop framework is written in Java, and its services require a compatible Java Runtime Environment (JRE) and Java Development Kit (JDK). Use the following command to update your system before initiating a new installation:
sudo apt updateAt the moment, Apache Hadoop 3.x fully supports Java 8 and 11. The OpenJDK 8 package in Ubuntu contains both the runtime environment and development kit.
Type the following command in your terminal to install OpenJDK 8:
sudo apt install openjdk-8-jdk -yNote: The OpenJDK or Oracle Java version can affect how elements of a Hadoop ecosystem interact. To install a specific Java version, check out our detailed guide on how to install Java on Ubuntu.
Once the installation process is complete, verify the current Java version:
java -version; javac -version
The output informs you which Java version is in use.
Set Up Hadoop User and Configure SSH
It is advisable to create a non-root user, specifically for the Hadoop environment. A distinct user improves security and helps you manage your cluster more efficiently. To ensure the smooth functioning of Hadoop services, the user should be able to establish a passwordless SSH connection with the localhost.
Install OpenSSH on Ubuntu
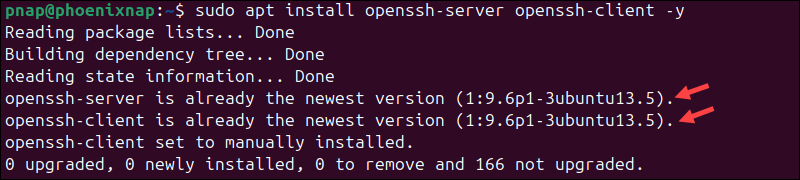
Install the OpenSSH server and client using the following command:
sudo apt install openssh-server openssh-client -yIn the example below, the output confirms that the latest version is already installed.
Note: If you have installed OpenSSH for the first time, use this opportunity to learn about Linux SSH security best practices.
Create Hadoop User
Utilize the adduser command to create a new Hadoop user:
sudo adduser hdoopThe username, in this example, is hdoop. You are free to use any username and password you see fit.
Tip: Check out our strong password ideas or try our free password generator.
Switch to the newly created user and enter the corresponding password:
su - hdoopThe user now needs to be able to SSH to the localhost without being prompted for a password.
Enable Passwordless SSH for Hadoop User
Generate an SSH key pair and define the location it is to be stored in:
ssh-keygen -t rsa -P '' -f ~/.ssh/id_rsaThe system proceeds to generate and save the SSH key pair.
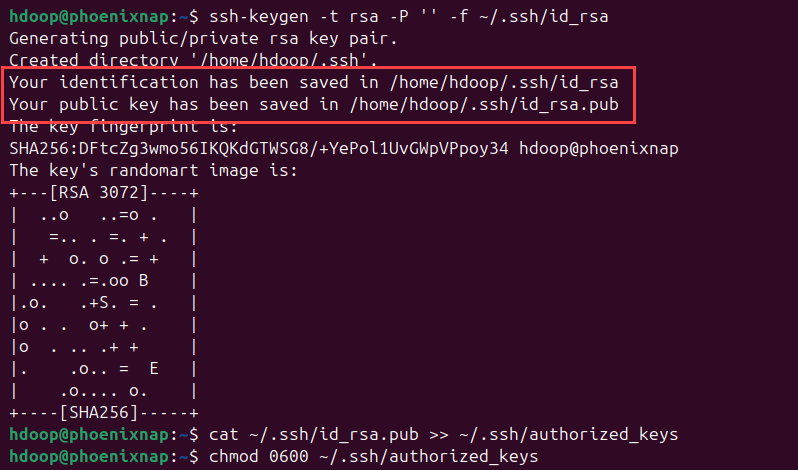
Use the cat command to store the public key as authorized_keys in the ssh directory:
cat ~/.ssh/id_rsa.pub >> ~/.ssh/authorized_keysSet the file permissions for your user with the chmod command:
chmod 0600 ~/.ssh/authorized_keysThe new user can now SSH without entering a password every time. Verify everything is set up correctly by using the hdoop user to SSH to localhost:
ssh localhostAfter an initial prompt, the Hadoop user can seamlessly establish an SSH connection to the localhost.
Download and Install Hadoop on Ubuntu
After configuring the Hadoop user, you are ready to install Hadoop on your system. Follow the steps below:
1. Visit the official Apache Hadoop project page and select the version of Hadoop you want to implement.
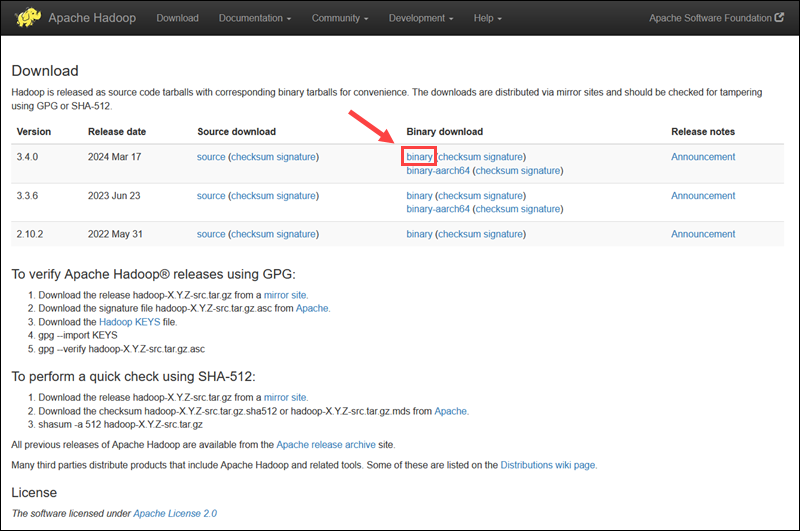
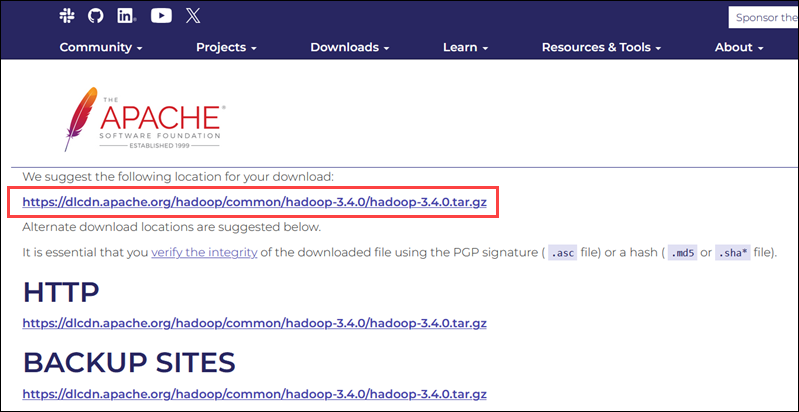
The steps outlined in this tutorial use the binary download for Hadoop Version 3.4.0. Select your preferred option, and you will be presented with a mirror link to download the Hadoop tar package.
Note: It is sound practice to verify Hadoop downloads originating from mirror sites. The instructions for using GPG or SHA-512 for verification are provided on the official download page.
2. Use the provided mirror link and download the Hadoop package using the wget command:
wget https://dlcdn.apache.org/hadoop/common/hadoop-3.4.0/hadoop-3.4.0.tar.gz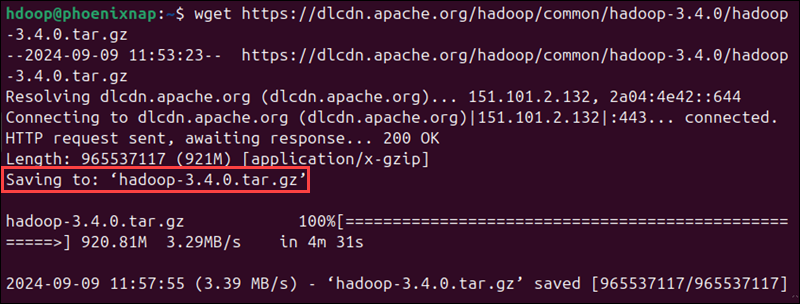
3. Once the download completes, use the tar command to extract the .tar.gz file and initiate the Hadoop installation:
tar xzf hadoop-3.4.0.tar.gzThe Hadoop binary files are now located in the hadoop-3.4.0 directory.
Single Node Hadoop Deployment (Pseudo-Distributed Mode)
Hadoop excels when deployed in a fully distributed mode on a large cluster of networked servers. However, if you are new to Hadoop and want to explore basic commands or test applications, you can configure Hadoop on a single node.
This setup, also called pseudo-distributed mode, allows each Hadoop daemon to run as a single Java process. Configure a Hadoop environment by editing a set of configuration files:
- .bashrc
- hadoop-env.sh
- core-site.xml
- hdfs-site.xml
- mapred-site-xml
- yarn-site.xml
Configure Hadoop Environment Variables (bashrc)
The .bashrc config file is a shell script that initializes user-specific settings, such as environment variables, aliases, and functions, every time a new Bash shell session is started. Follow the steps below to configure Hadoop environment variables:
1. Edit the .bashrc shell configuration file using a text editor of your choice (we will use nano):
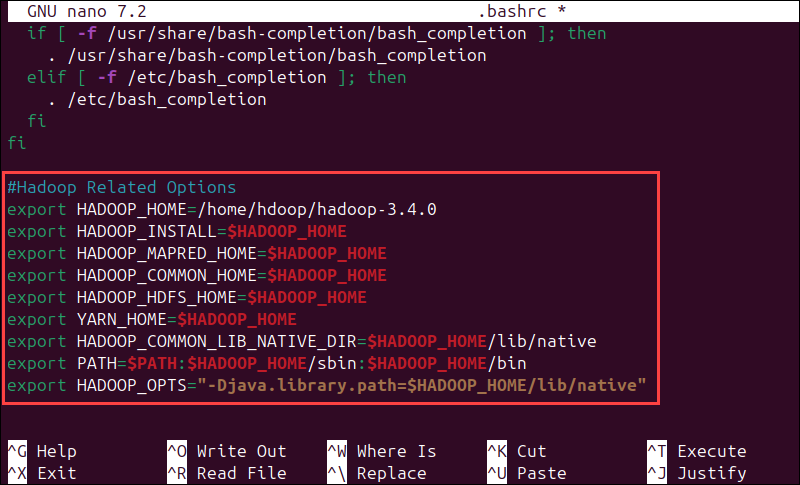
nano .bashrc2. Define the Hadoop environment variables by adding the following content to the end of the file:
#Hadoop Related Options
export HADOOP_HOME=/home/hdoop/hadoop-3.4.0
export HADOOP_INSTALL=$HADOOP_HOME
export HADOOP_MAPRED_HOME=$HADOOP_HOME
export HADOOP_COMMON_HOME=$HADOOP_HOME
export HADOOP_HDFS_HOME=$HADOOP_HOME
export YARN_HOME=$HADOOP_HOME
export HADOOP_COMMON_LIB_NATIVE_DIR=$HADOOP_HOME/lib/native
export PATH=$PATH:$HADOOP_HOME/sbin:$HADOOP_HOME/bin
export HADOOP_OPTS="-Djava.library.path=$HADOOP_HOME/lib/native"
3. Once you add the variables, save and exit the .bashrc file.
4. Run the command below to apply the changes to the current running environment:
source ~/.bashrcEdit hadoop-env.sh File
The hadoop-env.sh file serves as a master configuration file for YARN, HDFS, MapReduce, and Hadoop-related projects. When setting up a single-node Hadoop cluster, you need to specify which Java implementation to use.
Follow the steps below:
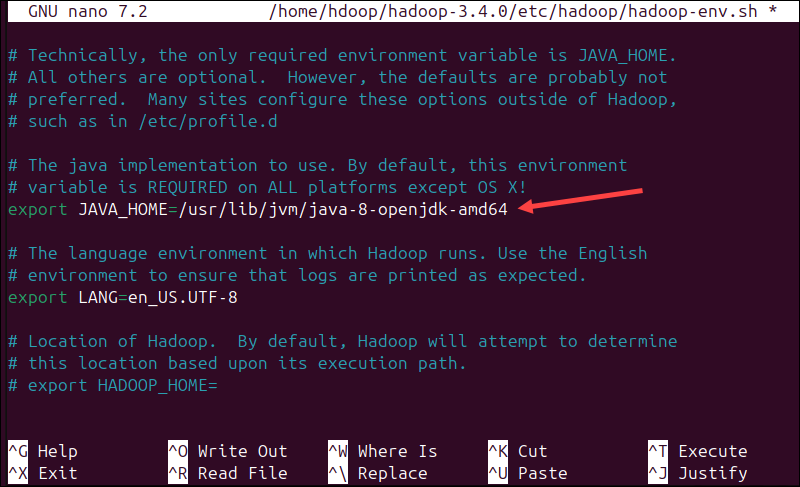
1. Use the previously created $HADOOP_HOME variable to access the hadoop-env.sh file:
nano $HADOOP_HOME/etc/hadoop/hadoop-env.sh2. Uncomment the $JAVA_HOME variable (i.e., remove the # sign) and add the full path to the OpenJDK installation on your system. If you have installed the same version as presented in the first part of this tutorial, add the following line:
export JAVA_HOME=/usr/lib/jvm/java-8-openjdk-amd64The path needs to match the location of the Java installation on your system.
If you need help to locate the correct Java path, run the following command in your terminal window:
which javacThe resulting output provides the path to the Java binary directory.

3. Use the provided path to find the OpenJDK directory with the following command:
readlink -f /usr/bin/javacThe section of the path just before the /bin/javac directory needs to be assigned to the $JAVA_HOME variable.

Edit core-site.xml File
The core-site.xml file defines HDFS and Hadoop core properties. To set up Hadoop in a pseudo-distributed mode, you need to specify the URL for your NameNode, and the temporary directory Hadoop uses for the map and reduce process.
The steps below show how to configure the file.
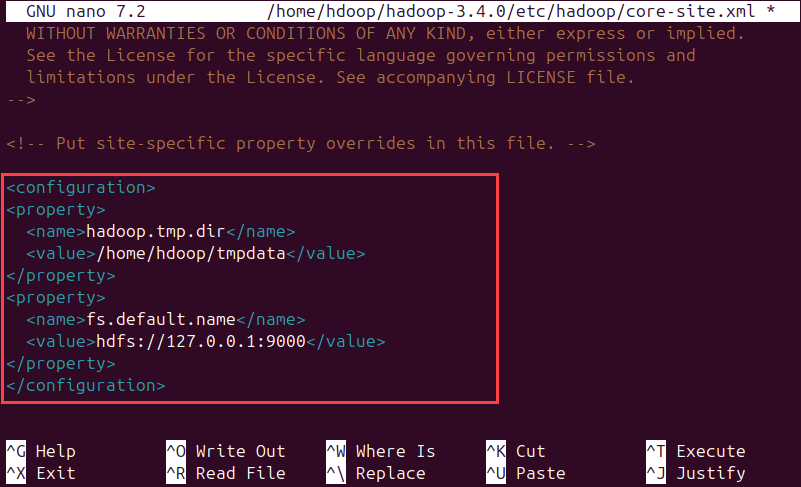
1. Open the core-site.xml file in a text editor:
nano $HADOOP_HOME/etc/hadoop/core-site.xml2. Add the following configuration to override the default values for the temporary directory and add your HDFS URL to replace the default local file system setting:
<configuration>
<property>
  <name>hadoop.tmp.dir</name>
  <value>/home/hdoop/tmpdata</value>
</property>
<property>
  <name>fs.default.name</name>
  <value>hdfs://127.0.0.1:9000</value>
</property>
</configuration>
This example uses values specific to the local system. You should use values that match your system's requirements. The data needs to be consistent throughout the configuration process.
Do not forget to create a directory in the location you specified for your temporary data.
Edit hdfs-site.xml File
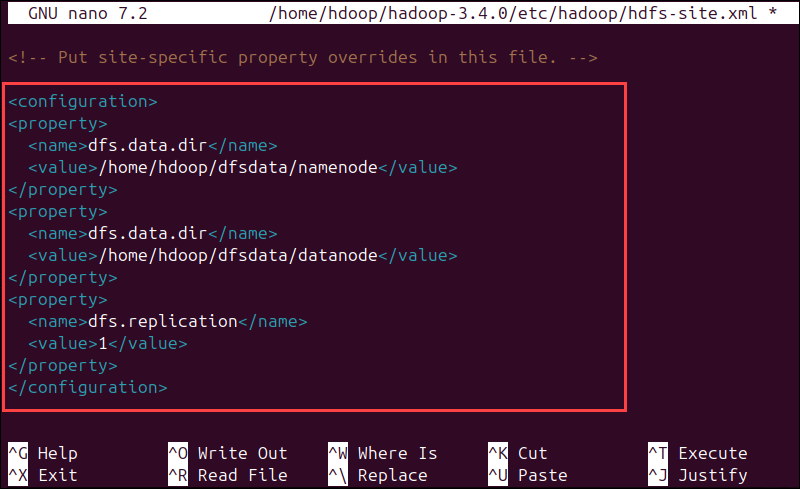
The hdfs-site.xml file governs specifies critical parameters, such as data storage paths, replication settings, and block sizes, which govern the behavior and performance of the HDFS cluster. Configure the file by defining the NameNode and DataNode storage directories. Additionally, the default dfs.replication value of 3 needs to be changed to 1 to match the single-node setup.
Follow the steps below:
1. Use the following command to open the hdfs-site.xml file for editing:
sudo nano $HADOOP_HOME/etc/hadoop/hdfs-site.xml2. Add the following configuration to the file and, if needed, adjust the NameNode and DataNode directories to your custom locations:
<configuration>
<property>
  <name>dfs.data.dir</name>
  <value>/home/hdoop/dfsdata/namenode</value>
</property>
<property>
  <name>dfs.data.dir</name>
  <value>/home/hdoop/dfsdata/datanode</value>
</property>
<property>
  <name>dfs.replication</name>
  <value>1</value>
</property>
</configuration>
If necessary, create the specific directories you defined for the dfs.data.dir value.
Edit mapred-site.xml File
The mapred-site.xml file is a configuration file that defines settings for the MapReduce framework, including parameters such as the job tracker address, the number of map and reduce tasks, and resource management, to control how MapReduce jobs are executed across the cluster.
Follow the steps below to configure the mapred-site.xml file:
1. Use the following command to access the mapred-site.xml file and define MapReduce values:
sudo nano $HADOOP_HOME/etc/hadoop/mapred-site.xml2. Add the following configuration to change the default MapReduce framework name value to yarn:
<configuration>
<property>
  <name>mapreduce.framework.name</name>
  <value>yarn</value>
</property>
</configuration>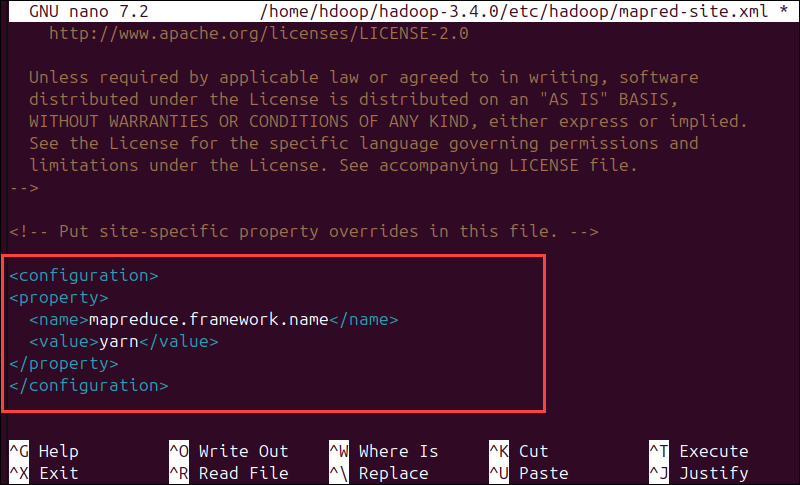
Edit yarn-site.xml File
The yarn-site.xml file defines YARN settings. It contains configurations for the Node Manager, Resource Manager, Containers, and Application Master.
1. Open the yarn-site.xml file in a text editor:
nano $HADOOP_HOME/etc/hadoop/yarn-site.xml2. Append the following configuration to the file:
<configuration>
<property>
  <name>yarn.nodemanager.aux-services</name>
  <value>mapreduce_shuffle</value>
</property>
<property>
  <name>yarn.nodemanager.aux-services.mapreduce.shuffle.class</name>
  <value>org.apache.hadoop.mapred.ShuffleHandler</value>
</property>
<property>
  <name>yarn.resourcemanager.hostname</name>
  <value>127.0.0.1</value>
</property>
<property>
  <name>yarn.acl.enable</name>
  <value>0</value>
</property>
<property>
  <name>yarn.nodemanager.env-whitelist</name>
  <value>JAVA_HOME,HADOOP_COMMON_HOME,HADOOP_HDFS_HOME,HADOOP_CONF_DIR,CLASSPATH_PERPEND_DISTCACHE,HADOOP_YARN_HOME,HADOOP_MAPRED_HOME</value>
</property>
</configuration>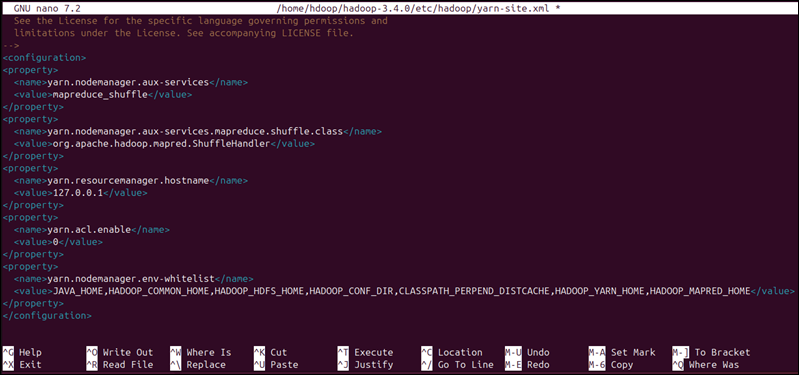
Format HDFS NameNode
It is important to format the NameNode before starting Hadoop services for the first time:
hdfs namenode -formatThe shutdown notification signifies the end of the NameNode format process.

Start Hadoop Cluster
Starting a Hadoop cluster involves initializing the key services - HDFS for distributed storage and YARN for resource management. This enables the system to process and store large-scale data across multiple nodes.
Follow the steps below:
1. Navigate to the hadoop-3.4.0/sbin directory and execute the following command to start the NameNode and DataNode:
./start-dfs.shThe system takes a few moments to initiate the necessary nodes.

2. Once the namenode, datanodes, and secondary namenode are up and running, start the YARN resource and nodemanagers by typing:
./start-yarn.shAs with the previous command, the output informs you that the processes are starting.

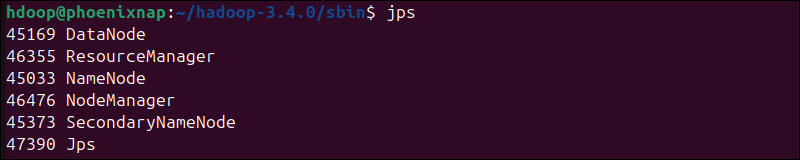
3. Run the following command to check if all the daemons are active and running as Java processes:
jpsIf everything works as intended, the resulting list of running Java processes contains all the HDFS and YARN daemons.
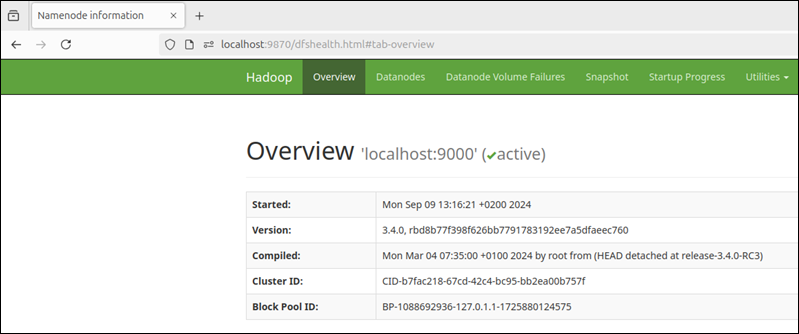
Access Hadoop from Browser
Use your preferred browser and navigate to your localhost URL or IP. The default port number 9870 gives you access to the Hadoop NameNode UI:
http://localhost:9870The NameNode user interface provides a comprehensive overview of the entire cluster.
The default port 9864 is used to access individual DataNodes directly from your browser:
http://localhost:9864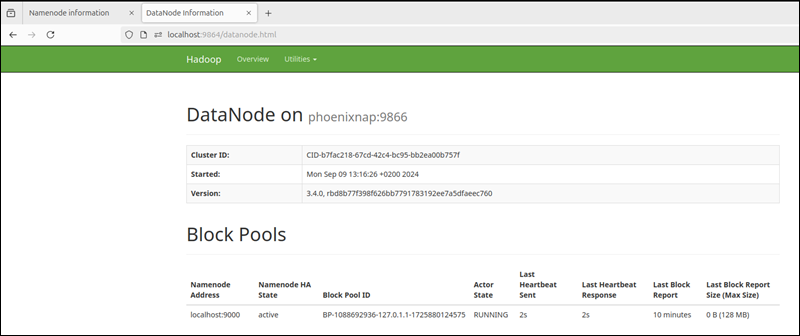
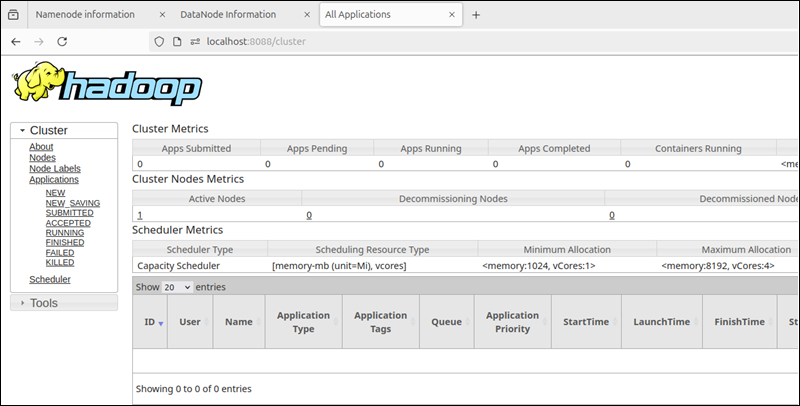
The YARN Resource Manager is accessible on port 8088:
http://localhost:8088The Resource Manager is an invaluable tool that allows you to monitor all running processes in your Hadoop cluster.
Conclusion
You have successfully installed Hadoop on Ubuntu and deployed it in a pseudo-distributed mode. A single-node Hadoop deployment is an excellent starting point for exploring basic HDFS commands and acquiring the experience you need to design a fully distributed Hadoop cluster.
Consider installing Apache Hive to manage your Hadoop storage and perform SQL-like tasks.
Next, learn about the Hadoop architecture and the layers and tools that make Hadoop an irreplaceable framework in big data.