Machine learning, deep learning, computer vision, and large datasets require a robust, GPU-based infrastructure with parallel processing. The Bare Metal Cloud (BMC) GPU instances offer dedicated access to hardware designed for demanding GPU computing and AI tasks.
These BMC server types have two Intel MAX 1100 GPU cards. The server's parallel processing capabilities and computational power are essential for faster model training and intensive machine learning tasks.
This guide shows how to set up a machine learning environment on a BMC GPU instance.

Prerequisites
- BMC portal credentials. Create a Bare Metal Cloud account if you are a new client.
- Access to the terminal.
Step 1: Deploy and Access BMC GPU Server
This section shows how to deploy and access the BMC GPU server through simplified steps. For more information about each server deployment step, see our in-depth guide on deploying a Bare Metal Cloud server.
To deploy and access a BMC server:
1. Log into the BMC portal using your credentials.
2. Navigate to the Deploy Servers page. Alternatively, use an existing reservation.
3. Choose the data center location (Phoenix or Ashburn).
4. Select an hourly or a long-term reservation billing model.

The reservation guarantees the resources during the selected period. For more details about reservations and billing, see the in-depth guide for billing with different reservation types.
5. Select the number of servers to deploy.
6. Use the GPU filter to list the MAX GPU servers. Select one of the available server instances.
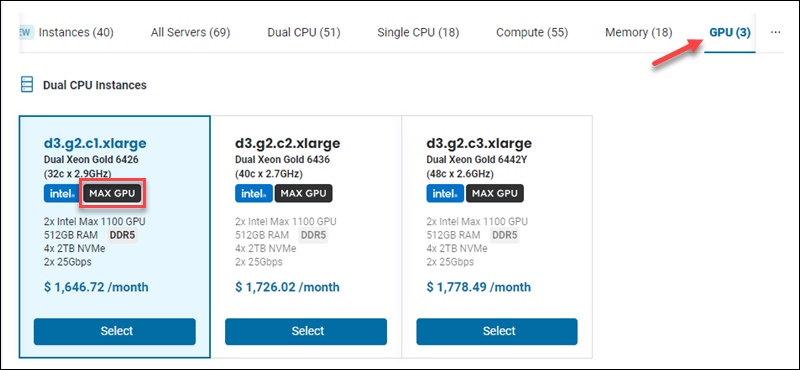
This guide uses the d3.g2.c1.xlarge instance to demonstrate the installation steps.
7. Choose the OS settings in the following section. There are two available options:
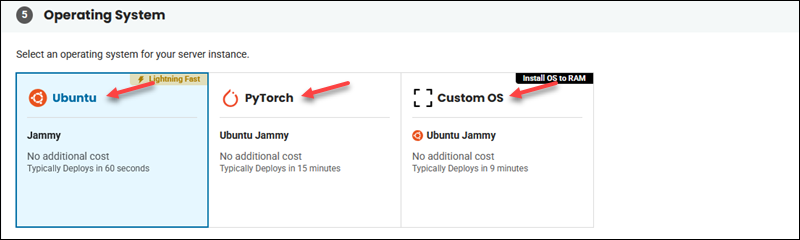
- Ubuntu Jammy. It requires manually setting up one API Base Toolkit and installing an AI or machine learning environment (steps 2 and 3 in this guide). The GPU driver is preinstalled.
- PyTorch (Ubuntu Jammy). An out-of-the-box solution. Comes with the latest available PyTorch image pre-installed via Docker.
- Custom OS. It requires manually setting up a custom OS, GPU driver, and machine learning environment.
8. Provide the hostname for the server.
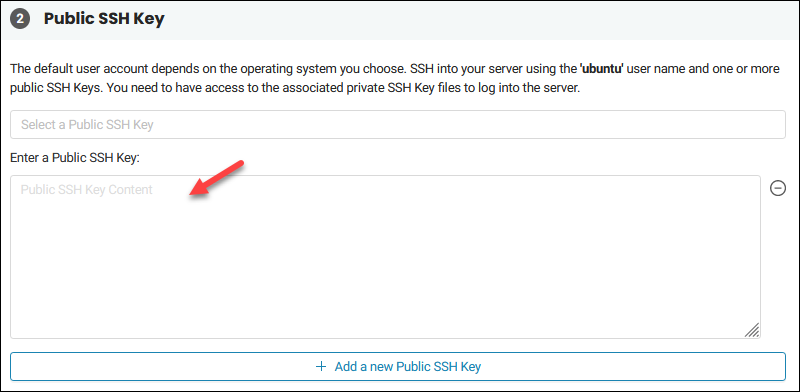
9. Choose an existing public SSH key from the list. Alternatively, generate an SSH key pair and add the new public key.
10. (Optional) Set up the network and IP settings. If using a public network, refer to our public IP management guide and configure the server after deployment.
11. Review all the information and deploy the server when ready.
12. Once deployed (status POWERED ON), SSH into the server:
ssh ubuntu@[server_IP]Replace [server_IP] with the actual server address. The address is visible on the server listing page in the IP Address column and the server details page in the Network & IP Settings tab.
13. Enter yes to approve the connection when prompted.
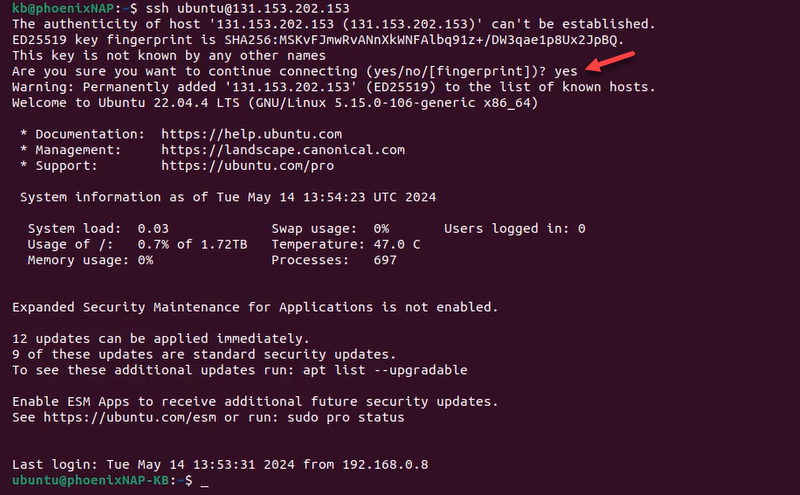
The IP address is added to the list of known hosts, and the connection to the server is established.
Note: The BMC API is another way to deploy the server. Use the POST /servers method and provide the server type as either d3.g2.c1.xlarge, d3.g2.c2.xlarge, or d3.g2.c3.xlarge.
For more information, see how to create a server via BMC API.
View GPU Topology and Driver Details
The server has two Intel MAX 1100 GPU cards and a preinstalled GPU driver. To view the card topology, run:
xpu-smi topology -m
This command shows the system's GPU topology in matrix form, illustrating how the GPU cards are interconnected and how data flows between them.
To view the preconfigured driver details, run:
modinfo i915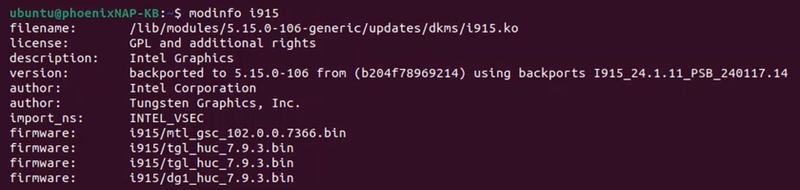
This command displays information about the i915 kernel module, which manages the Intel graphics driver. It shows details such as module parameters, dependencies, and license information.
Note: Learn more about why GPUs and deep learning go hand-in-hand.
View PyTorch Docker Image and Run Container
If using the PyTorch GPU server, the machine learning library Docker image is preinstalled and ready to run on the server. Do the following:
1. To see the Docker image, use:
docker images
The output shows the image details, including the repository and tag (required to run the container).
2. To run the container, execute the following docker run command:
docker run --rm -it --privileged --device=/dev/dri --ipc=host [repository]:[tag] bash
The command runs and attaches to the container as a root user. It immediately switches to the Bash shell inside the container.
3. To check the PyTorch version and view the XPU details, run the following inside the container:
python -c "import torch; import intel_extension_for_pytorch as ipex; print(torch.__version__); print(ipex.__version__); [print(f'[{i}]: {torch.xpu.get_device_properties(i)}') for i in range(torch.xpu.device_count())];"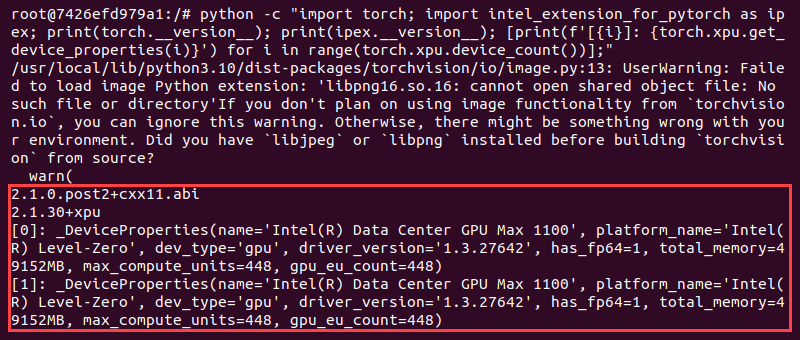
The command shows the PyTorch version, the Intel extension version, and the data for each XPU device.
Step 2: Install Intel oneAPI Base Toolkit
The Intel oneAPI Base Toolkit is a collection of essential tools for optimizing machine learning across different hardware. It serves as a unified API that (with minimal adjustments) works in various architectures.
To install the toolkit, do the following:
1. Update the APT package list:
sudo apt update2. Set up the repository:
wget -O- https://apt.repos.intel.com/intel-gpg-keys/GPG-PUB-KEY-INTEL-SW-PRODUCTS.PUB | gpg --dearmor | sudo tee /usr/share/keyrings/oneapi-archive-keyring.gpg > /dev/null
The command downloads the repository key and adds it to the system keyring.
3. Add the entry to APT sources:
echo "deb [signed-by=/usr/share/keyrings/oneapi-archive-keyring.gpg] https://apt.repos.intel.com/oneapi all main" | sudo tee /etc/apt/sources.list.d/oneAPI.list
The command adds the signed entry and enables using the repository.
4. Update the package list:
sudo apt updateThe list now includes the newly added source.
5. Install the base toolkit with:
sudo apt install intel-basekit
The command installs the latest available toolkit.
6. Set up the oneAPI environment variables by running these shell scripts:
- Data Parallel C++ (DPC++) Compiler (oneDPL):
source /opt/intel/oneapi/compiler/latest/env/vars.sh- Math Kernel Library (oneMKL):
source /opt/intel/oneapi/mkl/latest/env/vars.sh- MPI Library:
source /opt/intel/oneapi/mpi/latest/env/vars.sh- Collective Communications Library (oneCCL):
source /opt/intel/oneapi/ccl/latest/env/vars.sh
These are the minimum requirements for the Intel extension to work with TensorFlow or PyTorch. Add other components as needed, such as the oneDNN library for deep neural networks or oneTBB for parallelizing compute-intensive workloads.
Step 3: Set Up Machine Learning Libraries
PyTorch and TensorFlow are popular machine learning libraries that support Intel GPUs.
First, install the Python venv module with:
sudo apt install python3.10-venvThis module lets you create isolated virtual environments for Python development.
Next, depending on your requirements, install and set up either TensorFlow or PyTorch. The sections below provide step-by-step installation instructions specifically tailored for Intel AI workloads.
Note: For a standard setup, follow normal PyTorch or TensorFlow installation steps instead.
Option 1: TensorFlow for GPU
To install TensorFlow with the Intel extension for TensorFlow support, follow the steps below:
1. Create a virtual environment for the installation:
python3 -m venv tensorflow_testThis command creates an isolated environment for package installation, as TensorFlow recommends.
2. Run the activation script to activate the virtual environment:
source tensorflow_test/bin/activate
3. Upgrade PIP to the latest version:
pip install --upgrade pip4. Install TensorFlow using PIP:
pip install tensorflow==2.15.0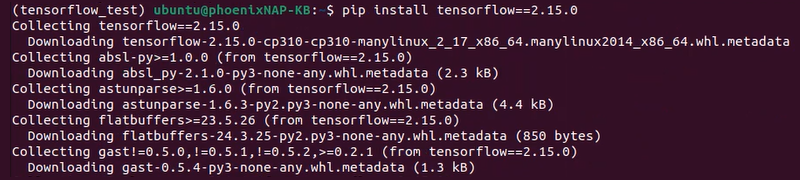
Adjust the version number to make it compatible with the oneAPI base toolkit version.
5. Install the Intel extension for TensorFlow:
pip install --upgrade intel-extension-for-tensorflow[xpu]
The Intel extension is specifically tailored for Intel-based AI workloads.
6. Confirm the setup worked. Run the following command:
python3 -c "import tensorflow as tf; import intel_extension_for_tensorflow as itex; print(tf.__version__); print(itex.__version__); [print(f'[{device}]: {tf.config.experimental.get_device_details(device)}') for device in tf.config.experimental.list_physical_devices('XPU')];"
The script imports TensorFlow and the Intel extension for TensorFlow. It prints the versions of these two libraries and the device details.
If successful, the output shows that the Intel extension for TensorFlow GPU has been loaded and lists the two available XPU devices.
Option 2: PyTorch for GPU
To install and set up PyTorch and the Intel extension for PyTorch, do the following:
1. Create a virtual environment:
python3 -m venv torch_testThe environment enables isolating the installation from the rest of the system.
2. Activate the environment:
source torch_test/bin/activate
The terminal changes to the torch_test environment.
3. Upgrade PIP with:
pip install --upgrade pip4. Install PyTorch inside the environment:
python -m pip install torch==2.1.0.post2 torchvision==0.16.0.post2 torchaudio==2.1.0.post2 intel-extension-for-pytorch==2.1.30+xpu oneccl_bind_pt==2.1.300+xpu --extra-index-url https://pytorch-extension.intel.com/release-whl/stable/xpu/us/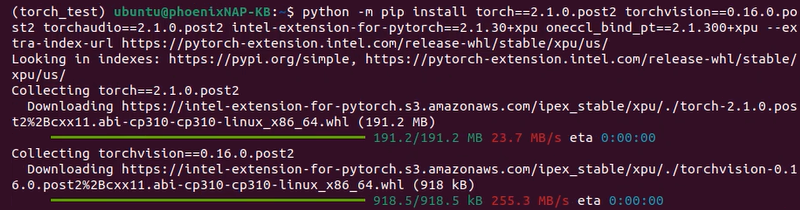
The command installs torch, torchvision, torchaudio, and the Intel extension for PyTorch. Ensure the versions are compatible with the installed oneAPI version.
Note: Installing torchvision and torchaudio is optional. Check project requirements to install only the required packages.
5. Confirm the installation worked with the following:
python3 -c "import torch; import intel_extension_for_pytorch as ipex; print(torch.__version__); print(ipex.__version__); [print(f'[{i}]: {torch.xpu.get_device_properties(i)}') for i in range(torch.xpu.device_count())];"
The script imports PyTorch and the Intel extension libraries. It prints their versions and the details for the two XPU devices.
Conclusion
This guide showed how to set up a machine learning environment on a BMC GPU instance. You can now leverage powerful tools like TensorFlow and PyTorch with Intel's oneAPI Base Toolkit to optimize performance.
Contact us if you need assistance with your Bare Metal Cloud instance.