The Custom OS feature allows provisioning a Bare Metal Cloud server with a fully functional OS in RAM.
The phoenixNAP BMC Ansible module enables automatic provisioning and installation of a custom OS through the RAM OS.
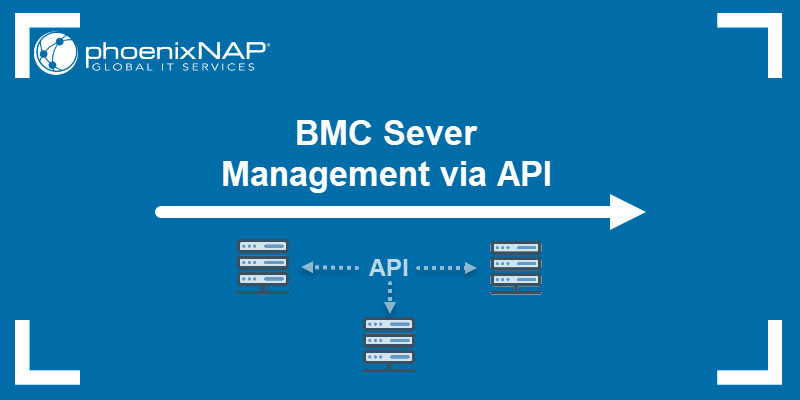
This article shows you how to provision a BMC server with a custom OS using Ansible.

Prerequisites
- Bare Metal Cloud portal account. Create an account if you do not own one.
- Ansible 2.9+ installed (follow our guides for Ansible on Ubuntu or Ansible on Windows).
- PhoenixNAP BMC Ansible module installed.
- Git installed.
Custom OS On BMC
To demonstrate the custom OS feature on BMC, we will show you how to install a CentOS alternative: Rocky Linux. The custom OS installs Ubuntu Jammy Jelly (22.04) to RAM by default to allow post-provisioning actions.
The RAM OS lets you install a different OS on the server with a unique setup. The following features are customizable through the Ansible playbook:
- The root size.
- The choice whether to use LVM or not.
- Setting the RAID level, if any. To learn more, check out our RAID levels and types guide.
- Custom OS disk image, either a pre-created one or a custom made image.
The steps below show how to provision a server with a custom OS using an Ansible playbook. The Ansible playbook uses the Bare Metal Cloud API to provision a server and performs additional post-provisioning actions. All commands are performed on an Ubuntu machine.
Step 1: Authorize Access to BMC Resources
To authorize Ansible access to the BMC API, do the following:
1. Log into the Bare Metal Cloud portal.
2. Navigate to the API Credentials page.
3. Create new credentials, or alternatively, locate the existing credentials you wish to use.
4. From the Actions menu, click View Credentials.
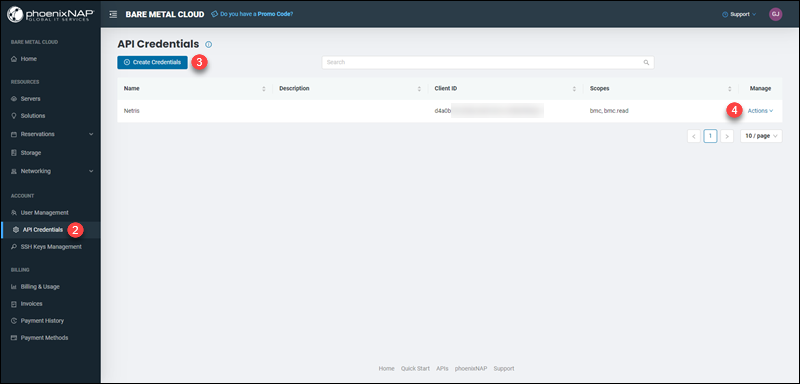
5. The Client ID and Client Secret display.

Copy and paste the credentials into a ~/.pnap/config.yaml file in the following format:
clientId: <client ID>
clientSecret: <client secret>
The Ansible playbook uses these credentials to authorize API requests for provisioning the server.
6. Lastly, generate SSH keys to allow access to the server:
ssh-keygenSave the keys using default names (id_rsa and id_rsa.pub). If using different names, make sure to apply changes in subsequent steps.
The SSH public key provisions the server with the Ansible playbook. After the setup, the keys allow you to access the server remotely via SSH.
Step 2: Clone Ansible Playbook Files from GitHub
The custom OS playbooks are available on phoenixNAP's GitHub page. The playbooks work with the BMC API to provision and set up the server.
Fetch the Ansible playbook files using:
git clone https://github.com/phoenixnap/ansible-ramos-bmc
The playbook files are:
- inventory.yaml contains all the information about the BMC server. Custom values in this file allows custom OS setup.
- provision.yaml deploys the BMC server using the RAM OS feature. The playbook uses the information from inventory.yaml to deploy and set up custom OS on the server.
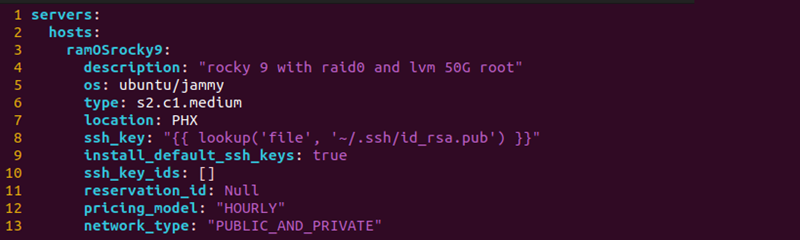
Step 3: Customize OS Inventory File
The inventory.yaml file contains information about your server and the custom OS setup. The default values used in this guide are:
- An s2.c1.medium server in Phoenix at an hourly rate.
- Rocky OS with a 50G root volume, LVM, and RAID level 0.
To configure the Ansible playbook and add your preferences, open the file using a text editor:
vim inventory.yaml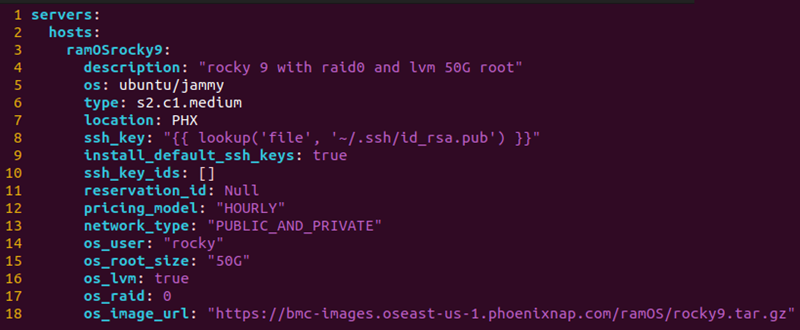
The file contains information about the server in the following fields:
- hosts - Lists individual hosts. The example file uses one host with the hostname ramosrocky9. Specify additional hosts with personalized options to provision multiple custom OS servers.
- description - A description of the server.
- os - The OS of the provisioned server, which is ubuntu/jammy. Do not change this field.
- type - The BMC server instance to provision. Check the availability of the server instance via the BMC portal. For a complete list of servers, view the Bare Metal Cloud instances page.
- location - The three-letter code for the server site. For example, PHX for Phoenix.
- ssh_key - The location of the public SSH key for authentication. If using a different name or path, change the value.
- install_default_ssh_keys - Tells the server to add any default SSH keys from your BMC account.
- ssh_key_ids - List of additional SSH keys to add. Locate the IDs on the SSH Keys Management page in the BMC portal. Leave blank if no additional keys are necessary.
- reservation_id - If using a reservation, provide the reservation ID in this field. If provisioning a new server, leave this field as Null.
- pricing_model - The default billing model is set to "HOURLY" for a standard server usage rate by the hour.
- network_type - The server requires a connection to the internet to install requirements.
Additional information about the custom OS is in the following variables:

- os_user - The user for accessing the server via SSH after installation. The default value is "rocky".
- os_root_size - Size of the root partition in gigabytes. Set the size between 20-50GB.
- os_lvm - Indicates whether to use logical volume management.
- os_raid - Sets the RAID level. Available options are 0 or 1. Leave blank for no RAID setup.
- os_image_url - Link to the image of the custom OS you wish to install.
Step 4: Run Provision Playbook
The provision.yaml playbook provisions a server with Ubuntu 22.04 booted in RAM. After the boot, the playbook automatically installs a custom OS based on the values provided in inventory.yaml.
To run the playbook, use the following:
ANSIBLE_HOST_KEY_CHECKING=False ansible-playbook provision.yaml -i inventory.yamlThe playbook runs through the following tasks:
1. Provisions the server - once the server provisions, the output shows a response with the server details:
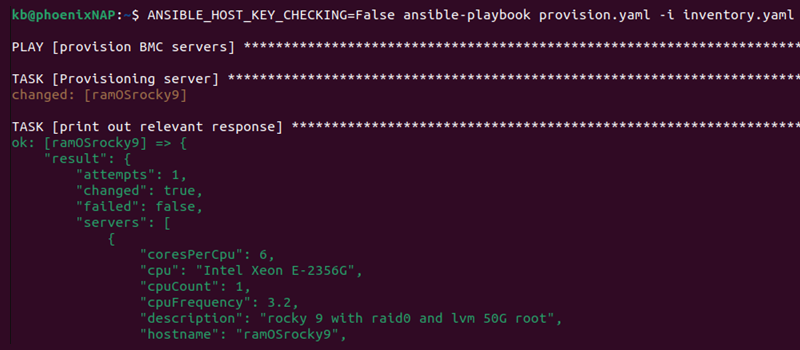
If provision fails, double check the server instance you're trying to deploy is available for the chosen location.
2. Connects to the server via SSH.
3. Sets up the OS image. The playbook uses the curtin tool to download the image previously created using packer.
4. Performs block device checks to ensure the right resources are available for the custom setup.
5. Creates the curtin installer configuration file and executes the file to perform the installation.
6. Reboots and connects via SSH to confirm a connection.
Note: Add the -vv tag for verbose output to see task details.
Once the setup completes, the output prints the playbook recap.

The server is set up with a custom OS and ready to use.
Step 5: Connect to Server
To connect to the server via SSH, use the following ssh command:
ssh <hostname>@<IP>
Use the OS user provided in the inventory.yaml file and the server's IP address to access the server via SSH. If using the default values, the user is set to rocky.
After connecting to the server, list the block devices to confirm the setup is successful:
lsblk
The output shows the values provided in the inventory.yaml file. The default values are a 50G root volume with LVM and RAID 0 setup. Root access and sudo commands are immediately available.
Note: We also recommend you check out our guide on installing Rocky Linux on VMware.
Conclusion
After going through the steps from this guide, you've successfully installed a custom OS using the BMC Ansible module and the BMC API.
Utilizing the custom OS feature on BMC provides a fully functional OS customized to your needs.