Ansible is an Infrastructure as Code tool for managing and monitoring remote servers. It requires a Linux-based system to run, which can be an issue if you want to use its features on Windows. However, there are multiple methods to install Ansible on Windows.
This tutorial covers different ways to install Ansible on Windows.

Prerequisites
- A machine running Windows.
- A user account with administrator privileges.
Install Ansible on Windows Using WSL
Windows Subsystem for Linux (WSL) allows users to install different Linux distributions (such as Ubuntu) and use Linux apps and Bash command-line tools directly. This method does not require a virtual machine or dual-boot setup.
Install Ansible with WSL by following the steps below:
1. Press the Windows key and type powershell. In the right panel, select the Run as administrator option.
2. Run the following command to install WSL and Ubuntu:
wsl --installNote: To install a distribution other than Ubuntu, run wsl --list --online to see a list of available distros and use the syntax below to install a specific distro:
wsl --install -d [distro_name]3. Once the installation completes, Ubuntu automatically launches. Run the following command to update the system repository information:
sudo apt update4. Install the prerequisite packages that allow you to add the official Ansible PPA:
sudo apt install software-properties-common5. Add the PPA with the following command:
sudo apt-add-repository ppa:ansible/ansible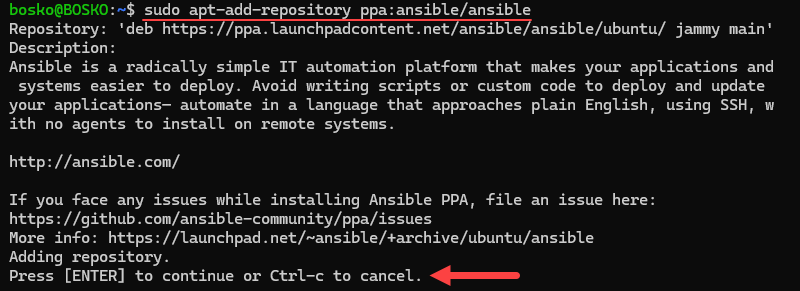
When prompted, press Enter to continue.
6. Update the package repository information after adding the PPA:
sudo apt update7. Install Ansible by running:
sudo apt install ansible -yWait for the process to complete, and you can start using Ansible.
Note: Check out our tutorial on how to install Ubuntu on Windows with Hyper-V. Hyper-V allows you to install a distribution of Linux on Windows, including Ubuntu.
Install Ansible on Windows Using Cygwin
Cygwin is a POSIX-compatible environment that lets you run tools and code designed for Unix-like operating systems on Microsoft Windows.
To install Ansible on Windows using Cygwin, follow these steps:
1. Download the Cygwin installation file. This file is compatible with both the 32-bit and 64-bit versions of Windows. It automatically installs the right version for your system.
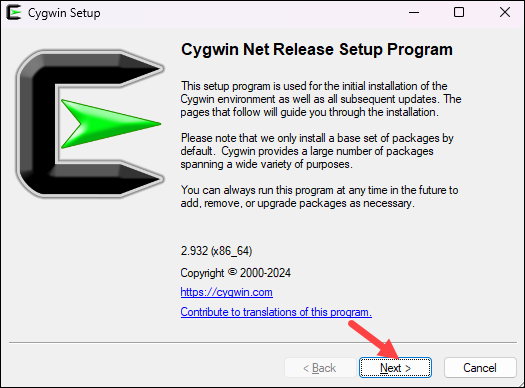
2. Double-click the downloaded file to run it. On the welcome screen, click Next to continue.
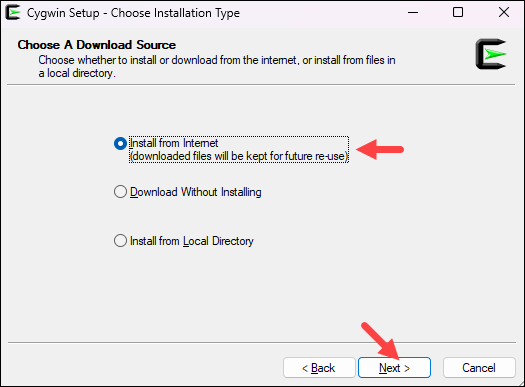
3. Select Install from Internet as the download source and click Next.
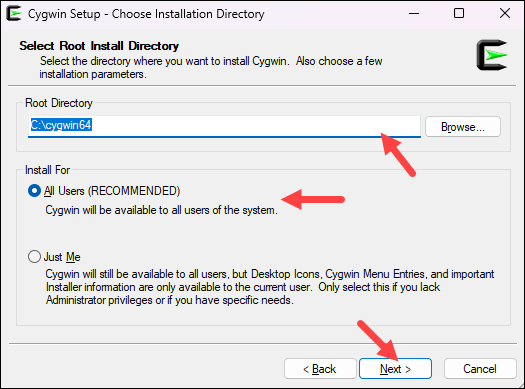
4. In the Root Directory field, specify where you want the application installed, then click Next.
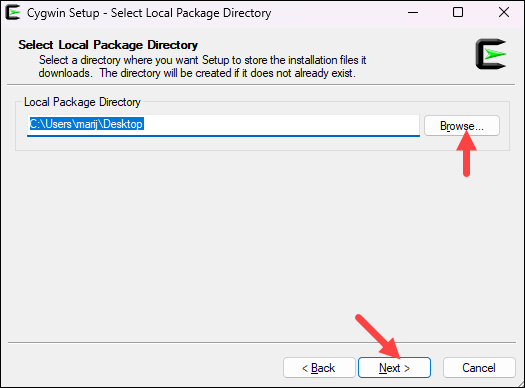
5. In the Local Package Directory field, select where you want to install your Cygwin packages, then click Next.
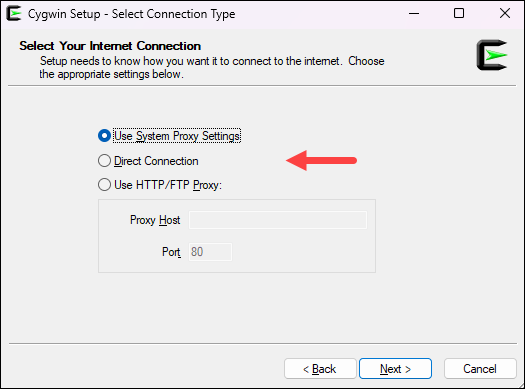
6. Choose the appropriate Internet connection option. If you are not using a proxy, select Direct Connection. Otherwise, select Use System Proxy Settings or enter proxy settings manually using Use HTTP/FTP Proxy. Click Next to continue.
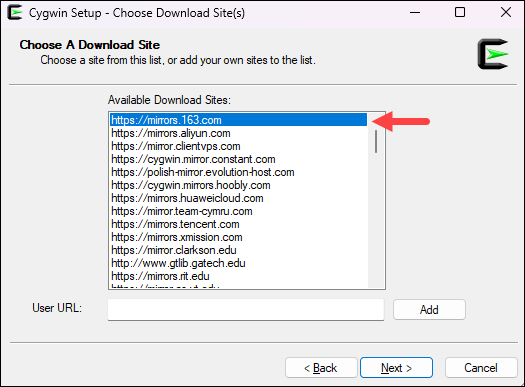
7. Choose one of the available mirrors to download the installation files, then click Next.
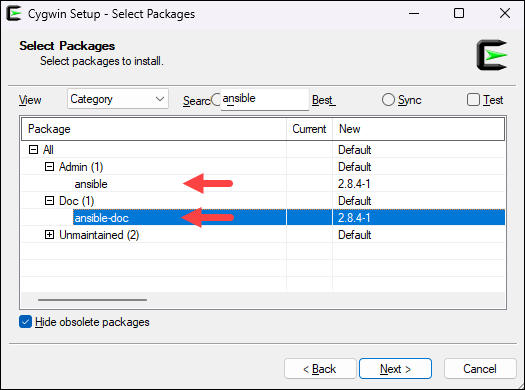
8. On the Select Packages screen, type ansible in the search bar and press Enter to perform the search. Expand the Admin and Doc categories and double-click the ansible and ansible-doc files to select them.
Click Next to install the packages.
9. The next screen lets you review the installation settings. To confirm and begin the installation process, click Next.
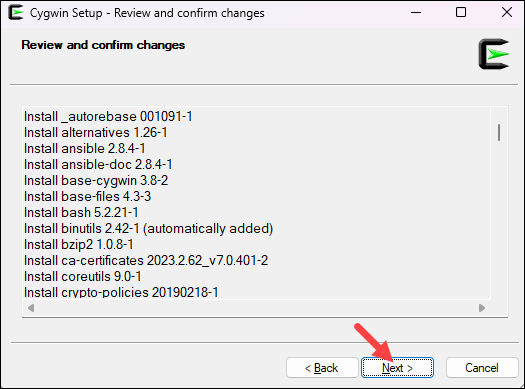
The install wizard downloads and installs all the selected packages, including Ansible.
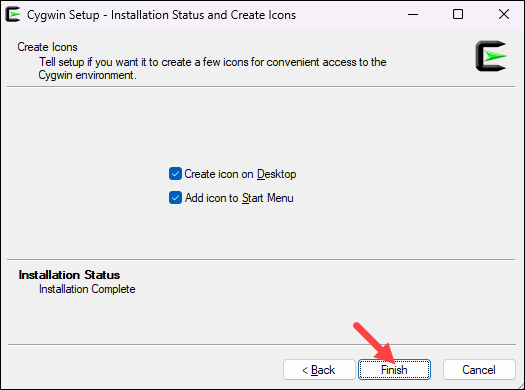
10. Once the installation is complete, select whether you want to add a Cygwin desktop and the Start Menu icon. Click Finish to close the wizard.
Install Ansible on Windows Using Linux Virtual Machine
Another way to install Ansible on Windows is to use a virtualization tool and a Linux virtual box. In this example, we will use Oracle VM VirtualBox to set up an Ubuntu virtual machine and install Ansible.
Follow the steps in the sections below.
Step 1: Set up VirtualBox
Follow the steps below to set up VirtualBox on your system:
1. Using a web browser, navigate to the VirtualBox Downloads page. Download the VirtualBox Windows installation file and double-click it to start the installation.
2. Click Next on the welcome screen of the installation wizard to continue.
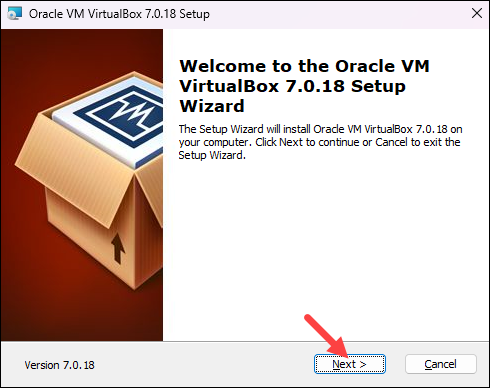
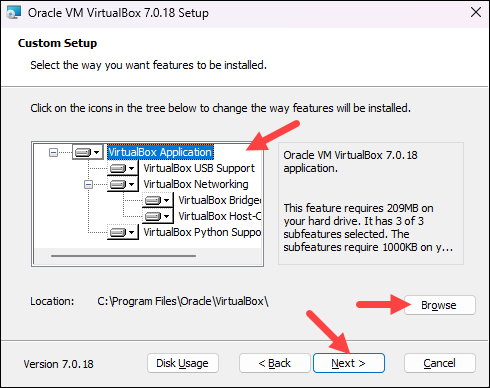
3. The next step allows you to select which VirtualBox features you want to install. This is also where you can set the installation location. Click Next to continue.
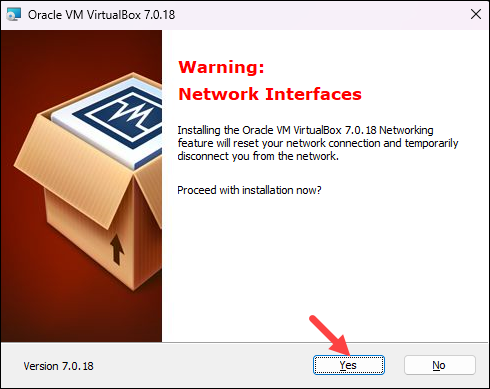
4. A new screen will warn you that the install wizard needs to reset your network connection. Click Yes to continue.
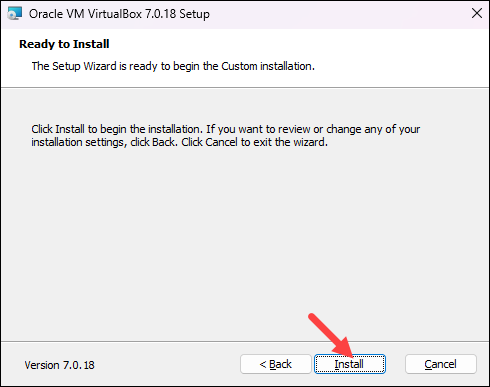
5. On the next screen, click Install to begin the installation process and wait until it completes.
Step 2: Create Ubuntu Virtual Machine
The steps below show how to create a new Ubuntu virtual machine:
1. Download the Ubuntu desktop image. In this tutorial, we will use Ubuntu 22.04.
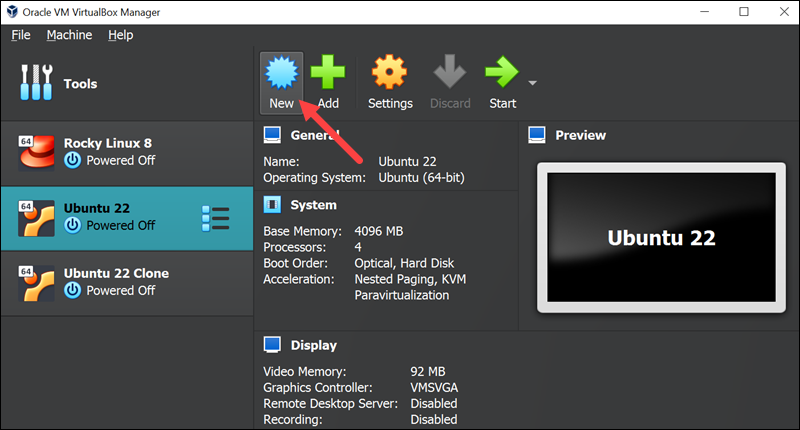
2. On the VirtualBox starting screen, click New.
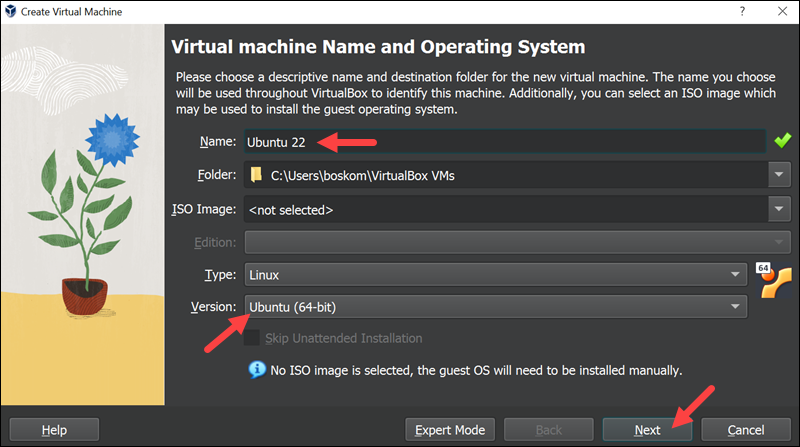
3. Type in the name of your virtual machine. If the name contains the word Ubuntu, the operating system dropdown menu automatically updates to Ubuntu (64-bit). If not, you can select the operating system manually using the dropdown menu. Click Next to continue.
4. Use the sliders to set the amount of RAM and number of CPU cores you want the virtual machine to have, and click Next to continue.
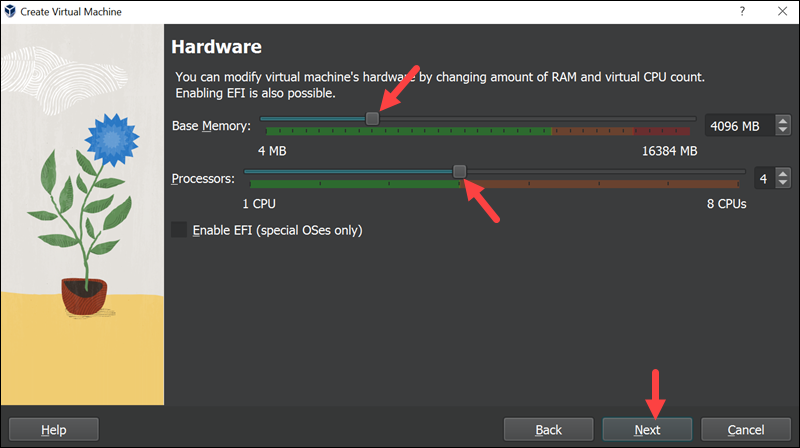
Note: By default, Oracle VM VirtualBox assigns 1024MB of RAM to every virtual machine. Make sure you assign enough RAM to your new VM, or it will not work properly.
5. Select a hard disk option for your virtual machine. Choose Create a virtual hard disk now if you are creating a brand-new VM. Use the slider to set the hard disk capacity, and click Next to continue.
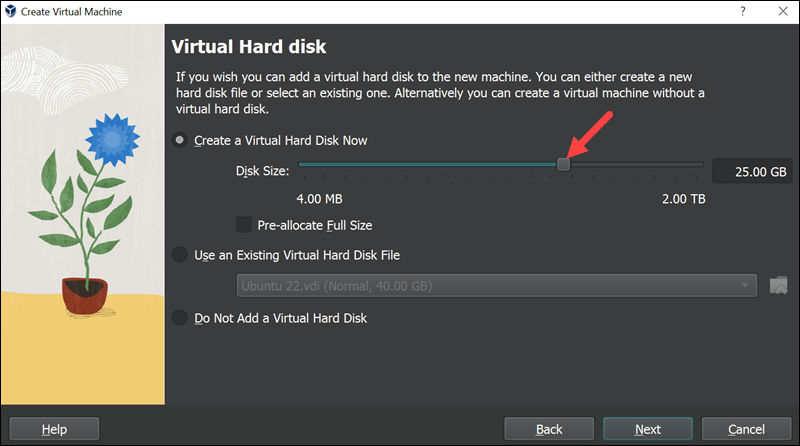
Note: Just like with RAM, you need to make sure you assign enough hard disk space to your virtual machine.
6. Select the new VM you just created on the left side of the VirtualBox starting screen. Click Start to run the new VM.
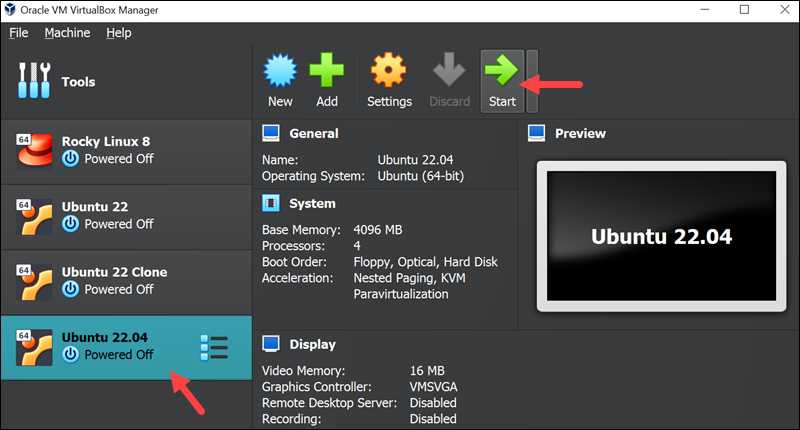
7. VirtualBox will prompt you to select a start-up disk. Click the button next to the drop-down menu to open the optical Disk Selector and find the Ubuntu ISO you previously downloaded.
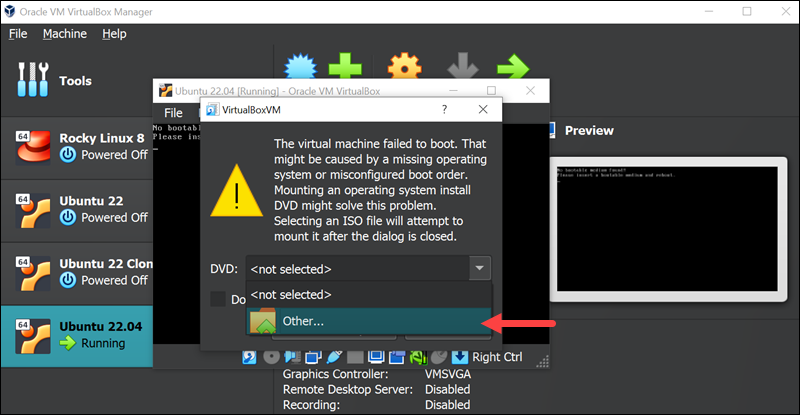
Click the Mount and retry boot button, and the VM boots from the Ubuntu ISO. Follow the steps for installing Ubuntu outlined in our tutorial.
Step 3: Install Ansible
Once you are done installing Ubuntu, open the command terminal (Ctrl + Alt + T) to install Ansible and follow the steps below:
1. Update the local repository information:
sudo apt update2. Install Ansible with this command:
sudo apt install ansible -y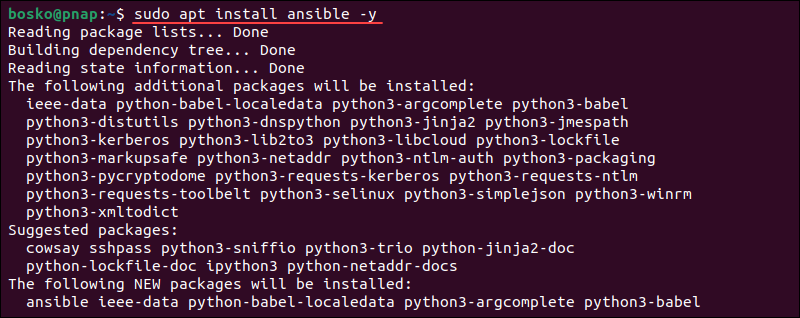
The rest of the installation process is automated.
After you install the tool on your virtual machine, you can configure Ansible by setting up the hosts inventory file and checking the connections.
Note: After setting up Ansible on Windows, check out our Ansible shell module guide to learn how to run ad-hoc shell commands and incorporate them into your automation workflows.
Conclusion
If you followed the steps in this guide, you now have Ansible installed on your Windows system. Ansible is a great tool for automating IT tasks such as configuration management, application deployment, and orchestration. You can use it to manage and configure remote servers and plan your CI/CD process.
Next, see how Ansible compares to SaltStack, or read our article to help you decide between Ansible and Jenkins.

