Rocky Linux is one of the distributions that emerged as an alternative to CentOS after CentOS's discontinuation in 2021. As a free and open-source project, Rocky Linux aims to provide a viable replacement for enterprise operating systems in application development.
The server-centric and performance-oriented nature of Rocky Linux makes it a good choice for running containerized workloads. However, managing app containers at scale requires a container orchestrator like Kubernetes.
This article will guide you through installing Kubernetes on Rocky Linux.
Prerequisites
- Two or more machines running Rocky Linux (Bare Metal Cloud offers server instances that are deployed automatically with Rocky Linux).
- 2 GB of RAM and 2 CPU cores or more on each machine.
- Sudo or root access for each system.
- Ansible installed (for the 2nd method).
Install Kubernetes on Rocky Linux (Manual Method)
Manual installation of Kubernetes on Rocky Linux involves:
- Setting up a container runtime interface (CRI).
- Making adjustments to security and networking configuration.
- Installing the essential Kubernetes tools.
Note: Execute the installation steps on each node (physical or virtual machine) you plan to add to the cluster.
Step 1: Install containerd
containerd is a Docker-made CRI tool that creates, executes, and supervises containers. Follow the procedure below to set it up on your Rocky Linux system.
1. Add the official Docker repository to your system. Docker does not maintain a separate repository for Rocky Linux, but the CentOS repo is fully compatible.
sudo dnf config-manager --add-repo https://download.docker.com/linux/centos/docker-ce.repoThe output confirms the operation's success.

2. Refresh the local repository information.
sudo dnf makecache
3. Install the containerd.io package.
dnf install -y containerd.io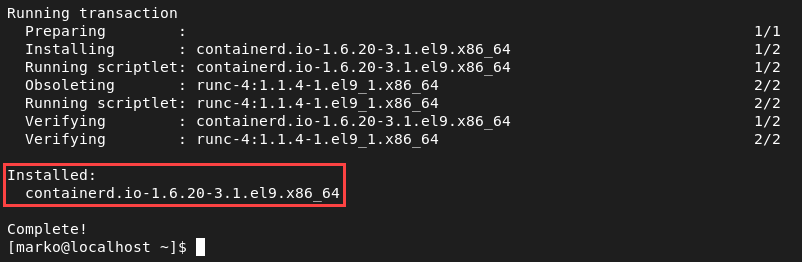
4. Back up the default configuration file for containerd:
sudo mv /etc/containerd/config.toml /etc/containerd/config.toml.bak5. Create a new file with the default template:
containerd config default > config.toml6. Open the file in a text editor. This tutorial uses nano.
sudo nano config.toml7. Find the SystemdCgroup field and change its value to true.
SystemdCgroup = true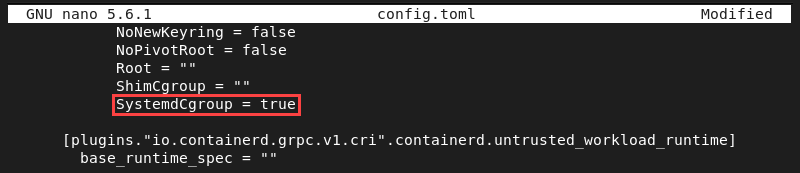
Save the file and exit.
8. Place the new file in the /etc/containerd directory:
sudo mv config.toml /etc/containerd/config.toml9. Enable the containerd service:
systemctl enable --now containerd.service
10. Open the Kubernetes modules configuration file:
sudo nano /etc/modules-load.d/k8s.conf11. Add the two modules required by the container runtime:
overlay
br_netfilter
Save the file and exit.
12. Add the modules to the system using the modprobe command:
sudo modprobe overlaysudo modprobe br_netfilterIf the commands execute successfully, they return no output.
Step 2: Modify SELinux and Firewall Settings
For Kubernetes to work properly, cluster nodes need to communicate without interruptions. To ensure smooth networking, adjust SELinux permissions and open the necessary ports on each machine:
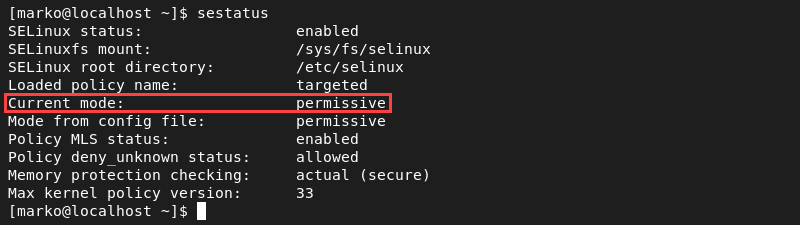
1. Change the SELinux mode to permissive with the setenforce command:
sudo setenforce 02. Enter the following sed command to make changes to the SELinux configuration:
sudo sed -i --follow-symlinks 's/SELINUX=enforcing/SELINUX=permissive/g' /etc/sysconfig/selinux3. Confirm the changes by checking the SELinux status:
sestatusThe value of the Current mode field should be set to permissive.
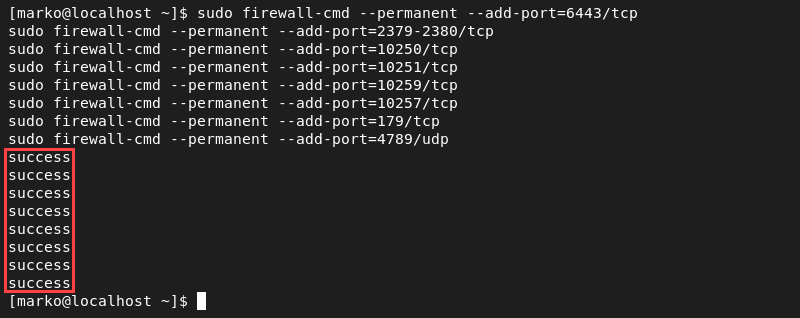
4. Add firewall exceptions to allow Kubernetes to communicate via dedicated ports. On the master node machine, execute the following commands:
sudo firewall-cmd --permanent --add-port=6443/tcp
sudo firewall-cmd --permanent --add-port=2379-2380/tcp
sudo firewall-cmd --permanent --add-port=10250/tcp
sudo firewall-cmd --permanent --add-port=10251/tcp
sudo firewall-cmd --permanent --add-port=10259/tcp
sudo firewall-cmd --permanent --add-port=10257/tcp
sudo firewall-cmd --permanent --add-port=179/tcp
sudo firewall-cmd --permanent --add-port=4789/udp
The output confirms the operation's success.
5. On worker nodes, open the following ports:
sudo firewall-cmd --permanent --add-port=179/tcp
sudo firewall-cmd --permanent --add-port=10250/tcp
sudo firewall-cmd --permanent --add-port=30000-32767/tcp
sudo firewall-cmd --permanent --add-port=4789/udp
6. Reload the firewall configuration to enforce the changes.
sudo firewall-cmd --reload
Step 3: Configure Networking
Kubernetes requires filtering and port forwarding to be enabled for packets going through a network bridge. Perform the network configuration in the k8s.conf file:
1. Open the file in a text editor:
sudo nano /etc/sysctl.d/k8s.conf2. Ensure the file contains the following lines:
net.ipv4.ip_forward = 1
net.bridge.bridge-nf-call-ip6tables = 1
net.bridge.bridge-nf-call-iptables = 1
Save the file and exit.
Note: Read our tutorial to find out how can you save a file in Vim and exit.
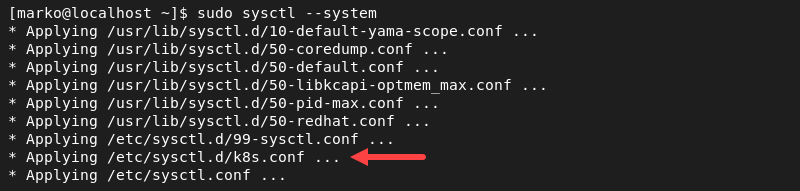
3. Apply the changes with the sysctl command:
sudo sysctl --systemThe system processes the k8s.conf file for changes.
Step 4: Disable Swap
For performance and to maximize each node's resource utilization, Kubernetes requires virtual memory to be disabled on each node.
1. Disable swap with the swapoff command.
sudo swapoff -a2. Make the changes persist across reboots by typing:
sudo sed -e '/swap/s/^/#/g' -i /etc/fstabStep 5: Install Kubernetes Tools
The following are the three main packages in a Kubernetes installation:
- kubeadm helps initialize a Kubernetes cluster.
- kubelet runs containers on each node.
- kubectl is the command-line utility for controlling the cluster and its components.
Install the packages by following the procedure explained below:
1. Create a repository file for Kubernetes:
sudo nano /etc/yum.repos.d/k8s.repo2. Copy the repository specification below and paste it into the file.
[kubernetes]
name=Kubernetes
baseurl=https://packages.cloud.google.com/yum/repos/kubernetes-el7-x86_64
enabled=1
gpgcheck=1
repo_gpgcheck=1
gpgkey=https://packages.cloud.google.com/yum/doc/yum-key.gpg https://packages.cloud.google.com/yum/doc/rpm-package-key.gpg
Save the file and exit.
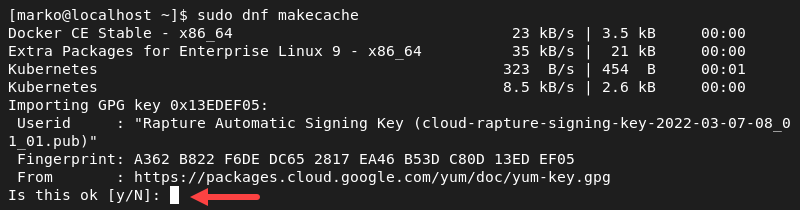
3. Refresh the local repository cache.
sudo dnf makecacheWhen prompted, type Y and press Enter.
4. Install the packages with the following command.
dnf install -y {kubelet,kubeadm,kubectl} --disableexcludes=kubernetes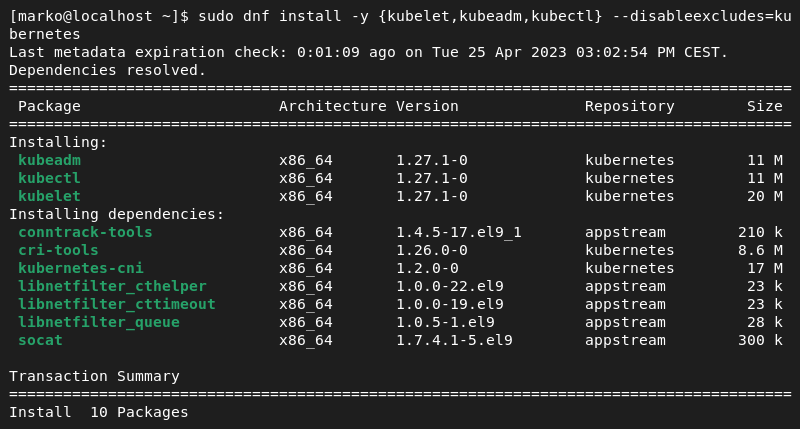
The system is now ready to deploy a Kubernetes cluster.
Install Kubernetes on Rocky Linux Using Ansible
Ansible is an IaC tool that automates infrastructure deployment. It uses human-readable instruction files called playbooks to simplify and speed up repetitive deployments.
The following sections provide instructions for installing Kubernetes using Ansible.
Step 1: Connect Hosts
To enable communication between the Ansible host and the Kubernetes nodes, connect the machines via SSH.
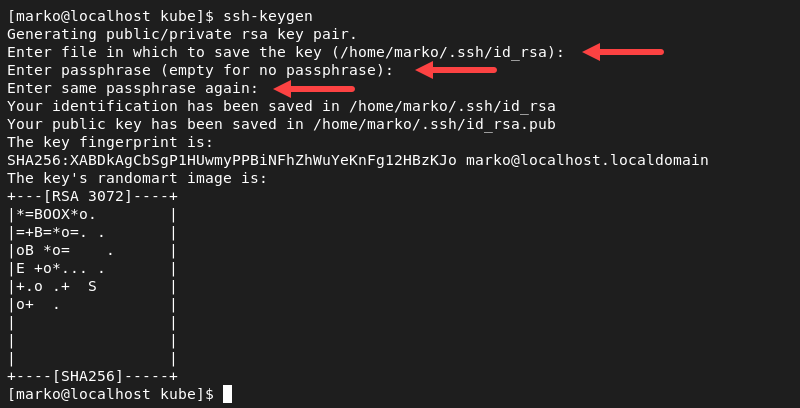
1. Generate an SSH key:
ssh-keygenWhen prompted, type the filename for the new key and press Enter. Next, press Enter twice to create an empty passphrase.
2. Copy the credentials to each machine:
ssh-copy-id -i ~/.ssh/[ssh-key-name].pub root@[ip-address]For example, to copy the id_rsa key to the machine with the IP address 10.240.12.82, type:
ssh-copy-id -i ~/.ssh/id_rsa.pub root@10.240.12.823. Create and go to the kube directory.
mkdir kube && cd kube4. Create a file titled hosts using a text editor:
nano hosts5. Paste the information about the nodes into the file. Split the info into two sections, masters and workers:
[masters]
master ansible_host=[ip-address] ansible_user=root

[workers]
worker1 ansible_host=[ip-address] ansible_user=root
Save the file and exit.
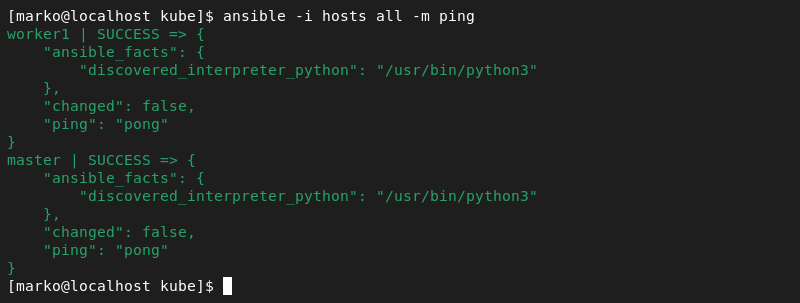
6. Test the connectivity between the nodes and the Ansible host by typing:
ansible -i hosts all -m pingThe output confirms that Ansible successfully pinged the machines.
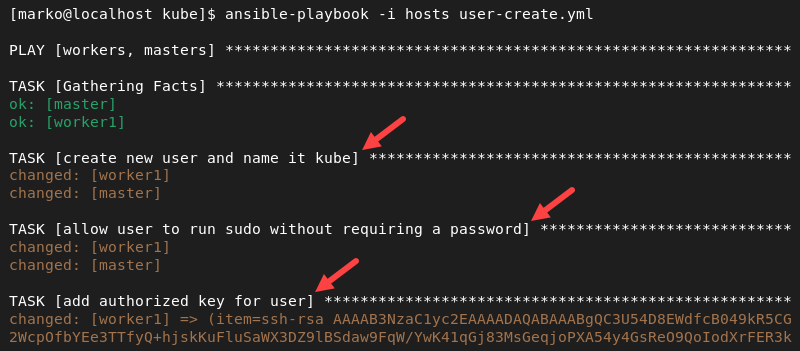
Step 2: Create Users
The first playbook to be applied creates a user named kube on each machine. This user receives an authorized SSH key and permissions that allow it to run sudo commands without providing a password.
1. Create a playbook YML file in a text editor:
nano user-create.yml2. Copy and paste the code below into the file.
- hosts: 'workers, masters'
  become: yes

  tasks:
    - name: create a new user and name it kube
      user: name=kube append=yes state=present createhome=yes shell=/bin/bash

    - name: allow the user to run sudo without requiring a password
      lineinfile:
        dest: /etc/sudoers
        line: 'kube ALL=(ALL) NOPASSWD: ALL'
        validate: 'visudo -cf %s'

    - name: add authorized key for user
      authorized_key: user=kube key="{{item}}"
      with_file:
        - ~/.ssh/id_rsa.pub
Save the file and exit. The playbook now contains a set of tasks that Ansible will execute on the relevant connected machines.
3. Run the playbook by typing:
ansible-playbook -i hosts user-create.ymlThe output shows the progress for each task.
Step 3: Install Kubernetes
After the necessary setup, create a playbook that instructs Ansible to install Kubernetes tools on each node.
1. Create a YAML file in a text editor.
nano k8s-install.yml2. Copy and paste the following code into the file.
---
- hosts: "masters, workers"
  remote_user: [current-user]
  become: yes
  become_method: sudo
  become_user: root
  gather_facts: yes
  connection: ssh

  tasks:
     - name: create containerd configuration file
       file:
         path: "/etc/modules-load.d/containerd.conf"
         state: "touch"

     - name: set up containerd prerequisites
       blockinfile:
         path: "/etc/modules-load.d/containerd.conf"
         block: |
               overlay
               br_netfilter

     - name: load modules
       shell: |
               sudo modprobe overlay
               sudo modprobe br_netfilter

     - name: create network settings configuration file
       file:
         path: "/etc/sysctl.d/99-kubernetes-cri.conf"
         state: "touch"

     - name: set up containerd networking
       blockinfile:
         path: "/etc/sysctl.d/99-kubernetes-cri.conf"
         block: |
                net.bridge.bridge-nf-call-iptables = 1
                net.ipv4.ip_forward = 1
                net.bridge.bridge-nf-call-ip6tables = 1

     - name: apply settings
       command: sudo sysctl --system

     - name: add docker repository
       shell: |
               sudo dnf config-manager --add-repo https://download.docker.com/linux/centos/docker-ce.repo
               sudo dnf makecache
               sudo dnf install -y containerd.io
               sudo mkdir -p /etc/containerd
               sudo containerd config default | sudo tee /etc/containerd/config.toml
               sudo systemctl restart containerd

     - name: create k8s repo file
       file:
         path: "/etc/yum.repos.d/kubernetes.repo"
         state: "touch"

     - name: write repository information in the kube repo file
       blockinfile:
         path: "/etc/yum.repos.d/kubernetes.repo"
         block: |
                [kubernetes]
                name=Kubernetes
                baseurl=https://packages.cloud.google.com/yum/repos/kubernetes-el7-x86_64
                enabled=1
                gpgcheck=1
                repo_gpgcheck=1
                gpgkey=https://packages.cloud.google.com/yum/doc/yum-key.gpg https://packages.cloud.google.com/yum/doc/rpm-package-key.gpg

     - name: install kubernetes
       shell: |
               sudo dnf install -y kubelet kubeadm kubectl

     - name: disable swap
       shell: |
               sudo swapoff -a
sudo sed -i '/ swap / s/^\(.*\)$/#\1/g' /etc/fstabNote: Do not forget to replace the [current-user] value in the remote_user field with the current username on your Ansible host.
Save the file and exit.
3. Execute the playbook by entering the following:
ansible-playbook -i hosts k8s-install.ymlWhen Ansible finishes all the operations, it displays a Play Recap.

Kubernetes has been successfully installed on all the nodes.
Conclusion
After completing this tutorial, you should know how to install Kubernetes on Rocky Linux and prepare for cluster deployment. The tutorial covered two methods of installation: manual and via Ansible.
If you are still looking for the best replacement for CentOS, read our comparison article, Rocky Linux vs. AlmaLinux, to see how the two major competitors stack up against each other.