Kubectl is a set of commands for controlling Kubernetes clusters. Every Kubernetes command has an API endpoint, and kubectl’s primary purpose is to issue HTTP requests to that endpoint.
While you can issue HTTP requests yourself (e.g., using curl), kubectl is designed to make this process easier.
This tutorial will cover common kubectl operations and provide practical examples.
Note: For more information about the Kubernetes installation, refer to How to Install Kubernetes on a Bare Metal Server.
List of kubectl Commands
Use the kubectl commands listed below as a quick reference when working with Kubernetes.
Listing Resources
To list one or more pods, replication controllers, services, or daemon sets, use the kubectl get command.
Generate a plain-text list of all namespaces:
kubectl get namespacesShow a plain-text list of all pods:
kubectl get podsGenerate a detailed plain-text list of all pods, containing information such as node name:
kubectl get pods -o wideDisplay a list of all pods running on a particular node server:
kubectl get pods --field-selector=spec.nodeName=[server-name]List a specific replication controller in plain-text:
kubectl get replicationcontroller [replication-controller-name]Generate a plain-text list of all replication controllers and services:
kubectl get replicationcontroller,servicesShow a plain-text list of all daemon sets:
kubectl get daemonsetCreating a Resource
Create a resource, such as a service, deployment, job, or namespace, using the kubectl create command.
For example, to create a new namespace, type:
kubectl create namespace [namespace-name]Create a resource from a JSON or YAML file:
kubectl create -f [filename]Applying and Updating a Resource
To apply or update a resource, use the kubectl apply command. The source in this operation can be either a file or the standard input (stdin).
Create a new service with the definition contained in a [service-name].yaml file:
kubectl apply -f [service-name].yamlUse the definition contained in a [controller-name].yaml file to create a new replication controller:
kubectl apply -f [controller-name].yamlCreate the objects defined in any .yaml, .yml, or .json file in a directory:
kubectl apply -f [directory-name]You can update a resource by configuring it in a text editor, using the kubectl edit command. This command is a combination of kubectl get and kubectl apply.
For example, to edit a service, type:
kubectl edit svc/[service-name]This command opens the file in your default editor. To use a different editor, specify it in front of the command:
KUBE_EDITOR=”[editor-name]” kubectl edit svc/[service-name]Displaying the State of Resources
To display the state of any number of resources in detail, use the kubectl describe command. By default, the output also lists uninitialized resources.
View details about a particular node:
kubectl describe nodes [node-name]View details about a particular pod:
kubectl describe pods [pod-name]Display details about a pod whose name and type are listed in pod.json:
kubectl describe -f pod.jsonSee details about all pods managed by a specific replication controller:
kubectl describe pods [replication-controller-name]Show details about all pods:
kubectl describe podsDeleting Resources
To remove resources from a file or stdin, use the kubectl delete command.
Remove a pod using the name and type listed in pod.yaml:
kubectl delete -f pod.yamlUse a specific label to remove all pods and services:
kubectl delete pods,services -l [label-key]=[label-value]Remove all pods (including uninitialized pods):
kubectl delete pods --allExecuting a Command
Use kubectl exec to issue commands in a container or to open a shell in a container.
Receive output from a command run on the first container in a pod:
kubectl exec [pod-name] -- [command]Get output from a command run on a specific container in a pod:
kubectl exec [pod-name] -c [container-name] -- [command]Run /bin/bash from a specific pod. The received output comes from the first container:
kubectl exec -ti [pod-name] -- /bin/bashModifying kubeconfig Files
kubectl config lets you view and modify kubeconfig files. This command is usually followed by another sub-command.
Display the current context:
kubectl config current-contextSet a cluster entry in kubeconfig:
kubectl config set-cluster [cluster-name] --server=[server-name]Unset an entry in kubeconfig:
kubectl config unset [property-name]Printing Container Logs
To print logs from containers in a pod, use the kubectl logs command.
Print logs:
kubectl logs [pod-name]To stream logs from a pod, use:
kubectl logs -f [pod-name]Short Names for Resource Types
Some of the kubectl commands listed above may seem inconvenient due to their length. For this reason, names of common kubectl resource types also have shorter versions.
Consider the command mentioned above:
kubectl create namespace [namespace-name]You can also run this command as:
kubectl create ns [namespace-name]Here is the full list of kubectl short names:
| Short Name | Long Name |
|---|---|
csr | certificatesigningrequests |
cs | componentstatuses |
cm | configmaps |
ds | daemonsets |
deploy | deployments |
ep | endpoints |
ev | events |
hpa | horizontalpodautoscalers |
ing | ingresses |
limits | limitranges |
ns | namespaces |
no | nodes |
pvc | persistentvolumeclaims |
pv | persistentvolumes |
po | pods |
pdb | poddisruptionbudgets |
psp | podsecuritypolicies |
rs | replicasets |
rc | replicationcontrollers |
quota | resourcequotas |
sa | serviceaccounts |
svc | services |
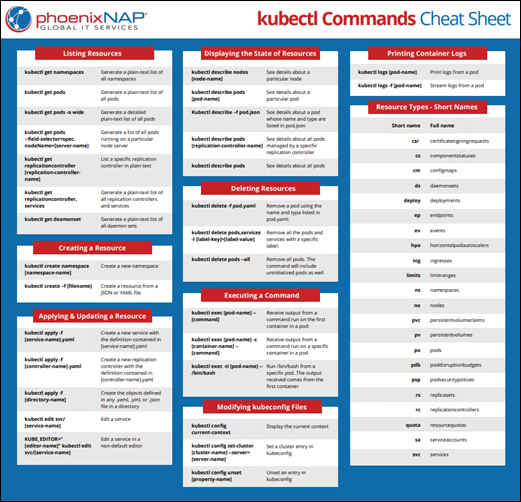
kubectl Cheat Sheet
You can find all the commands listed in this article in the one-page reference sheet below. Download the kubectl Command PDF and save it for future use.
Conclusion
This tutorial explained the most common kubectl commands to help you manage your Kubernetes API. The accompanying cheat sheet gathers all the commands in one place for quick reference.
