After the CentOS discontinuation in 2021, AlmaLinux became a popular alternative for those who need a free enterprise-grade server OS. As a stable and robust system suitable for large-scale applications, AlmaLinux often serves as a foundation for Kubernetes cluster deployments.
In this article, you will learn how to install Kubernetes and deploy a Kubernetes cluster on AlmaLinux.
Prerequisites
- Two or more servers running AlmaLinux.
- 2 GB of RAM and 2 CPU cores or more on each machine.
- Sudo or root access for each system.
Install Kubernetes on AlmaLinux
Kubernetes installation involves configuring the operating system and obtaining the dependencies necessary for the cluster setup. The following section lists the steps to prepare your AlmaLinux machines for a Kubernetes cluster deployment.
Note: Unless otherwise indicated, perform each step in this tutorial on every node you want to add to the cluster.
Step 1: Configure SELinux and Firewall
To ensure unhindered network traffic between nodes in the cluster, configure SELinux permissions and add the relevant ports to the list of firewall exceptions:
1. Use the setenforce command to change SELinux mode to permissive:
sudo setenforce 02. Execute the sed command below to edit the selinux configuration file:
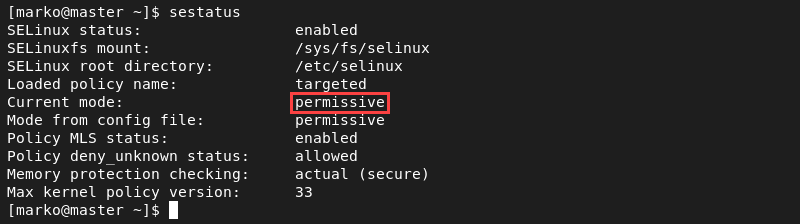
sudo sed -i --follow-symlinks 's/SELINUX=enforcing/SELINUX=permissive/g' /etc/sysconfig/selinux3. Check the SELinux status to confirm the changes:
sestatusLook for the Current mode field in the output and ensure its value is permissive.
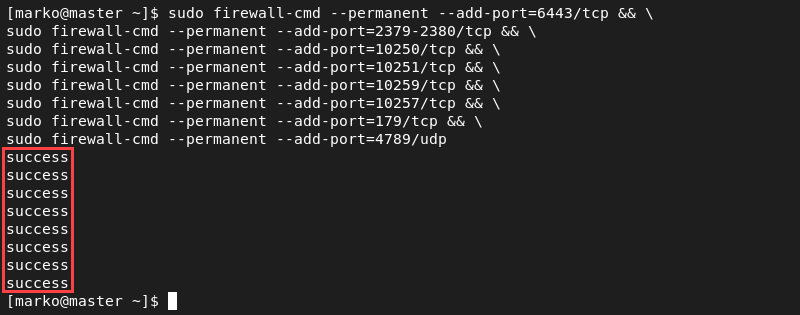
4. Add firewall exceptions on the master node:
sudo firewall-cmd --permanent --add-port=6443/tcp
sudo firewall-cmd --permanent --add-port=2379-2380/tcp
sudo firewall-cmd --permanent --add-port=10250/tcp
sudo firewall-cmd --permanent --add-port=10251/tcp
sudo firewall-cmd --permanent --add-port=10259/tcp
sudo firewall-cmd --permanent --add-port=10257/tcp
sudo firewall-cmd --permanent --add-port=179/tcp
sudo firewall-cmd --permanent --add-port=4789/udp
The output confirms the success of the operation.
5. Add the following exceptions on each worker node:
sudo firewall-cmd --permanent --add-port=179/tcp
sudo firewall-cmd --permanent --add-port=10250/tcp
sudo firewall-cmd --permanent --add-port=30000-32767/tcp
sudo firewall-cmd --permanent --add-port=4789/udp
6. Reload the firewall configuration on all the machines:
sudo firewall-cmd --reload
Step 2: Assign Unique Hostnames for Cluster Nodes
Cluster nodes in Kubernetes need to have unique hostnames. Change the hostnames of your master and worker machines by applying the following two steps on each node:
1. Use the hostnamectl command:
sudo hostnamectl set-hostname [hostname]2. Navigate to the directory where the hosts file is and open it in a text editor:
cd /etc && sudo nano hostsNote: Find out what are the best Linux text editors.
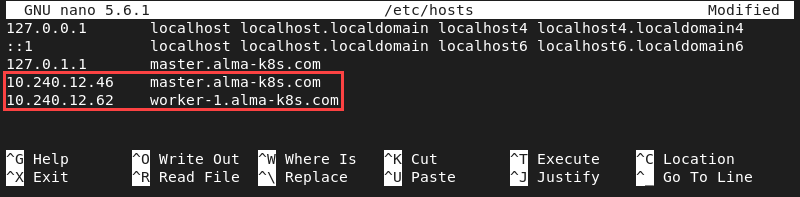
3. Add the hostnames and the corresponding IP addresses of all the cluster members:
[master-node-ip] [master-node-hostname]
[worker-node-ip] [worker-node-hostname]
...
Ensure that the naming pattern is logical to avoid confusing the node names later. For example, the configuration below names the master node master.alma-k8s.com and worker nodes worker-[number].alma-k8s.com.
Step 3: Disable Swap Memory
Kubernetes requires virtual memory to be disabled before cluster initialization. Running a node with the swap on affects cluster performance. Disable swap memory on AlmaLinux by applying the following steps:
1. Execute the swapoff command:
sudo swapoff -a2. Make the change persist across reboots by disabling swap on startup:
sudo sed -i '/ swap / s/^/#/' /etc/fstabStep 4: Install Docker
Kubernetes requires Docker installed on each node to act as a container builder. The steps below explain how to install Docker on AlmaLinux.
1. Update YUM repositories:
sudo yum update2. Install yum-utils, a package that facilitates working with repositories:
sudo yum install -y yum-utils3. Add the official Docker repository for CentOS, which is fully compatible with AlmaLinux:
sudo yum-config-manager --add-repo https://download.docker.com/linux/centos/docker-ce.repo4. Install Docker and all the necessary dependencies by typing:
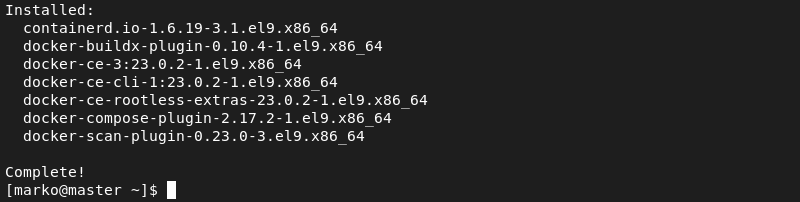
sudo yum install -y docker-ce docker-ce-cli containerd.io --allowerasingAfter the installation finishes, YUM outputs the installed packages.
5. Enable the Docker service:
sudo systemctl enable docker
6. Start Docker:
sudo systemctl start dockerStep 5: Change cgroup Driver
1. Use a text editor to open the daemon.json file:
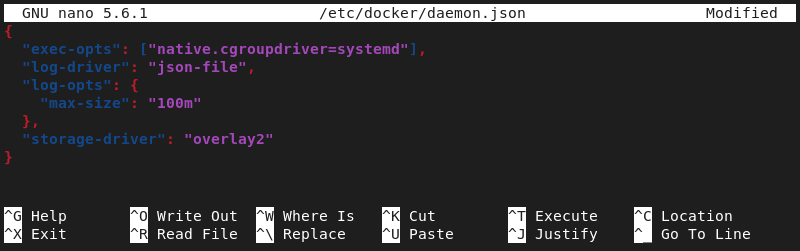
sudo nano /etc/docker/daemon.json2. Insert the following configuration into the file:
{
  "exec-opts": ["native.cgroupdriver=systemd"],
  "log-driver": "json-file",
  "log-opts": {
    "max-size": "100m"
  },
  "storage-driver": "overlay2"
}
3. Reload the Docker daemon by typing:
sudo systemctl daemon-reload4. Restart Docker to complete the process:
sudo systemctl restart dockerStep 6: Install cri-dockerd
The dockerd CRI (Compliant Runtime Interface) is a Docker Engine shim that allows Kubernetes to control Docker Engine. Install cri-dockerd by following the procedure below.
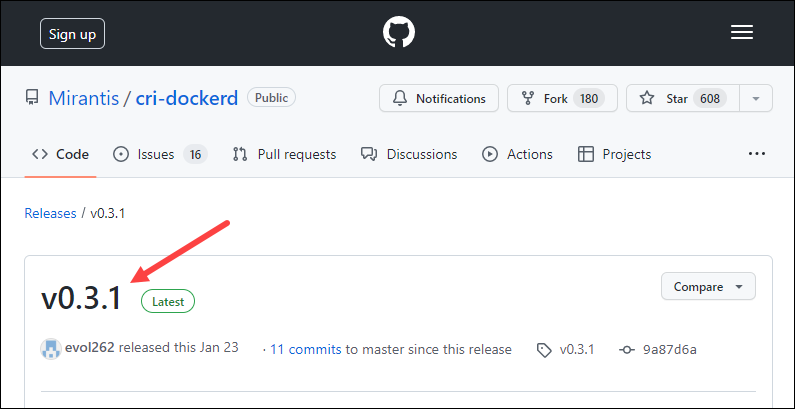
1. Visit the cri-dockerd GitHub latest release page.
2. Write down the latest version number. At the time of writing, the latest cri-dockerd version was 0.3.1.
3. Use the wget command to download the cri-dockerd TGZ archive:
wget https://github.com/Mirantis/cri-dockerd/releases/download/v0.3.1/cri-dockerd-0.3.1.amd64.tgz4. Untar the archive by typing:
tar xvf cri-dockerd-0.3.1.amd64.tgzNote: Find out more on tar command in Linux and how to use it.
5. Move the binary to /usr/local/bin:
sudo mv cri-dockerd/cri-dockerd /usr/local/bin/6. Test the installation by checking the cri-dockerd version:
cri-dockerd --version
7. Download the cri-dockerd service binary and the socket:
wget https://raw.githubusercontent.com/Mirantis/cri-dockerd/master/packaging/systemd/cri-docker.service https://raw.githubusercontent.com/Mirantis/cri-dockerd/master/packaging/systemd/cri-docker.socket8. Move both files to /etc/systemd/system/:
sudo mv cri-docker.socket cri-docker.service /etc/systemd/system/
9. Connect the service with the main cri-dockerd binary:
sudo sed -i -e 's,/usr/bin/cri-dockerd,/usr/local/bin/cri-dockerd,' /etc/systemd/system/cri-docker.service
10. Reload the daemon configuration:
sudo systemctl daemon-reload11. Enable the service using the systemctl command:
sudo systemctl enable cri-docker.service
12. Next, enable the socket:
sudo systemctl enable --now cri-docker.socket
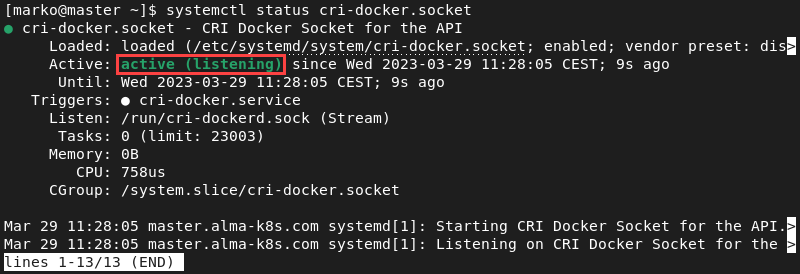
13. Confirm that the service is running by typing:
systemctl status cri-docker.socketThe output shows the service as active.
Step 7: Install Kubernetes
Kubernetes installation consists of three main packages:
- kubeadm that contains cluster initialization tools.
- kubelet, the primary node agent.
- kubectl, the Kubernetes command-line tool.
Follow the steps below to install the packages on your system.
1. Use a text editor to create and open a .REPO file for Kubernetes:
sudo nano /etc/yum.repos.d/kubernetes.repo2. Copy the code below and paste it into the file.
[kubernetes]
name=Kubernetes
baseurl=https://packages.cloud.google.com/yum/repos/kubernetes-el7-x86_64
enabled=1
gpgcheck=1
repo_gpgcheck=1
gpgkey=https://packages.cloud.google.com/yum/doc/yum-key.gpg https://packages.cloud.google.com/yum/doc/rpm-package-key.gpg
Save the file and exit.
3. Once the repository is defined, install the Kubernetes tools by typing:
sudo yum install -y kubelet kubeadm kubectl --disableexcludes=KubernetesNote: phoenixNAP offers one-click Kubernetes deployments and a production-grade Kubernetes environment with Rancher on the Bare Metal Cloud platform.
Deploy Kubernetes Cluster on AlmaLinux
After configuring the system and installing the packages, initialize the master node, configure the pod networking, and join worker nodes to the cluster. Find the instructions for each step of the process in the sections below.
Step 1: Initialize Kubernetes on Master Node
Every Kubernetes cluster deployment starts by initializing the cluster on the master node. Execute the following steps on the machine you set up as the master in the installation part of this tutorial.
1. Enable the kubelet service:
sudo systemctl enable kubelet
2. Start the service:
sudo systemctl start kubelet3. Use the kubeadm tool to initialize the cluster. Since cri-dockerd provides the second CRI endpoint, specify the endpoint to use with the --cri-socket option:
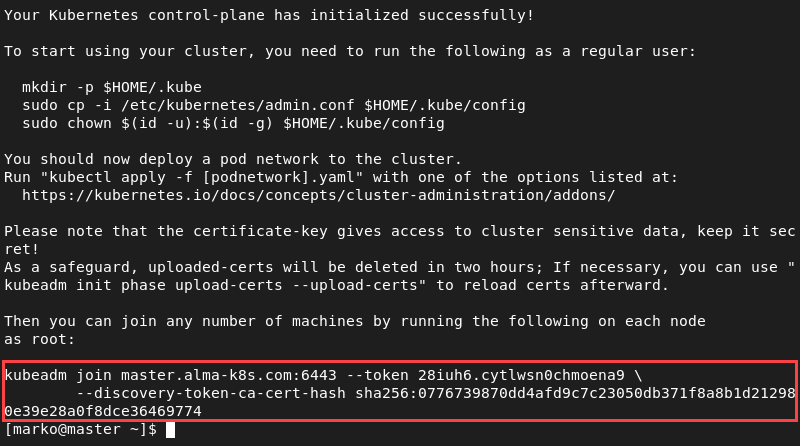
sudo kubeadm init --cri-socket /run/cri-dockerd.sockWait for the cluster to initialize. When Kubernetes finishes the setup, a confirmation message appears. The message contains additional instructions to start using the cluster.
4. Write down the kubeadm join command at the bottom of the initialization message. You will use it later to join the worker nodes to the cluster.
Step 2: Export Certificate
Finalize the cluster initialization by executing the following steps:
1. Create .kube directory in your user's home directory:
mkdir -p $HOME/.kube2. Copy the Kubernetes configuration file to the newly created directory:
sudo cp -i /etc/kubernetes/admin.conf $HOME/.kube/config3. Change the directory permissions:
sudo chown $(id -u):$(id -g) $HOME/.kube/config4. Use kubectl to see the status of the nodes in the cluster:
kubectl get nodesThe output shows the initialized master node with the NotReady status.

Step 3: Pod Network Configuration
Configure a pod network to enable the master node to schedule pods. This tutorial shows you how to establish pod networking with Flannel, a lightweight pod traffic manager.
1. Apply Flannel's manifest YAML file by using kubectl apply:
kubectl apply -f https://github.com/flannel-io/flannel/releases/latest/download/kube-flannel.ymlWait for Flannel to create the necessary pods.
2. Remove the node taint and enable the master node to serve as the control plane:
kubectl taint nodes --all node-role.kubernetes.io/control-plane-
3. Check the status of the node:
kubectl get nodesThe master node now shows the Ready status.

Step 4: Join Worker Nodes
Once the control plane on the master node is up and running, proceed to join additional nodes to the cluster. Perform the following steps on each machine you want to add as a worker node.
1. Execute the kubeadm join command you copied from the master node initialization message in Step 1 of this section.
kubeadm join [master-node-ip]:6443 --token abcdef.1234567890abcdef --discovery-token-ca-cert-hash sha256:1234..cdef Wait for the node to join the cluster. Once the procedure finishes, a message is displayed.

If you receive the message that the token has expired, create a new one with kubeadm:
kubeadm token create
2. List the available nodes on the master node:
kubectl get nodesThe list now shows two cluster nodes with the Ready status.

Conclusion
After reading this article, you should know how to set up all the packages required for a Kubernetes installation on AlmaLinux. The tutorial also covers the instructions for a fully functional Kubernetes cluster deployment.
If you are still looking for an alternative to CentOS that will suit your needs, check out our article on 8 Best CentOS Alternatives.