Apache Tomcat is a lightweight and open-source application server that provides a runtime environment for deploying Java-based web applications.
It supports core Java technologies, including Java Servlets, JavaServer Pages (JSP), Java Expression Language (EL), and WebSocket APIs.
Learn how to install and configure Apache Tomcat on Ubuntu to power your website or RESTful API.
Prerequisites
- A system running Ubuntu (this tutorial uses Ubuntu 26.04).
- Access to a terminal window.
- A user account with sudo privileges.
Steps for Installing Tomcat on Ubuntu
Follow the steps below to download and install Apache Tomcat on an Ubuntu system.
Step1: Check If Java Is Installed
Before downloading Tomcat, confirm the Java Development Kit (OpenJDK) is installed. Open the terminal and use the following command to check the Java version:
java -versionIn this example, the OpenJDK version is 21.0.5.

If Java is not installed, the system displays the Command 'java' not found message.
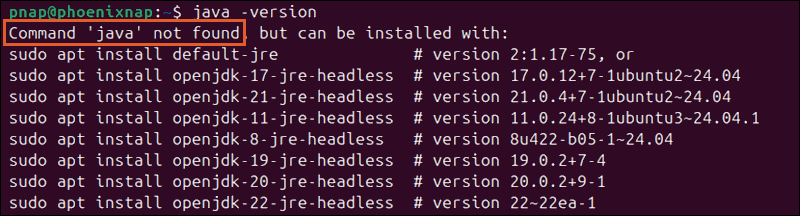
To resolve this, install the latest OpenJDK version.
Step 2: Install OpenJDK
1. Update the Ubuntu package repository list:
sudo apt update2. Use the following command to install the latest OpenJDK version:
sudo apt install default-jdk -y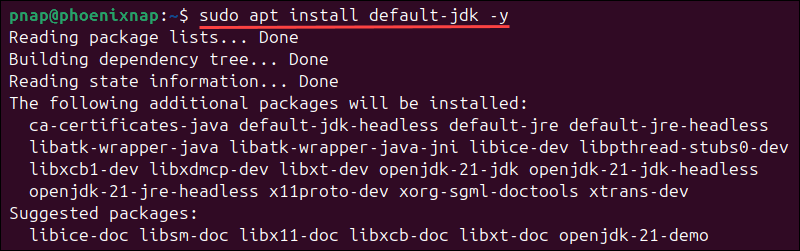
The installation takes a few moments to complete.
Step 3: Create Tomcat User and Group
Running Tomcat as the root user increases the risk of potential security breaches. To improve security, create a dedicated group and system user to run the Apache Tomcat service:
1. Create a new /opt/tomcat directory for your Tomcat installation:
sudo mkdir -p /opt/tomcat2. To create a new group called tomcat, enter:
sudo groupadd tomcat3. Create a system user named tomcat, assign it to the tomcat group, and set /opt/tomcat as the home directory:
sudo useradd -s /bin/false -g tomcat -d /opt/tomcat tomcat
The system does not display a message to confirm that the user and group were created.
Step 4: Download Tomcat
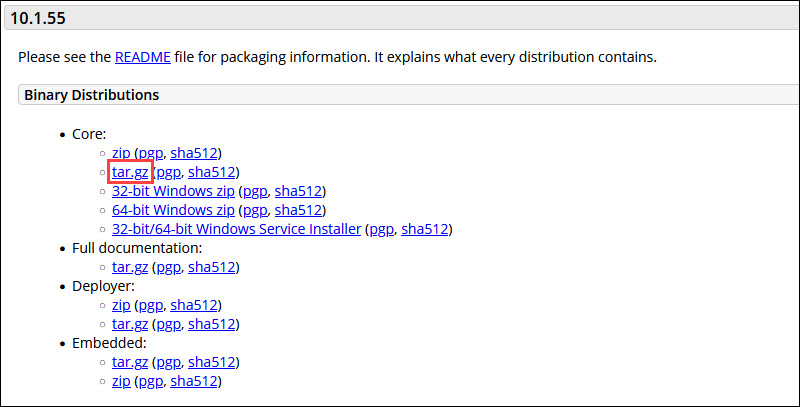
To download the latest stable Apache Tomcat version (10.1.55 at the time of writing this article):
1. Open a browser and visit the official Apache Tomcat Download page.
2. In the Binary Distributions section, under Core, right-click the tar.gz link and copy the URL.
3. In the terminal, move to the /tmp directory:
cd /tmp4. Use the curl command and paste the tar.gz link you copied to download the package:
curl -O https://dlcdn.apache.org/tomcat/tomcat-10/v10.1.55/bin/apache-tomcat-10.1.55.tar.gz
The URL is version-specific. If you want to download a different version, update the URL in the command accordingly.
Step 5: Verify Tomcat File Integrity
Verify the integrity of the tar.gz file using its checksum.
1. Copy the SHA-512 checksum URL for the corresponding Tomcat binary file from the Apache website.

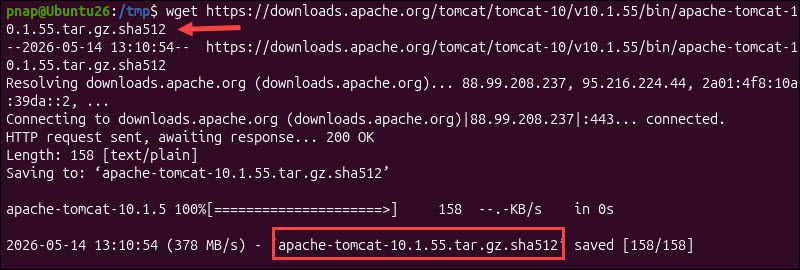
2. Use the wget command and the URL to download the SHA-512 checksum file for Apache Tomcat version 10.1.55:
wget https://downloads.apache.org/tomcat/tomcat-10/v10.1.55/bin/apache-tomcat-10.1.55.tar.gz.sha512Replace the version number in the command if you downloaded a different Tomcat version.
3. Compare the checksum of the downloaded Tomcat package with the one in the checksum file:
sha512sum -c apache-tomcat-10.1.34.tar.gz.sha512
The OK message indicates that the file is legitimate.
Step 6: Extract tar.gz File
While still in the /tmp directory, extract the tar.gz file into the /opt/tomcat/ directory using the following command:
sudo tar xzvf apache-tomcat-10*tar.gz -C /opt/tomcat --strip-components=1
Step 7: Modify Tomcat User Permission
The newly created tomcat user needs execute privileges to access and run Tomcat. To set up the necessary permissions:
1. Use the chown command to grant the tomcat user and group ownership over the installation directory:
sudo chown -RH tomcat: /opt/tomcatAfter changing the ownership of the /opt/tomcat directory, only the tomcat user, sudo users, or users in the tomcat group can modify files in the directory.
2. Change script permissions to ensure all scripts in the /opt/tomcat/bin/ directory are executable:
sudo sh -c 'chmod +x /opt/tomcat/bin/*.sh'The system does not provide output to confirm the commands were successful.
Step 8: Create System Unit File
To use Tomcat as a service, create a systemd unit file:
1. Enter the following command to retrieve the Java installation package path (JAVA_HOME):
sudo update-java-alternatives -l
In this example, the path is /usr/lib/jvm/java-1.25.0-openjdk-amd64.
Note: If multiple Java versions are listed, choose the version you want to use and copy its path.
2. Use a text editor like Nano to create a tomcat.service file in the /etc/systemd/system directory:
sudo nano /etc/systemd/system/tomcat.service3. Add the following configuration in the tomcat.service file and replace the JAVA_HOME path with your Java installation path:
[Unit]
Description=Apache Tomcat Web Application Container
After=network.target

[Service]
Type=forking

User=tomcat
Group=tomcat

Environment="JAVA_HOME=/usr/lib/jvm/java-1.21.0-openjdk-amd64"
Environment="CATALINA_BASE=/opt/tomcat"
Environment="CATALINA_HOME=/opt/tomcat"
Environment="CATALINA_PID=/opt/tomcat/temp/tomcat.pid"
Environment="JAVA_OPTS=-Djava.security.egd=file:///dev/urandom -Djava.awt.headless=true"
Environment="CATALINA_OPTS=-Xms512M -Xmx1024M -server -XX:+UseParallelGC"

ExecStart=/opt/tomcat/bin/startup.sh
ExecStop=/opt/tomcat/bin/shutdown.sh

[Install]
WantedBy=multi-user.target
4. Save and Exit the file (Ctrl+X, followed by y[es] and Enter).
5. Reload the system daemon:
sudo systemctl daemon-reload6. Start the Tomcat service:
sudo systemctl start tomcat7. Enable Tomcat to start on boot:
sudo systemctl enable tomcat8. Verify the Apache Tomcat service is running:
sudo systemctl status tomcat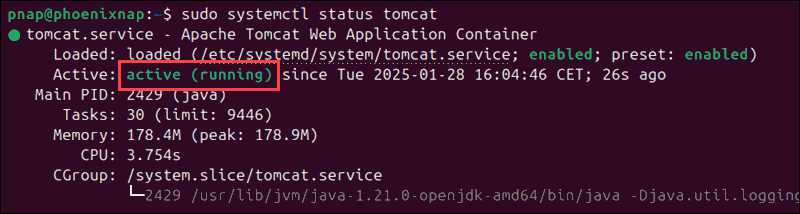
The output confirms the Tomcat service is active (running).
Step 9: Adjust Firewall
Apache Tomcat listens on port 8080 for incoming connections. To allow traffic through this port in the firewall:
1. Use the UFW (Uncomplicated Firewall) tool to open port 8080:
sudo ufw allow 8080/tcp
2. Open a web browser and access the Apache Tomcat Web Interface. If accessing Tomcat from a remote machine, use the following URL:
http://server_ip:8080Replace server_ip with your server's IP address.
If running Tomcat on a local machine, enter:
http://localhost:8080 The Apache Tomcat splash page will appear. This confirms Tomcat is installed correctly and listening on port 8080.

Step 10: Configure Web Management Interface
The Web Application Manager and Host Manager are web-based administration tools for managing Tomcat applications and virtual hosts. To access these tools, create a user in the tomcat-users.xml file.
1. Open the tomcat-users.xml file using the Nano text editor:
sudo nano /opt/tomcat/conf/tomcat-users.xml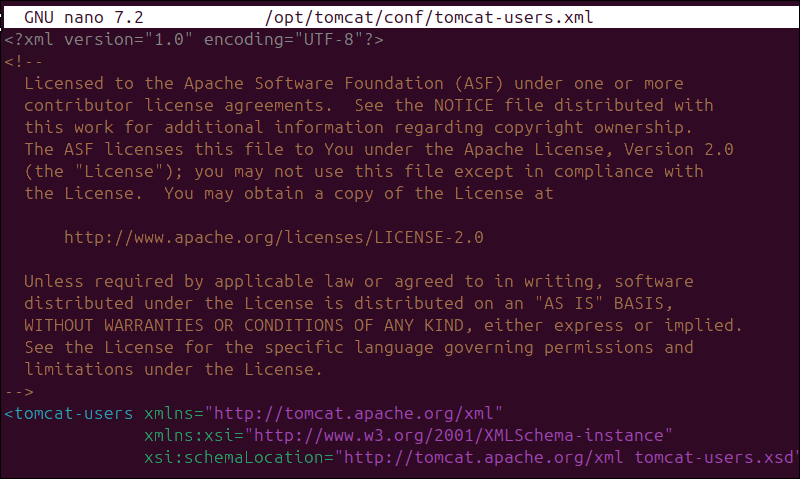
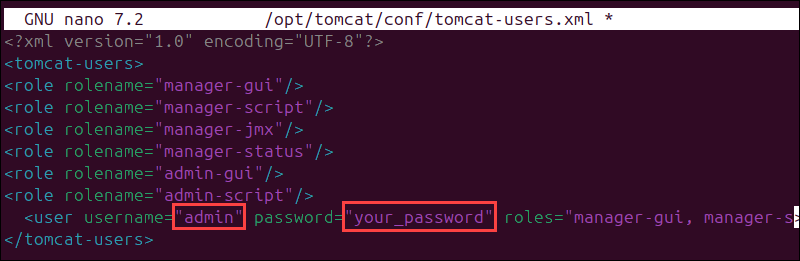
2. Delete the default content and replace it with the following configuration:
<?xml version="1.0" encoding="UTF-8"?>
<tomcat-users>
  <role rolename="manager-gui"/>
  <role rolename="manager-script"/>
  <role rolename="manager-jmx"/>
  <role rolename="manager-status"/>
  <role rolename="admin-gui"/>
  <role rolename="admin-script"/>
  <user username="admin" password="your_password" roles="manager-gui, manager-script, manager-jmx, manager-status, admin-gui, admin-script"/>
</tomcat-users>
Replace the admin placeholder with a unique username and your_password with a strong password.
3. Save the changes and Exit the file.
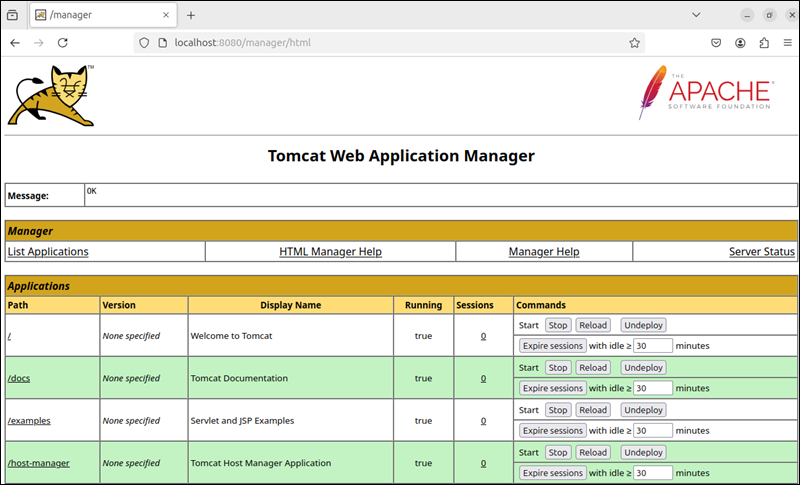
4. To access the Tomcat Manager App, open a browser and go to:
http://localhost:8080/manager/htmlEnter the credentials from tomcat.users to log in.
5. Open the following URL to access the Tomcat Virtual Host Manager:
http://localhost:8080/host-manager/htmlUse the credentials created in the previous step to log in.

Step 11: Configure Remote Access
By default, the Tomcat Web Application Manager and Virtual Hosts Manager are not accessible remotely. To enable remote access, you need to modify the context.xml files for each application.
Web Application Manager
To allow remote access to the Tomcat Application Manager interface:
1. Use a text editor to open its context.xml file:
sudo nano /opt/tomcat/webapps/manager/META-INF/context.xml2. Modify the allow attribute by adding a specific IP address:
<Valve className="org.apache.catalina.valves.RemoteAddrValve"
allow="127\.\d+\.\d+.d+|::1|your_ip_address" />
Replace your_ip_address with the actual IP. Use the pipe (|) character if you need to add multiple IPs.
3. Press Ctrl+X, followed by y, then Enter to save the changes and exit the file.
4. Restart the Tomcat service for the changes to take effect:
sudo systemctl restart tomcatVirtual Hosts Manager
To allow remote access to the Hosts Manager interface:
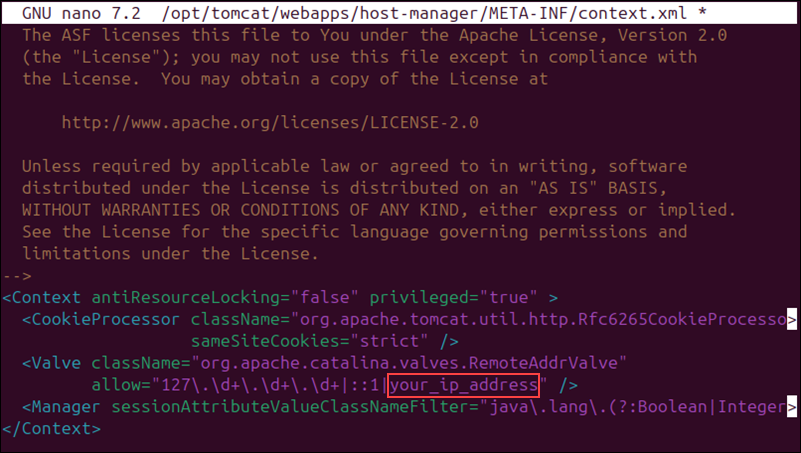
1. Open the corresponding context.xml file using the following command:
sudo nano /opt/tomcat/webapps/host-manager/META-INF/context.xml2. To allow access from a specific IP address, modify the allow attribute as follows:
<Valve className="org.apache.catalina.valves.RemoteAddrValve"
allow="127\.\d+\.\d+\.\d+|::1|your_ip_address"/>
Enter the actual IP address instead of the your_ip_address placeholder. To allow multiple IPs, separate them using the pipe (|) character.
3. Save the changes and Exit the file.
4. Apply the changes by restarting the Tomcat service:
sudo systemctl restart tomcatNote: As an alternative to editing the context.xml configuration file, you can use SSH tunneling to establish a secure remote connection to the Tomcat server.
Conclusion
You have successfully installed and configured Apache Tomcat and can now deploy and manage Java web applications on your Ubuntu server.
If you manage multiple servers running different operating systems, learn how to install Apache Tomcat on Windows.