KVM (short for Kernel-based Virtual Machine) is a Linux virtualization application that allows users to turn their machine into a hypervisor. It enables multiple virtual machines to run in isolated environments.
In this tutorial, you will learn how to install KVM on Rocky Linux or CentOS.
Prerequisites
- A system running Rocky Linux or CentOS.
- An account with sudo privileges.
- Access to the command line/terminal.
Steps to Install KVM on CentOS or Rocky Linux
The sections below provide step-by-step instructions on how to install KVM. The steps listed in this tutorial work with CentOS and Rocky Linux.
Step 1: Check if Your System Supports Hardware Virtualization
To see if the system is capable of hardware virtualization (HV), run the following:
cat /proc/cpuinfo | egrep "vmx|svm"
The egrep command highlights the flags if present. If you find either vmx (Intel processors) or svm (AMD), the system supports hardware virtualization.
Step 2: Install KVM
Use the following commands to install KVM on CentOS or Rocky Linux:
1. Update the system repositories:
sudo yum update2. Install virtualization tools:
- CentOS:
sudo yum install @virt- Rocky:
sudo dnf groupinstall "Virtualization Host"3. Enable the libvirtd service:
sudo systemctl enable --now libvirtd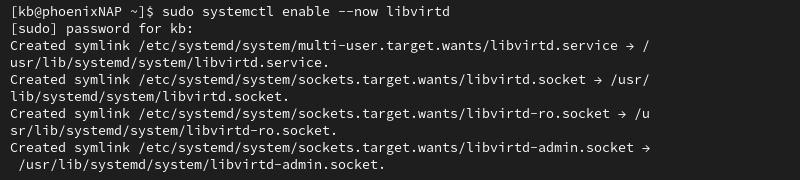
The command creates several symlinks.
4. Install tools required for KVM management:
sudo yum -y install virt-top libguestfs-tools
The command also installs additional dependencies for the two libraries.
Step 3: Verify KVM Installation
To confirm that the KVM module is loaded, run:
lsmod | grep kvm
The output lists the loaded KVM modules.
Step 4: Configure Bridge Interface
A bridge interface is required to access VMs from outside of the hypervisor network. To create a bridge interface:
1. Identify the network interfaces attached to your machine:
sudo nmcli connection show
The output shows all available network interfaces. Note the name of the ethernet interface (in this case, it is enp0s3).
2. Delete the connection by name or UUID:
sudo nmcli connection delete [name_or_UUID]
The system confirms the deletion.
3. Add a new bridged connection called br0:
sudo nmcli connection add type bridge con-name br0 ifname br0
The command confirms the connection creation.
4. Add a physical interface to the bridge:
sudo nmcli connection add type bridge-slave ifname enp0s3 master br0
5. Modify the connection details. To use DHCP for IP address assignment, run:
sudo nmcli connection modify br0 ipv4.method autoAlternatively, provide the data for a static IP address:
sudo nmcli connection modify br0 ipv4.addresses [IP_address/subnet]
sudo nmcli connection modify br0 ipv4.gateway [gateway]
sudo nmcli connection modify br0 ipv4.dns [DNS]
sudo nmcli connection modify br0 ipv4.method manual
The following information is required:
- IP_address/subnet. IP address and subnet for the connection (e.g.
192.168.122.1/24). - gateway. Default gateway address (e.g.
192.168.122.1). - DNS. DNS addresses (e.g.
8.8.8.8and/or8.8.4.4).
6. Activate the bridge and interface with:
sudo nmcli connection up br0
The command brings up the bridged connection and interface. The network takes a few moments to connect.
7. Verify the bridge configuration is functional:
ip addr show br0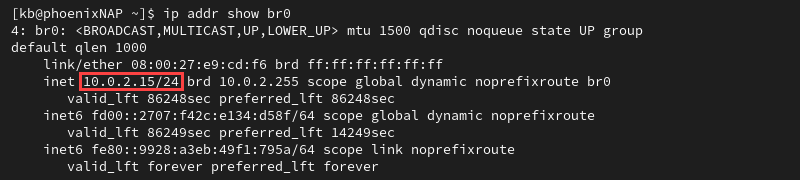
The ip command fetches the IP address for the bridged connection, which is either a static or dynamic IP address.
8. Ping a public server to test bridge connectivity. For example:
ping -c 4 google.com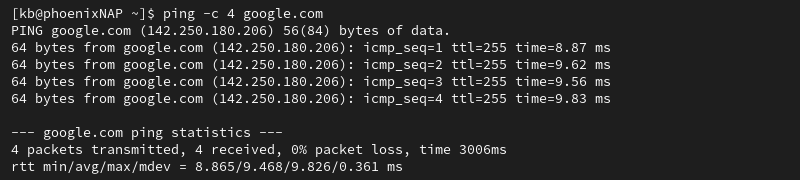
If the packets successfully perform the round trip, the bridged connection is functional.
Create Virtual Machine via Command Line
To create a VM via the command line, download an a .iso image for the operating system you want to install and use the virt-install command:
1. Install the utility with:
sudo yum -y install virt-install2. Adjust the user permissions to allow the hypervisor access to the .iso file:
sudo setfacl -m u:qemu:x [file_location]Adjust the path in the command to the location of the .iso file.
3. Create a virtual machine. The following example command demonstrates how to install Ubuntu 24.04 on a VM:
sudo virt-install --name=ubuntu --ram=3072 --vcpus=2 --file=/var/lib/libvirt/images/ubuntu.img,size=20 --cdrom=Downloads/ubuntu-24.04.1-desktop-amd64.iso --network bridge=br0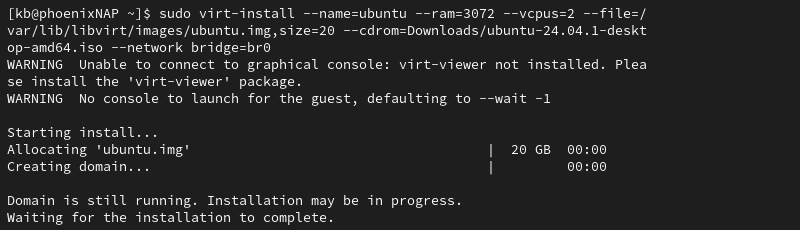
The example uses the following command line arguments to set up a virtual machine:
| Argument | Description |
|---|---|
--name= | Custom name of the VM |
--ram= | Allocated RAM |
--vcpu= | Number of virtual CPUs |
--file= | Disk file/image location |
--size= | Allocated file size of the VM |
--cdrom= | Installation media |
--network bridge= | Network used for the VM |
Create Virtual Machine via GUI
Use the virt-manager GUI to create a VM with KVM:
1. Install virt-manager with:
sudo yum -y install virt-managerThe program provides a graphical interface for creating and managing VMs.
2. Start virt-manager from the console:
sudo virt-managerThe command opens a GUI interface for the Virtual Machine Manager.
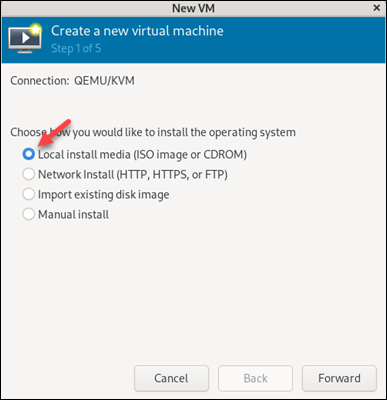
3. Open the File menu and select New Virtual Machine. Alternatively, click the new VM button below the menu.
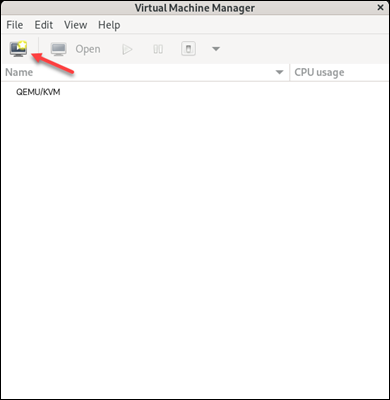
The action opens a new window to create a VM.
4. Choose to install the OS from local media and click Forward to proceed.
5. Specify the path to the .iso file with the OS.
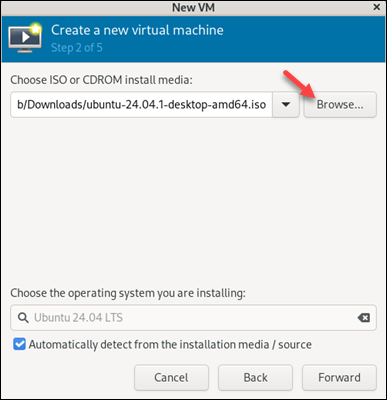
The program detects the OS based on the file. Click Forward to proceed.
6. Allocate RAM and CPU resources. The numbers depend on the OS requirements.
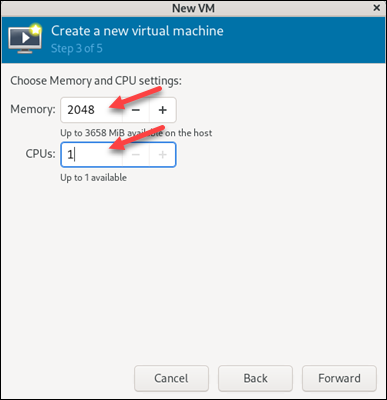
Click Forward to continue.
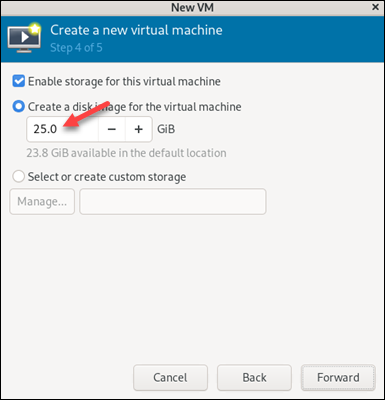
7. Set the virtual hard disk size (in GiB) and proceed to the final step.
8. Change the VM name and review the configuration.
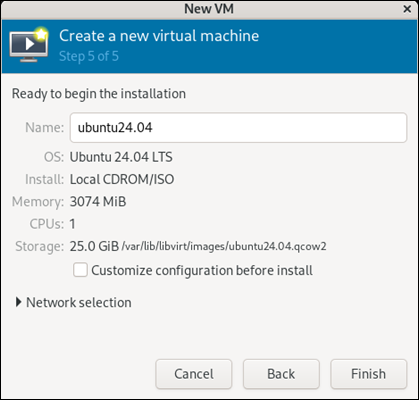
Press Finish to set up the virtual machine. The installation process begins immediately after the VM is set up.
Conclusion
This article showed how to set up KVM on Rocky Linux and CentOS. It provided instructions for installing KVM, configuring a bridge interface, and setting up virtual machines using the GUI or terminal.
A popular alternative to KVM is VirtualBox. If you are interested, learn how to install VirtualBox on CentOS.