Oracle VirtualBox is a virtualization software solution that allows users to create and run multiple virtual machines on a single hardware machine. Using a Type 2 hypervisor, like VirtualBox, the host operating system remains unaffected by the virtual environment.
This guide outlines how to install VirtualBox on CentOS and Rocky Linux.
Prerequisites
- CentOS or Rocky Linux installed.
- Command-line access.
- A user with sudo privileges.
Installing VirtualBox from Oracle Repositories on CentOS and Rocky Linux
Setting up VirtualBox on CentOS and Rocky Linux involves downloading dependencies, adding the Oracle repository, and installing via YUM. Follow the steps in the sections below to install VirtualBox.
Step 1: Install vboxdrv Kernel Module
VirtualBox uses the vboxdrv kernel module to control and allocate physical memory for the guest operating systems. The following is the procedure to install additional modules and other dependency packages:
1. Update YUM repositories:
sudo yum update2. Use the following command to install the kernel and necessary tools:
sudo yum install –y patch gcc kernel-headers kernel-devel make perl wgetWait for the installation to finish.
3. Reboot the system to start using the new kernel:
sudo rebootStep 2: Download VirtualBox Repository
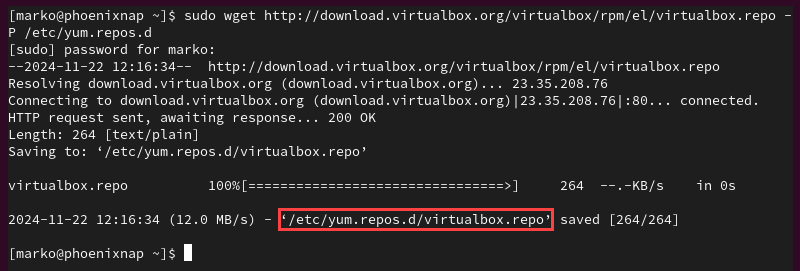
The official Oracle's VirtualBox repository contains the latest versions of VirtualBox binaries available for download. To download the VirtualBox repository, enter the following wget command:
sudo wget http://download.virtualbox.org/virtualbox/rpm/el/virtualbox.repo -P /etc/yum.repos.dThe command downloads the repository file and places it in the /etc/yum.repos.d directory.
Step 3: Install VirtualBox
Install the latest version of VirtualBox from the official repository. The following example downloads version 7.1:
1. Enter the following command:
sudo yum install VirtualBox-7.1When prompted, enter Y to continue the process.
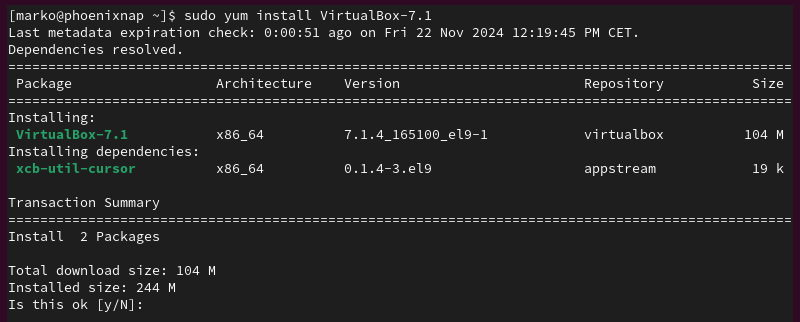
2. The system prompts the user to accept the GPG key. Enter Y to confirm, and wait for the installation to finish.
3. Check the status of the VirtualBox Linux kernel module service:
sudo systemctl status vboxdrvThe output confirms that the service is active.

Step 4: Install Oracle VirtualBox Extension Pack (Optional)
Additional packs for functions like USB drives, remote desktop protocols, or disk encryption must be installed separately. Proceed with the steps below to download and import the VirtualBox extension pack:
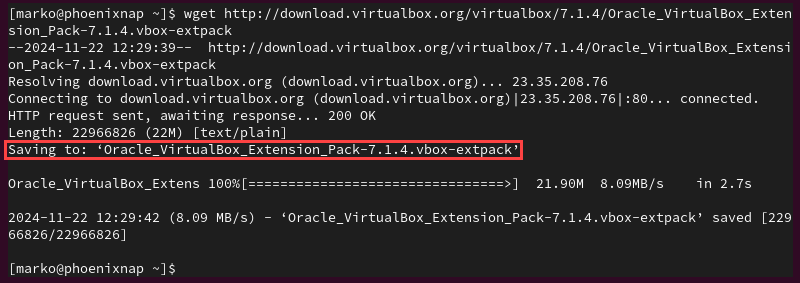
1. Download the extension pack:
wget http://download.virtualbox.org/virtualbox/7.1.4/Oracle_VirtualBox_Extension_Pack-7.1.4.vbox-extpackThe terminal confirms that the pack has been downloaded.
2. Import the pack to VirtualBox:
sudo VBoxManage extpack install Oracle_VM_VirtualBox_Extension_Pack-7.1.4.vbox-extpack3. Accept the terms and conditions by entering Y. The system confirms the successful installation of the extension pack.

Step 5: Start VirtualBox
Use the command below to access the newly installed VirtualBox:
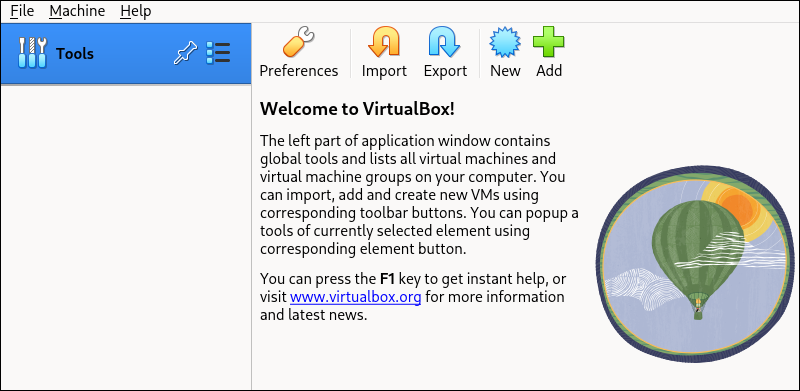
VirtualBoxThe VirtualBox manager interface appears.
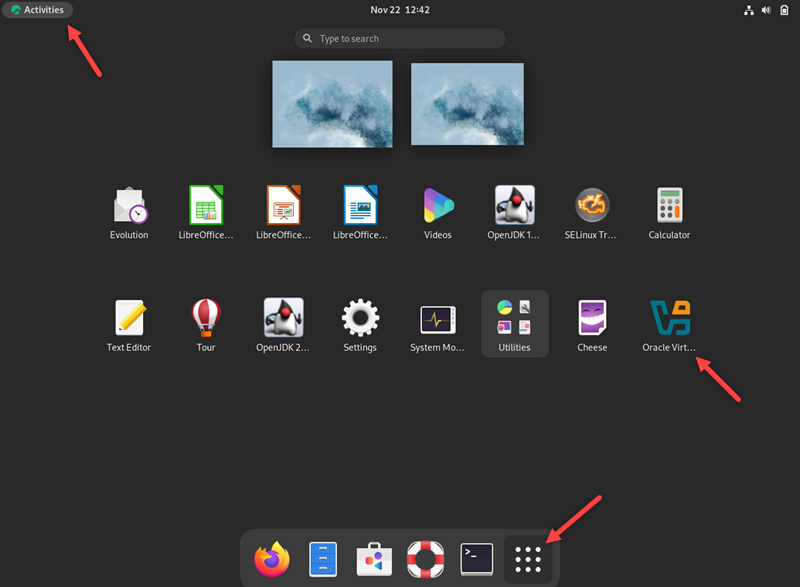
If you prefer using the graphical interface to access the application, follow the steps below:
1. Click Activities in the upper-left corner of the screen
2. Select the Applications button in the dashboard.
3. Click the Oracle VirtualBox icon.
Conclusion
By following these instructions, you have learned how to install VirtualBox on your CentOS and Rocky Linux systems. VirtualBox provides a simple, cost-effective way to set up multiple virtual environments. Still, its performance depends on the physical limitations of memory and the processing power of the host machine.
Learn more about VirtualBox and its features in our article VirtualBox vs. VMware.
