Git is a widely used open-source version control system that allows users to track projects across teams and revisions. It is available on most modern platforms. Since every developer uploads their code to the same remote repository, it does not matter which system they use to work on the code.
In this guide, you will learn to install Git on Windows and learn some of its basic functions.
Prerequisites
- A user account with administrator privileges.
- Access to a command-line tool.
- Your favorite coding text editor.
- Username and password for the GitHub website (optional).
Note: For Linux and macOS installation guides, check out our articles on installing Git on Ubuntu, CentOS, and macOS.
How to Install Git on Windows
There are two ways to install Git on Windows:
- Using the Git installer. The GUI installer wizard is available on the official Git website and lets you configure Git step by step.
- Using Winget. A Linux-style CLI package manager for Windows that simplifies app installations but offers fewer configuration options as it assumes all default options.
Choose your preferred installation method based on how much control you want over the process and whether you prefer the GUI or CLI.
Install Git on Windows via GUI
The GUI method involves downloading the Git installer wizard from the official website and configuring the installation in a traditional Windows step-by-step manner. This approach is useful if you want full control of the installation process and do not like using the CLI.
Note: During the installation, Git prompts you to select a text editor. If you don't have one, we strongly advise you to install it prior to installing Git. Our roundup of the best text editors for coding may help you decide.
Follow the steps below:
1. Navigate to the official Git downloads page and click the download link for the latest Git version for Windows:
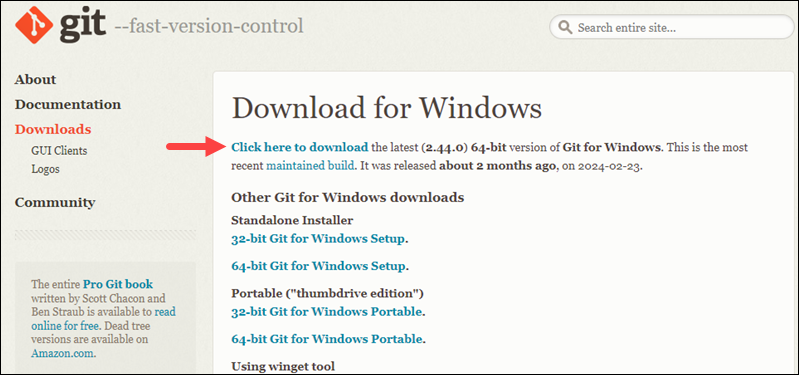
The link contains the latest 64-bit version of Git for Windows. Alternatively, if you use a 32-bit system, download the 32-bit Git installer.
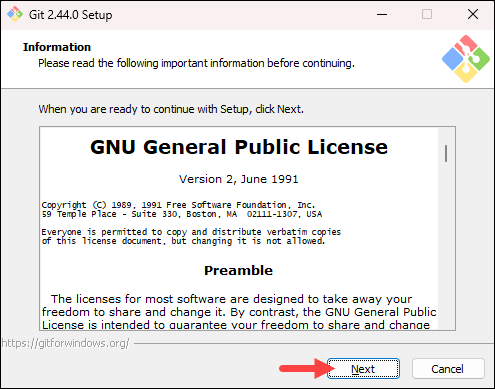
2. Double-click the downloaded file to extract and launch the installer.
3. Review the GNU General Public License, and when you are ready to install, click Next.
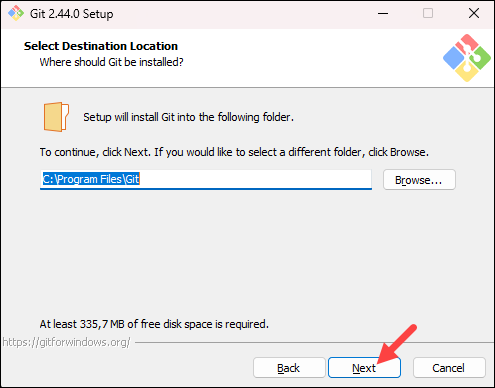
4. The installer prompts you for an installation location. Leave the default one unless you want to change it, and click Next.
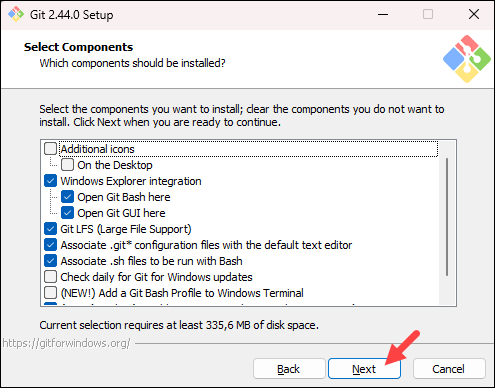
5. In the component selection screen, leave the defaults unless you need to change them and click Next.
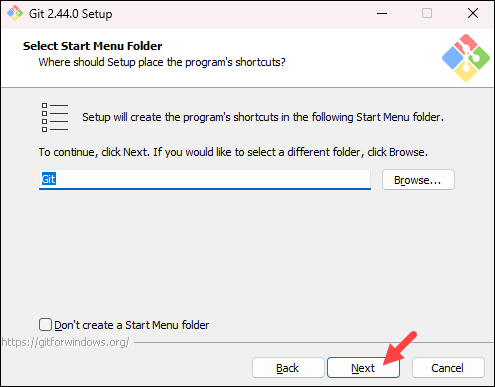
6. The installer offers to create a start menu folder. Click Next to accept and proceed to the next step.
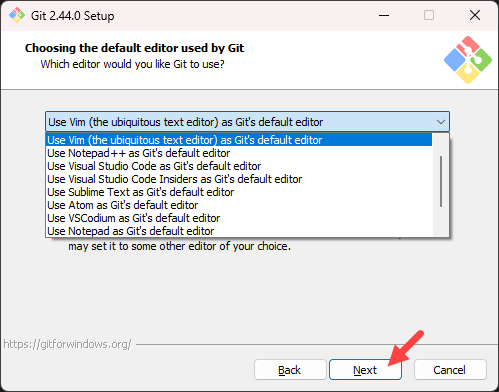
7. Select a text editor you want to use with Git. Use the drop-down menu to select Notepad++ (or whichever text editor you prefer) and click Next.
If you prefer to use a CLI text editor in Git Bash, select nano or Vim from the list.
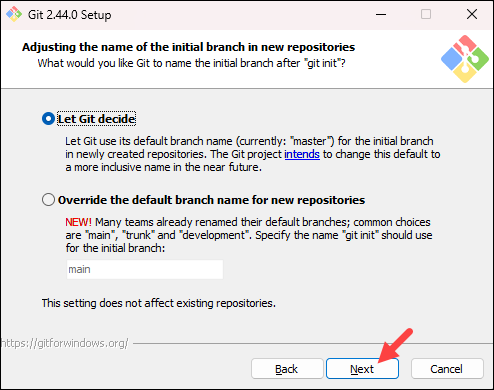
8. The next step allows you to choose a different name for your initial branch. The default is master. Unless you are working in a team that requires a different name, leave the default option and click Next.
Note: If you are new to Git, check out our guides to Git branch name conventions and Git branching strategies.
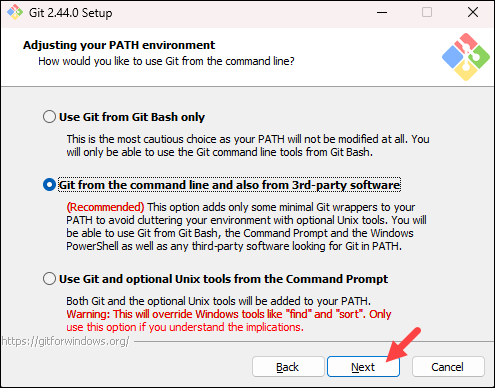
9. The next step allows you to change the PATH environment. The PATH is the default set of directories included when you run a command from the command line. Keep the middle (recommended) selection and click Next.
10. The installer prompts you to select the SSH client for Git to use. Git already includes its own SSH client, so if you don't need a specific one, keep the default option and click Next.
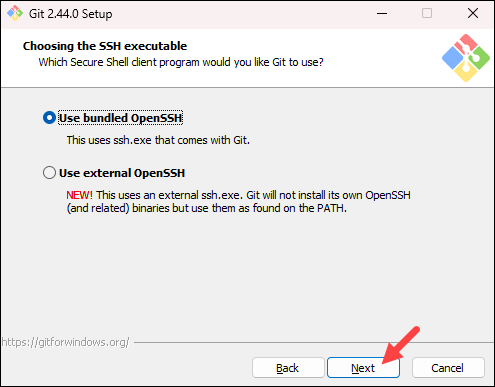
Note: Check out our comparison of SSH and HTTPS for Git and which one you should use.
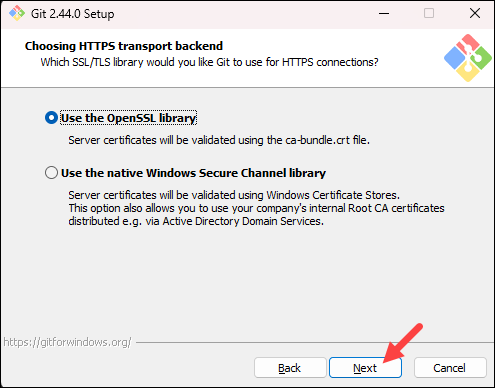
11. The next option relates to server certificates. The default option is recommended for most users. If you work in an Active Directory environment, you may need to switch to Windows Store certificates. Select your preferred option and click Next.
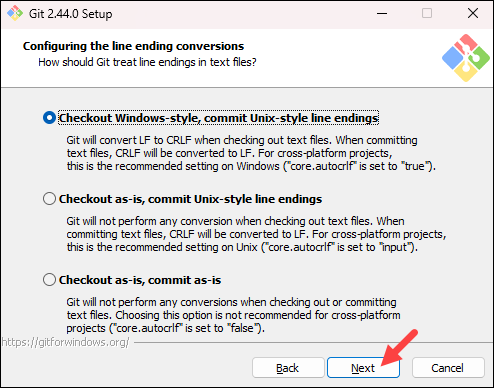
12. The following selection configures line-ending conversion, which relates to the way data is formatted. The default selection is recommended for Windows. Click Next to proceed.
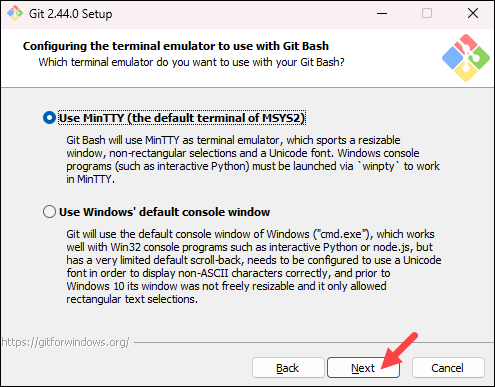
13. Choose the terminal emulator you want to use. The default MinTTY is recommended for its features. Click Next to continue.
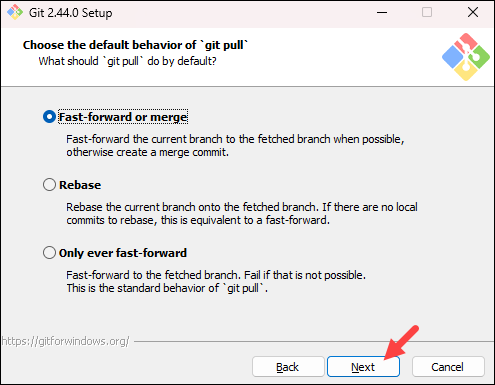
14. The next step allows you to choose what the git pull command will do. The default option is recommended unless you specifically need to change its behavior. Click Next to continue with the installation.
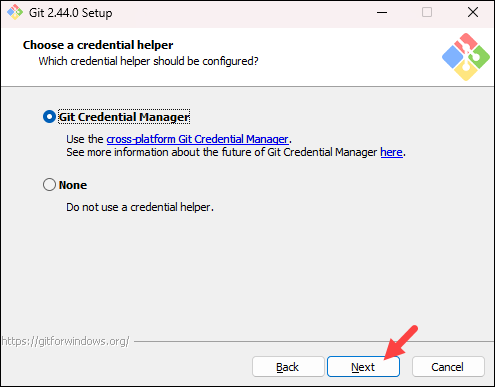
15. The next step is to choose which credential helper to use. Git uses credential helpers to fetch or save credentials. The default option is the most stable one. Select your preferred credential manager and click Next.
16. The next step lets you decide which extra options to enable. If you use symbolic links (command-line shortcuts), tick the box. Keep the file system caching checked, and click Next.

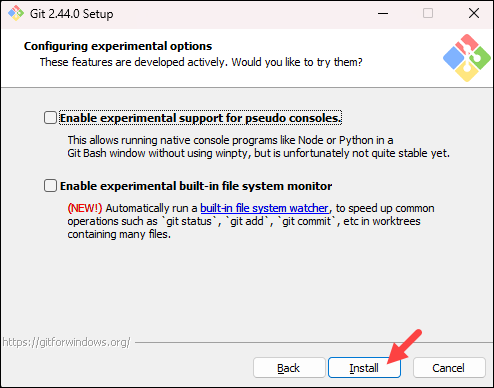
17. Depending on which Git version you are installing, it may offer to install experimental features. At the time this article was written, the installer offered options to include support for pseudo controls and a built-in file system monitor. For the most stable operation, do not install experimental features and click Install.
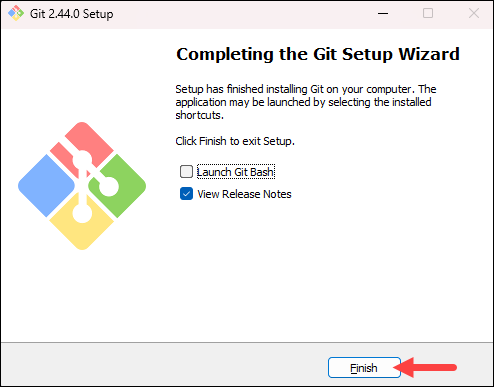
18. Once the installation is complete, tick the boxes to view the Release Notes or launch Git Bash if you want to start using Git right away, and click Finish.
Install Git on Windows via CMD
Installing Git on Windows using the command line requires a working Winget installation, an Internet connection to download the necessary files, and access to the Command Prompt or PowerShell.
If you prefer using a package manager for installing and managing programs, follow the steps below:
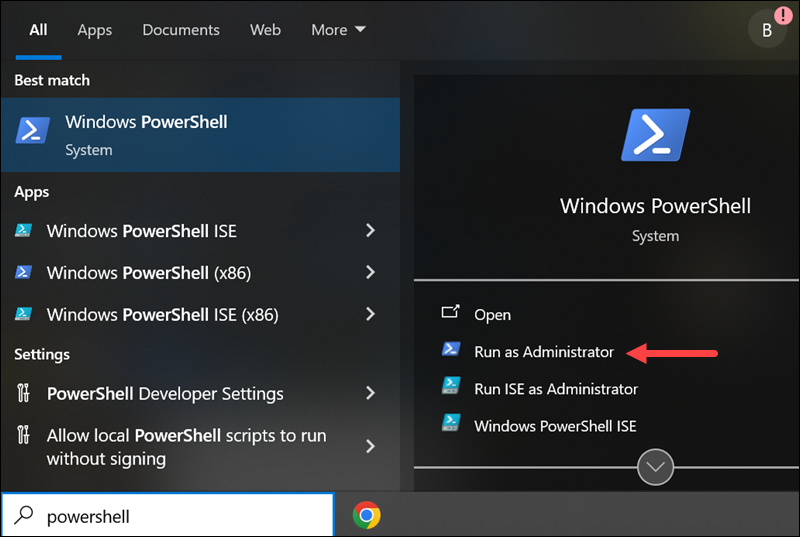
1. Press the Windows key and type powershell. From the results, select the Run as administrator option for Windows PowerShell.
2. In PowerShell, run the following command to install the latest Git version:
winget install --id Git.Git -e --source winget
The command downloads and installs Git for Windows. It assumes all the default settings and completes the installation automatically.
How to Launch Git in Windows
Git has two modes of use – a bash scripting shell (or command line) and a graphical user interface (GUI). This section shows how to launch Git after installation.
Launch Git Bash Shell
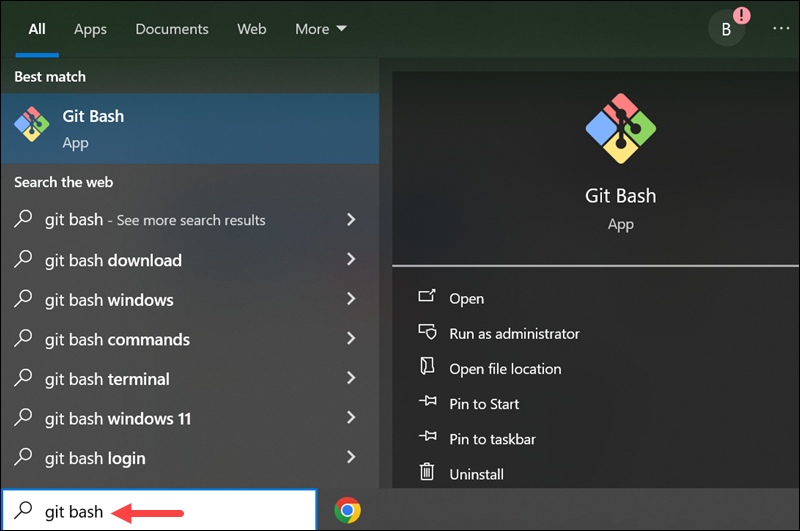
To launch Git Bash, open the Windows Start menu, type git bash, and press Enter (or click the application icon).
Launch Git GUI
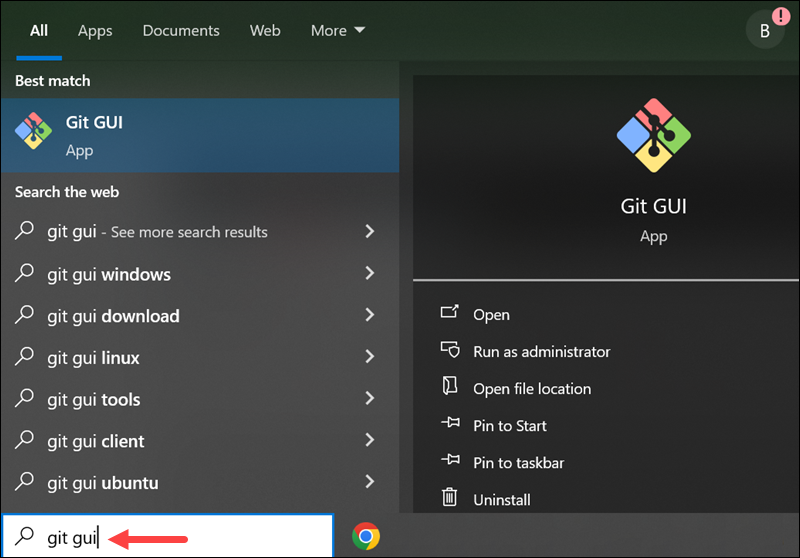
To launch Git GUI, open the Windows Start menu, type git gui, and press Enter (or click the application icon).
Configuring Git on Windows
After installing Git, you should configure some options to customize your Git environment. These configurations stick between upgrades, so they should be done only once after a fresh install. This section shows how to set up Git after installation.
Configure Identity
Your identity in Git is your username and email address, which Git uses every time you create a commit. To set up your identity, open Git Bash and use the syntax below:
git config --global user.name "[username]"Replace [user_name] with the actual username you will use. If you have a GitHub account, you can use that username and email.
git config --global user.email [email]Replace [email] with the email you want to use.
Change Default Text Editor
The default text editor for Git is the same as your system's default editor unless you specify a different one during installation. You can change the text editor for Git after installation using the following syntax:
git config --global core.editor [path_to_editor_exe_file]The path to the editor's executable file may vary depending on how your editor is packaged and whether you are running a 32-bit or 64-bit system. For example, to set Notepad++ as the default editor for Git, run the following command:
git config --global core.editor "'C:/Program Files/Notepad++/notepad++.exe' -multiInst -notabbar -nosession -noPlugin"-multiInst- This option tells Notepad++ to open files in a new instance rather than reusing an existing instance. It is useful if you want to edit multiple files simultaneously.-notabbar- This option hides the tab bar in Notepad++, which is useful when working with a single file at a time.-nosession- This option prevents Notepad++ from restoring the last session on startup. It opens Notepad++ with a clean slate without previously opened files.-noPlugin- This option disables all plugins in Notepad++. It is useful if you want to minimize startup time or prefer to work without plugins.
If you want to use a different editor, refer to the official configuration instructions and find the command for that editor.
Change Default Branch Name
The default branch in Git is master. However, some developers have started using main instead. If your organization wants to change the default branch name, you can do so using the syntax below:
git config --global init.defaultBranch [branch_name]For example, to use main as the default branch name, run:
git config --global init.defaultBranch mainGit on Windows: Getting Started With Your First Repo
This section shows the basic steps for using Git on Windows - from checking your Git version to creating a test directory and making your first commit. Since we will be working with a remote repository, you will need a GitHub username and password.
How to Check Git Version
To check which Git version is installed on your system, open PowerShell and run the following command:
git --version
The output shows which Git version is installed on the system.
List All Git Commands
Git has a help file that lists the most commonly used Git commands. To see the help file, open Git Bash or Windows PowerShell and run the following command:
git help -a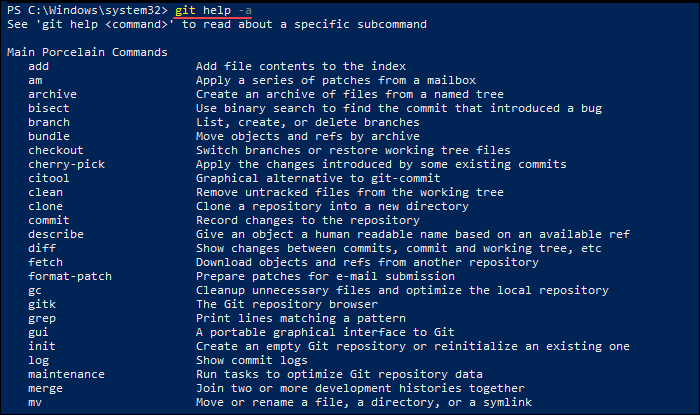
The output contains the most common Git commands.
Create and Initialize Test Directory
Follow the steps below to create a new directory and initialize it as a Git repository:
1. Open Git Bash or a Windows PowerShell interface and use the syntax below to create a new test directory (folder):
mkdir [directory_name]2. Change your location to the newly created directory with the cd command:
cd [directory_name]3. Initialize the directory as Git repository by running:
git init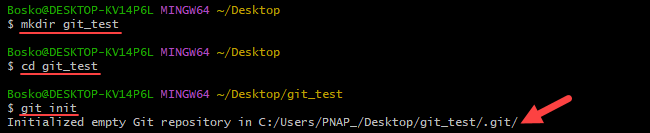
Clone GitHub Repository
Follow the steps below to clone a repository from GitHub to your local Windows machine:
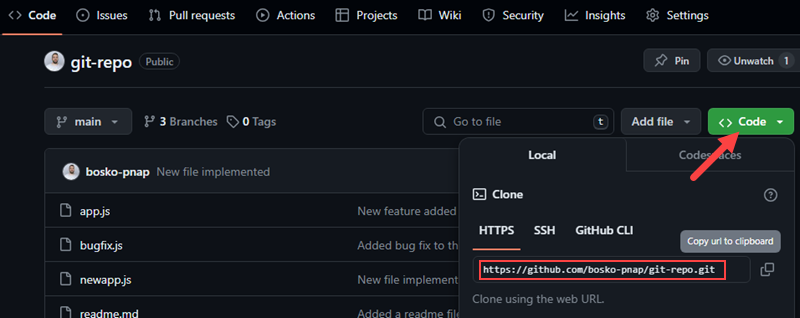
1. In a web browser, navigate to your repository on GitHub.
2. Click the Code button and select the HTTPS or SSH option, depending on how you want to secure your connection. For this tutorial, we will use HTTPS. Copy the URL for cloning the repository.
Note: To clone a repository using SSH, you must generate an SSH key pair on your Windows workstation and assign the public key to your GitHub account.
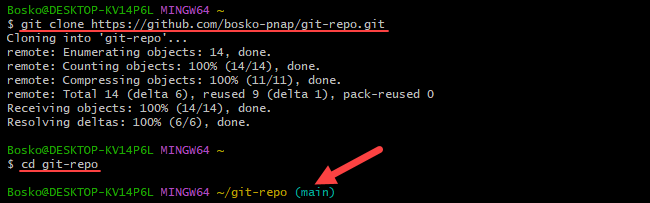
3. Open Git Bash or Windows PowerShell and use the syntax below to clone the repository:
git clone [repository_url]Replace [repository_url] with the URL you copied on GitHub. For example:
List Remote Repositories
After cloning, your working directory should have a copy of the repository from GitHub. It should contain a directory named after the project. Move to the directory with cd:
cd [repository_name]Replace [repository_name] with the actual name of the repository you downloaded. If it is not working, list the contents of the current directory with the ls command. This is helpful if you don't know the exact name or need to check your spelling.
Once you are in the subdirectory, list the remote repositories with:
git remote -v
The output lists the remote repositories associated with your local repository and their corresponding URLs.
Push Local Files to Remote Repository
This section shows how to create a new file, add it to the tracking index, create a commit, and ultimately push the changes to the remote repository. Follow the steps below:
1. Open Git Bash and create a new file with the touch command:
touch text.txt2. Add your new file to the tracking index:
git add text.txtIf you have created multiple files, you can track all files by running:
git add .3. Run the following command to make sure the text.txt file has been added:
git status4. Next, commit the changes using the syntax below:
git commit -m "[commit_message]"The -m option allows you to specify a commit message within the commit command. If you omit the -m option, Git opens the default text editor in which you can write the commit message.
5. Finally, push the changes to the remote GitHub repository:
git push [remote_repository]Replace [remote_repository] with the name of your remote repo. For example:
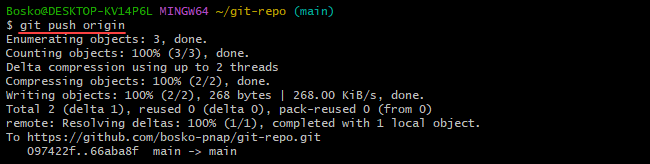
Depending on how you have configured GitHub authentication, you may need to enter your username and access token.
Note: If you are new to Git, read our tutorial on how Git works to learn more about Git workflow and Git functions.
Conclusion
You now have a working Git installation on your Windows system. If you already have Git installed, you might want to know how to update Git. Use Git's features to coordinate work among programmers on a project.
Next, check out our Git commands cheat sheet or learn how to remove a Git remote from a repository.