Git is a distributed version control system (DVCS) that enables teams to collaboratively track changes and manage revisions within a single project. Keeping Git updated is essential to access the latest features, security patches, and usability enhancements.
This tutorial shows you how to update to the latest version of Git on Linux, Windows, and macOS.

Prerequisites
- A system running Linux, Windows, or macOS.
- Git installed (see how to install Git on Ubuntu, macOS, or Windows).
- Administrative access to the terminal (Linux, macOS) or command prompt (Windows).
How to Update Git on Linux
Updating Git on Linux is a simple process that can be done using the appropriate package manager for your distribution. This tutorial uses Ubuntu, which, like other Debian-based Linux distros, uses the apt package manager. On RHEL-based distros, use a package manager such as yum or dnf.
Follow the steps below:
1. Run the following apt command to update the system package repository information:
sudo apt update2. Update Git by running:
sudo apt install git
In the example above, the latest Git version is already installed, so the system makes no changes.
3. To verify the installation has completed successfully, check the Git version:
git --version
Another way to install Git on Linux is to build it from source. Check out our guide to installing Git on Ubuntu for details.
How to Update Git on Windows
Git provides a simple, automated way to update on Windows with a single command.
Note: If you are using an old Git version (2.14.1 or below), the only way to update Git is to uninstall it from your system and install the latest version. Check out our guide for installing Git on Windows for more details.
Follow the steps below to update Git on Windows:
1. Open the Command Prompt or Windows PowerShell and run the following command to update Git:
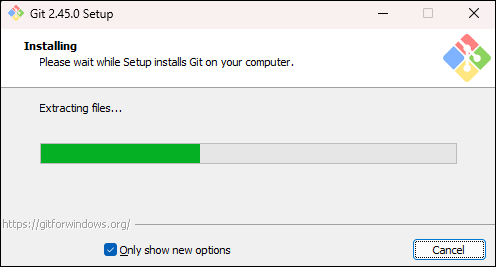
git update-git-for-windows
The command automatically downloads the latest Git version and starts the installer, which completes the process:
2. After the process completes, you have the latest Git version. Check the version with the following command:
git --version
How to Update Git on Mac
To update Git on macOS, follow the steps below:
1. Updating Git is the easiest with Homebrew, a macOS package manager. To install Homebrew, run the following command:
/usr/bin/ruby -e "$(curl -fsSL https://raw.githubusercontent.com/Homebrew/install/master/install)"If you already have Homebrew, update it to ensure you get the latest Git version:
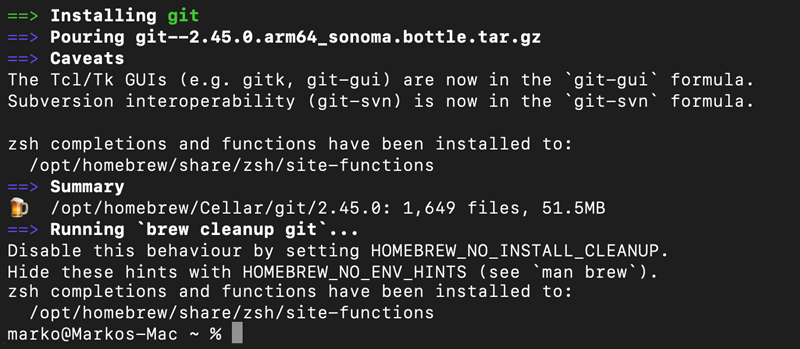
brew update2. Install the latest Git version by running:
brew install gitThe command installs the latest version of Git available on your system.
Wait for the installation to finish, then open a new terminal window.
3. Check the Git version with:
git --versionIf the command output shows the latest Git version without apple in the version details, you have completed the update process.

However, if you still see the apple version, the system has retained the previous Git version and is still using it by default. In that case, move on to the next step.
4. Run the command below to manually set the path to the Homebrew Git installation instead of the Apple one:
export PATH=/usr/local/bin:$PATH5. Check the Git version again to verify it has been updated to the latest one:
git --versionConclusion
After following this tutorial, you should have an updated version of Git installed on your Linux, Windows, or macOS system. This process ensures access to the latest features, bug fixes, and security patches, enhancing overall efficiency and reducing potential vulnerabilities in version-control workflows.
Next, take a look at our Git commands cheat sheet for a comprehensive primer on working with Git. If you come across a Git merge conflict, see how to resolve merge conflicts in Git.