Git is a version control system that allows developers to track a project and actively contribute without interfering with each other's work. It facilitates collaboration and helps prevent miscommunication or code clashing between team members.
In this tutorial, you will learn how to install and use Git on Mac.
Prerequisites
- A Mac machine.
- A user account with root privileges.
- Access to the terminal.
Option 1: Install Git on Mac with Installer
The easiest way to set up Git is to use the Git installer for Mac. It features a GUI and simplifies Git installation on Mac. However, the Git installer development was abandoned in 2021, and it does not install the latest Git version. If you need a newer version of Git, it is better to install it using one of the terminal methods.
Follow the steps below if you decide to install Git using the installer:
1. Open a browser and download the Git installer from Sourceforge. The download should start automatically.
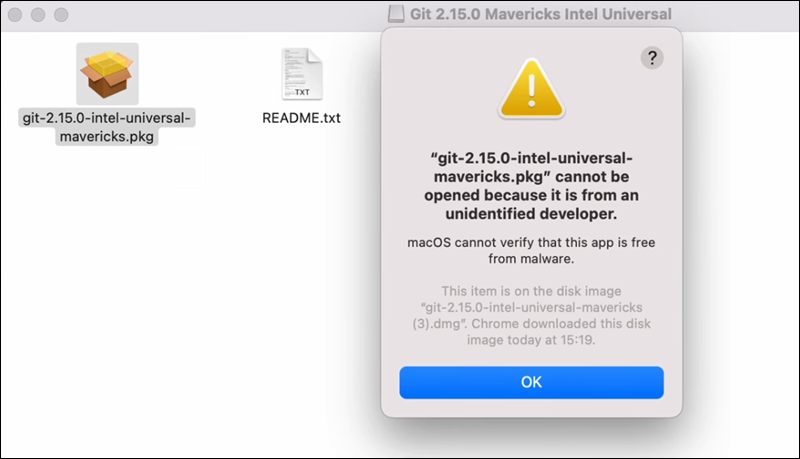
2. Find the package you downloaded and double-click it to open the Git installer. Since the installer is a third-party app, the system will output an error such as the one below, which you need to override in system settings:
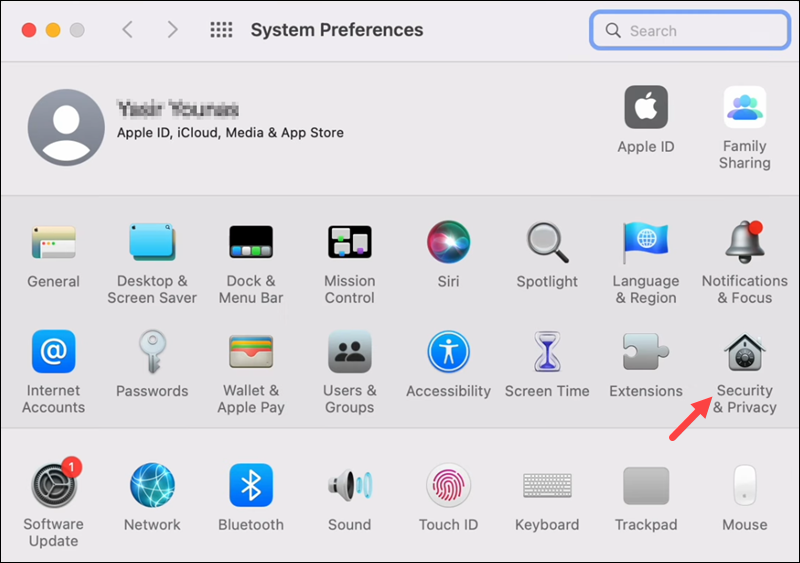
3. Open System Preferences and select Security and Privacy:
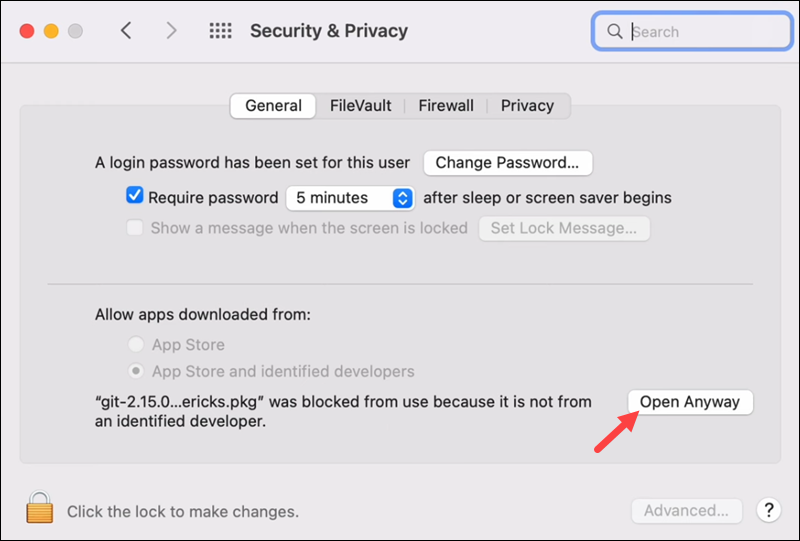
4. In the General tab, click the Open Anyway button to open the Git installer:
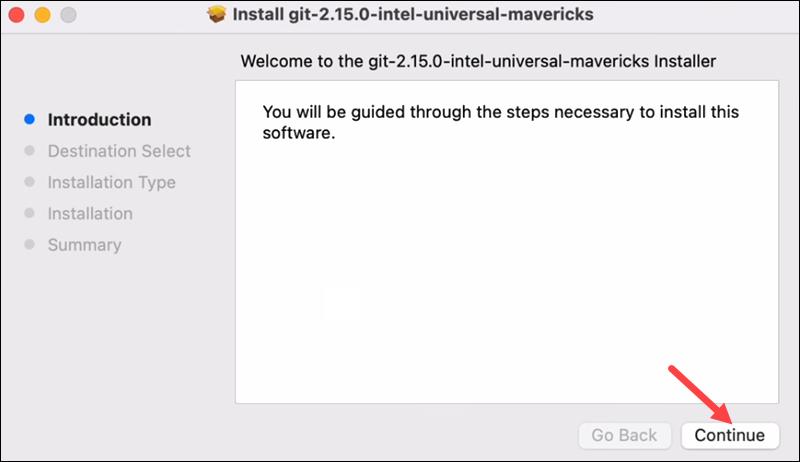
5. Click Continue in the wizard to start the installation and follow the steps to configure Git to suit your development needs. If you are new to version control systems, it is best to leave the default settings.
6. Click Install and enter your password when prompted.
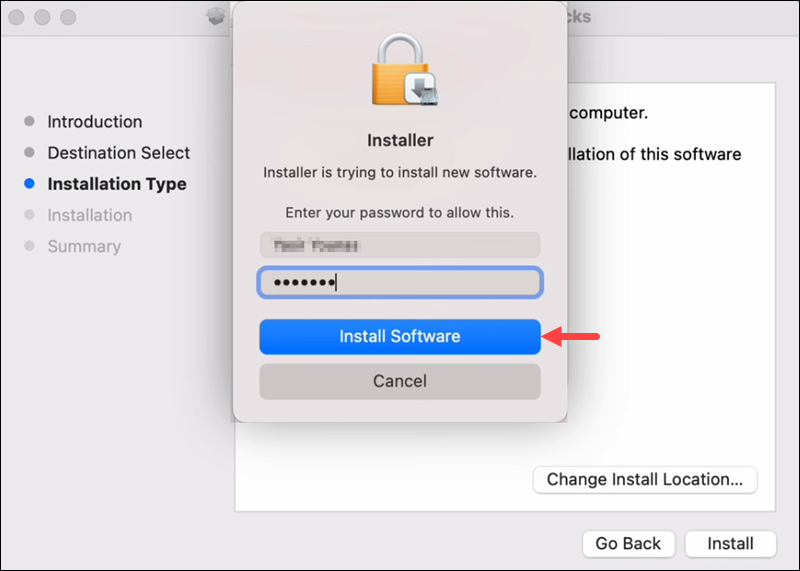
Confirm once again by clicking Install Software in the popup window. Wait for the installation to complete.
7. When the process completes, click Close to exit the installer.
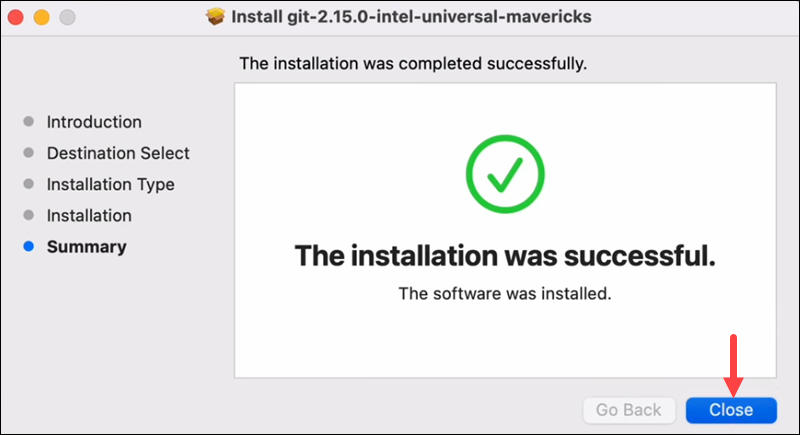
You are now ready to use Git on your Mac.
Option 2: Install Git on Mac using the Terminal
There are multiple ways to install Git on Mac via the terminal, depending on the development environment or the package manager you have on your system.
This guide covers three different options.
Install Git on Mac Using Xcode
Xcode is the fastest and easiest way to start working with Git. Its command-line tools include Git in the package.
Users who do not have Xcode can install it using the command below:
xcode-select --installWith Xcode running on your Mac, you can verify if Git is available by checking the program version:
git --versionThe output should display the latest Git release, as in the example below.

If you do not have Git, it automatically asks whether you want to install it. Confirm the installation, and Xcode sets up Git.
Install Git on Mac Using Homebrew
Another way to install Git is to use Homebrew, the package management system for macOS.
Run the following brew command in the terminal to install Git:
brew install git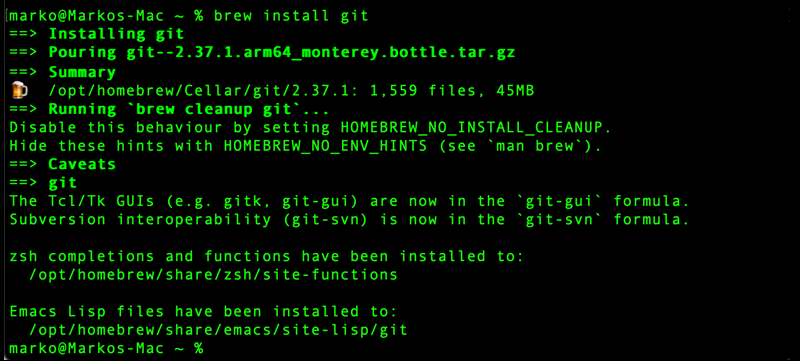
Check the Git version to verify the installation:
git --version
Install Git on Mac Using MacPorts
If you use MacPorts to manage your packages on the system, you can use the port command to set up Git. Follow the steps below:
1. Start by updating MacPorts with the command:
sudo port -v selfupdate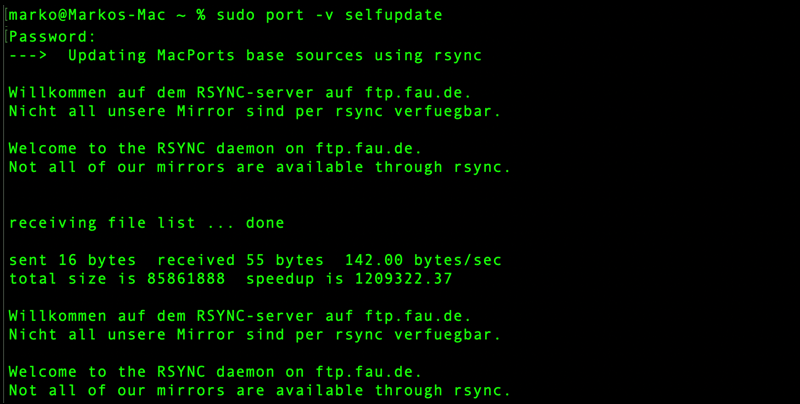
2. Search for the newest Git ports by running the following command:
port search git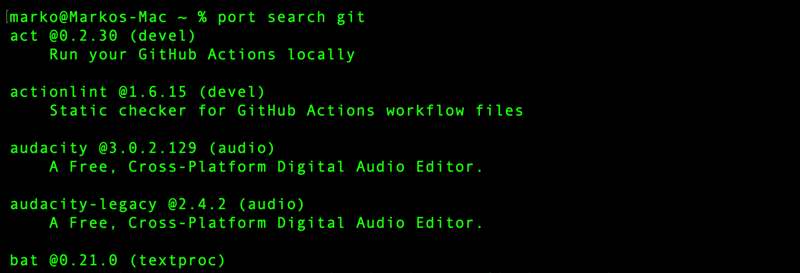
The command returns a list of Git-related ports that you can install, along with their descriptions and version numbers. This command is useful when you need a specific Git version or related utilities available through MacPorts.
3. Run the command below to search for Git variants:
port variants git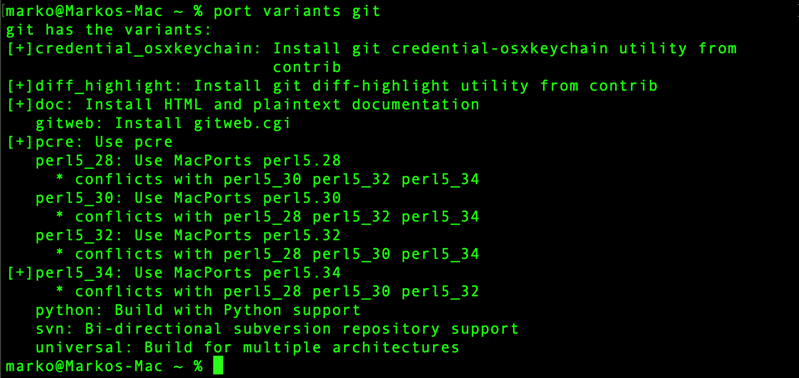
The command outputs the available variants for the git port. Variants are optional features or configurations that can be enabled or disabled when installing a port. The variants allow you to customize the Git installation to suit your needs. For example, if you want to enable GPG support during Git installation, append +gpg to the installation command.
4. To install Git without any variants, run the following command:
sudo port install git
How to Configure and Use Git on Mac
This section shows the basics of configuring and using Git after installation. Refer to the sections below to learn how to add your credentials to Git and start tracking the changes you make on the project.
Configure Git on Mac
After installing, configure Git by adding your credentials to the system. This is important as it helps keep track of which user is committing changes to a project.
1. Open the terminal and configure your GitHub username with the following syntax:
git config --global user.name "your_github_username"2. Add your email:
git config --global user.email "[email protected]"Note: Check out this article for a comprehensive list of Mac terminal commands alongside a downloadable PDF cheat sheet for easy reference.
Track and Commit Changes
To demonstrate how to work with files on local Git repositories, we will create a demo folder and file to work with.
1. Open the terminal and create a new folder named NewFolder using the mkdir command.
mkdir /Users/[username]/Desktop/Tools/Git/NewFolderReplace [username] with your actual username.
2. Move into the directory you created with the cd command:
cd /Users/[username]/Desktop/Tools/Git/NewFolder/3. Create a local Git repository to track the changes. Run the following command to initialize an empty Git repository:
git init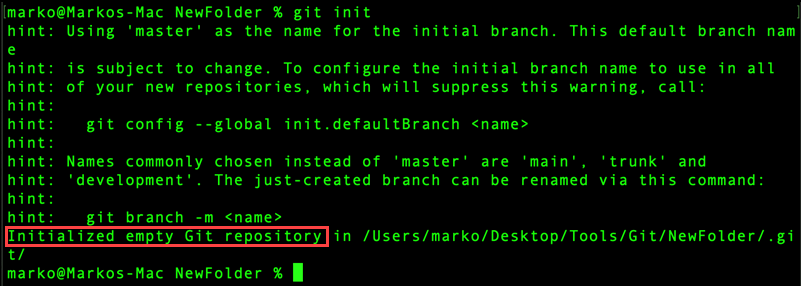
The command adds a hidden folder inside the directory named .git.
Note: To see the hidden .git folder, run:
defaults write com.apple.finder AppleShowAllFiles YESTo hide the folder again, run the same command but modify the last part (change YES to NO).
4. In the NewFolder directory, run:
git status
The command shows the working directory state and displays if any changes were made inside the directory. Since we still have no files in the folder, the output responds with: No commits yet - nothing to commit.
5. Add some files inside NewFolder and see how the git status output changes. Use the touch command to create a file:
touch file1.txt6. Check the status again:
git status
The output states that there are untracked files inside the directory and lists file1.txt. Git tracks the folder in which the file was added and notifies you that the file changes are not being tracked.
7. Instruct Git to track the new file by running:
git add file1.txtRecheck the git status and you will see that the file is being tracked. However, you still need to commit the change.
8. Commit all changes and add a message within quotes that describes the commit. For example:
git commit -m "added file1.txt"
Now, the git status output states that the working tree is clean, and there is nothing to commit.
Note: If you're new to Git, check out our beginner's guide: How to Use Git.
Get acquainted with the popular version control system via basic and advanced examples.
Conclusion
This tutorial showed how to install Git on macOS. Use Git to collaborate with other developers seamlessly and contribute your changes to the code without affecting other's work.
If you already have Git installed, you might want to know how to update Git, or download our Git commands cheat sheet to have all the important commands in one place.
