The git blame command is a Git tool that allows users to see who last modified each line of a file and when. It is mainly used for identifying the origin of specific lines of code, tracking down the cause of bugs, understanding a file's history, and pinpointing when and why a change was made.
In this tutorial, you will learn to use the git blame command to inspect file modifications line by line.
Prerequisites
- Git installed (install Git on Windows, macOS, or Ubuntu).
- A working Git repository.
What Is git blame?
git blame is a Git utility that displays the author metadata attached to specific committed lines in a file. Its purpose is to examine specific points in a file's history and get context as to who the last author was that modified the line.
It is especially useful for debugging, as it helps identify the origin of a bug by showing who last modified the problematic line. Additionally, it allows users to understand a code's evolution and attributing contributions during code reviews.
How Does git blame Work?
The git blame command annotates each line of a file with information about the last commit that modified it. This includes the commit hash, author, timestamp, and the line content. It helps track changes and understand the history of a file.
Beyond its basic functionality, git blame utilizes various options to allow users to focus on a particular range of lines, detect lines that have been moved or copied within or across files, and much more. All these capabilities make git blame a versatile tool for exploring a file's history in detail.
The syntax for git blame is:
git blame [options] [file_path]The [options] are discussed in the section below.
The example below shows the basic git blame output when run without options:
git blame README.md
In the output:
85a37a3ais the commit hash where line 1 was last changed.bosko-pnapis the commit author.2023-02-17 11:28:24 +0100is the commit timestamp.# git-projectis the content of line 1.
The rest of the information is for lines 2 and 3 in the file, and it helps identify who made specific changes and when, which facilitates debugging and code reviews.
git blame Options
There are several git blame options that tailor the output to specific user needs. The table below summarizes the 15 most essential git blame options, along with a description for each:
| Option | Description |
|---|---|
-b | Show a zero/SHA-1 (0000000…) for commits past the history boundary. |
--root | Don't stop at the first (root) commit, treat it like any other commit (available since Git 2.23). |
-L [start],[end] | Annotate only the given line range (by absolute lines, regex match, or offsets); repeatable for multiple regions. |
-l | Use full 40-character commit IDs instead of abbreviations. |
-t | Display raw UNIX timestamps rather than formatted dates. |
-p, --porcelain | Emit a stable, script-friendly output format. |
--line-porcelain | Like --porcelain, but include complete commit info on every line. |
--reverse [A]..[B] | Walk history forward (from A to B), showing when lines last existed instead of when they first appeared. |
--first-parent | On merge commits, follow only the first‐parent chain. This option is useful to see when a line entered a specific branch. |
-M[<n>] | Detect lines moved within a file (threshold <n> chars, default 20) by performing extra comparison passes. |
-C[<n>] | In addition to -M, detect lines copied from other files in the same commit (threshold <n> chars, default 40). |
--ignore-revs-file [file] | Skip all revisions listed in [file] (fsck.skipList format) when assigning blame. Useful for bulk-ignoring churn commits. |
-w | Ignore whitespace-only changes when matching lines between revisions. |
-f, --show-name | Show the original filename for each blamed line (handy after renames). |
--date [format] | Override the date format (e.g., iso, relative); falls back to blame.date config or ISO if unset. |
For a comprehensive list of options, refer to the official git blame website.
git blame vs. Other Commands
While many Git commands help you explore a repository's history, git blame is unique because it attributes individual lines in a file to the commits (and authors) that last modified them. Other commands, by contrast, tend to operate at the commit or range level, showing which commits touched a file (or range of files) but not which lines came from which commit.
Use git blame when you want to pinpoint the exact origin of a specific line, while other history commands are useful when you want an overview of changes over time.
The sections below compare git blame to other Git history commands.
git blame vs. git log
The git log command lists commits in reverse chronological order, optionally filtered by path or author. It tells the user which commits modified a file and when, but not which lines each commit affected.
For example, to show all commits touching README.md, run git log:
git log --pretty=oneline README.mdThe example output would be:

On the other hand, to only show who last touched line 3 of README.md, run git blame:
git blame -L27,27 app.jsThe output is different:

In the given examples, git log provides a high-level commit timeline, whereas git blame shows the exact commit and author responsible for a specific line.
git blame vs. git annotate
The git annotate command is an older alias for git blame. In some installs, it acts as a wrapper that invokes blame -c. By default, git annotate uses the commit-style (-c) output: it prefixes each line with the full commit SHA, author, and date in a compact form.
Below is an example of git annotate output:

In the output:
85a37a3ais the abbreviated SHA-1 of the commit that last changed this line.(bosko-pnapis the author name (as configured in Git) who made the change.2023-02-17 11:28is the date and time when the line was last modified.+0100is the timezone offset from UTC.1)is the line number in the file.# git-projectis the actual content of the line.
Essentially, the output is the same as that of git blame -c since they are the same tool, so you can choose whichever matches your team's conventions.
git blame vs. git bisect
While git blame shows who last touched any given line, git bisect helps find which commit introduced a bug by performing a binary search over the commit history.
Use git bisect when you know a test (or behavior) passes on one revision but fails on a later one. Git will check out middle-point commits so you can identify the exact commit that broke something.
For example, to start a bisect section, run:
git bisect start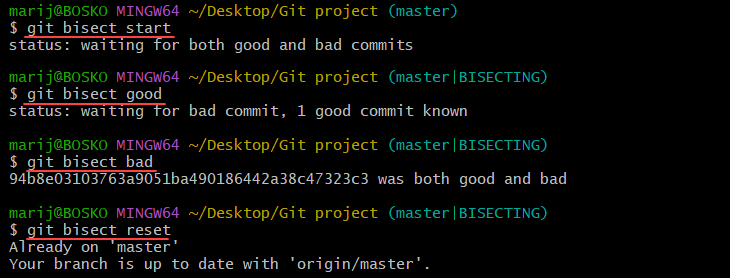
Run the test suite and mark each commit good/bad until Git isolates the culprit. If, after finding the bad commit, you need to see which lines in a file were changed there (and by whom), use git blame.
Stop git bisect with:
git bisect resetgit blame in Visual Studio Code
Visual Studio Code (VS Code) is a popular, lightweight, and extensible code editor developed by Microsoft for Windows, Linux, macOS, and web browsers. It includes built-in Git support and can be enhanced with extensions for powerful version control features.
One such extension is GitLens, which greatly enhances Git capabilities in VS Code, including rich git blame integration. While VS Code provides basic blame features, GitLens makes the information more accessible and interactive by showing detailed line-by-line commit history, author, timestamp, and commit messages directly in the editor.
Follow the steps below to use GitLens in VS Code and inspect a file with git blame:
1. Install GitLens from the Extensions pane. Click View > Extensions, and search for GitLens.
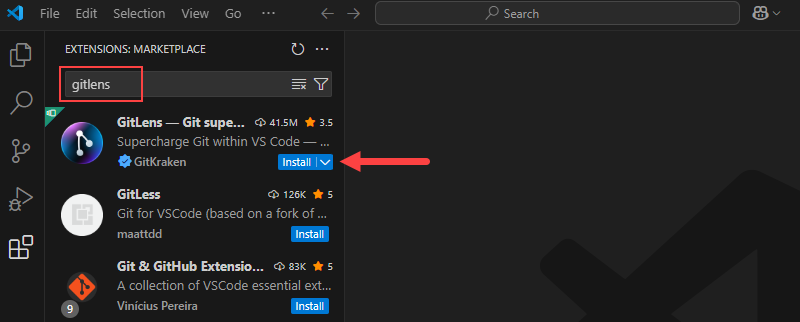
2. When prompted, click Trust Publisher & Install:
3. Select a file from the file tree (e.g., README.md).
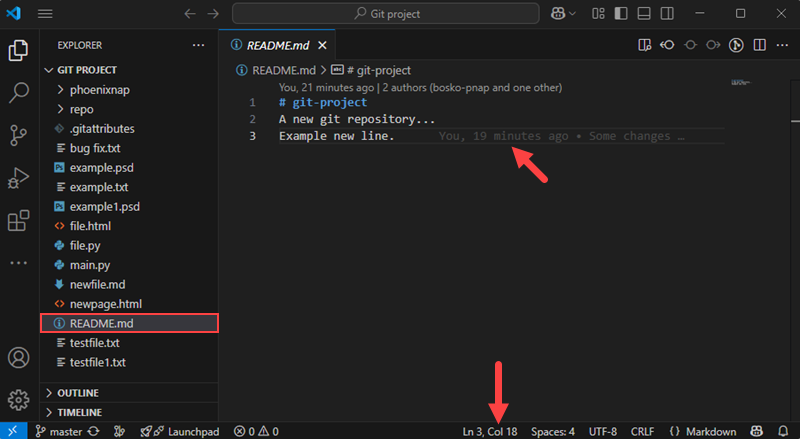
The app displays who last modified the line, when, and why when you hover over each line, or in the status bar when you click the line you want to inspect.
GitLens helps you explore git blame data visually and intuitively, making it easier to understand code history without leaving your editor or running Git commands in the terminal.
Conclusion
This tutorial showed how to use git blame, how it differs from other history commands in Git, and how you can use it in the VS Code GUI app. The tool is especially helpful for code reviews, identifying the cause of bugs, and understanding a file's history in Git.
Next, check out our tutorial on Git LFS and see how it allows users to upload large files, or get a closer look at Git tags and understand how they work.