The Domain Name System (DNS) is a distributed system of network devices that computers use to locate and communicate with Internet servers. The DNS translates human-readable domain names (e.g., https://www.google.com/) into machine-readable numerical IP addresses (e.g., 74.125.130.101).
This article will explain the "DNS server not responding" error, explain potential causes, and give a comprehensive troubleshooting guide.
What Does "DNS Server Not Responding" Mean?
The "DNS Server Not Responding" error indicates a failure in communication between a device and the DNS server. When a DNS server is unresponsive, the device cannot use it to resolve domain names, resulting in the inability to access internet resources.
This issue can manifest across various operating systems and devices connected to a network.
What Causes "DNS Server Not Responding" Error?
Several factors can contribute to a DNS server failing to respond. They range from localized issues on a user's device to server-side or network problems.
Common causes for the "DNS server not responding" error include:
- Network connectivity issues. Problems with the physical or wireless connection between the device and the network, including faulty cables, router malfunctions, or Wi-Fi issues.
- Router configuration errors. Incorrect settings or temporary glitches in the router's firmware or DNS configuration.
- Firewall or security software interference. Overly aggressive firewall rules or security applications blocking communication with DNS servers.
- Local DNS cache problems. Corrupted or outdated DNS information on the device.
- Incorrect IP configuration. Issues with the device's IP address settings, including conflicts or invalid configurations.
- DNS server outages. Temporary problems or maintenance on the DNS servers.
- Unused network adapters. Inactive network connections interfering with the active one.
- IPv6 incompatibility. Issues arising from the use of the IPv6 protocol, which may not be fully supported by all network infrastructure or websites.
How to Fix "DNS Server Not Responding" Error
Troubleshooting the "DNS Server Not Responding" error requires a systematic approach. Read the sections below for standard troubleshooting procedures to isolate and resolve the underlying cause.
Try a Different Browser
Browser-specific issues like browser cache corruption or faulty proxy configurations can mimic a DNS problem. Try accessing a website using a different web browser to rule this out.
If the website loads correctly, return to the original browser and proceed with some or all of the following actions:
- Clear the browser's cache and cookies.
- Disable extensions one by one.
- Update the browser.
- Reset the browser's settings to default.
Troubleshoot Network Connection
A faulty network connection is a frequent cause of the "DNS server not responding" error. Problems with connectivity can prevent a device from reaching the DNS servers.
Below are the procedures for troubleshooting network connections on Windows, Mac, and Linux.
Troubleshooting Network Connection on Windows
Follow the steps below to start the troubleshooting wizard on Windows:
1. Right-click the network icon in the system tray.
2. Select Diagnose network problems.
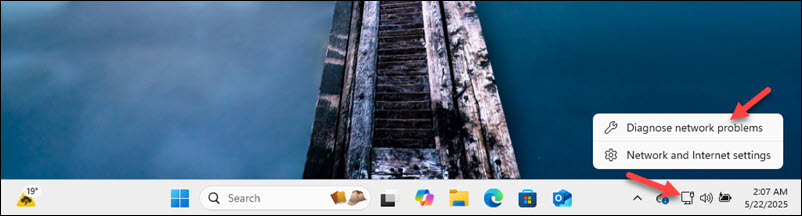
3. Follow the on-screen instructions.
Troubleshooting Network Connection on Mac
The following is the procedure to start troubleshooting a network on macOS:
1. Click the Wi-Fi icon in the menu bar while holding the Option key.
2. Select Open Wireless Diagnostics.

3. Follow the prompts.
Troubleshooting Network Connection on Linux
Depending on the Linux distribution, there are multiple ways to approach network connectivity troubleshooting.
Note: GUI Linux distributions commonly feature a Network Manager applet. Use the applet to verify the connection status and reconnect if necessary.
The following is a command-line method that can be performed on any Linux machine:
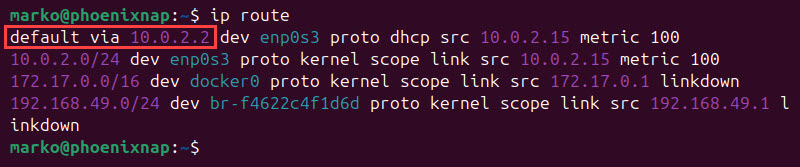
1. Enter the command below to find the gateway IP of the connection:
ip routeThe output shows the gateway address after the phrase default via.
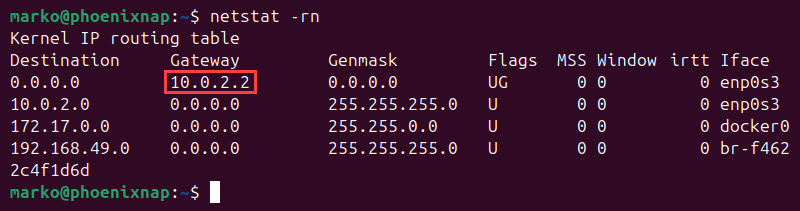
Alternatively, use the netstat command:
netstat -rnLocate the gateway address in the Gateway column of the output table.
2. Use the ping command to test the gateway address:
ping [gateway_address]If the communication with the gateway address functions properly, the ping command shows packet exchange taking place.

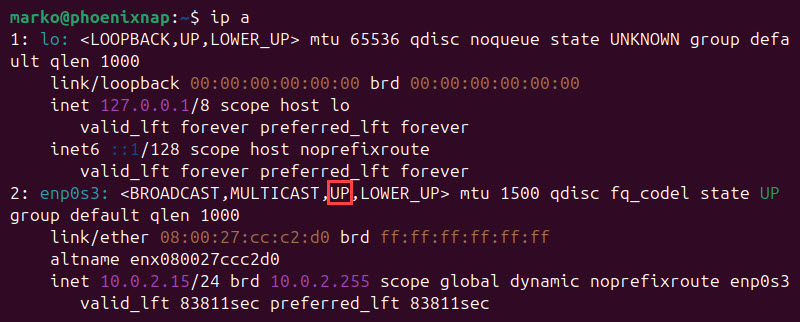
The ip command also offers a way to check the network interface status:
ip aThe UP flag next to the network interface name indicates that the interface is operational.
3. If necessary, restart the network service. On systems using systemd, type:
sudo systemctl restart NetworkManagerFor SysVinit systems, enter the command below:
sudo service networking restartRestart Device
Before more drastic measures, try restarting the device experiencing the error. This procedure can often resolve temporary software glitches affecting network connectivity and DNS resolution.
Try a Different Device
Attempt to access the internet using a different device (e.g., a smartphone or another computer) connected to the same network. If the error persists on other devices, the issue is with the router or on the server side.
Deactivate Unused Connections
Inactive network adapters can interfere with the active connection's DNS resolution process and cause the "DNS server not responding" error. Refer to the sections below to learn how to deactivate unused connections on Windows, Mac, and Linux.
Deactivating Unused Connections on Windows
Deactivate a connection in Windows with the following procedure:
1. Press Win + R.
2. Enter the following in the run dialog to open Network Connections:
ncpa.cpl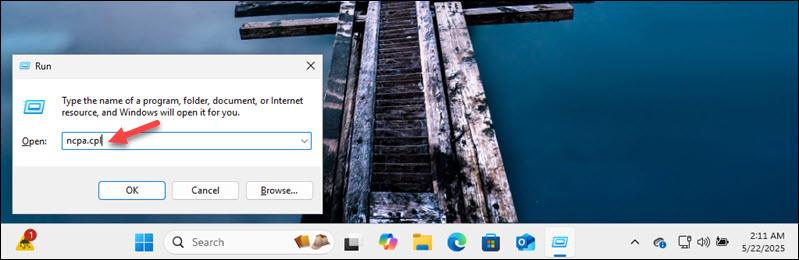
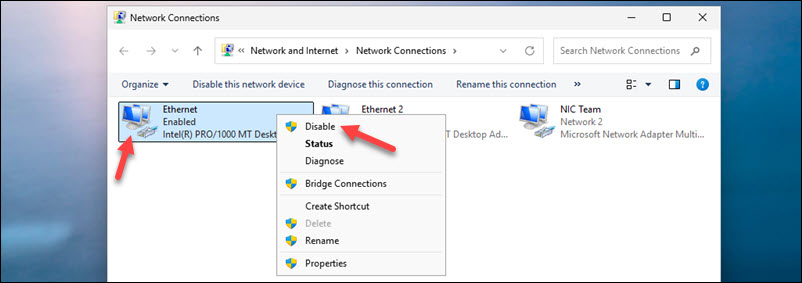
3. Right-click any network adapter not currently in use (e.g., Bluetooth Network, older Wi-Fi adapters) and select Disable.
Deactivating Unused Connections on Mac
In macOS, use the following procedure to deactivate an interface:
1. Go to Apple menu > System Settings.
2. Select Network in the bar on the left side.
3. Select the unused network interface.
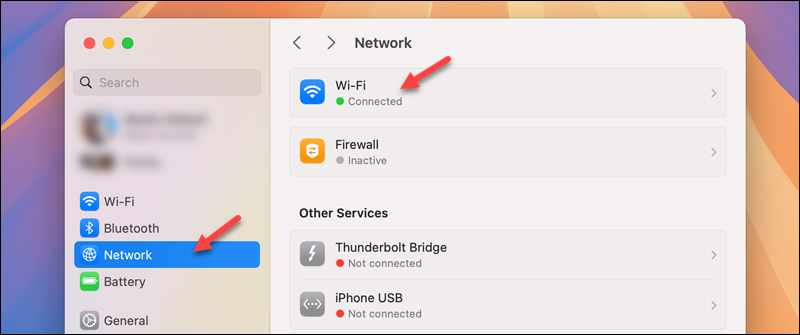
4. Select the switch to disable the connection.

Deactivating Unused Connections on Linux
Linux offers both a GUI and a CLI method to deactivate connections. The GUI method involves using the Network Manager applet to disable inactive connections.
The CLI method employs the ip command. Follow the steps below:
1. List interfaces:
ip a2. Enter the following command to disable a specific interface:
sudo ip link set [interface] downFor example:
sudo ip link set enp0s3 downRenew IP Address
Renewing the device's IP address can resolve IP configuration issues affecting DNS resolution. The following sections explain how to perform this action on Windows, Mac, and Linux.
Renewing IP Address on Windows
The procedure below releases the old IP address and renews it on Windows:
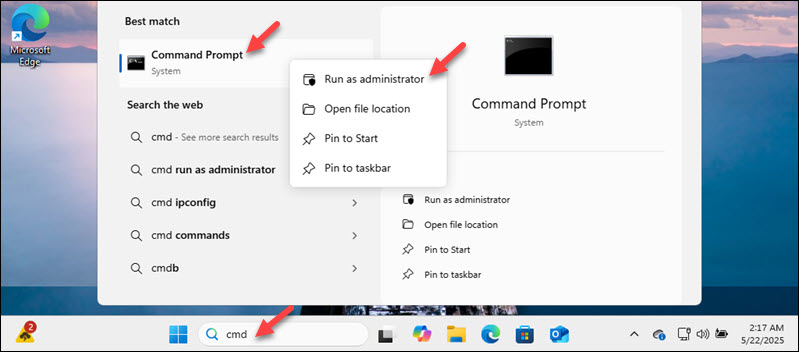
1. Type cmd in the search field. The Command prompt appears in the results.
2. Right-click the search result and select Run as administrator.
3. Enter the following command:
ipconfig /release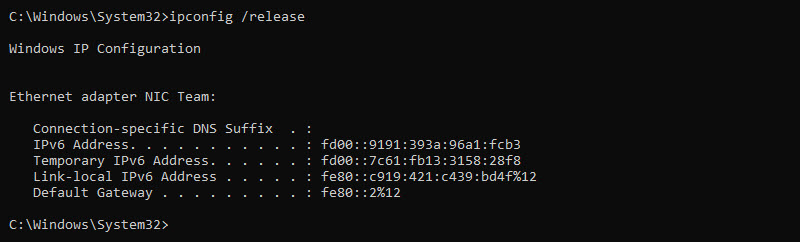
4. Once the IP is released, type the command below to renew the IP address:
ipconfig /renew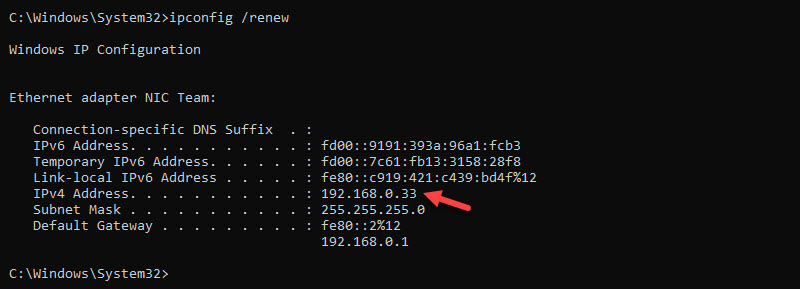
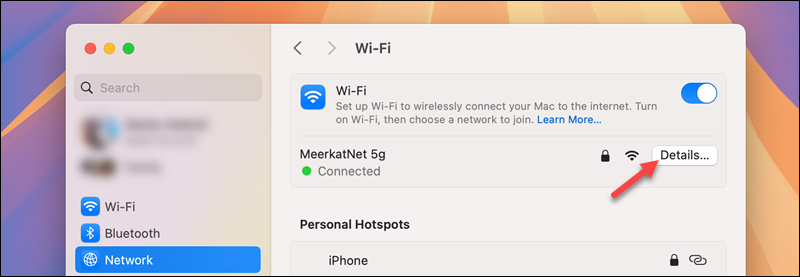
Renewing IP Address on Mac
On macOS, renew the IP address in the Network Settings:
1. Go to Apple menu > System Settings.
2. Select Network in the left sidebar.
3. Select the active network connection (e.g., Wi-Fi or Ethernet).
4. Click the Details button.

5. Go to the TCP/IP tab.
6. Click the Renew DHCP Lease button.

Renewing IP Address on Linux
Linux offers command-line and graphical interface methods for renewing IP addresses.
Use the dhclient command to change the IP address using the CLI.
Note: The dhclient command is part of the isc-dhcp-client package on Ubuntu and dhclient on RHEL-based distributions.
1. Type the following command to release the current IP address:
sudo dhclient -r [network_interface]For example:
sudo dhclient -r enp0s3
2. Complete the procedure by requesting a new IP address:
sudo dhclient [network_interface]
Alternatively, on desktop distributions such as Ubuntu, Debian, or Fedora, use the nmcli, the Network Manager command-line interface:
1. View the list of available connections:
nmcli connection show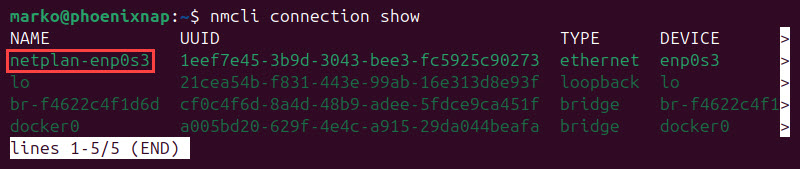
Press Q to quit the listing.
2. Enter the following command to disable the connection:
nmcli connection down [connection_name]
3. Re-enable the connection by typing the following:
nmcli connection up [connection_name]
Disable Security
Temporarily disabling the firewall or other security software can help determine if it interferes with DNS. If the error disappears after disabling security, the security software's settings may need adjustment to allow DNS traffic.
Note: For a third-party antivirus/firewall, consult the documentation for the specific security software to learn how to disable it temporarily.
Disable Security on Windows
Follow the steps below to disable Windows Firewall:
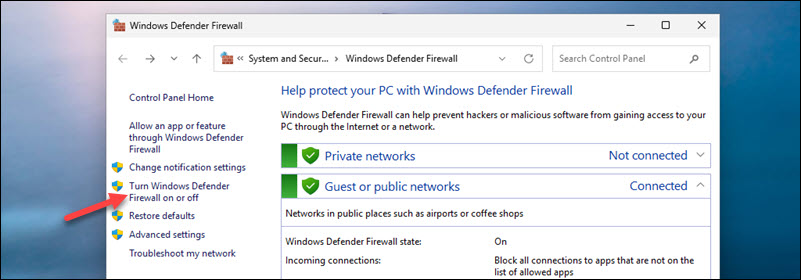
1. Search for and open Windows Defender Firewall.
2. Click Turn Windows Defender Firewall on or off.
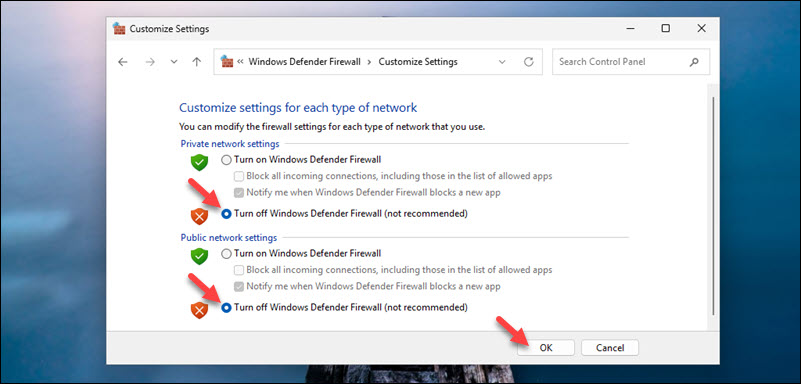
3. Select Turn off Windows Defender Firewall (not recommended) in Private and Public network settings.
4. Click OK to confirm.
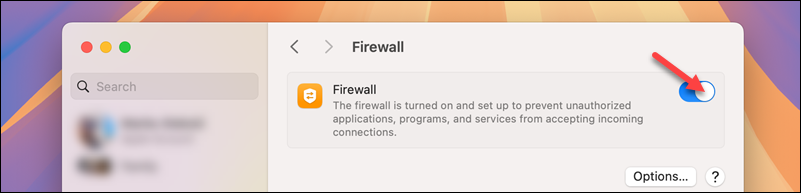
Disable Security on Mac
Use the procedure below to disable macOS Firewall:
1. Go to Apple menu > System Settings.
2. In the Network section, select Firewall.
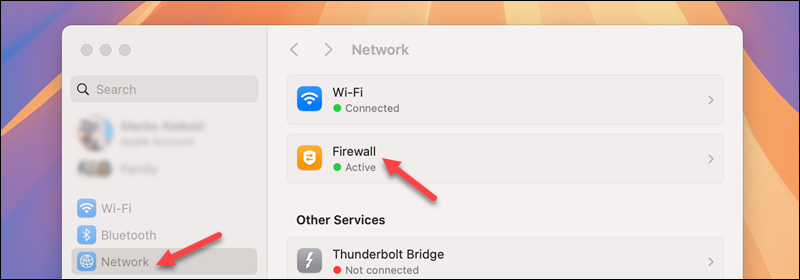
3. Click the switch to turn the firewall off.
Disable Security on Linux
Firewall solutions in Linux vary significantly between the distributions. Below is a list of popular Linux firewalls and the instructions for disabling them:
- To disable ufw (Uncomplicated Firewall):
sudo ufw disable- To disable firewalld, enter the command below:
sudo systemctl stop firewalld- For iptables, depending on the configuration, the rules may need to be flushed using the commands below:
sudo iptables -F
sudo iptables -X
sudo iptables -P INPUT ACCEPT
sudo iptables -P FORWARD ACCEPT
sudo iptables -P OUTPUT ACCEPTNote: Remember to re-enable the security software immediately after testing.
Deactivate IPv6
If the ISP or local network infrastructure has limited or no IPv6 support, disabling IPv6 can resolve DNS issues and remove the "DNS Server Not Responding" error.
Read the sections below for OS-specific instructions.
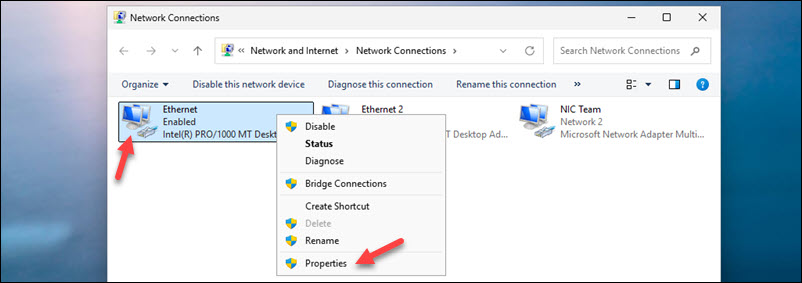
Deactivate IPv6 on Windows
The following procedure deactivates IPv6 on Windows:
1. Press Win + R.
2. Open Network Connections by entering the following:
ncpa.cpl3. Right-click the active network adapter and select Properties.
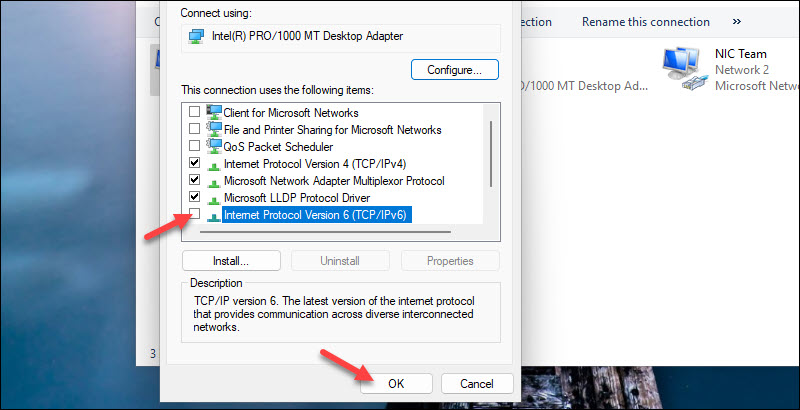
4. Uncheck the box next to Internet Protocol Version 6 (TCP/IPv6).
5. Select OK.
Deactivate IPv6 on Mac
Turn off IPv6 on macOS in the Network Settings:
1. Go to Apple menu > System Settings.
2. Click Network in the left sidebar.
3. Select the active network connection.
4. Click the Details button.
5. In the TCP/IP tab, click the Configure IPv6 dropdown menu and select Link-Local Only.
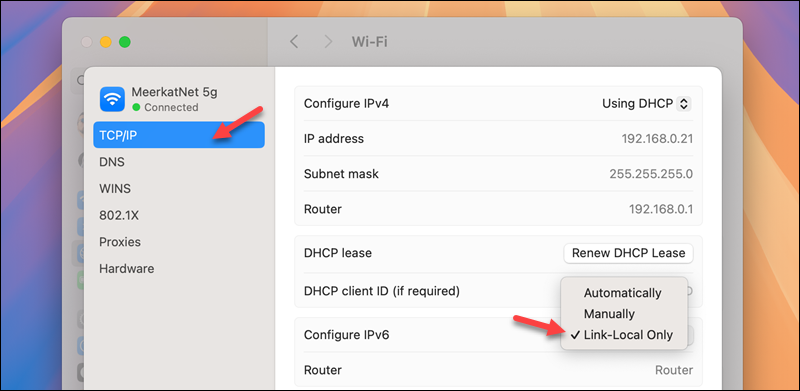
6. Click OK.
Deactivate IPv6 on Linux
On Linux, users can disable IPv6 temporarily and permanently. For temporary configuration changes, enter the following commands:
sudo sysctl -w net.ipv6.conf.all.disable_ipv6=1sudo sysctl -w net.ipv6.conf.default.disable_ipv6=1To permanently disable IPv6, use the procedure below:
1. Open the sysctl.conf file in a text editor such as Nano:
sudo nano /etc/sysctl.conf2. Add the following lines to the end of the file:
net.ipv6.conf.all.disable_ipv6 = 1
net.ipv6.conf.default.disable_ipv6 = 1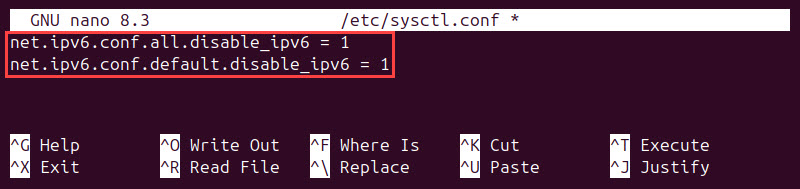
3. Save the file and exit.
4. Apply the changes with the command below:
sudo sysctl -pPerform DNS Flush
Flushing the DNS cache removes any potentially corrupted or outdated DNS entries stored locally on the device.
Flush DNS on Windows
Use the steps below to flush DNS on Windows:
1. Type cmd in the search field. The Command prompt appears in the results.
2. Right-click the search result and select Run as administrator.
3. Enter the following command:
ipconfig /flushdns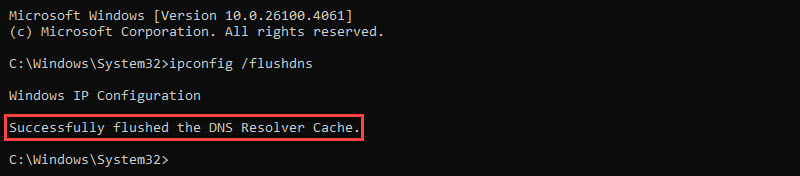
A confirmation message appears.
Flush DNS on Mac
Flush DNS on Mac by typing the following command in the terminal:
sudo dscacheutil -flushcache; sudo killall -HUP mDNSResponderEnter the administrator password if prompted.
Flush DNS on Linux
The command to flush DNS cache in Linux varies depending on the DNS service being used:
- For systemd-resolved, type the following command:
sudo systemctl restart systemd-resolved- To flush DNS using NetworkManager, enter the command below:
sudo systemctl restart NetworkManager- For nscd, enter the following:
sudo systemctl restart nscdModify DNS Address
Switching to a different, reliable DNS server (such as Google Public DNS or Cloudflare DNS) can bypass any potential issues with the ISP's default DNS servers.
Refer to the steps below to learn how to modify the DNS address in Windows, Mac, and Linux.
Modify DNS Address on Windows
The following procedure allows the Windows user to change a DNS address:
1. Press Win + R.
2. Open Network Connections by typing the following:
ncpa.cpl3. Right-click the active network adapter and select Properties.
4. Select Internet Protocol Version 4 (TCP/IPv4) and click Properties.
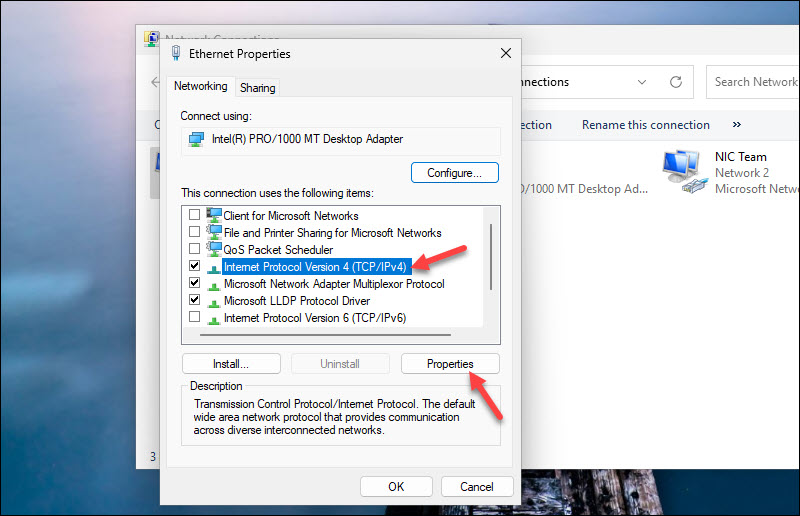
5. Select Use the following DNS server addresses.
6. Enter the preferred and alternate DNS server addresses (e.g., Google Public DNS: 8.8.8.8 and 8.8.4.4 or Cloudflare DNS: 1.1.1.1 and 1.0.0.1).
7. Optionally, repeat steps 4-6 for Internet Protocol Version 6 (TCP/IPv6) if it is enabled (e.g., Google Public DNS IPv6: 2001:4860:4860::8888 and 2001:4860:4860::8844 or Cloudflare DNS IPv6: 2606:4700:4700::1111 and 2606:4700:4700::1001).
8. Click OK to confirm the changes.
Modify DNS Address on Mac
Access DNS configuration in the Network Settings on Mac:
1. Go to Apple menu > System Settings > Network.
2. Select the active network connection.
3. Click Details.
4. Click the (+) button in the DNS tab to add new DNS server addresses. Enter the preferred and alternate DNS server addresses.

5. Click OK to confirm the changes.
Modify DNS Address on Linux
DNS addresses on Linux can be changed using both the GUI and the command line.
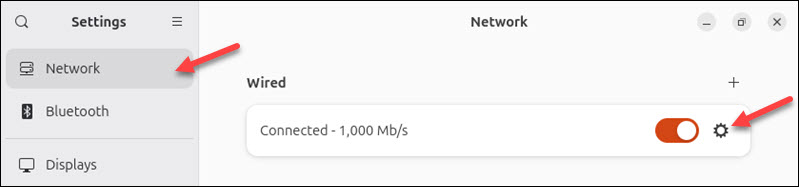
The procedure to modify DNS addresses using Network Manager (GUI) differs based on the distribution. The example below shows how to configure the network in Ubuntu:
1. Open Settings and go to Network.
2. Click the cog button to open Network Options.
3. In the IPv4 Settings tab, click the Automatic switch to turn it off and enter the DNS server addresses in the DNS field, separated by commas.
4. Click Apply to save the configuration.
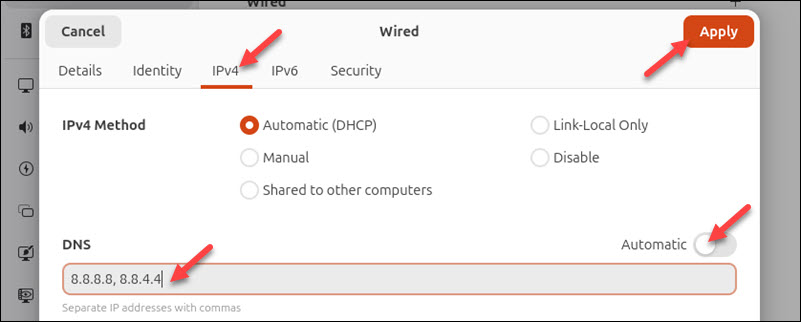
5. Optionally, repeat the previous step for IPv6 in the IPv6 Settings tab.
The command-line method for modifying DNS addresses involves editing configuration files and varies by distribution.
- Some systems may require editing of the /etc/resolv.conf file.
- On the systems with systemd-resolved service, edit the /etc/systemd/resolved.conf file by setting the DNS value to the new DNS server IPs. Save the file, then restart systemd-resolved.
Update Router Firmware
Outdated router firmware can cause network and DNS-related problems. Consult the router's manual or the manufacturer's website for instructions on updating its firmware.
Factory Reset Device
Performing a factory reset on a router reverts it to its default settings. Attempt this action after exhausting other troubleshooting steps, as it will erase any custom configurations.
Consult your router's manual for instructions on how to perform a factory reset.
Conclusion
This tutorial prepared you to troubleshoot the "DNS Server Not Responding" error on Windows, Mac, and Linux. The article included 12 possible solutions covering scenarios from a faulty browser to malfunctioning ISP DNS servers.
Next, read more about DNS record types or learn about DNS best practices.