MySQL Workbench is an integrated GUI tool for MySQL database management. Its graphical interface provides an easier way for database architects and administrators to model data, build and run SQL queries, and manage databases.
This tutorial shows you how to install, configure, and get started with MySQL Workbench on Ubuntu.
Prerequisites
- Ubuntu installed.
- MySQL server installed (Ubuntu 20.04 MySQL installation, Ubuntu 22.04 MySQL installation).
- Command-line access.
- A user with sudo privileges.
How to Install MySQL Workbench on Ubuntu
Multiple methods exist for installing MySQL Workbench on Ubuntu. Aside from downloading packages from the official APT repository, the tool can also be installed from Snap packages, DEB files, or compiled from the source.
The following sections contain the instructions for all the installation methods mentioned above.
Installing MySQL Workbench on Ubuntu via APT Package Manager
The simplest way to set up MySQL Workbench is via the official APT repository. Proceed with the following steps to add the repository to the system and install MySQL Workbench:
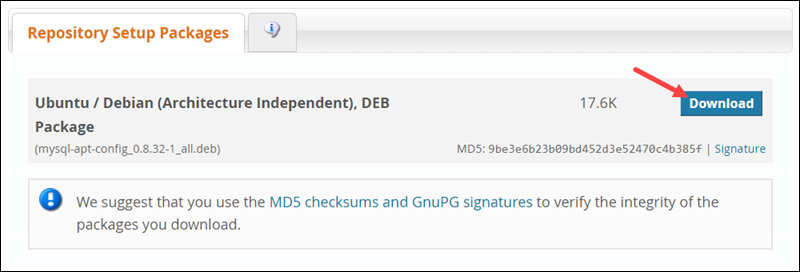
1. Go to the Downloads section of the official MySQL website and download the DEB package containing repository information.
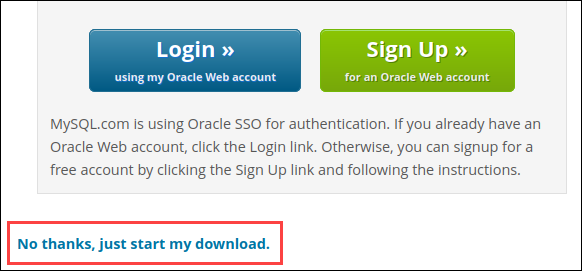
2. Log in or sign up for an Oracle Web account. Alternatively, skip the step by clicking No thanks, just start my download, and wait for the download to finish.
3. Open the terminal and use the following command:
sudo dpkg -i [path_to_DEB_file]Replace [path_to_DEB_file] with the actual path to the downloaded file. For example, to install the mysql-apt-config_0.8.32-1_all.deb package located in the ~/Downloads directory, enter:
sudo dpkg -i ~/Downloads/mysql-apt-config_0.8.32-1_all.deb4. When prompted, select Ok to save the configuration.
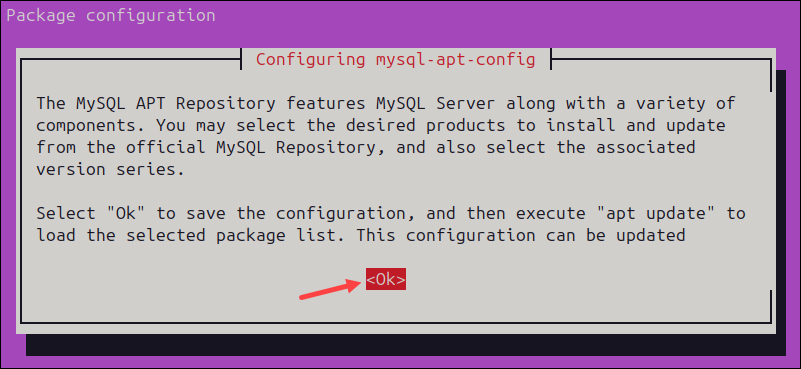
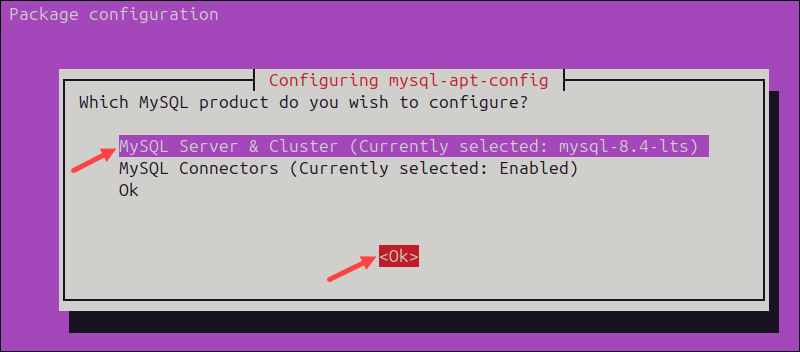
5. Using the Tab button and the arrow keys, ensure that the MySQL Server & Cluster item is highlighted, then select the Ok button below to configure the product.
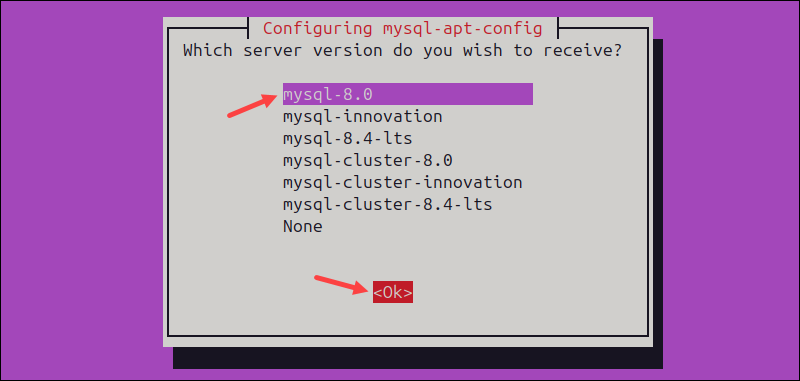
6. Highlight the mysql-8.0 version and select Ok.
7. Press Ok to confirm the configuration.
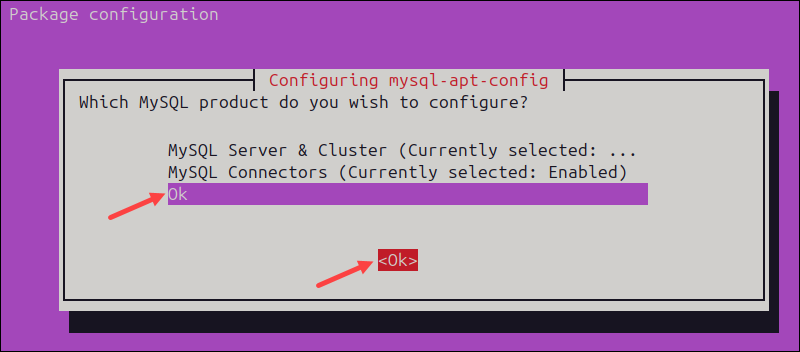
8. In the product selection menu, highlight Ok in the list, then select the Ok item below to exit the configuration wizard.
9. Update the APT package list from the terminal:
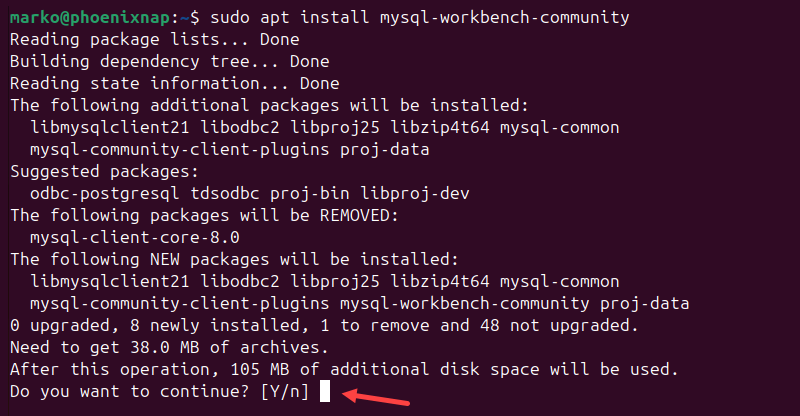
sudo apt update10. Download and install Workbench with the following command:
sudo apt install mysql-workbench-community11. When prompted, type Y and press Enter to start the installation.
Install MySQL Workbench on Ubuntu Using DEB Packages
MySQL Workbench is also available as a DEB package, which can be helpful when working on systems without internet access. Follow the steps to download and install the MySQL Workbench DEB package:
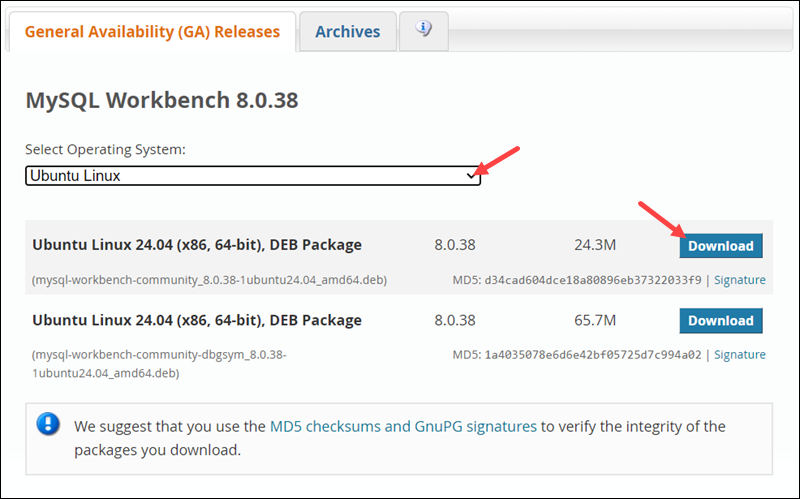
1. Visit the General Availability Releases section of the official website.
2. Choose Ubuntu Linux in the Select Operating System dropdown menu.
3. Select the file and wait for the download to complete.
4. Install the DEB package with the dpkg command:
sudo dpkg -i [path_to_DEB_file]For example, to install mysql-workbench-community_8.0.38-1ubuntu24.04_amd64.deb located in the ~/Downloads directory, type:
sudo dpkg -i ~/Downloads/mysql-workbench-community_8.0.38-1ubuntu24.04_amd64.deb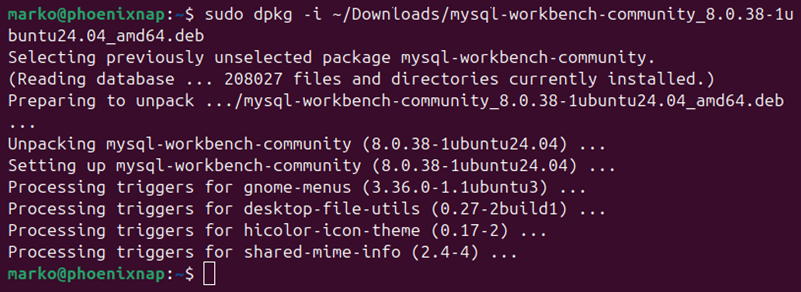
Install MySQL Workbench on Ubuntu Using Snap
MySQL Workbench is also available as a Snap package. Snaps are a modern packaging format designed for the Ubuntu ecosystem.
Type the following command to install the Workbench Snap using the terminal:
snap install mysql-workbench-communityAlternatively, follow the steps below to perform the same operation via Ubuntu GUI:
1. Press the Super/Windows key to open the Activities view.
2. Search for Ubuntu Software, then click the search result to start the application.

3. Search for MySQL Workbench in Ubuntu Software and select the tool from the search results.

4. Click the Install button.

5. Type the sudo password for the user. The installation starts.
Install MySQL Workbench on Ubuntu via Source Code
MySQL Workbench Community Edition is an open-source program, meaning the source code is freely available for download and compilation on a system. Follow the steps below to install MySQL Workbench on Ubuntu via source code:
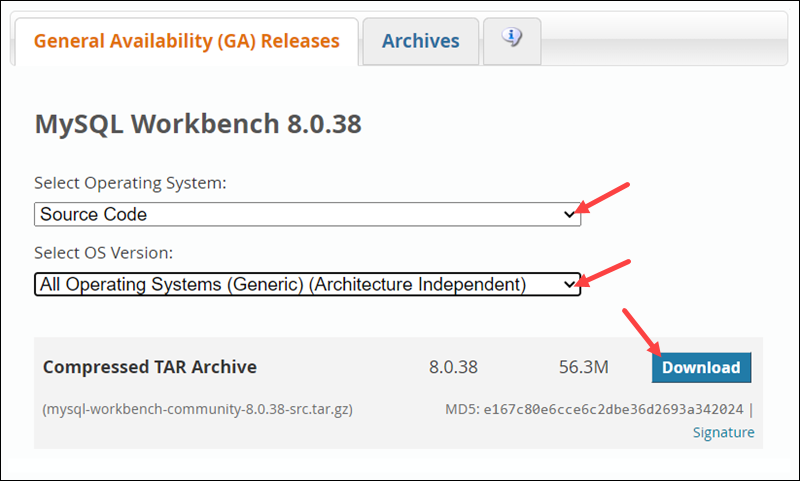
1. Visit the official MySQL Workbench downloads page.
2. Choose Source Code in the Operating System dropdown menu.
3. Select All Operating Systems in Select OS Version.
4. Click the Download button to start downloading the TAR.GZ archive.
5. Unpack the archive by typing:
tar xf [path_to_tar_gz_archive]For example, to unpack the mysql-workbench-community-8.0.38-src.tar.gz archive located in the Downloads directory, type:
tar xf ~/Downloads/mysql-workbench-community-8.0.38-src.tar.gzNote: Alternatively, download the files by cloning the official git repository: git clone https://github.com/mysql/mysql-workbench.git
6. Go to the main project directory:
cd [mysql_workbench_directory]7. Create and go to the build directory:
mkdir wb-build & cd wb-build8. Update the package sources list:
sudo apt update9. Install the necessary dependencies:
sudo apt install build-essential cmake libgtk-3-dev libglib2.0-dev libgladeui-dev libzip-dev libmysqlclient-dev libsqlite3-dev libssl-dev libpcre2-dev libcurl4-gnutls-dev libxml2-dev libgcrypt20-dev python3-dev python3-pip libboost-dev libtool libjpeg-dev libpng-dev libpixman-1-dev swig default-jre libgtkmm-3.0-dev libmysqlcppconn-dev libvsqlitepp-dev libgdal-dev rapidjson-dev unixodbc python3-pyodbc libsecret-1-dev antlr4 libantlr-dev libantlr4-runtime-dev libssh-dev10. Use the cmake command to define the build configuration and generate project files:
cmake ..Depending on your configuration, the command may require additional options. For example, the following cmake command defines paths for Antlr4 parser generator files and configures UnixODBC as a driver manager:
cmake -DANTLR_JAR_PATH="/usr/share/java" -DANTLR4_INCLUDE_DIR="/usr/share/java" -DUSE_UNIXODBC=True -DUNIXODBC_INCLUDE_DIRS="/usr/include" ..
11. Compile the application with the make command:
make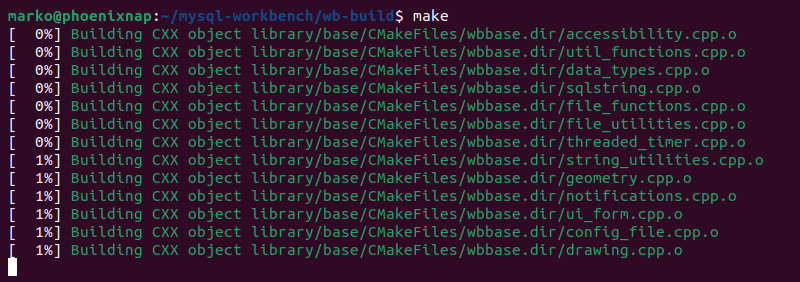
12. Finally, install MySQL Workbench:
sudo make installLaunch MySQL Workbench
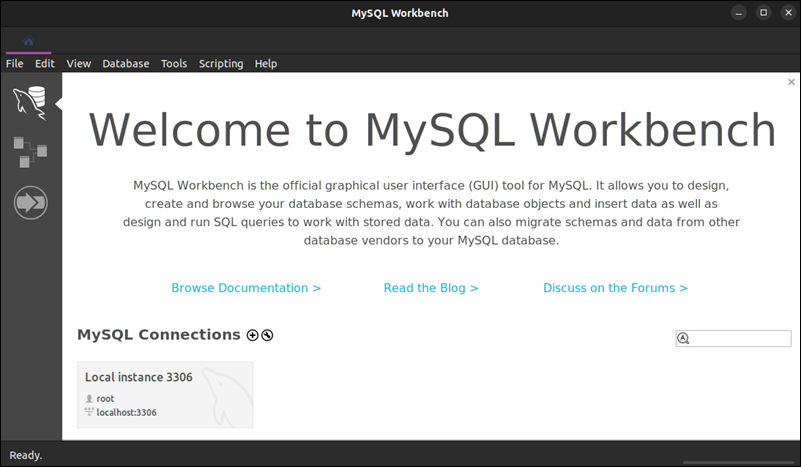
Once you have installed the software, launch MySQL Workbench. Search for it in the Activities menu and click the icon in the search results.

Alternatively, launch the following command from the terminal:
mysql-workbench-communityA MySQL Workbench instance opens.
Configure MySQL Workbench
MySQL Workbench allows users to modify the default settings before starting database management. To access Workbench preferences:
1. Select Edit in the top menu and choose Preferences.

The Workbench Preferences window appears.
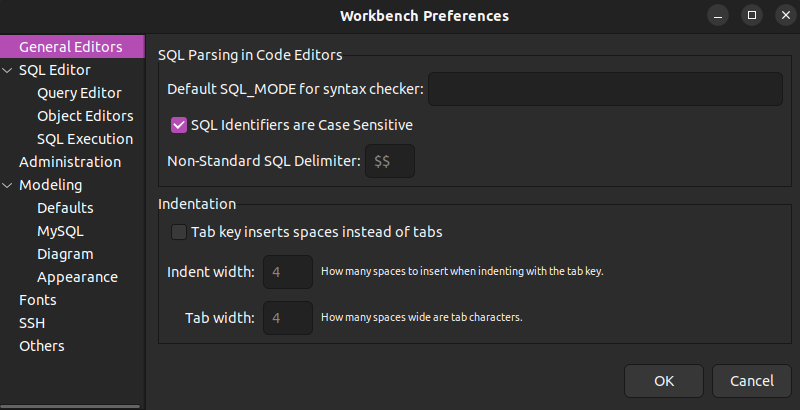
2. Make the necessary changes. The Preferences section consists of several sub-sections:
- General Editors. Contains SQL Parsing and general formatting options.
- SQL Editor. Features configuration parameters for Query Editor, Object Editors, and SQL Execution.
- Administration. Hosts data export and import preferences.
- Modeling. Contains Default values, MySQL version settings, Diagram formatting, and Appearance options.
- Fonts. Allows changing various interface fonts.
- SSH. Provides parameters for SSH connections.
- Others. Contains miscellaneous options.
Uninstall MySQL Workbench
The procedure to remove MySQL Workbench from an Ubuntu system depends on the installation method:
- If the application was installed from the official repository, use the following
aptcommand:
sudo apt remove mysql-workbench-community- Uninstall the DEB file by entering:
sudo dpkg --purge [deb_package_name]- Use the command below to remove the MySQL Workbench Snap package:
sudo snap remove mysql-workbench-community- If you installed MySQL Workbench from source code, remove the files and directories it created.
Conclusion
This article showed you how to install, configure, and remove MySQL Workbench on Ubuntu. The installation methods included the official APT repository, DEB packages, the Snap Store, and source code.
Next, learn how to create a database with MySQL Workbench.
