Snap packages, commonly called Snaps, are self-contained software applications with all the necessary dependencies to run on a Linux system. Unlike traditional package managers such as APT or RPM, Snap packages are designed to work across various Linux distributions, ensuring consistency and ease of use.
The package manager responsible for handling Snap applications is Snap, which is developed and maintained by Canonical.
This tutorial will explain how to use Snap packages on Ubuntu and provide practical examples.

Prerequisites
- An Ubuntu system.
- Access to the terminal.
- A user account with sudo or root privileges.
Note: Snap comes preinstalled on the latest Linux distributions. To check if you have Snap preinstalled on your system and to see how to install Snap, read our tutorial on how to install Snap on Ubuntu.
How to Use Snap Packages on Ubuntu
Manage Snap packages in two ways: by running snap commands in the terminal or by using the Snap Store GUI app.
The Snap Store is a Snap app itself. Install it by entering the following command in the terminal:
sudo snap install snap-storeAfter the installation finishes, open it by entering the app name snap-store.
Install Snap Apps on Ubuntu
There are two ways to Install a Snap app: using the terminal or the Snap Store. Pick one method listed below.
Install via Terminal
To install a Snap using the terminal, you need the exact package name. The general syntax is:
sudo snap install [package_name]For example, to install Opera, run:
sudo snap install opera
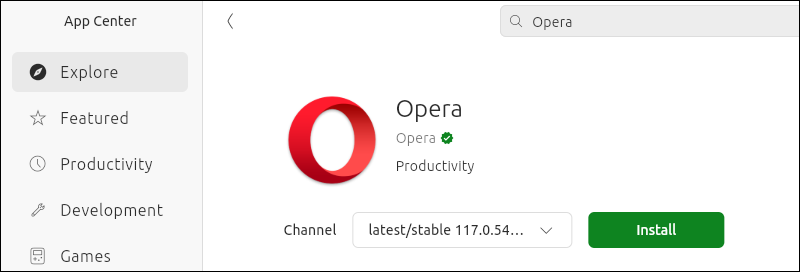
Install Using Snap Store
If you prefer a graphical environment, install a Snap using the Snap Store app. Follow these steps:
1. Open the Snap Store by entering the following in the terminal:
snap-store 2. Find and click the app you want to install.
3. Select Install and enter your password. Wait for the download to finish.
Snap Confinement
Snap confinement describes the level of isolation of a Snap on your system. There are three confinement levels:
- Strict. Applies to most Snaps. Snaps run in complete isolation and cannot access system resources without permission.
- Classic. Allows Snaps to function like traditional packages, with unrestricted access to system resources. Installing a Snap with classic confinement requires the
--classicflag. - Devmode. Intended for developers and Snap creators. A Snap in devmode runs with strict confinement but has full system access and provides debug output. These Snaps require installation with the
--devmodeflag. Devmode Snaps do not appear in search results and cannot be published to the stable channel.
Note: Snap is similar to apt. The basic difference is snaps remain confined in the .snap package on the system, while the apt package manager integrates the required app dependencies on the system. Read our article to learn more about the differences between snap and apt.
Run Snaps on Ubuntu
There are two ways to run Snaps: via the terminal or from the Desktop. Check out the two methods in the following sections.
Run Snaps via Terminal
To run a Snap via the terminal, enter the package name in the terminal.
For example, enter the following to open the Snap Store app:
snap-storeThe command launches Snap Store.
Note: If you get theme parsing errors when launching some Snaps, this is due to incompatibilities between the fontconfig library in the Snap and the hosts fontconfig. This is a known issue, and the app opens normally anyway.
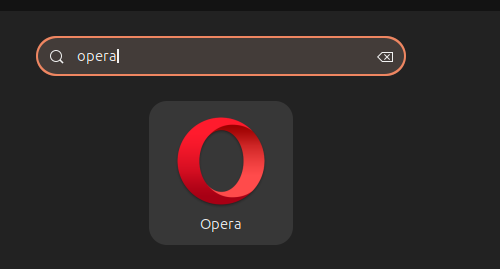
Run Apps from Desktop
Another way to run Snaps is to search for the app in the app menu and launch it from there. For example, search for Opera:
List Installed Snaps on Ubuntu
See a list of installed Snaps in two ways: via the terminal or in the Snap Store. Take the steps below to accomplish that.
List Installed Snaps in Terminal
To list installed Snaps using the terminal, use the list command:
snap list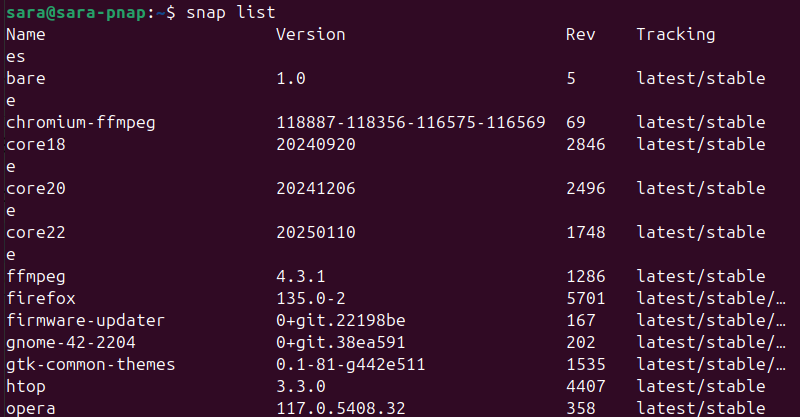
This shows a list of installed Snaps, including the app version, revision number, Snap confinement level, publisher, and app notes.
List Apps in Snap Store
To list apps, launch the Snap Store and locate the Manage tab. The new window lists all the installed Snap apps on your system.
Search for Snaps
Searching for Snaps allows you to find and install applications that you need directly from the Snap Store. This is important because Snaps provide a secure, dependency-free way to install and manage software across different Linux distributions.
Refer to the two methods to search for Snaps in the following text.
Search for App via Terminal
Run the find command with snap to search for an application:
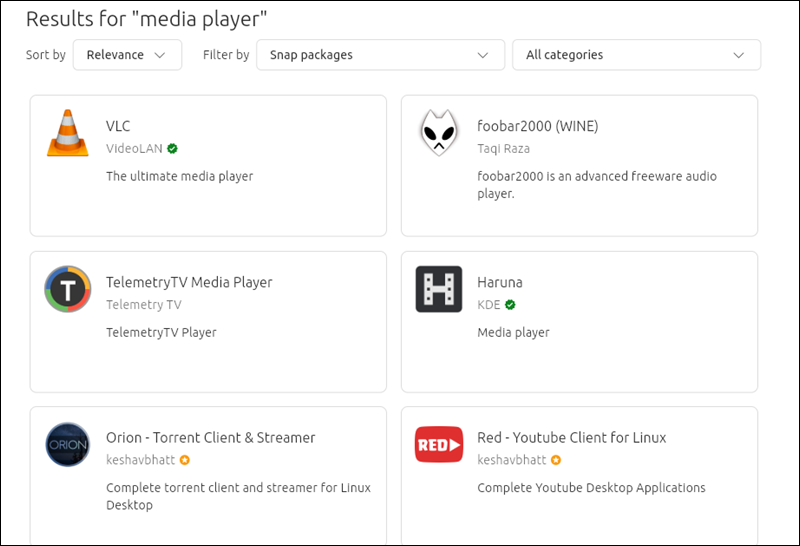
snap find [search_term]The search term doesn't need to match the application name. For example, you can search for a media player by typing media_player.
snap find media_player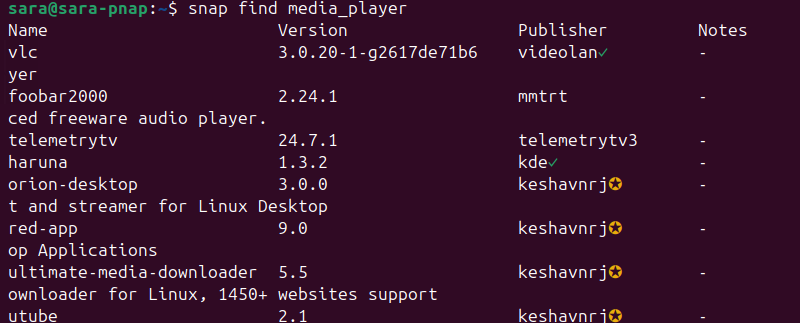
The [search_term] syntax implies entering a keyword or search phrase. Separate words in a phrase using an underscore to search for a single keyword or a phrase:
snap find media player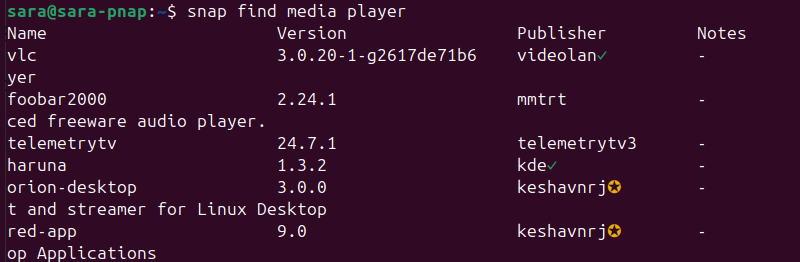
Search for App via GUI
Search for an app by entering the keyword in the Snap Store search box or browse the available categories.
Update Snaps on Ubuntu
Snaps automatically update to the latest available version each day. To update Snaps manually, use the terminal or the Snap Store.
Update Snaps via Terminal
Check for updates for a single app or see all available updates via the following command:
sudo snap refresh [package_name]For example, to check Opera updates, run:
sudo snap refresh opera
This updates the app or informs the user the latest version is already installed.
To see which Snap packages have available updates, use the command below:
sudo snap refresh --list
The output lets you know if there are any updates available for your installed Snaps. In this case, the Firefox web browser has available updates.
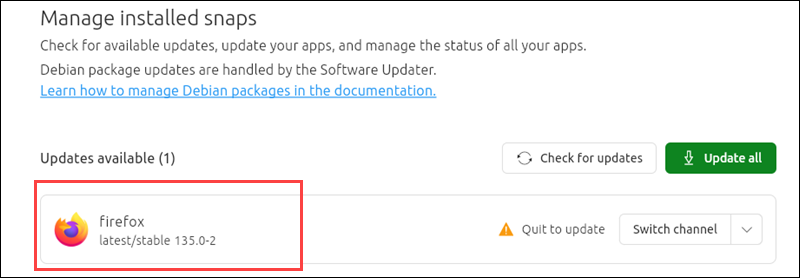
Update Snaps via Snap Store
Available updates are displayed.
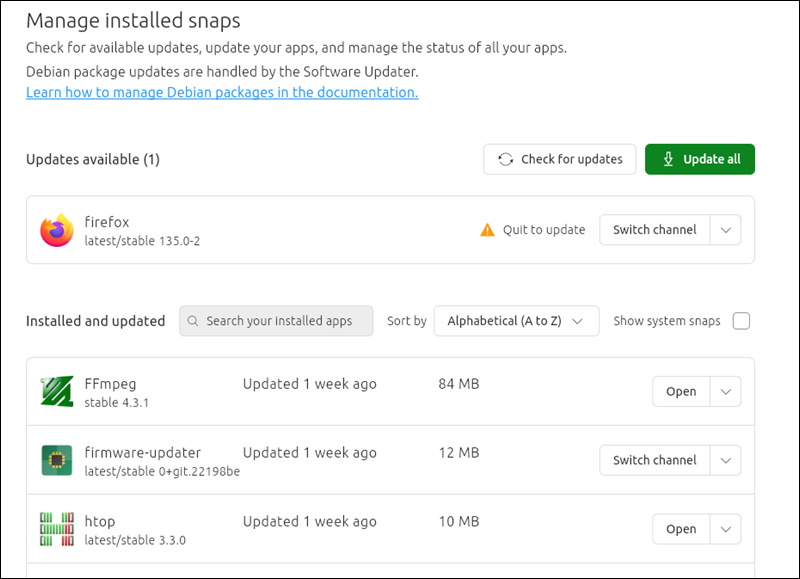
For a visual approach to updating apps, enter the Snap Store and click Manage. Next, click the Check for updates button.
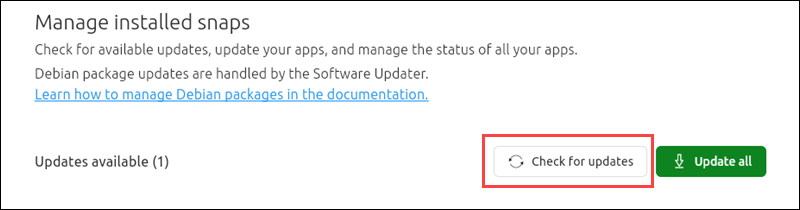
The app provides a list of available updates:
Downgrade Snaps on Ubuntu
If you encounter issues after updating a Snap to its latest version, or if you do not like the new update, revert to the previous one by entering the snap revert command:
sudo snap revert [package_name]Important: This is only possible if you had the app's previous version on your system. Otherwise, you get an error saying there is no revision to revert to. This also works when you try a beta version of an app and want to revert to the stable one.
Remove Snaps on Ubuntu
Removing Snaps is important for freeing up system resources and maintaining a clean environment by uninstalling unnecessary applications. It also helps resolve issues with outdated or malfunctioning Snap packages that are no longer needed.
Take the following steps to remove Snaps either via the terminal or using the Snap Store.
Remove Snap Packages via Terminal
To remove a Snap from the system, use the following command:
sudo snap remove [package_name]For example, to remove Opera, run:
sudo snap remove opera
The procedure also removes all previous revisions.
When an app is removed, Snap's system snapshot, configuration, and user data are retained for 31 days.
To remove a Snap without keeping a snapshot, use the --purge option with the snap remove command:
sudo snap remove [package_name] --purgeFor instance, purge Opera with:
sudo snap remove opera --purgeNote: In Ubuntu 24.04, the command sudo snap remove opera removes the app completely. Therefore, sudo snap remove opera --purge shows Opera is not installed. Therefore, in this Ubuntu version, the second command is unnecessary.
Remove Snap Package using Snap Store
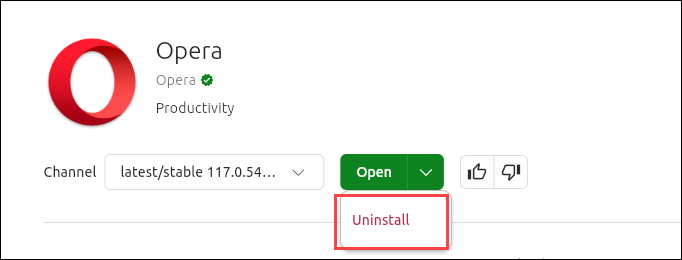
To remove a Snap using the Snap Store, go to the Manage tab. Next, find the app you want to uninstall and click the arrow next to the Open button.
Click Install, and the process removes the app.
Enable and Disable Snaps on Ubuntu
If you don't need a Snap, but you don’t want to remove it from your system, disable it by entering:
sudo snap disable [package_name]For instance, disable Opera with:
sudo snap disable opera
Enable a disabled Snap with the following command:
sudo snap enable [package_name]For example, enable Opera with:
sudo snap enable opera
List All Running Snap Services
Snap allows you to see the services initiated by Snap apps.
Use the following command to list all system services launched by Snap packages currently installed and enabled on your system:
snap services
The output shows the service name, whether it launches on system startup, if it's currently running, and whether any notes are available.
To list the services of a Snap, state the app name in the command:
snap services [app_name]For example, run the following to list the snapd-desktop-integration services:
snap services snapd-desktop-integration
Start, Restart, and Stop Snap Services on Ubuntu
Managing Snap services is important for controlling the functionality of Snap applications and ensuring they operate smoothly. Knowing how to start, restart, or stop services allows you to troubleshoot issues, apply changes, or optimize performance.
Restart Snap Services
After making changes to a Snap app, restart Snap services for the changes to take effect.
To restart all services for a specified Snap, enter the following command:
sudo snap restart [app_name]For example, to restart all services for firmware-updater, run:
sudo snap restart firmware-updater
To restart a specific service of an app, use the same command but with the [service_name].
sudo snap restart [service_name]For example, to restart the snapd-desktop-integration service (which is associated with snapd), run:
sudo snap restart snapd-desktop-integration
Stop Snap Services
To stop all Snap services, use the following command:
sudo snap stop [package_name]For example, to stop all firmware-updater services, run:
sudo snap stop firmware-updater
To stop a Snap's single service, enter the following:
sudo snap stop [service_name]For instance, stop the snapd-desktop-integration service with:
sudo stop snapd-desktop-integration
Note: If you manually stop Snap services the Snap app may malfunction. To temporarily disable a Snap, use the --disable command instead.
To prevent a Snap service from starting on boot, add the --disable argument:
sudo snap stop --disable [service_name]For example, run the following:
sudo snap stop --disable snapd-desktop-integration
Start Snap Services
Use the following command to start all Snap services:
sudo snap start [package_name]For instance, run the following:
sudo snap start firmware-updater
On the other hand, to start an individual Snap service, use the following command:
sudo snap start [service_name]For example, start the service with:
sudo snap start snapd-desktop-integration
The start command includes an --enable option to re-enable the automatic starting of a service on system boot.
For a service to start on the next boot, add the --enable argument:
sudo snap start --enable [service_name]For instance, enable snapd-desktop-integration to start on the next boot with:
sudo snap start --enable snapd-desktop-integration
Download and Install Snap Apps Offline on Ubuntu
To install Snap apps on a system without internet connection, you need to download the necessary files on a machine with internet access first. Take the following steps to download and install Snap apps offline:
1. On a machine with internet access, download the Snap app with:
snap download [package_name]For example. to download the kubectl package, which is the command-line tool for interacting with Kubernetes clusters, run:
snap download kubectl
The process downloads two files: a .assert file and a .snap file, both of which are saved in your $HOME directory.
2. Transfer the files you downloaded to the $HOME directory of the offline system. You can do this using a USB drive, network transfer, or a different method.
3. On the offline machine, run the following commands to install the Snap app:
sudo snap ack [package_name.assert]sudo snap install [package_name.snap]The ack command is used to confirm the Snap package's authenticity by accepting its assertion file and ensuring it's safe to install, while the install command installs the app itself.
For example, to install Snap, run:
sudo snap ack kubectl_3513.assertsudo snap install kubectl_3513.snap
Note: Ensure the names of the .assert file and the .snap file, are correct. Verify the names in the $HOME directory of the offline system you moved them to.
Modify Snap Configurations
Snaps that provide background services allow you to see and change their configuration options. Follow these steps to accomplish that.
List Snap Configuration
To see a Snap’s configuration options, use the:
sudo snap get [package_name]For example, the configuration for the core Snap, which provides essential system services and supports other snaps, run:
sudo snap get core
The output shows the available configuration options for the specified snap. A {...} in the output indicates there are further options below the current key level.
The output also indicates if the specified app does not have configuration options. For example, in Opera:
sudo snap get opera
To explore additional options, add the [key name] to the previous command:
sudo snap get [package_name] [key_name]For example, run the following to show Snap's automatic update settings, including the update schedule.:
sudo snap get core refresh
Change Configuration Options
Snap configuration options allow you to customize a Snap's behavior, such as update schedules, resource limits, or feature settings. Adjusting these options ensures the Snap functions optimally.
None of the following commands produce an output.
To change a Snap's configuration option, use the command:
sudo snap set [package_name] [key_name]=[value]For example, set a refresh timer for Snap updates (core):
sudo snap set core refresh.timer=00:00-04:00The command restricts Snap updates to run only between midnight and 4 AM.
To restore a configuration value to its default state, use:
sudo snap unset [package_name] [key_name]Reset the refresh timer to default for core:
sudo snap unset core refresh.timerAlternatively, to restore a value to its default stage, use the set command but add ! at the end of the key name to restore the default value:
sudo snap set [package_name] [key_name]!For example, reset the refresh timer for core with:
sudo snap set core refresh.timer!Moreover, combine ! with other setting options at the same time:
sudo snap set [package_name] [key_name]! [key_name2]=[key_value]For example, reset the refresh timer and change the number of retained versions with:
sudo snap set core refresh.timer! refresh.retain=3The system checks the configuration update. If you enter a wrong value, the system detects the error and cancels the change, reverting to the previous configuration.
Note: If the update takes longer than 5 minutes, it automatically aborts and rolls back the configuration options.
Display History of Changes Snap Made to System
Snap allows the user to see the history of changes it has made on the system.
Use the following to see a full list of changes in your system:
snap changes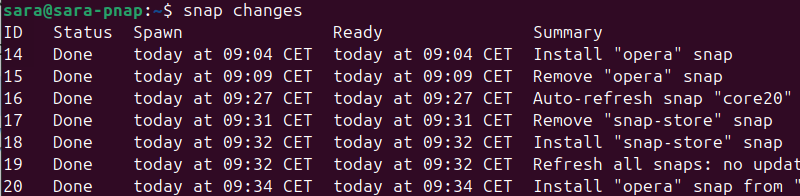
The output shows when the change occurred, its status, and a summary of what happened.
Switch Channels
Snap apps are available in several channels, depending on the apps' development status. Switch between these channels, for example, to access an app beta version. Switching channels is similar to switching branches in git.
There are four available channels:
- stable. The latest stable release of an app. It should not have any bugs.
- candidate. The release candidate (RC) of an app, close to a stable version.
- beta. Unstable version, users still encounter bugs.
- edge. Daily/nightly builds of an app under development.
To change to a different channel, use the following command:
sudo snap refresh [package_name] --channel=[channel_name]For example, to switch kubectl to the beta channel, use the following command:
sudo snap refresh kubectl --channel=beta
After switching the channel, the specified app gets updates from that channel. To switch back to the previous one, use the refresh command and enter the channel name.
Conclusion
This article explained how to use Snaps on Ubuntu, including how to install, run, and remove Snaps using either the terminal or Snap Store. It also elaborated on how to modify and adjust Snap services and configurations to your own preference and choose the release you like.
To learn more about package managers and different package formats in Linux, check out our comparison article on Flatpak vs. Snap vs. AppImage.